Loading ...
Loading ...
Loading ...
7. Repeat procedures 4-6 with the second piece of line.
8. Hold the outer spool. Wind the inner reel
counterclockwise until approximately four (4) inches
(102 mm) of line remain (Fig. 22).
NOTE: Do not wind the inner reel before installing the
second piece of line.
Fig. 22
g. If winding the line becomes difficult or the line jams,
pull the ends of the line from the spool (Fig, 23).
Gontinue winding the inner reel counterclockwise.
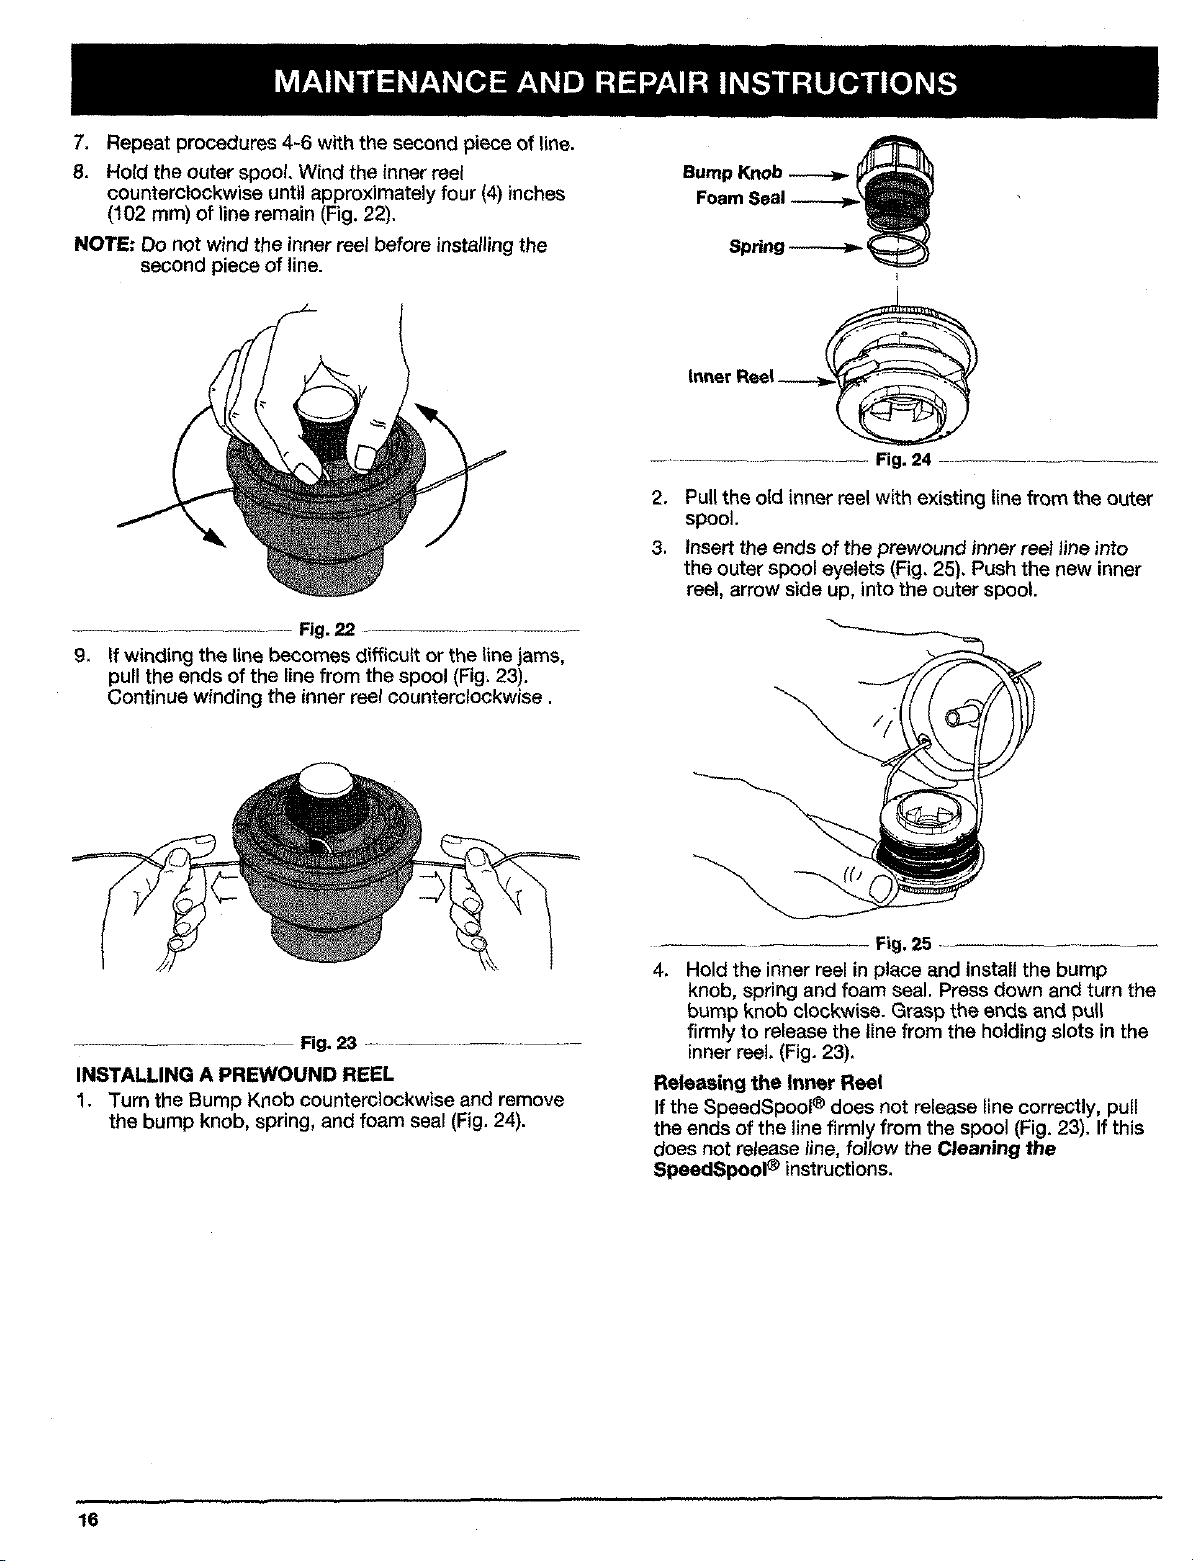
Bump Knob
Foam
I
inner Ree!__
Fig.24
2. Pull the old inner reel with existing line from the outer
spool,
3, Insert the ends of the prewound inner reel line into
the outer spool eyelets (Fig. 25). Push the new inner
reel, arrow side up, into the outer spool.
Fig. 23 ...................
INSTALLING A PREWOUND REEL
1. Turn the Bump Knob counterclockwise and remove
the bump knob, spdng, and foam seal (Fig. 24).
4.
Fig. 25
Hold the inner reel in place and install the bump
knob, spring and foam seal. Press down and turn the
bump knob clockwise. Grasp the ends and pul_
firmly to release the line from the holding slots in the
inner reel. (Fig. 23).
Releasing the Inner Reel
If the SpeedSpool ® does not release line correctly, pull
the ends of the line firmly from the spool (Fig. 23). If this
does not release line, follow the Cleaning the
SpeedSpool ® instructions.
16
Loading ...
Loading ...
Loading ...