
Loading ...
Loading ...
Loading ...
6
Installation Preparation
NOTE: If installing the hood in the recirculating configu-
ration (recirculating kit # AVDH1 or AVDH2), consult the
instructions that come with the kit before starting installa-
tion.
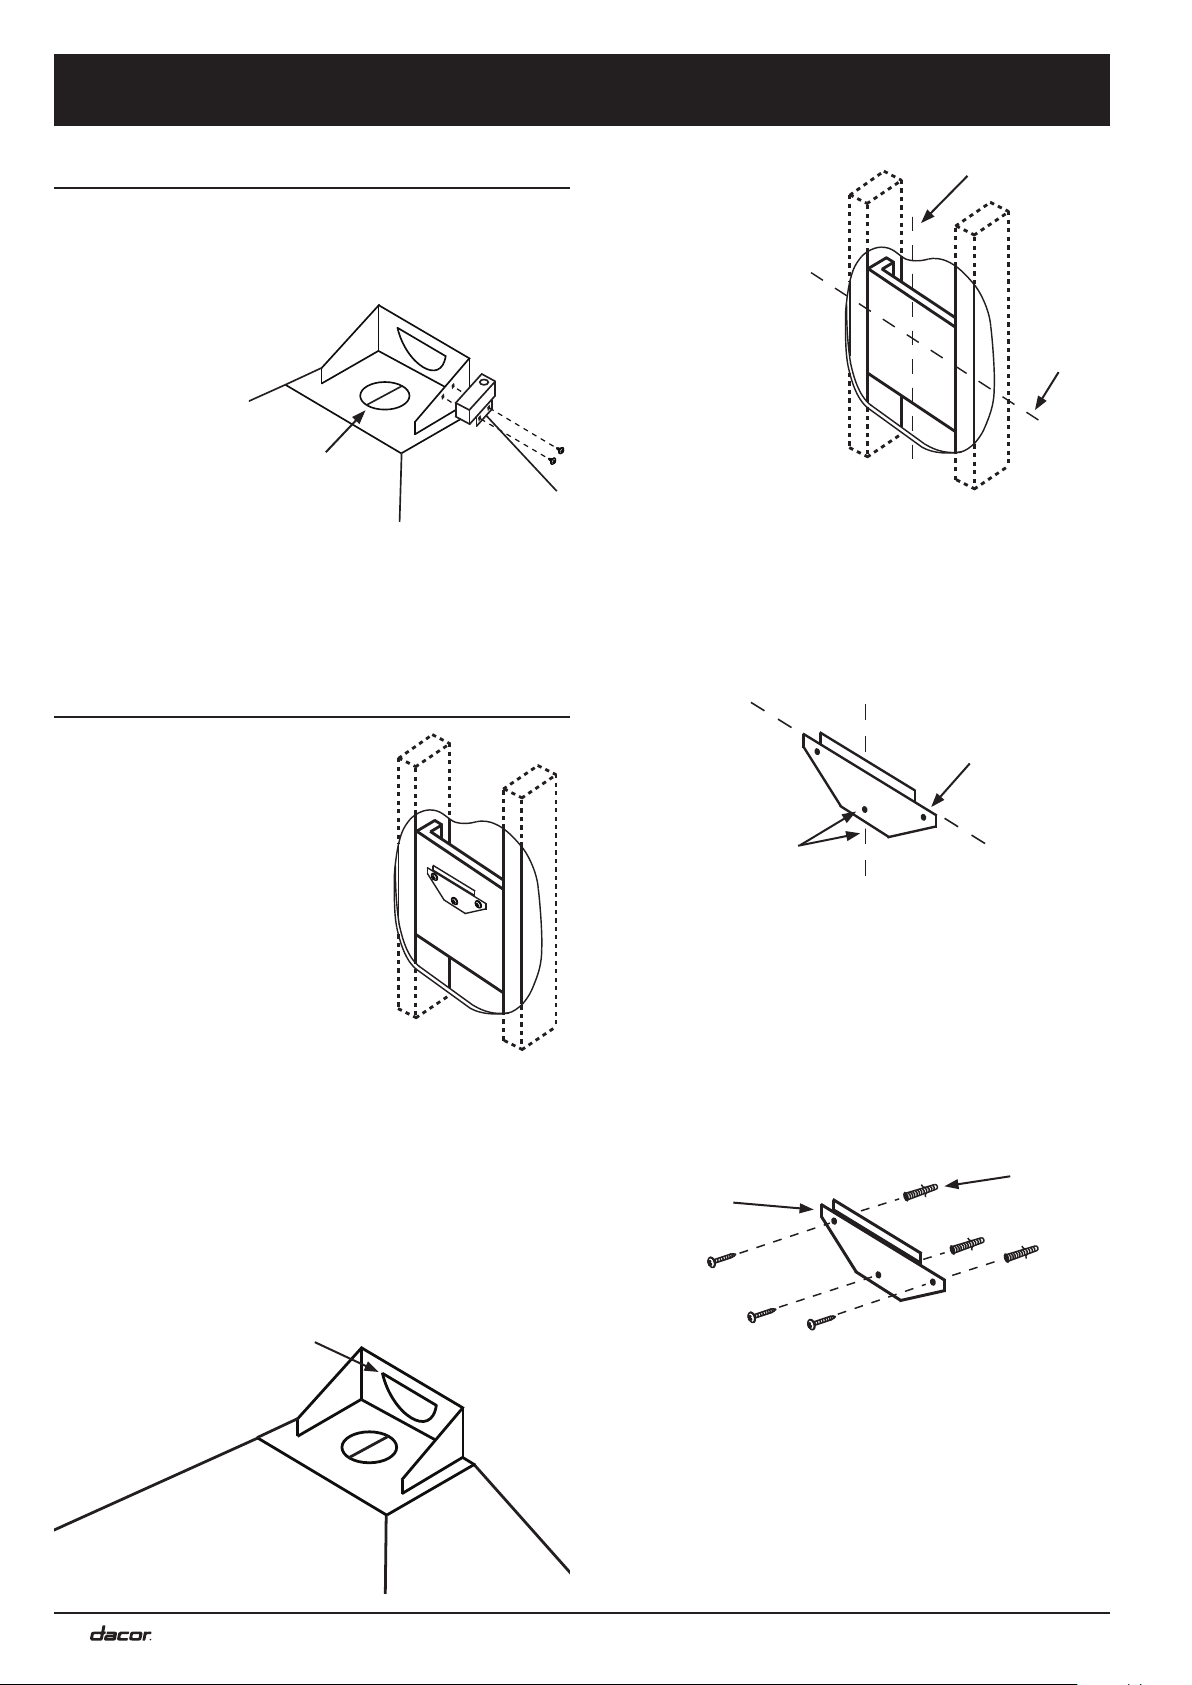
1. Attach the hood
junction box to
the top of the
hood using two
machine screws
as shown.
2. Remove the ship-
ping tape holding
the damper flaps
closed. Make
sure all the flaps open and close freely before pro-
ceeding.
3. Remove the filter(s) to reduce weight and avoid dam-
age.
Installing the Mounting Bracket
NOTE: The mounting hardware
included with the hardware packet
is suitable for mounting to brick and
masonry only. If mounting the range
hood to drywall, Dacor strongly
recommends the using a sturdy
anchoring system designed for
use with drywall. In addition, Dacor
strongly recommends that you
install a reinforced mounting block
between the studs behind all hood
mounting locations.
1. Using a pencil, draw a level
horizontal line on the wall
where the bottom of the hood will be. The line must
be at least 30 inches above the cooking surface.
2. On the hood itself, measure the distance between
the bottom of the hood and the top of the mounting
bracket hole on the hood being installed. Using a
pencil, draw a short line on the wall the same dis-
tance above the horizontal line drawn in step 1. You
will use this line to determine the height of the mount-
ing bracket when attached to the wall.
Installation Instructions
C
L
C
L
Hood center
line
Height of
mounting
bracket
(step 2)
C
L
C
L
Line up
center hole with
center line
Line horizontal
line up with this
edge
Mounting
bracket
Anchor
3. Locate the verti-
cal center line for
the hood mount-
ing location on
the wall. Mark the
center line with a
six inch vertical
line that intersects
the line drawn in
step 2.
4. Make sure the
mounting location
is properly rein-
forced so that it
will hold the weight
of the hood.
5. Find the mounting bracket in the shipping box. Place
it against the wall where the two lines cross. Center
it vertically and line the top of the bracket up with the
horizontal line as shown.
6. Making sure the bracket is level, use a pencil to
mark the mounting hole locations through the bracket
holes.
7. Drill the mounting holes. The method for drilling the
holes depends on the type of mounting surface...
If mounting the hood to brick or masonry:
■ Drill three 5/16” x 1 1/2” holes in the locations
marked.
■ Insert three of the provided wall anchors into the
holes. The anchors provided are for attaching the
hood to masonry or brick only.
Top of mounting
bracket hole
Remove
tape
Loading ...
Loading ...
Loading ...