Loading ...
Loading ...
Loading ...
Section 4 -ADJUSTMENTS & REPAIR
4.6.2. BELT REPLACEMENT (Continued)
9. Adjust bait guide. See Figure 4.25 for
proper bait-to-belt guide clearances.
10. Check mower drive belt tension and
adjust if necessary. Refer to 4.2.1., MOWER
DRIVE BELT ADJUSTMENT on Page 13.
11. Reinstall mowerdrive belt cover.
._6" N===OMINAL
-f
26" MODELS
28", 30"_ & 33" MODELS
1116" NOMINAL
r-" TM (Dual Idler System)
t
FIGURE 4.25
I& CAUTION &l
Never attempt to service or charge the battery while I
it is installed on the Rear Engine Rider. I
4.6
BATTERY
4.6.1. BATTERY REMOVAL
1. Carefully pull each side of battery cover
away from ratchet fasteners and remove
cover. See Figure 4.26.
BATTERY
COVER
RATCHET
I
FIGURE 4.26
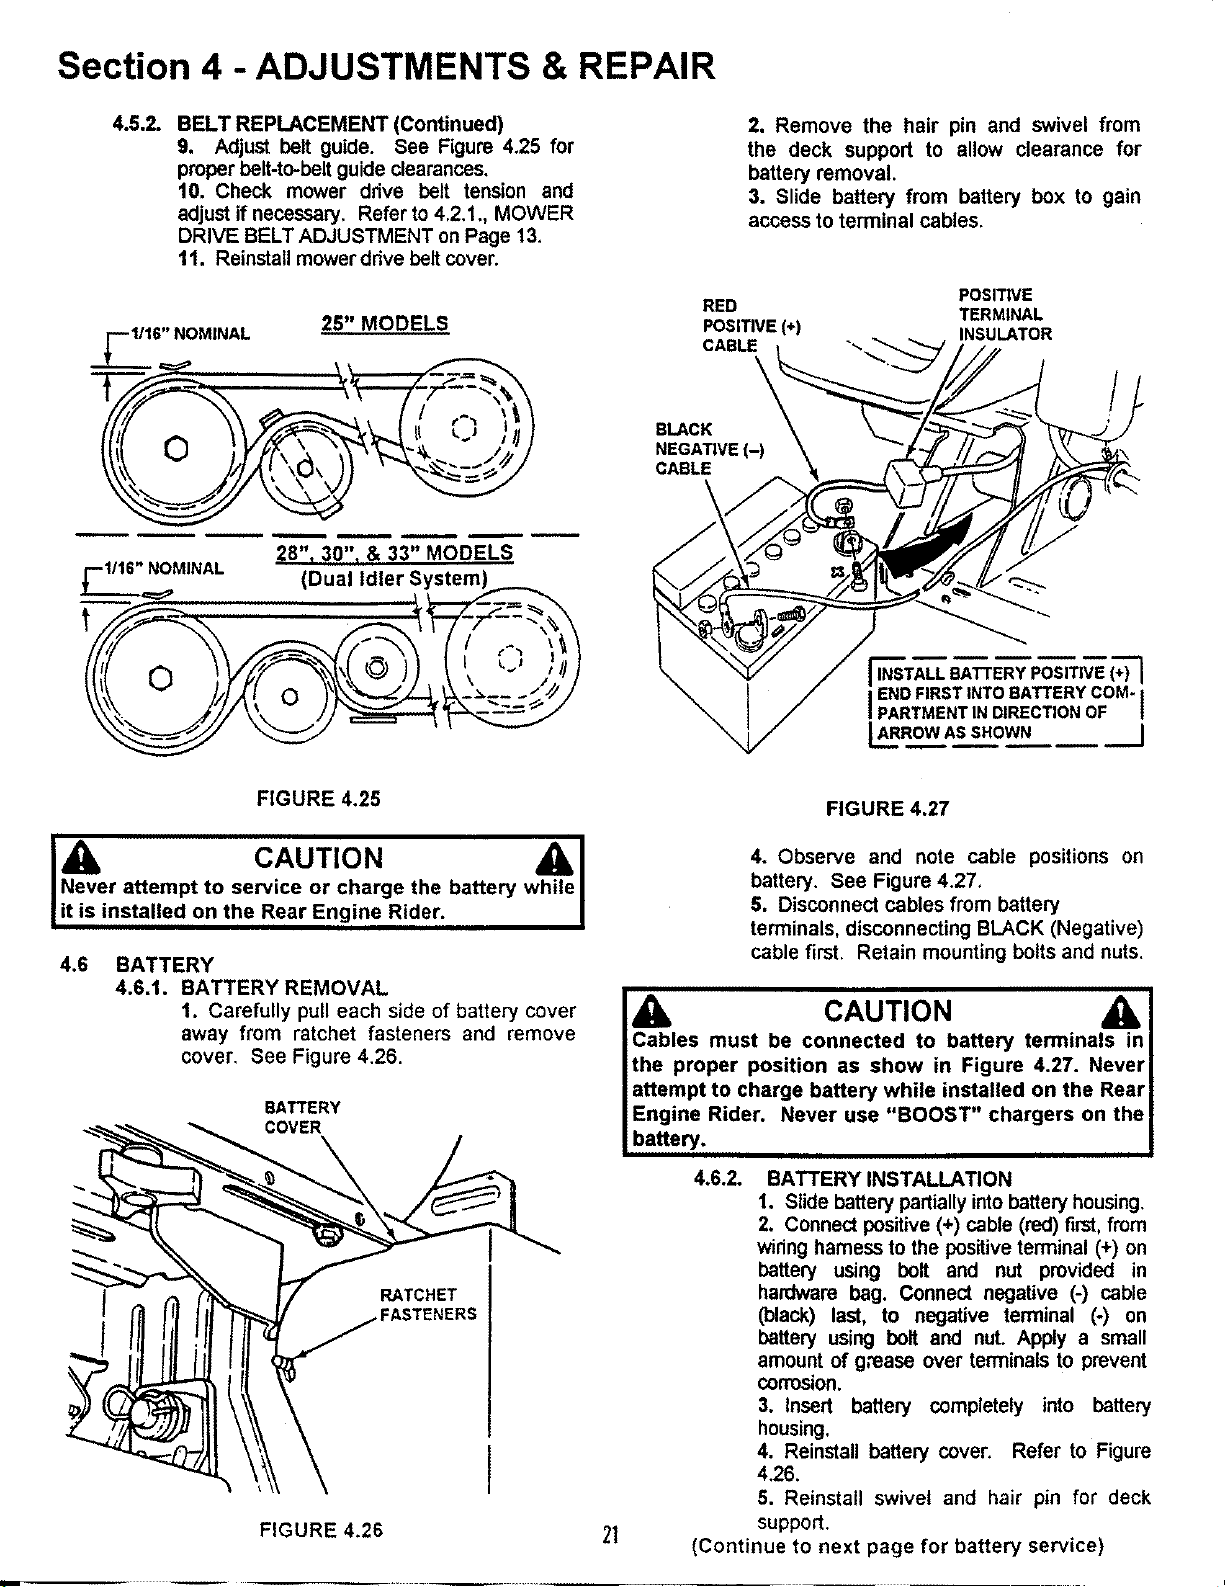
2. Remove the hair pin and swivel from
the deck support to allow clearance for
battery removal.
3. Slide battery from battery box to gain
access to terminal cables.
POSITIVE
RED TERMINAL
POSITIVE (+) INSULATOR
CABLE
BLACK
NEGATIVE (-)
CABLE
rlNSTALL BATTERY POSITIVE (+) ]
END FIRST INTO BATTERY COM-
PARTMENT N D RECTION OF
L ._owAsSHOWN I
21
FIGURE 4.27
4. Observe and note cable positions on
battery. See Figure 4.27,
6. Disconnect cables from battery
terminals, disconnecting BLACK (Negative)
cable first. Retain mounting bolts and nuts,
CAUTION
Cables must be connected to battery terminals in
the proper position as show in Figure 4.27. Never
attempt to charge battery while installed on the Rear
Engine Rider. Never use "BOOST" chargers on the
battery.
4.6.2. BATTERY INSTALLATION
1. Slide battery partially into battery housing.
2. Connect positive (+) cable (red) first, from
wiring harness to the positive terminal (+) on
battery using bolt and nut provided in
hardware bag. Connect negative (-) cable
(black) last, to negative terminal (-) on
battery using bolt and nut. Apply a small
amount of grease over terminals to prevent
corrosion.
3. Insert battery completely into battery
housing.
4. Reinstall battery cover. Refer to Figure
4.26.
5. Reinstall swivel and hair pin for deck
support.
(Continue to next page for battery service)
Loading ...
Loading ...
Loading ...