Loading ...
Loading ...
Loading ...
To set oven to start cleaning at a later time
1. C!ose door.
2. Move door took lever to locked position,
3. Touch Clean Pad,
4. Touch the Up or Down Arrow Pads to change desired clean time,
5. Touch Stop Time Pad.
Indicator Words SET STOP TIME will flash inthe Display. The calculated stoptime
wil! also appear in Display.
6. Touch the Up Arrow Pad to enter stop time.
A stop time can only be accepted for later in the day.
Example: If at 8 o'clock you set the oven to clean for 4 hours, the calculated stop
time wou_d be "12:00". The Display wilt show:
If you want the stop time to be 1'o'clock, touch the Up Arrow Pad. Three seconds
later, the Display wilt show the set stop time. The indicator Word DELAY willcome
on and the Display will show:
{I.ooo.l
When the oven begins to clean, the Indicator Word ON will come on and the
indicator Word DELAY wJ}tgo off.
When the clean time has been completed, the Indicator Words CLEAN and ON will
go off. The Indicator Word LOCK wilt remain on until the oven has cooled down.
To cancel self-clean
• Touch Canoe|lOft Pad.
• The oven door willbe locked while the LOCK Indicator Word remains in the Display.
Depending on the length of time the oven had been self-denning, it may take up to
45 minutes for the oven to cool down. After Lock Indicator Word goes out of the
Display, move the Door Lock Lever to the left.
IMPORTANT
• To recall cleaning time, current time of day or stop time: Touch the approprfat_
pad.
• To changecleaning time or stop time before cleaningbegins; Touch Cancel/
Off Pad and repeatthepreceding steps,
• Forcing the door lock lever to the left prior to the LOCK INDICATOR WORD going
out will damage the lock mechanism.
J
o
A slight odor may be detected, and if an oven is heavily soiled, some smoke may
be visible. Some smoke and odor during the cleaning process is a normal
occurrence. Since the oven vent is at the bottom of the control panel, vapors,
moisture, etc. may be seen coming from this area.
During the cleaning process, do not be alarmed if an occasional flame is visible
through the oven window. This Is caused by excessive food soil that was not
removed before the oven was set to clean.
SINCE THE DOOR AND WINDOW OF THE OVEN WILL GET WARM DURING
THE SELF-CLEANING PROCESS, AVOID CONTACT.
Some types of soil may disintegrate but leave a light film or heavier deposit of ash.
The amount of ash depends on the amount of soil which was inthe oven. After oven
has cooled, this ash may be removed with a damp sponge. If other dark deposits
remain after wiping with a sponge, the time set for the length of cleaning was not
enough. Increase the cleaning time for future c/eanings or clean more frequently.
The normal cleaning time ts 3 hours.
necessary.
A maximum of 4 hours may be selected if
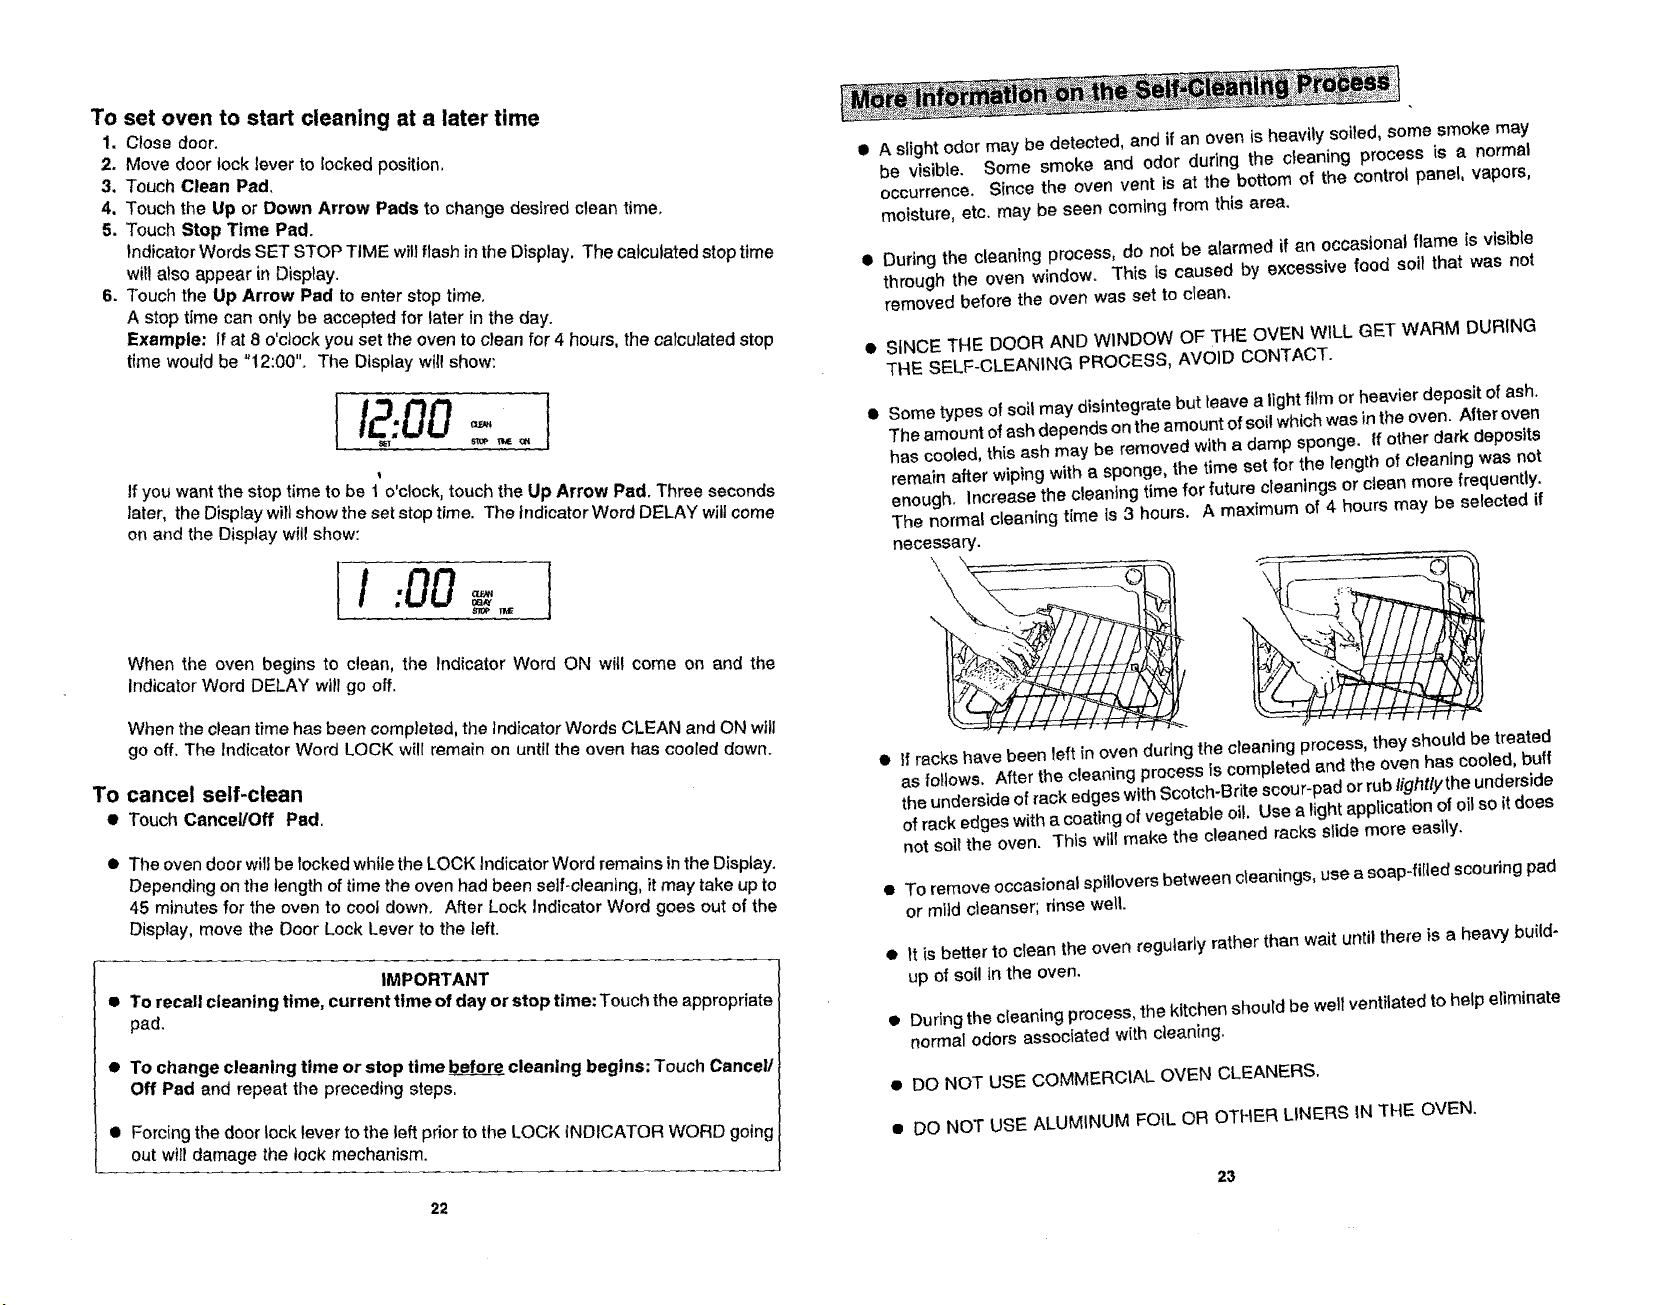
If racks have been left in oven during the cleaning process, they should be treated
as follows. After the cleaning process is completed and the oven has cooled, buff
the underside of rack edges with Scotch-Brite scour-pad or rub lightlythe underside
of rack edges with a coating of vegetable oil, Use a light application of oil so it does
not soil the oven. This will make the cleaned racks siide more easily.
To remove occasional sptllovers between cieanings, use a soap-fiIlect scouring pad
or mild cleanser; rinse well.
It is better to clean the oven regularly rather than wait ur_til there is a heavy build-
up of soi! in the oven.
During the cleaning process, the kitchen should be well ventilated to help eliminate
normal odors associated with cleaning.
DO NOT USE COMMERCIAL OVEN CLEANERS.
DO NOT USE ALUMINUM FOiL OR OTHER LINERS IN THE OVEN.
22 23
Loading ...
Loading ...
Loading ...