User Manual LiftMaster 860LMMC Receiver Security
APPLICATION
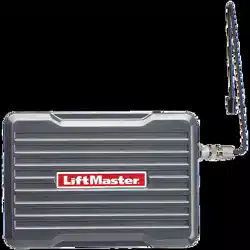
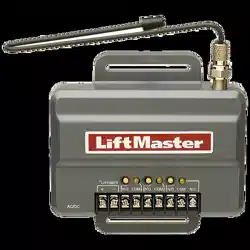
The receiver can be used as a single, two, or three channel receiver to control up to 3 gates or commercial door operators. The receiver can also be used with a 3-button remote control to operate the OPEN, CLOSE, and STOP feature on a commercial door operator. The 860LM Weather Resistant Universal Receiver may be mounted in outside locations that may be exposed to rain or moisture. This receiver is not compatible with myQ® enabled garage door openers or devices.
INSTALLATION
The receiver and antenna use TV Type F coaxial connectors. The antenna can be connected directly to the receiver or it can be installed remotely using a coaxial cable extension kit Model 86LM or 86LMT.
- Select a location for the receiver which allows access to the terminals and space for the antenna. Ensure antenna does not touch metal surfaces. DO NOT bend or fold the antenna.
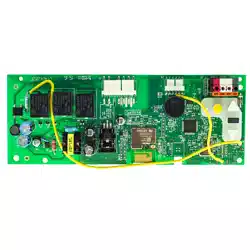
- Attach the receiver bracket to the mounting surface with hardware (not provided). Snap the receiver onto the bracket and secure the receiver to the bracket with the #8 screws provided.
- After the installation is complete, remove the cover. Connect power to the receiver with a 95LM wired-in transformer, or you may connect to the power going to the operator (see power ratings on next page).
WIRING
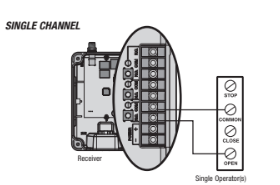
Below are wiring examples. Refer to your commercial door operator or gate operator owner's manual or wiring diagrams for specific wiring information.
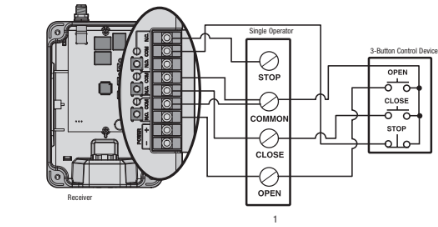
SINGLE CHANNEL
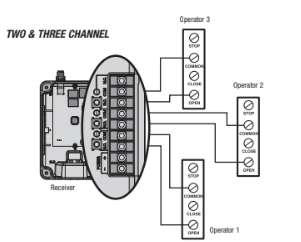
TWO & THREE CHANNEL
OPEN/CLOSE/STOP
PROGRAMMING
Each channel is compatible with a certain number of remote controls and keypads. Refer to the list below:
- CH1: 50 remote controls and 2 keypads
- CH2: 20 remote controls and 2 keypads
- CH3: 20 remote controls and 2 keypads
When the channel has reached full capacity for remote controls, all LEDs will blink 3 times. When the channel has reached full capacity for keypads, all LEDs will blink 4 times. Additional accessories can be programmed, however, the newly programmed accessory will replace the first programmed accessory.
NOTE: The receiver can command the operator to close the door or gate by constant pressure. This feature is only available with a wireless control panel Model 885LM). To enable this feature, press and hold the push bar until the gate or door moves to the closed position.

NOTE: This receiver will only allow you to program a button on the remote control to one channel at a time. For example, if the button on the remote control is already programmed to channel 1 and then is programmed to channel 3, the button will be erased from channel 1 and will only work on channel 3.
PROGRAM A SINGLE BUTTON REMOTE CONTROL
- Press and release the Learn button for the selected channel on the receiver. The corresponding LED will glow steadily for 30 seconds.
- Within 30 seconds press and hold the button on the remote control that you wish to program to the receiver.
- Release the remote control button when the LED on the receiver blinks, then turns off. Programming is complete.
Repeat the steps above for each remote control you would like to program.
PROGRAM A 3-BUTTON REMOTE CONTROL AS OPEN, CLOSE, AND STOP
- Press and release the CH1 Learn button on the receiver.
- Within 30 seconds press the desired OPEN button on the remote control.
- Press and release the CH2 Learn button on the receiver.
- Within 30 seconds press the desired CLOSE button on the remote control.
- Press and release the CH3 Learn button on the receiver.
- Within 30 seconds press the desired STOP button on the remote control.
NOTE: If a remote control button is not pressed within 30 seconds, the LED next to the selected Learn button will turn OFF. In that case, repeat the programming.
TO ERASE THE MEMORY
Press and hold the Learn button for the channel you want to erase. Release the button when the corresponding LED turns off; the memory has been erased.