Loading ...
Loading ...
Loading ...
8
ASSEMBLY INSTRUCTIONS
4-1
4-2
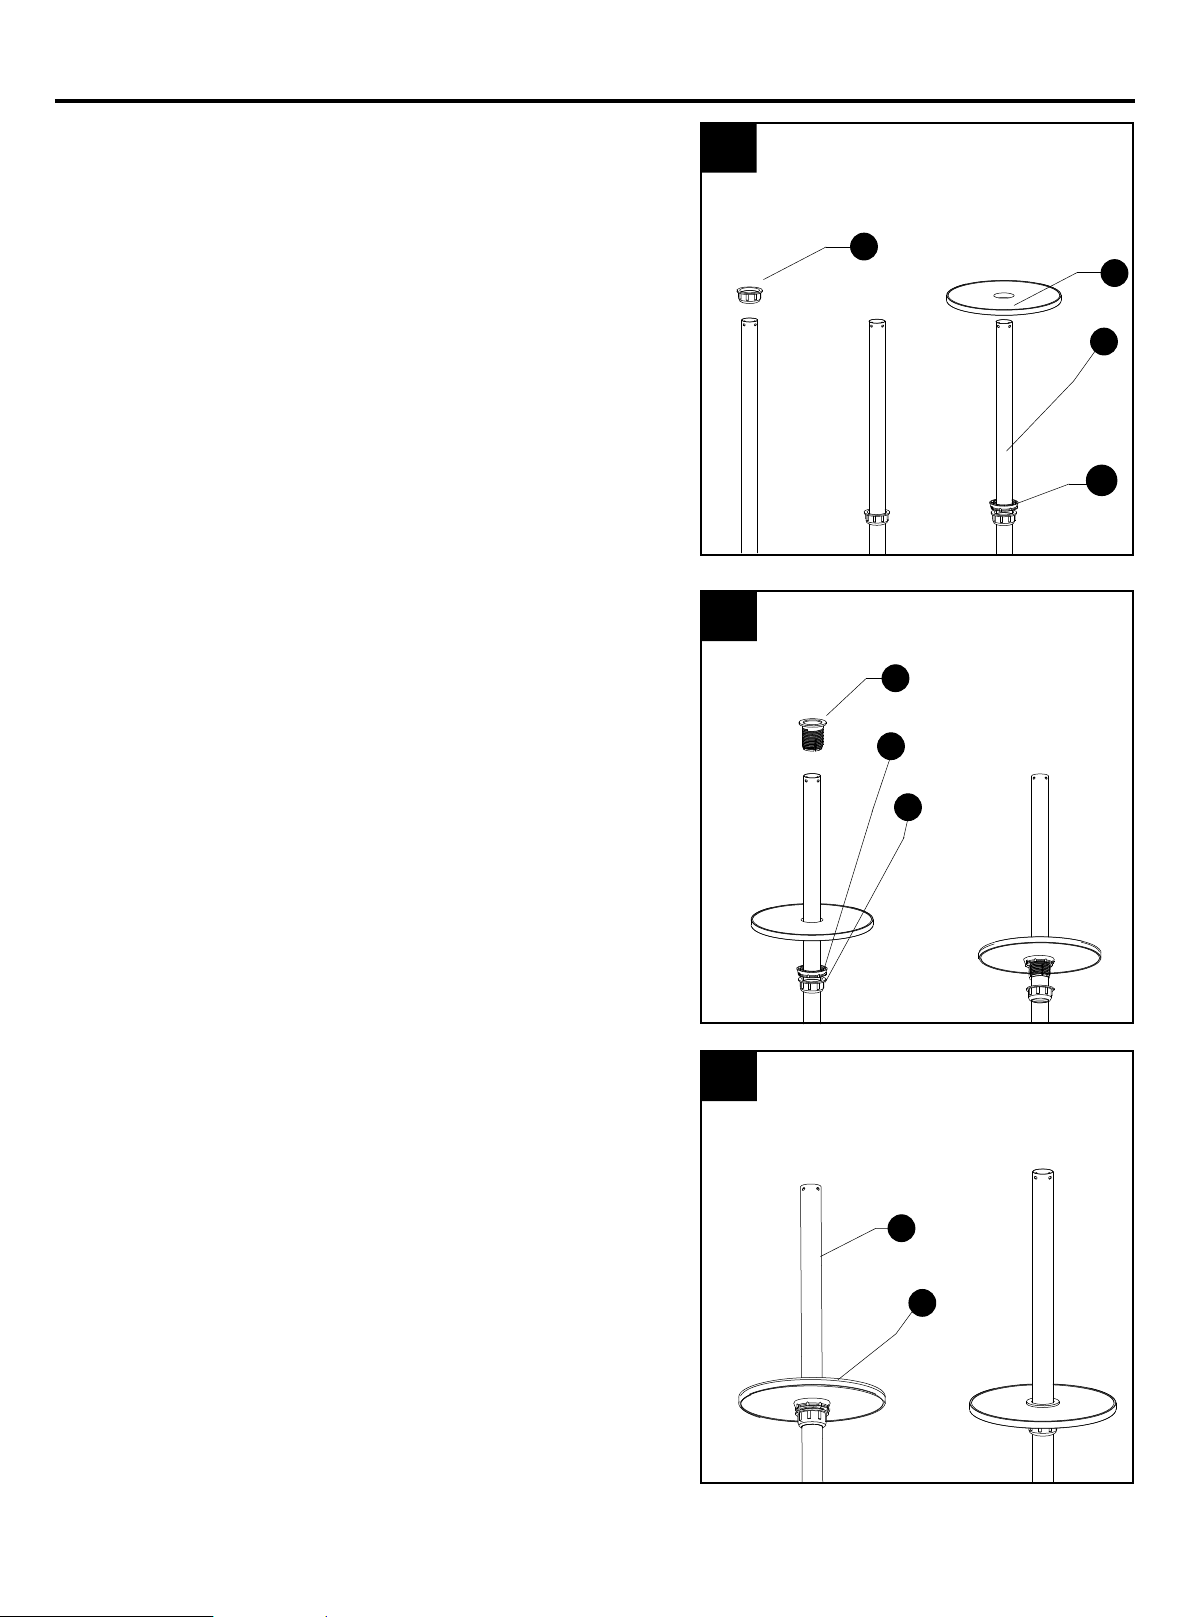
4.4-1. Slide fastening nut (G) down the post (H) with the
rounded side facing down. Next, slide the tightening
spacer (F) down the post (H) with the smaller side facing
down. Put the table (E) on the post (H) with the metallic
side facing up.
4-2. Insert the screw coupler (D) on the post (H),
inserting it through the middle of the table (E) on the
post (H). Thread the tightening spacer (F) on the bottom
of the table (E) counterclockwise onto the screw
coupler (D). Tighten securely to hold the table (E) to the
screw coupler (D). Thread the fastening nut (G)
counterclockwise.
4-3. Tighten securely to lock in place.
Loosen the fastening nut (G) to adjust the position of the
table (E) on the post (H).
H
F
G
D
G
E
H
E
F
4-3
Loading ...
Loading ...
Loading ...