Loading ...
Loading ...
Loading ...
18
If you leave the ice cubes in the
bucket, the ice cubes may clump
together making it difficult to
remove them.
Note:
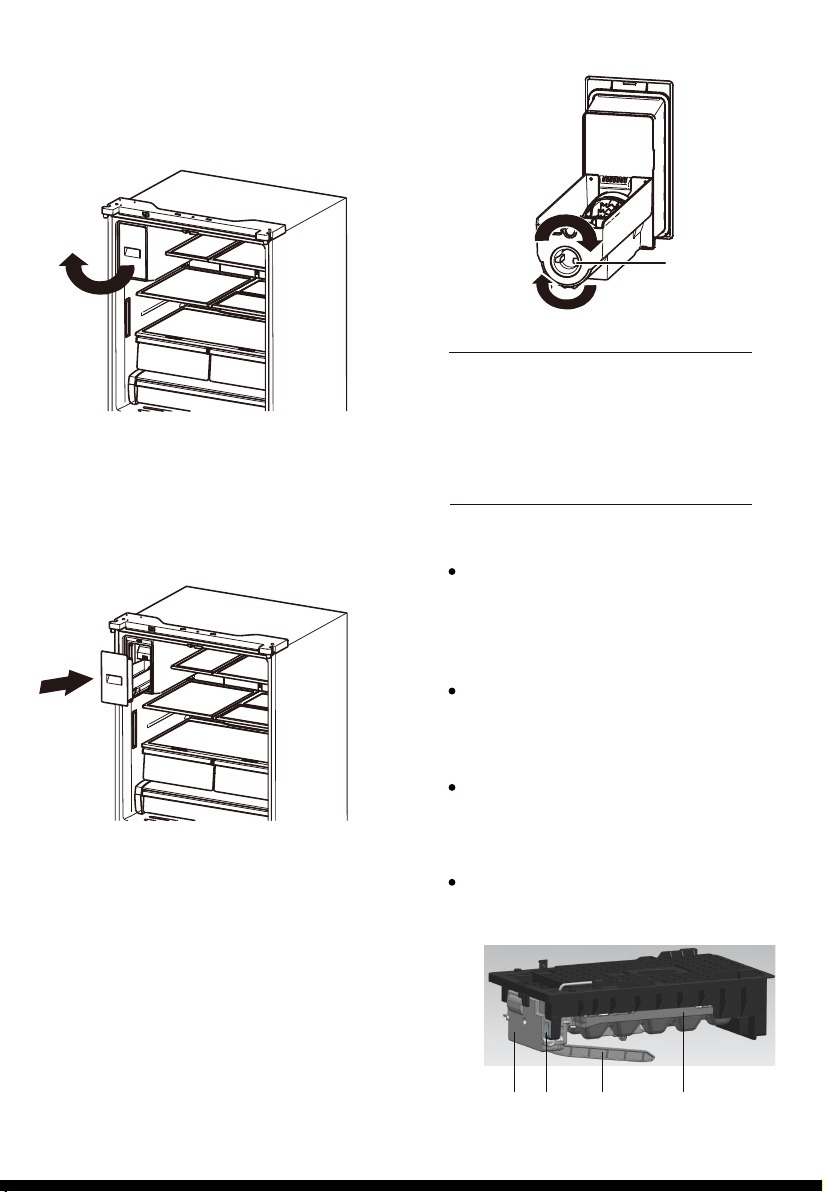
Knob
CAUTION
• Do not apply excessive force to the
bucket cover. The cover may break.
• Do not forcefully close the door. Water
may spill over the ice maker.
• To prevent injury, make sure to clean
up any ice or water that has fallen on
the floor.
• Do not put the your hand or an object
into the ice chute. This may cause
physical injury or product damage.
2. Empty the bucket.
1. Gently lift it up, and then pull it out slowly
while holding the bottom of the bucket with
one hand and the side with the other hand.
3. When done, put the bucket back into
position, If the bucket does not fit in, turn
the knob 90 degrees, and then try again.
To remove the ice bucket
To prevent accidents or injury, do not
let the children play with the water
dispenser or the ice maker.
The freezer compartment is provided with
an upper drawer, a lower drawer and an
ice storage box. To remove all of them,
refer to page 8 for disassembly instruction.
Using the freezer compartment
Ice Maker in Freezer
If the water line is connected, set the ice
maker power switch to the ON position.
Following installation, allow 24 hours to
produce the first batch of ice. Discard
the first three batches of ice produced.
Allow 2 to 3 days to fill the ice storage
container.
If the ice in the ice container clumps,
break up ice using a plastic utensil and
discard. Do not use a sharp tool to break
up the ice. This can cause damage to
the ice container.
Do not store any items other than ice in
the ice storage container.
•
Feeler Arm Ice Storage
Container
Motor
The ice maker will not begin to the
operate until it reaches its operating
temperature of 15°F(-9°C) or below. It
will then begin operation automaticaly
if the ice maker power switch is at the
ON position.
Switch
Loading ...
Loading ...
Loading ...