Loading ...
Loading ...
Loading ...
8 Cyclone Canopy Installation - English
Install the Wall Mount Hood
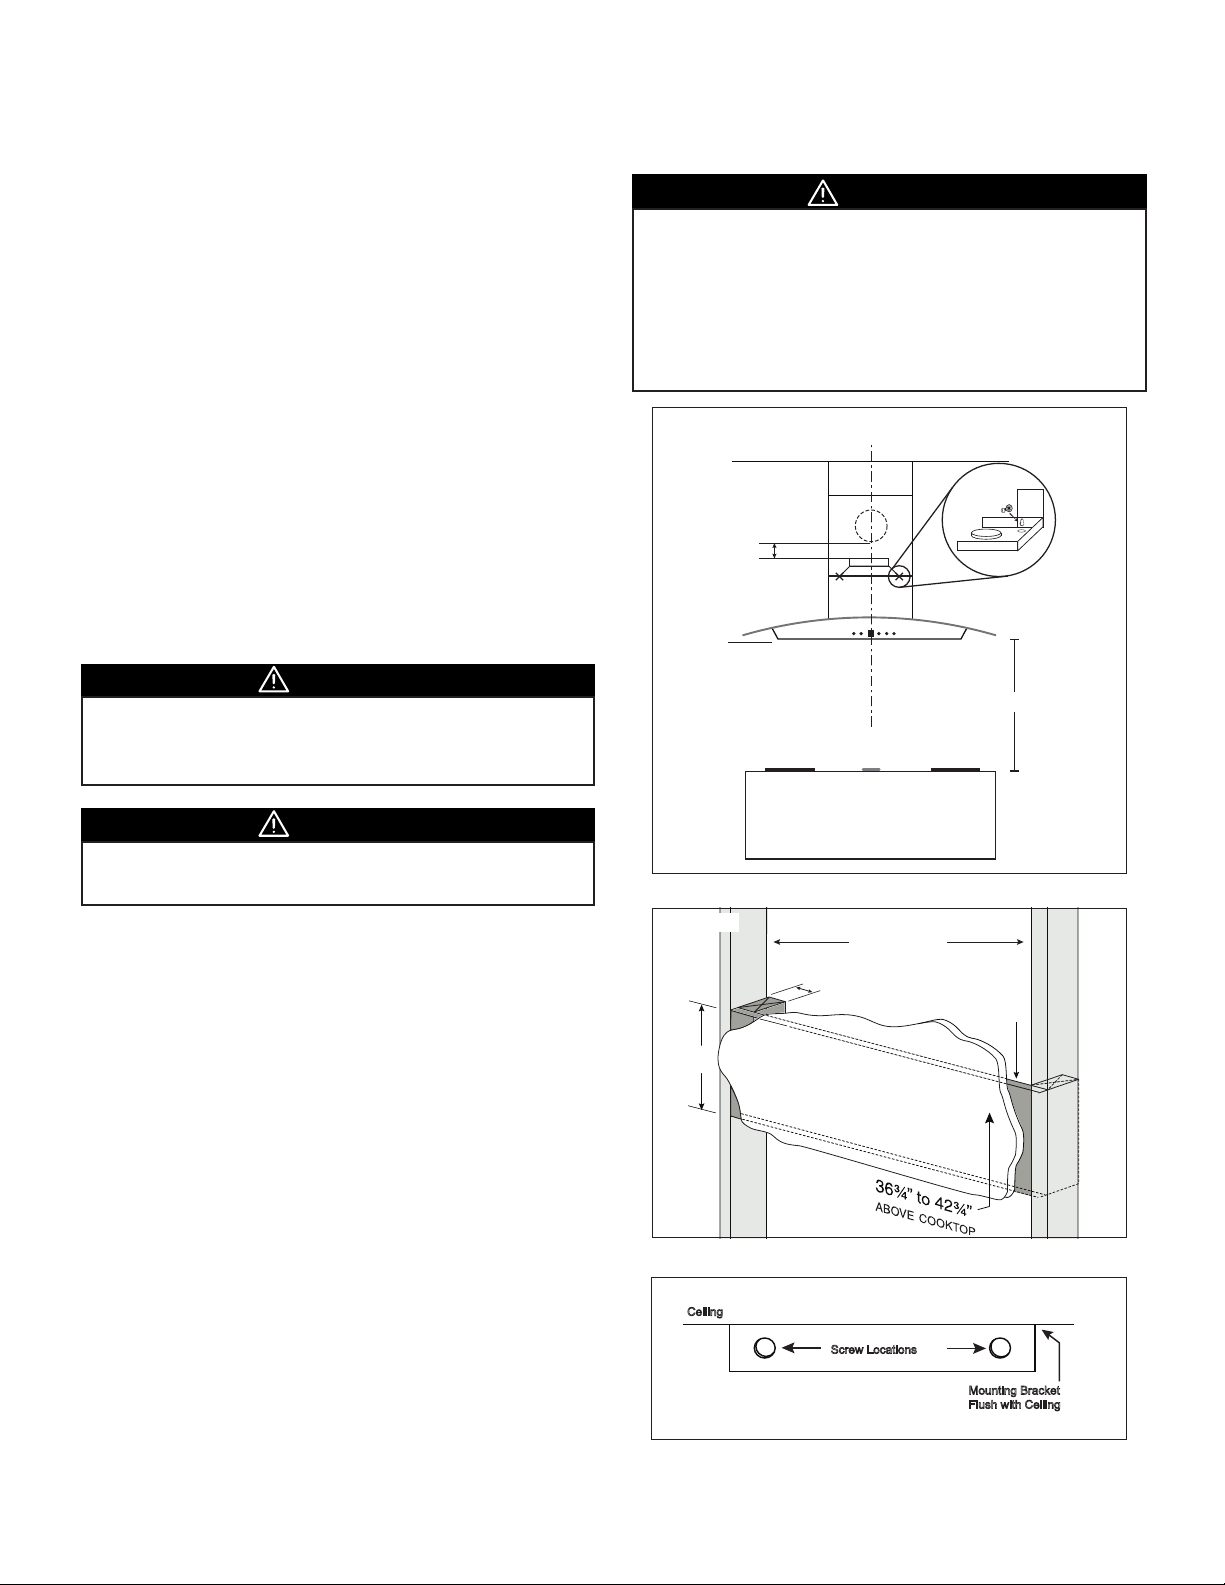
1. Measure from range top to hood bottom and use a leveler
to mark line A (28” minimum from range top for electric/
ceramic stoves, 30” minimum from range top for gas stoves).
2. Place and mark center line C/L.
3. Use the hood fan as template to nd the mounting screws
position. Keep the hood bottom centered and level on line
A. Mark the position of the two mounting screws (Figure 1).
Important: e minimum allowable distance from the top of the
damper on range hood to the bottom of the ductwork protruding
from wall is 3”.
4. Fasten two mounting screws into studs where possible at the
positions marked with an X. Do not fasten screws all the way.
5. Where studs are not available, you must construct wood wall
framing that is ush with surface of wall studs. Wood wall
framing should be at least 1/2” thick and 3” high. Assemble
wood wall framing to wall studs for a secure installation.
Make sure the height of the framing allows the hood fan to be
secured to the wood block (Figure 2).
6. Center the upper cover mounting bracket with the center line
and mount it ush with the ceiling by drilling pilot holes and
using small anchors provided (Figure 3).
7. Install 6” round adapter if not preinstalled.
8. Remove the lters from the hood.
9. Hang hood onto screws and hand tighten. If possible, use
extra screws to further secure the hood to the wall from inside
the hood.
10. Install 6” round duct over the adapter, connect it with the
venting duct coming from the wall or ceiling. Use metal foil
duct tape to seal the joint.
11. Install electrical connection. Turn on the hood and check for
leaks around duct tape.
12. Place telescopic duct covers onto hood and extend inner top
duct cover upwards and secure to duct cover bracket.
13. Reinstall lters to the hood. Remove protective plastic lm
covering the duct covers and hood.
• Wood blocking may need to be added behind the drywall
if no studs are present. Wall anchors may also be used,
check local codes before using wall anchors.
CAUTION
• When cutting or drilling into wall, do not damage electrical
wiring and other hidden utilities.
WARNING
Min. 3”
Min. 1 ½”
Framing Behind
Drywall
Wall Studs
C/L
A
Min. 28-30”
Min. 3”
Ceiling
Screw Locations
Mounting Bracket
Flush with Ceiling
WALL MOUNT HOOD INSTALLATION
• At least two installers are required due to the weight and
size of the hood.
• Turn o power circuit at the service panel before wiring
this unit.
• All electrical work must be done by a qualied electrician
in accordance with all applicable codes and standards.
is range hood must be properly grounded.
CAUTION
Figure 3.
Figure 1.
Figure 2.
Loading ...
Loading ...
Loading ...