Loading ...
Loading ...
Loading ...
8. OPERATING INSTRUCTIONS
17
8.15 FREQUENCY MEASUREMENT BY HZ / DUTY
Warning
Risk of electric shock.
When measuring high voltage, extra care should be taken to avoid electrical shock.
Do not attempt to use this meter on a voltage higher than the AC250V rms value.
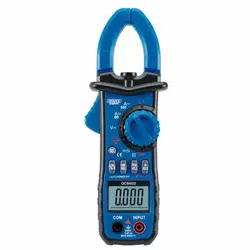
1. Rotate the measurement function selection dial to the "Hz%" position.
2. Connect the black lead to the COM probe socket and the red lead to the VΩ probe
socket.
3. Press the "Hz %" button to select the measurement function.
4. Connect the test leads to the signal .
5. The measurement result is read from the LCD.
Note: The frequency measurement range is 10Hz ~ 10MHz. If the measurement frequency
is lower than 10Hz, the LCD will display "00.0". It is possible to measure the frequency
higher than 10MHz, but it cannot guarantee the accuracy of the measurement. The
maximum input voltage is 250V AC (rms).
8.14 VOLTAGE MEASUREMENT
(THROUGH THE AC VOLTAGE RANGE)
Warning
Risk of electric shock
When measuring high voltage, extra care should be taken to avoid electrical shock.
Do not attempt to use this meter on a voltage higher than the AC600V rms value.
1. Rotate the measurement function selection dial to the AC voltage measurement.
2. Connect the black lead to the COM probe socket and the red lead to the VΩ probe
socket.
3. Press the "Hz %" button to select the measurement function.
4. Connect the test leads to the signal.
5. The measurement result is read from the LCD.
Note: The frequency measurement range is 10Hz ~ 10 kHz. If the measurement frequency
is lower than 10Hz, the LCD will display "00.0". It is possible to measure the frequency
higher than 10kHz, but it cannot guarantee the accuracy of the measurement.
The maximum input voltage is 600V AC (rms).
Loading ...
Loading ...
Loading ...