Loading ...
Loading ...
Loading ...

8.6 BACKLIGHT AND CLAMP HEAD LIGHTING
1. Press the “ ” function button for approx. 2 seconds to turn on and off the backlight.
Note: The light will turn off automatically after 60 seconds.
Note: The inspection light will only come on while in AC/DC current function.
8.7 AUTOMATIC SHUTDOWN FUNCTION
If the meter is not used for approx. 15 minutes the meter will automatically shut down. The
meter will give a warning buzz approx. 1 minute before.
8.8 BUZZER
When any key is pressed or the function switch is activated, (if the function key is valid),
the buzzer will sound; if the measured voltage or current is greater than the set value, such
as the voltage is greater than 600V and the AC / DC current is greater than 600A, the
buzzer will continue to sound as an over range warning.
8.9 PREPARATION FOR MEASUREMENT
1. Switch on the power by turning the measuring function selection dial.
If the battery voltage is lower than ≤3.9V, the “ ”symbol will appear and the batteries
should be replaced.
2. If the “ ”symbol shows that the input voltage or current should not exceed the
specified value in order to protect the internal circuit from damage.
3. Turn the measuring function selection dial to the required function and range to be
measured.
4. Connect the black lead to the com probe socket and the red lead to the VΩ probe
socket.
8. OPERATING INSTRUCTIONS
15
8.10
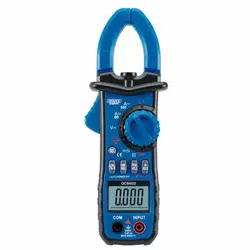
AC AND DC CURRENT MEASUREMENT USING CURRENT CLAMP HEAD.
Warning
Risk of electric shock. YOU MUST NOT measure current using the probes.
Remove the test leads from the meter when measuring with the clamp head.
1. Rotate the measurement function selection dial to the appropriate current.
2. Press the trigger to open the clamp, pass the wire to be measured into the centre of the
clamp, and then slowly release the trigger until the clamp is fully closed.
3. Read the measurement result from the LCD.
Note: The instrument can only measure one current conductor at a time.
If two or more current conductors are measured at the same time, the measurement will be
inaccurate.
Loading ...
Loading ...
Loading ...
