Loading ...
Loading ...
Loading ...
To Clean the Filter Plate
• Ensurethe DishDrawer iscool before you start
cleaning.
• Remove the drain fiher and spray arm (see
previous instructions for their removal).
• in the center of the filter plate, there are two rings.
Hold the center ring still and turn the outer ring
counk'r clockwise, about a _/_turn. rhis will
release the filter plate.
• When cleaning the underside of the filter plate,,
care must be taken on the sharp outer edge to
avoid the risk of cut type injuries.
• Remove any soil, wash in hot soapy water and
rinse thoroughly in clean water, rhe heater plate
can be wiped with a damp cloth.
• Replace the filter plate so that it lies fiat with the
base of the DishDrawer ensuring the filter plate is
fully locked into position with the outer ring. To
lock the filter plate into position, ensure the
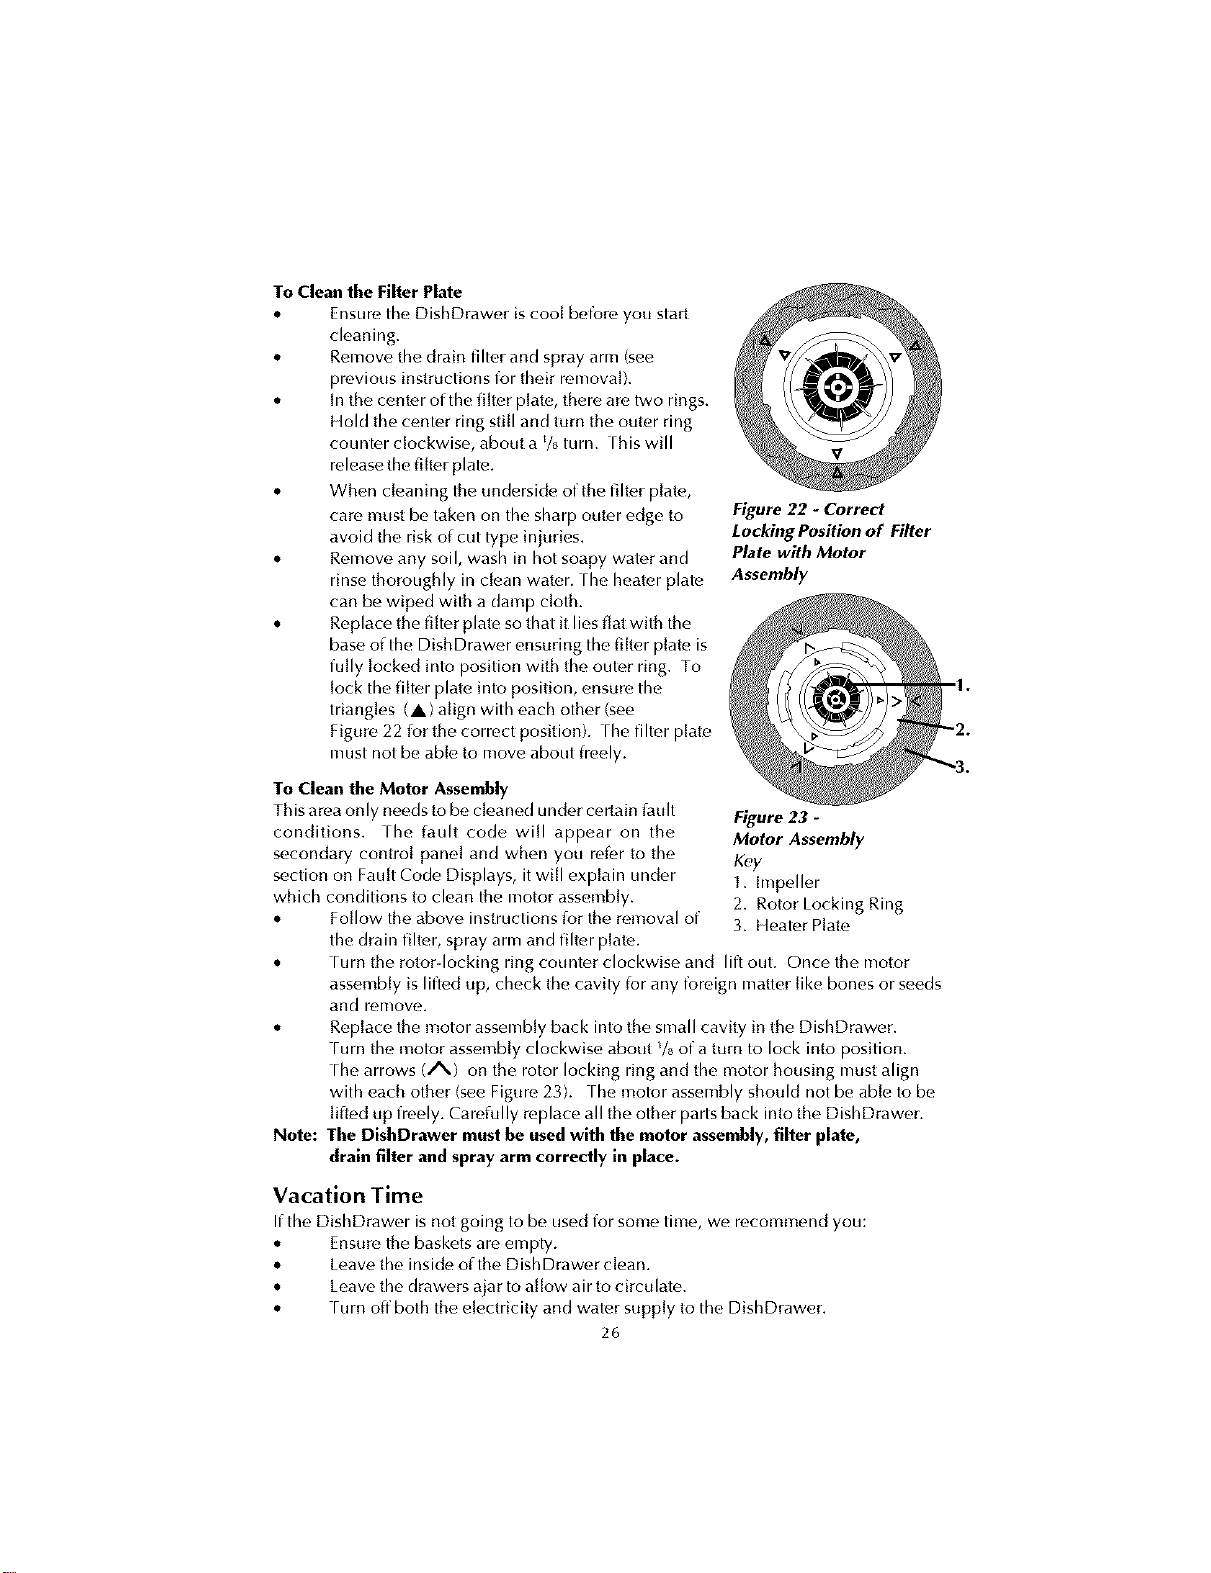
triangles (A) align with each other (see
Figure 22 lot the correct position), rhe fiher plate
must not be able to move about lreely.
Figure 22 - Correct
Locking Position of Filter
Plate with Motor
Assembly
To Clean the Motor Assembly
This area only needs to be cleaned Lmder cerlain iault
conditions, rhe iault code will appear on the
secondary contro[ pane[ and when you mf_r to the
section on Fault Code Displays, it will explain under
which conditions to clean the motor assembly.
• Follow the above instructions ior the removal of
the drain filter, spray arm and filter plate.
• rurn the rotor-locking ring counter clockwise and lift OLIL.Once the motor
assembly is lifted up, check the cavity ior any foreign matter like bones or seeds
and relnove.
• Replace the motor assembly back into the small cavity in the DishDrawer.
rurn the motor assembly clockwise about _/_of a turn to lock into position.
rhe arrows (A) on the rotor locking ring and the motor housing must align
with each other (see Figure 23). rhe motor assembly should not be able to be
Jilted up freely. Carefully replace all the other parts back into the DishDrawer.
Note: The DishDrawer must be usedwith the motor assembly, filter plate,
drain filter and spray arm correctly in place.
Figure 23 -
Motor Assembly
Key
L Impeller
2. Rotor Locking Ring
3. Heater Hate
Vacation Time
Ifthe DishDrawer is not going to be, used for some time, we recommend you:
• Ensurethe baskets am empty.
• Leave the inside of the Dish Drawer clean.
• Leave the drawers ajar to allow air to circulate.
• rurn off both the electricity and water supply to the DishDrawer.
26
Loading ...
Loading ...
Loading ...