Loading ...
Loading ...
Loading ...
9
SWITCH REPLACEMENT - Main On/Off
Power; Purier/Heat; Mode Selector
Tools required: Phillips head screwdriver
Flat head screwdriver
!
NOTE: Depending on the Modication Level (MOD.)
of your replace you will have at least two (or a variation) of
these types of switches: MAIN ON/OFF POWER; PURI-
FIRE/HEAT; MODE SELECTOR, all of which are located in
the same area in the rebox and can be replaced following
the same instructions below.
WARNING: If the replace was operating prior to
servicing allow at least 10 minutes for light bulbs and
heating elements to cool off to avoid accidental burning
of skin.
WARNING: Disconnect circuit power before attempt-
ing any maintenance or cleaning to reduce the risk of
electric shock or damage to persons.
1. Open the steel curtains (remove glass doors if appli-
cable).
2. Remove the 2 screws from the log set retaining plate
along the front of the log set and remove the retaining
plate..
3. Pull the rear edge of the log set forward by grasping
the ember bed by the sides, pull rmly until the rear tab
pops out from under the back ledge, then lift the logs
out. (Figure 5)
!
IMPORTANT: Only handle the log-set by the plastic
ember-bed, not the logs themselves.
!
NOTE: Log-set ts tightly into rebox. Some force
may be necessary to remove.
4. Disconnect the log set LED wire harness from unit.
(DXP MODELS ONLY)
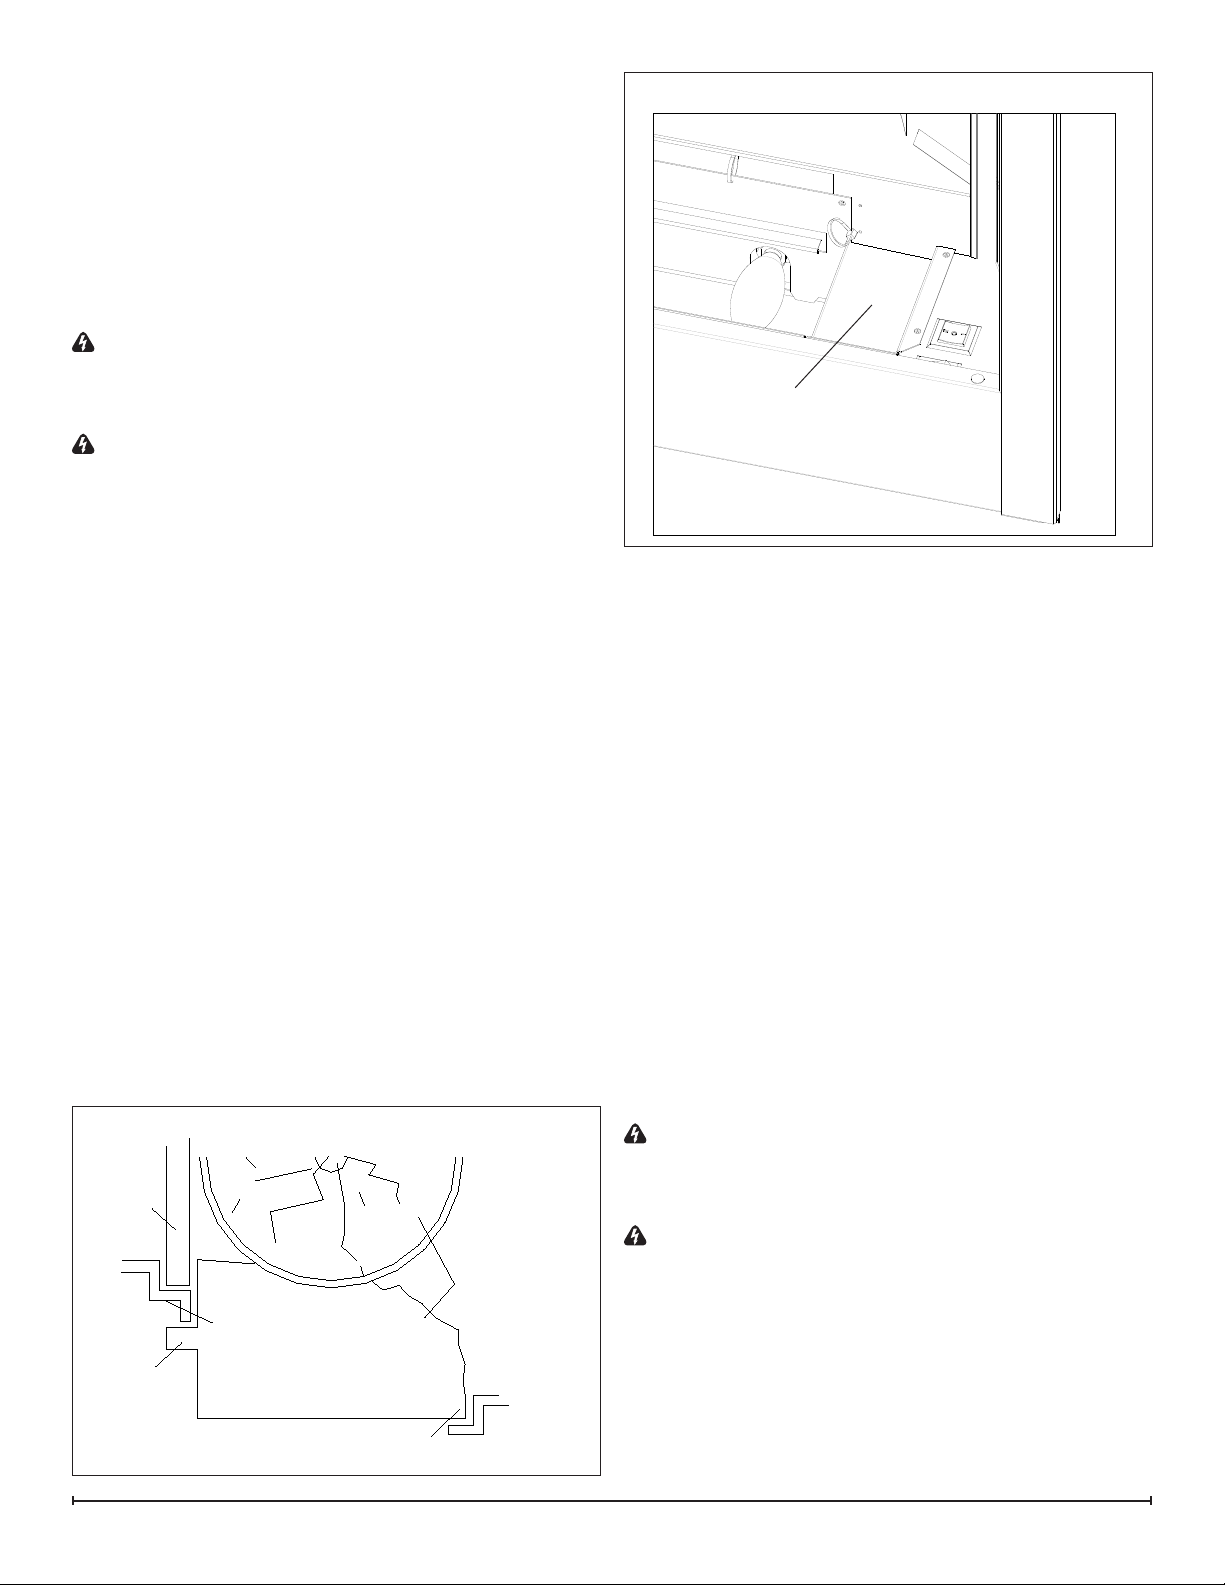
5. Locate the removable bracket on the lower right side
of the replace and remove the 2 mounting screws
located to the left of the switches. (Figure 6)
6. Remove the bracket - turn the back edge toward the
light bulb about 1/2” (12.7mm) then lift straight up.
!
NOTE: For Models with Remote Control Receiver
Installed the Plug Connector will have to be disconnected.
To do this, squeeze the tabs on either side.
7. Reach hand into the opening and locate the switch to
be replaced.
8. Depress the retainer clips on both sides of the switch
and push the switch out of the top.
9. Disconnect the wiring connections noting their original
locations.
!
NOTE: Using a at head screwdriver gently pry be-
tween the end of the connector and the switch to release
the wires.
10. Properly orient the new switch and reconnect all of the
wiring connections.
11. Reassemble in the reverse order as above.
!
NOTE: When re-inserting the log-set, insert the front
edge rst then push the backside of the log-set down until
the rear tab snaps under the back partially reective glass
ledge and the logs are resting against the partially reective
glass.
LIGHT HARNESS REPLACEMENT
Tools required: Phillips head screwdriver.
Wire cutters/strippers
WARNING: If the replace was operating prior to
servicing allow at least 10 minutes for light bulbs and
heating elements to cool off to avoid accidental burning
of skin.
WARNING: Disconnect circuit power before attempt-
ing any maintenance or cleaning to reduce the risk of
electric shock or damage to persons.
1. Open the steel curtains (remove glass doors if appli-
cable).
2. Remove the 2 screws from the log set retaining plate
along the front of the log set and remove the retaining
plate.
3. Pull the rear edge of the log set forward by grasping
Figure 6
Removable
Bracket
Ember Bed
Assembly
Front Edge
Rear Tab
Back Ledge
Mirror
Figure 5
Loading ...
Loading ...
Loading ...