Loading ...
Loading ...
Loading ...
5
GETTING TO KNOW
YOUR CONTROL PANEL
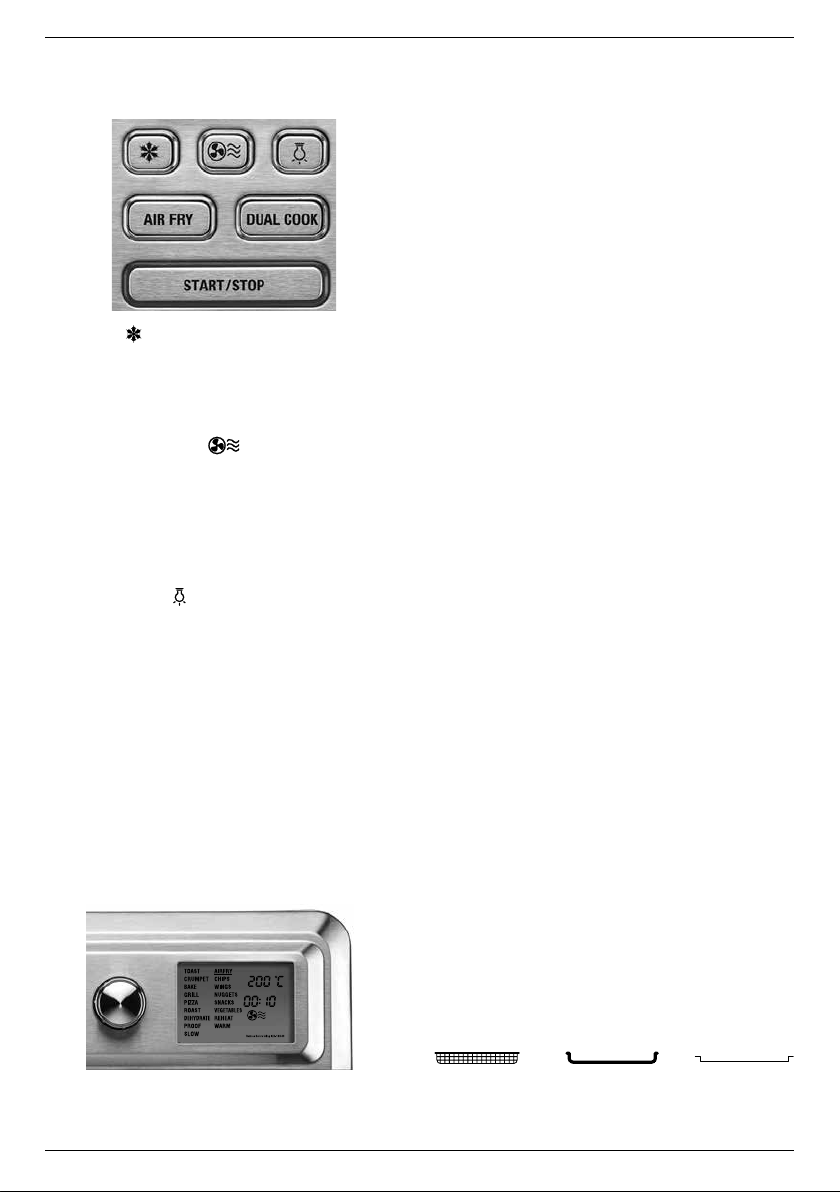
A. Frozen
Select when cooking/reheating from frozen using
the Toast, Crumpets, Pizza & certain Air Fry preset
functions. The frozen icon will display on the LCD
screen.
B. Super Convention
Fan speed is increased & can be set in Bake,
Grill, Roast, Proof, Slow or Reheat settings.
The Pizza setting is already preset with this as well
as Dehydrate & all Air Fry functions. When the icon
is NOT showing, normal convection fan speed is
set.
C. Interior Light
Press the light button to have a clear view of
cooking progress - light will turn off automati-
cally after 20 secs.
D. Air Fry Function
Takes you directly to the Air Fry setting & Air
Fry presets. Press again to toggle between
other functions menu.
E. Dual Cook
Use to program two-stage cooking operation
automatically.
F. Start/Stop
Use to start & stop cooking. Indicator will illu-
minate when cooking.
G. Selector Dial
Rotate to scroll through options on the LCD
screen. Press centre of dial to confirm selec-
tions.
H. LCD Digital Display
Displays cooking functions, toast shade & slices,
temperature, cooking/ countdown timer, clock
time, fan speed and frozen.
SETTING THE CLOCK
The clock can only be set when the oven is not
cooking i.e. when the clock is displayed on the
screen.
1. If LCD is not displaying the clock, scroll through
the function menu until clock is displayed.
2. Press and hold the Selector Dial for 3 seconds.
3. The clock hour will flash; turn the Selector Dial to
set hour, then press to confirm.
4. The clock minutes will flash; turn the Selector
Dial to set minutes, then press to confirm.
NOTE: If nothing is pressed, the clock will continue
to run from 12:00 from the time the power is con-
nected.
SETTING THE VOLUME OF THE
TONE
The tone volume can only be adjusted when the
time is displayed on the screen.
1. Press Air Fry and Dual Cook buttons simultane-
ously for 3 seconds.
2. The number 2 (default setting) or currently
selected setting will display.
3. Use the Selector Dial to set preferred tone level:
0 (off/tones deactivated), 1 (low), or 2 (high).
4. Once your selection is displayed, press the
Selector Dial to confirm.
OVEN RACK & PAN
POSITIONS
Please refer to the chart below for suggested
Oven Rack, Baking Tray/Drip Pan, and Air Fryer
Basket positions.
Rack Position 1 and Position 2 are marked on the
right side housing when the door is opened.
Oven
Rack
Baking Tray/
Drip Pan
Air Fryer
Basket
Loading ...
Loading ...
Loading ...