Loading ...
Loading ...
Loading ...
Care and Maintenance
IMPORTANT
1. Be sure to unplug the unit before cleaning or servicing.
2. Do not use gasoline, paint thinner or other chemicals to clean the
unit.
3. Do not wash the unit directly under a tap or using a hose. It may
cause electrical damage.
4. If the power cord is damaged, contact the service depot immediately.
AIR FILTER
UNIT ENCLOSURE
Use a lint-free cloth soaked with neutral detergent to clean the unit enclosure,
be sure to wring the cloth of excess water. Finish by wiping with a clean dry
cloth.
LONG-TERM STORAGE
• Remove the rubber plug at the back of the unit and attach a hose to the drain
outlet. Place the open end of the hose directly over the drain area in your base-
ment fl oor.
• Remove the plug from the bottom drain outlet, this means that all the water in
the bottom drain tray will drain out.
• Keep the appliance runnng on FAN mode for half a day in a warm room to dry
the appliance inside and prevent mold formation.
• Turn off the appliance and unplug it, wrap the cord and bundle it with tape.
• Remove the batteries from the remote controller.
• Clean the air fi lter and reinstall it.
Note: Always store the unit in the vertical position. DO NOT put heavy objects
on top of the unit.
Caution: NEVER operate this unit without the air fi lter in place, as this may
result in damage to the unit.
If the air fi lter becomes clogged with dust/dirt, air fl ow is restricted, which reduces
cooling effi ciency. The air fi lter should be cleaned every two (2) weeks. More fre-
quent cleaning may be necessary depending on indoor air quality.
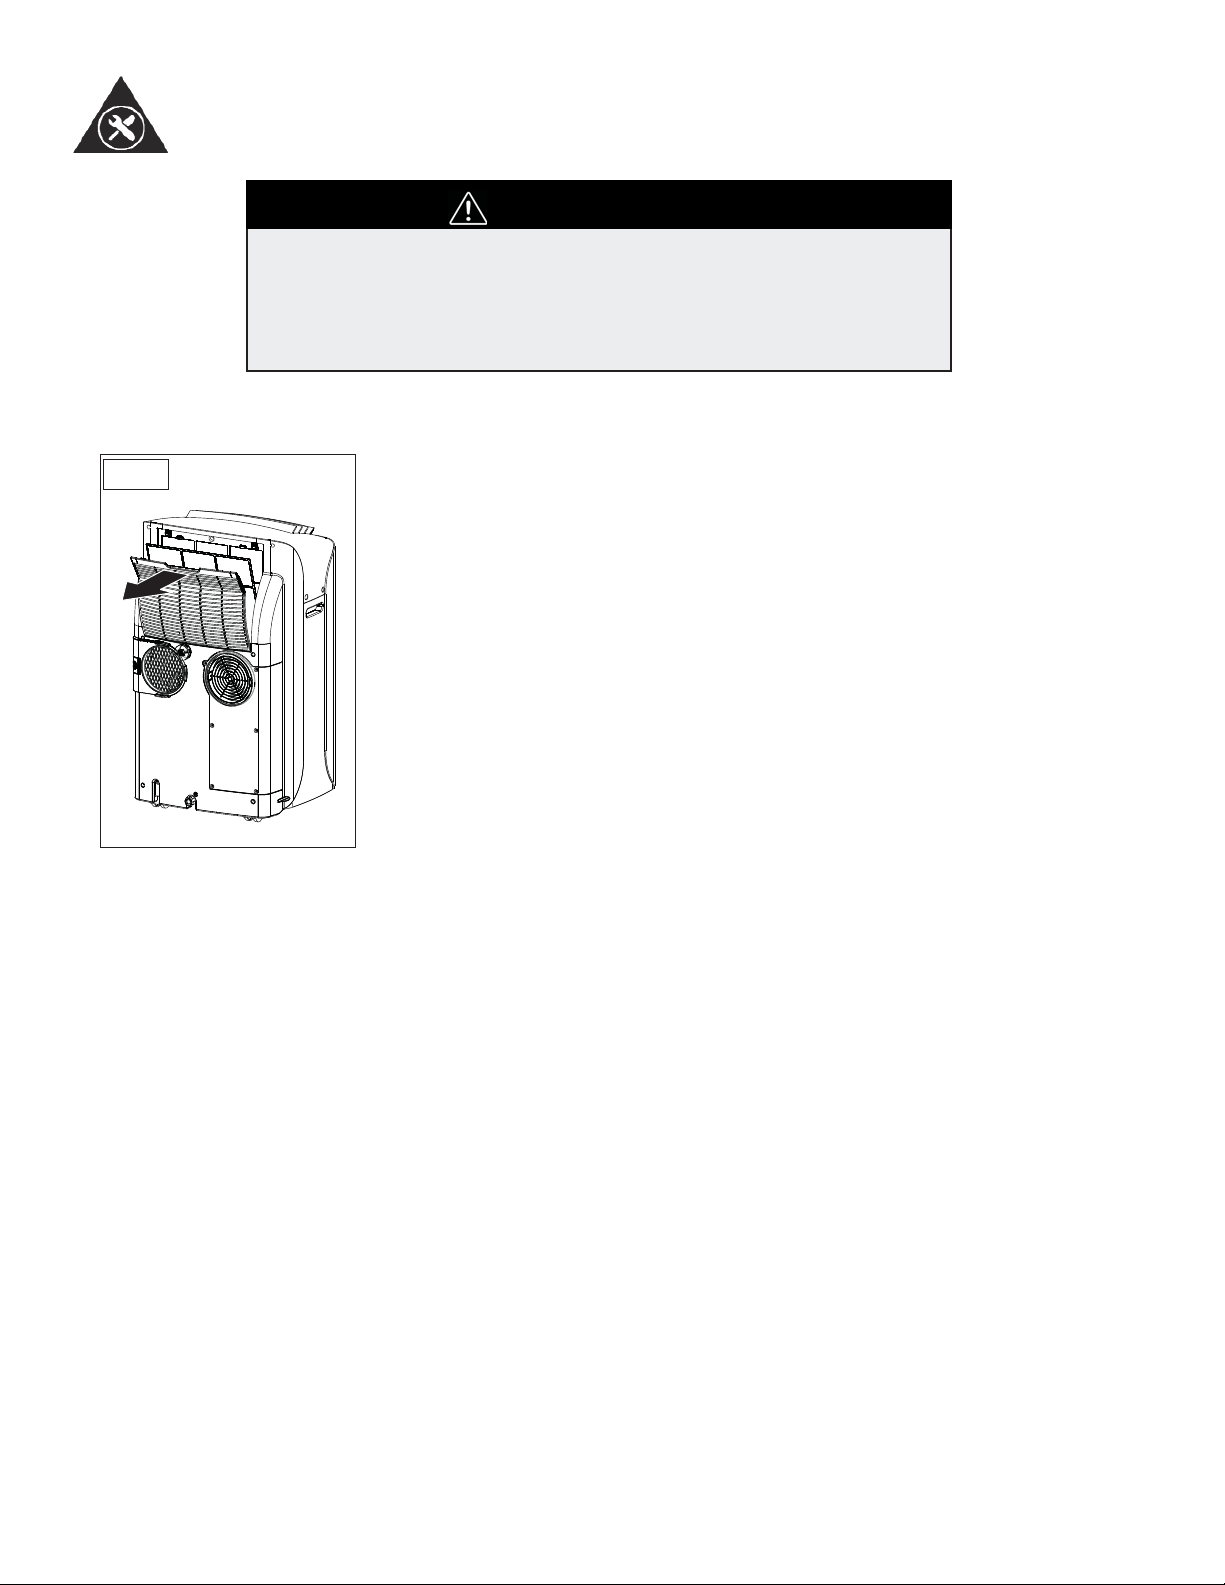
Note: The air fi lter is located at the upper rear side of the unit.
1. To remove the fi lter, pull the air fi lter cover upward in the direction of the arrow
(Fig. 9) and remove the fi lter.
2. Dust/dirt in the fi lter can be removed by vacuuming the soiled areas.
3. The fi lter can also be washed in lukewarm, soapy water while rubbing lightly
with a brush. A mild detergent (dishwashing liquid) is recommended.
4. Rinse the fi lter well using clean water. Allow time to dry before reinstalling into
the unit.
5. Replace the air fi lter and cover.
F ig.9
13
Loading ...
Loading ...
Loading ...