Loading ...
Loading ...
Loading ...
Warmer Drawer (some models)
Arranging Warmer Drawer Rack Positions
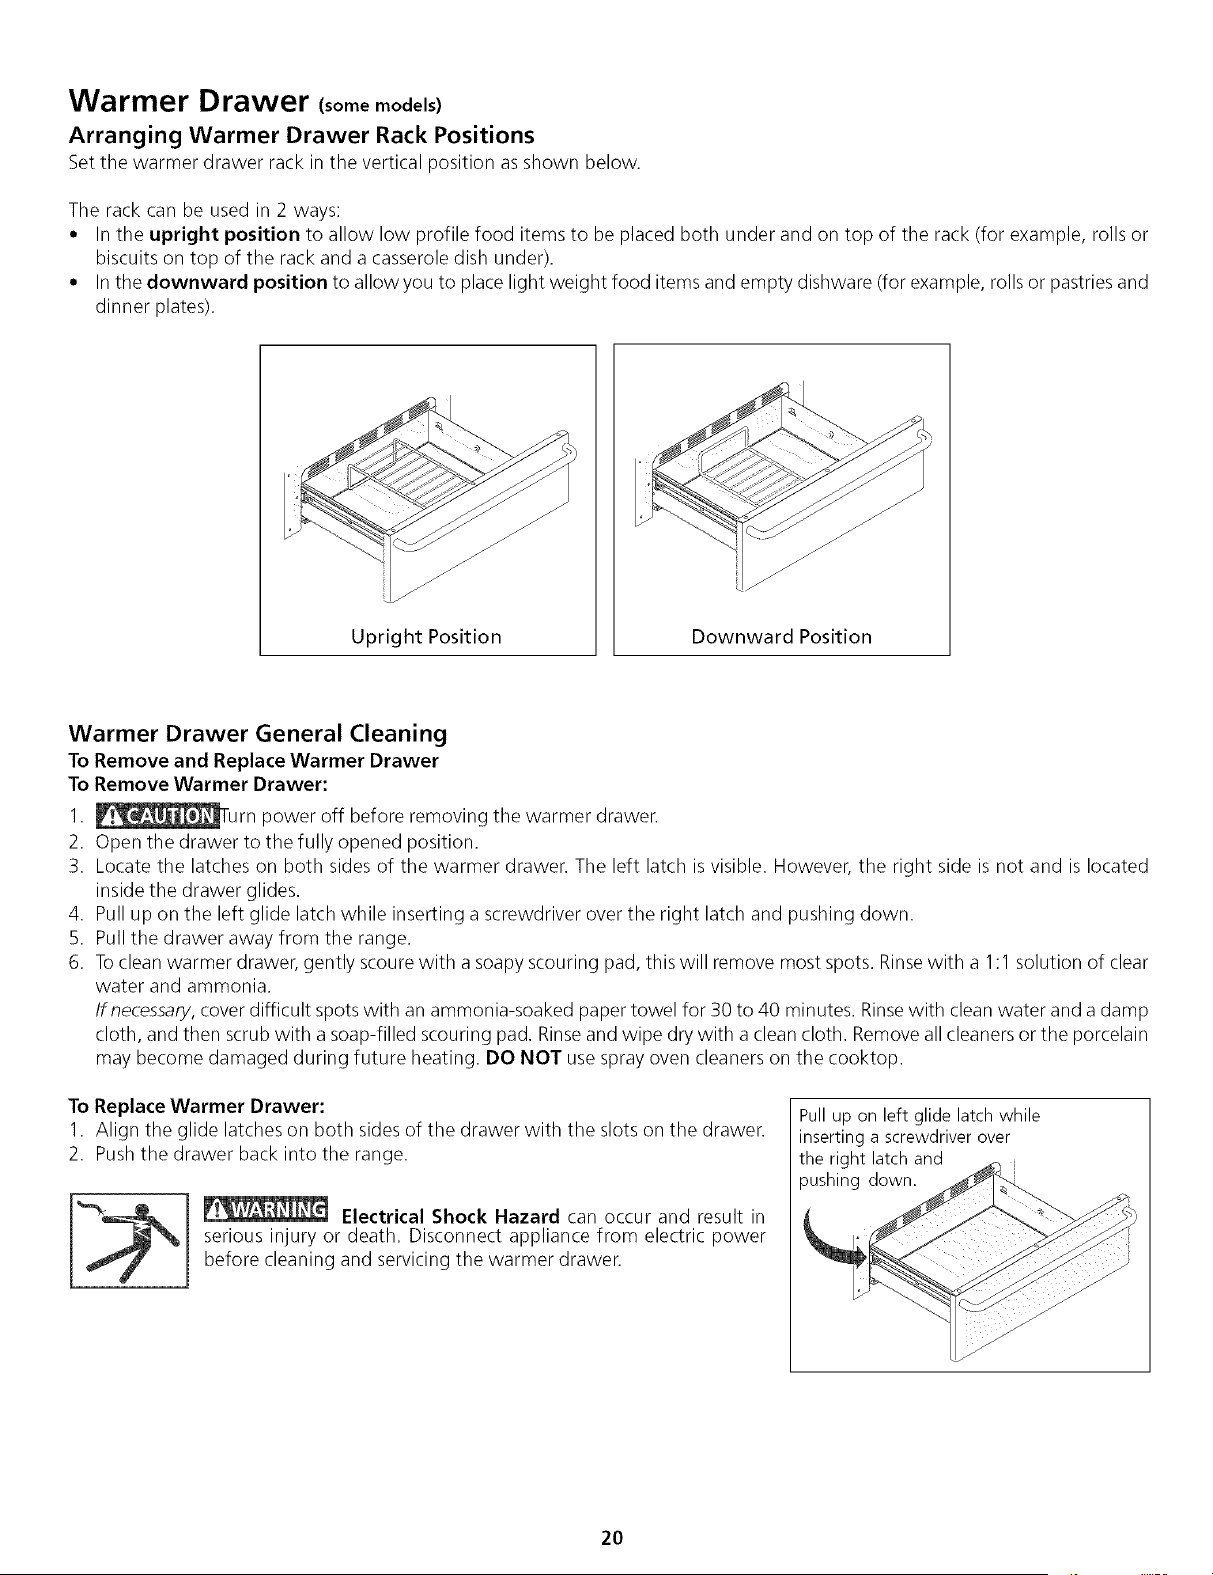
Set the warmer drawer rack in the vertical position asshown below.
The rack can be used in 2 ways:
° In the upright position to allow low profile food items to be placed both under and on top of the rack (for example, rolls or
biscuits on top of the rack and a casseroledish under).
° Inthe downward position to allow you to place light weight food items and empty dishware (for example, rolls or pastriesand
dinner plates).
Upright Position
Downward Position
Warmer Drawer General Cleaning
To Remove and Replace Warmer Drawer
To Remove Warmer Drawer:
1. _urn power off before removing the warmer drawer.
2. Open the drawer to the fully opened position.
3. Locate the latches on both sides of the warmer drawer. The left latch is visible. However, the right side is not and is located
inside the drawer glides.
4. Pull up on the left glide latch while inserting a screwdriver over the right latch and pushing down.
5. Pull the drawer away from the range.
6. Toclean warmer drawer, gently scoure with a soapy scouring pad, this will remove most spots. Rinsewith a 1:1 solution of clear
water and ammonia.
Ifnec-essary,cover difficult spotswith an ammonia-soaked paper towel for 30 to 40 minutes. Rinsewith cleanwater and a damp
cloth, and then scrub with a soap-filled scouring pad. Rinseand wipe dry with a clean cloth. Remove all cleaners or the porcelain
may become damaged during future heating. DO NOT use spray oven cleaners on the cooktop.
To Replace Warmer Drawer:
1, Align the glide latches on both sides of the drawer with the slots on the drawer.
2. Pushthe drawer back into the range.
Electrical Shock Hazard can occur and result in
serious injury or death. Disconnect appliance from electric power
before cleaning and servicing the warmer drawer.
Pull up on left glide latch while
inserting a screwdriver over
the right latch and
pushing down.
2O
Loading ...
Loading ...
Loading ...