Loading ...
Loading ...
Loading ...
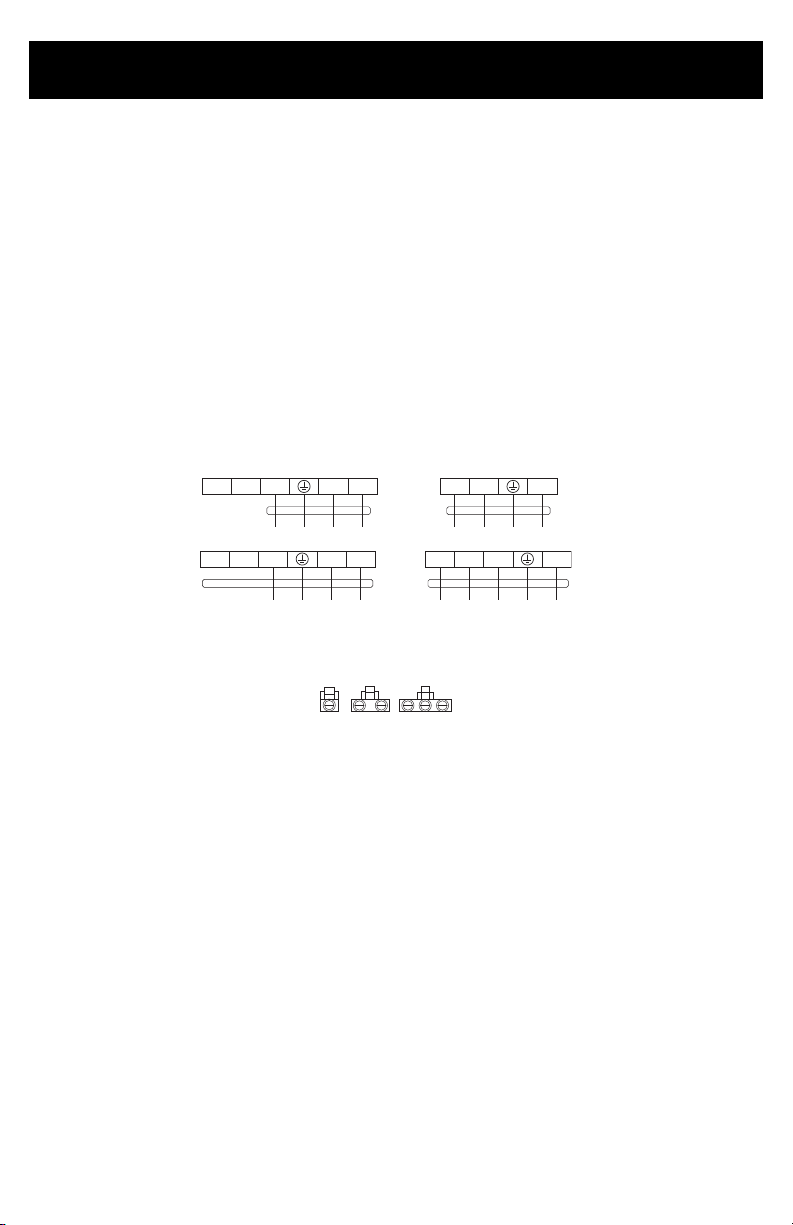
Wiring Diagram
NOTE:
• This manual usually includes the wiring mode for the different kind of A/C. It is
possible that some special type of wiring diagrams are not included.
• The diagrams are for reference only. If the entity is different with this wiring
diagram, please refer to the detailed wiring diagram adhered on the purchased
unit.
Wiring Connection
1. Loosen the screws and remove the E-parts cover from the unit.
2. Connect the cables to the corresponding terminals of the terminal board of the
outdoor unit (see the wiring diagram), and if there are signals connected to the
plug, just create a butt joint.
3. Ground Wire: Remove the grounding screw out of the electric bracket, cover the
grounding wire end onto the grounding screw and screw it into the grounding
hole.
4. Fix the cable reliably with fasteners (Pressing board).
5. Put the E-parts cover back in its original place and fasten it with screws.
INSTALLATION: OUTDOOR UNIT
15
Constant Speed Variable Speed
Connector
If there is a connector, connect
it directly.
5 4 3 2(N) 1(L)
5 4 3 2(N) 1(L)
N
S
L
N SLoL
Loading ...
Loading ...
Loading ...