Loading ...
Loading ...
Loading ...
Page 18
Installation
Instructions
Fig. 9
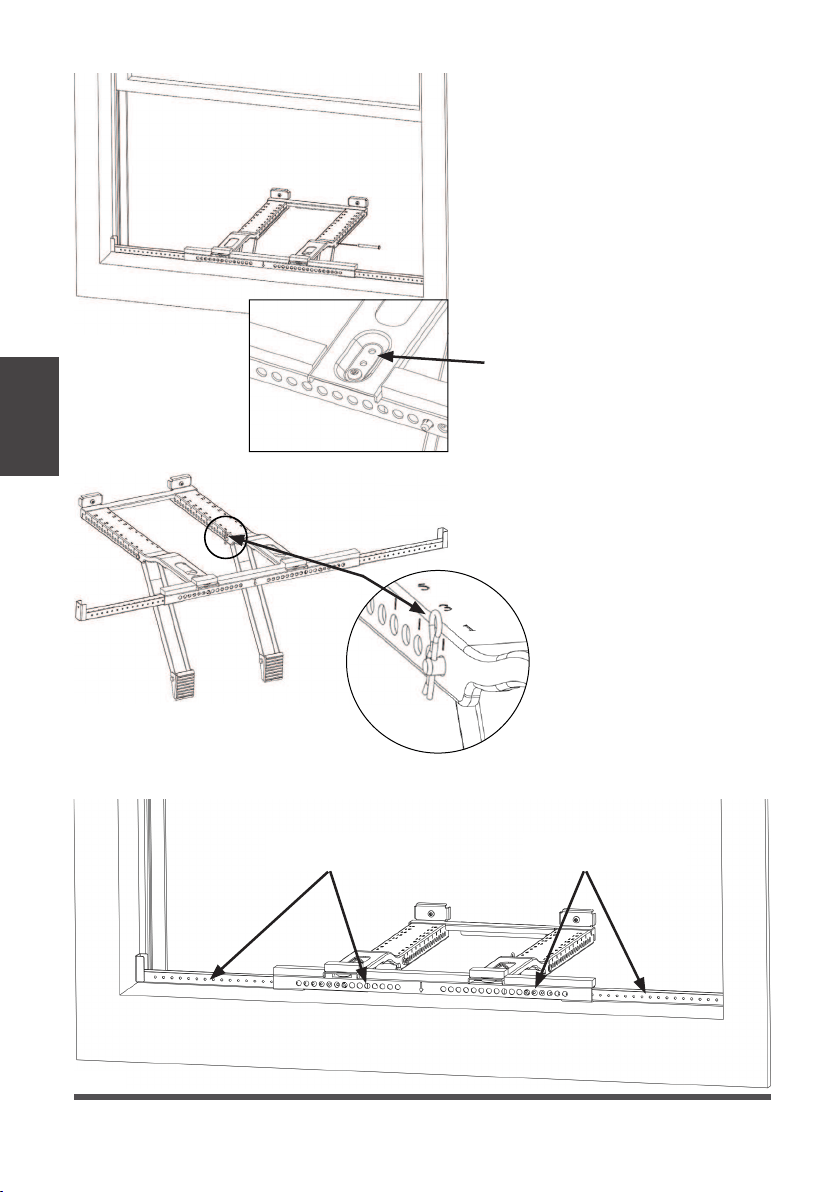
C. Insert the Main Support Pin
through the holes the Main
Support and Angled Support Arm.
Using the numbers on the Main
Support, repeat the adjustment
for the other Angled Support Arm
matching the hole number from
the first support arm.
D. Check the level again and
ensure the bracket feels secure.
After making any necessary
adjustments, insert the cotter
pins into the Main Support Pins.
Cotter Pin
E. If necessary, cover the holes on the front of the bracket with the Bracket Sealing Foam.
Fig. 10
Fig. 11
Cover holes with
Bracket Sealing Foam
Cover holes with
Bracket Sealing Foam
If further adjustment is needed,
use alternate holes where the
Main Supports attach to the
Horizontal Bracket
Loading ...
Loading ...
Loading ...