Loading ...
Loading ...
Loading ...
BAGMOUNT
NOTCH
318"HEXLOCKNU1
3f8" FLAT
3/8" HEXLOCK NLJT
3/8" x 3/4"
HEX BOLT
'3/8" x 1-1!4"
HEX BOI_T
BRACE
ROD END
FIGURE 6
6, Pull brace rod up tight under large flat washer
and hold while tightening the two bottom bag
mount arm bolts assembled in step 5. NOW
TIGHTEN ALL BOLTS ASSEMBLED IN STEPS 2,
3, 4 and 5o
7. Assemble the hitch pin, spring and 3/8"
flatwasher to the hitch pin bracket with one
1/8" x 3/4" cotter pin, See figure 7,
8, Assemble the hitch pin bracket and two 1" dia
x 3/4" long spacers to hitch bar with one 3/8"
x 1" carriage bolt and 3/8" hex lock nut,, See
figure 7, See page t0 for adjustment before con-
necting lawnsweeper to your Sears riding
mower or tractor_
(2) SPACER
I"' DIA, x 3t4"
1t8" x 3t4"
PIN
FIGURE 7
9_
5
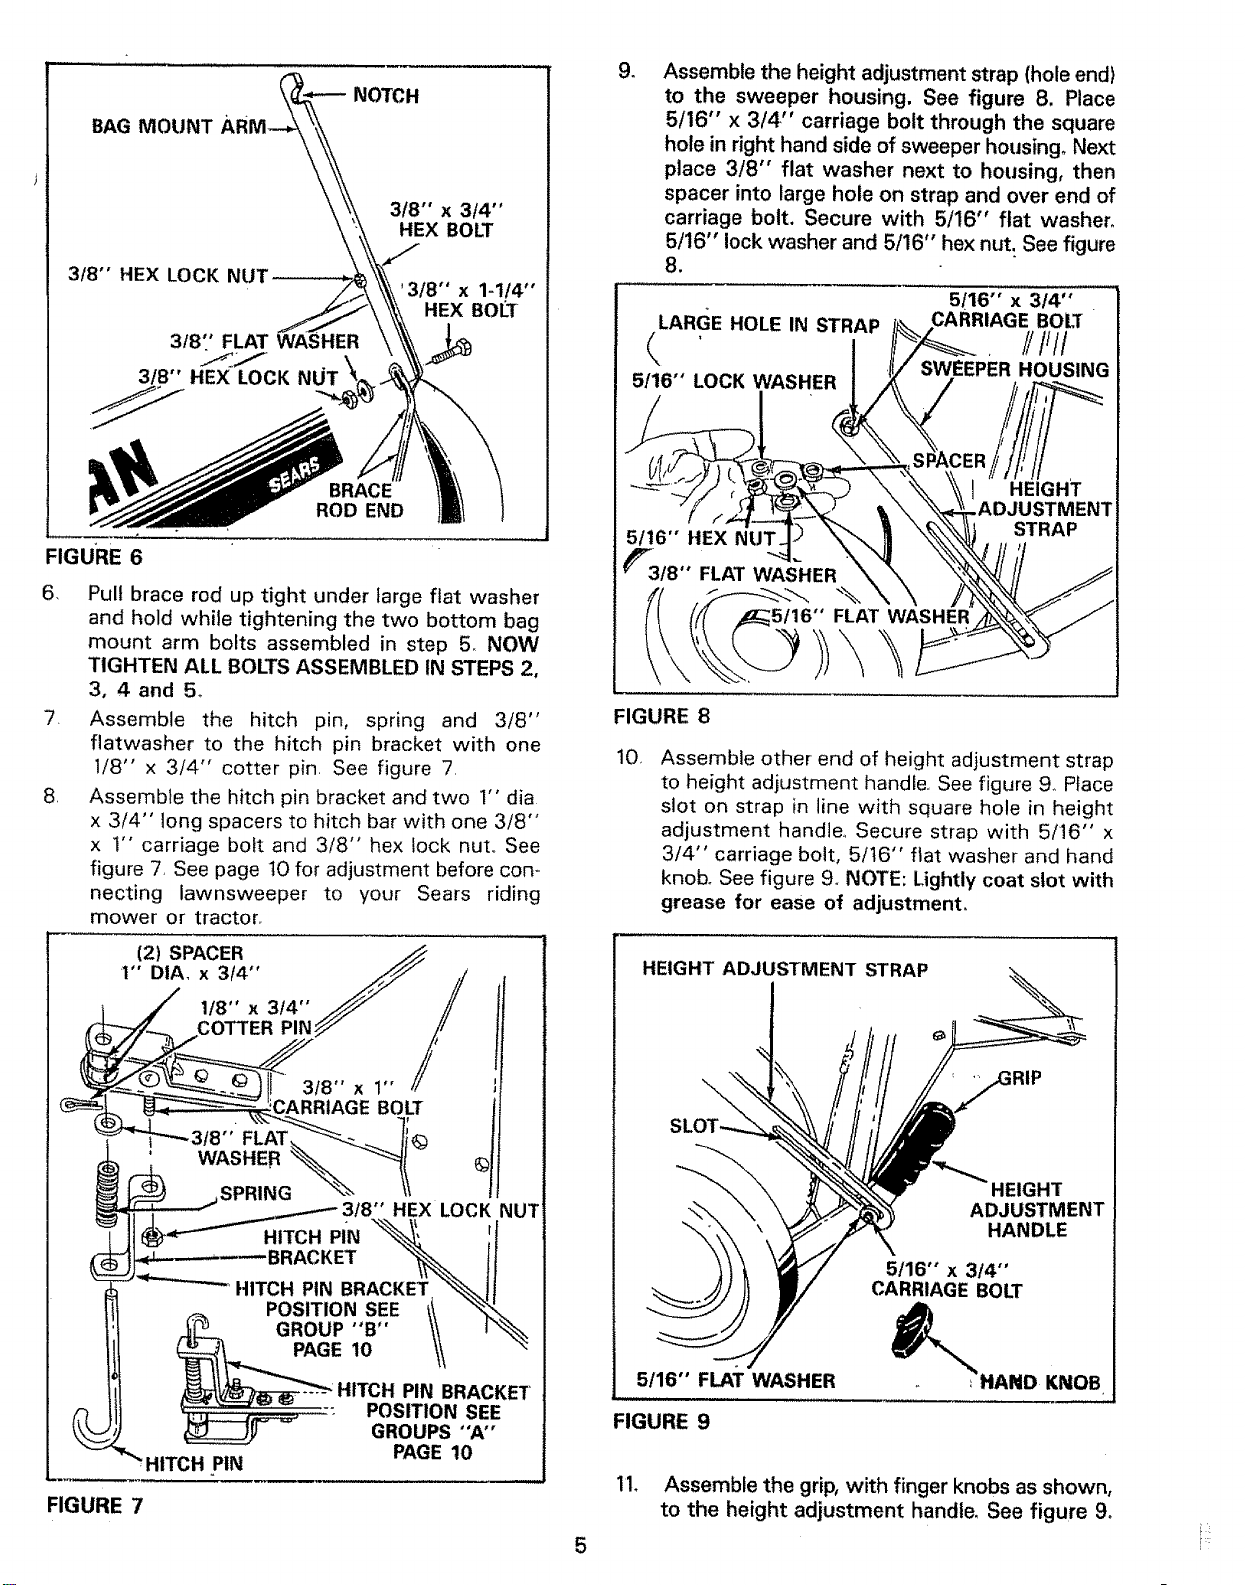
Assemble the height adjustment strap (hole end)
to the sweeper housing. See figure 8. Place
5/16" x 3/4" carriage bolt through the square
hole in right hand side of sweeper housing, Next
place 3/8" flat washer next to housing, then
spacer into large hole on strap and over end of
carriage bolt. Secure with 5/16" flat washer,
5/16" lock washer and 5/16" hex nut. See figure
8.
LARGE HOLE IN STRAP
5/16" LOCK WASHER
5_16" x 314"
BOLT "
111111
SWEEPER HOUSING
5/t6" HEX NUT.
_'_3!B" FLAT WASHER
-\
5/16"' FLAT WASHER
FIGURE 8
10
Assemble other end of height adjustment strap
to height adjustment handle., See figure 9_ Place
slot on strap in line with square hole in height
adjustment handle,, Secure strap with 5/16" x
3/4" carriage bolt, 5/16" flat washer and hand
knob° See figure 9o NOTE: Lightly coat slot with
grease for ease of adjustment,
HEIGHT ADJUSTMENT STRAP
\
_RIP
\
5/16" FLAT WASHER
HEIGHT
ADJUSTMENT
HANDLE
5/16" x 314"
CARRIAGE BOLT
HAND KNOB
FIGURE 9
11. Assemble the grip, with finger knobs as shown,
to the height adjustment handle. See figure 9.
Loading ...
Loading ...
Loading ...