Loading ...
Loading ...
Loading ...
©2020 ACP, Inc.
Cedar Rapids, IA 52404
Page 5 of 24
Part No. 20267401
Revised 9/2020
Grounding/Earthing Instructions
Oven MUST be grounded. Grounding reduces risk of electric shock by providing an
escape wire for the electric current if an electrical short occurs. This oven is
equipped with a cord having a grounding wire with a grounding plug. The plug
must be plugged into an outlet that is properly installed and grounded.
Consult a qualied electrician or servicer if grounding instructions are not
completely understood, or if doubt exists as to whether the oven is properly
grounded.
Do NOT use an extension cord.
If the product power cord is too short, have a qualied electrician install a three-slot receptacle.
This oven should be plugged into a separate circuit with the electrical rating as provided in product
specications (available at www.acpsolutions.com) and the oven’s serial plate / rating label. When
the oven is on a circuit with other equipment, an increase in cooking times may be required and
fuses can be blown.
EXTERNAL EQUIPOTENTIAL EARTHING TERMINAL (export only)
Equipment has secondary earthing terminal. Terminal provides external earthing connection used in addition to
earthing prong on plug. Located on outside of oven back, terminal is marked with symbol shown at right
Installation
Unpacking Oven
• Inspect oven for damage such as dents in door or inside oven cavity.
• Report any dents or breakage to source of purchase immediately.
Do not attempt to use oven if damaged.
• Remove all packing materials from oven interior.
• If oven has been stored in extremely cold area, wait a few hours
before connecting power.
Radio Interference
Microwave operation may cause interference to radio, television. Reduce
or eliminate interference by doing the following:
• Clean door and sealing surfaces of oven according to instructions in
“Care and Cleaning” section.
Oven Placement
• Do not install oven next to or above source of heat, such as pizza
oven or deep fat fryer. This could cause oven to operate improperly
and could shorten life of electrical parts.
• Do not block or obstruct oven lters. Allow access for cleaning.
• Install oven on level counter-top surface.
Install Air Filters (Style 4 models)
Oven ships with two (2) Air Filters taped to the oor of the oven interior.
⚠
Do NOT operate oven without the air lters installed.
1. Remove and discard tape.
2. Locate air lter in the recessed grills along the base of the left and
right sides of the oven.
3. Angle the Air Filter with the lower edge placed inside the bottom of
the recessed grill.
4. Rotate the top of the air lter to snap into place.
5. Repeat steps 2-4 for the other side and air lter.
⚠
WARNING
Excessive Weight Hazard
Use two or more people to move and
install oven. Failure to do so can result in
back or other injury
⚠
WARNING
To avoid risk of electrical shock or death,
this oven must be grounded and plug must
not be altered.
Grounding and Installation
A
B
C
D
A
D
B
C
A
B
C
D
A
D
B
C
A
B
C
D
A
D
B
C
A
B
C
D
A
D
B
C
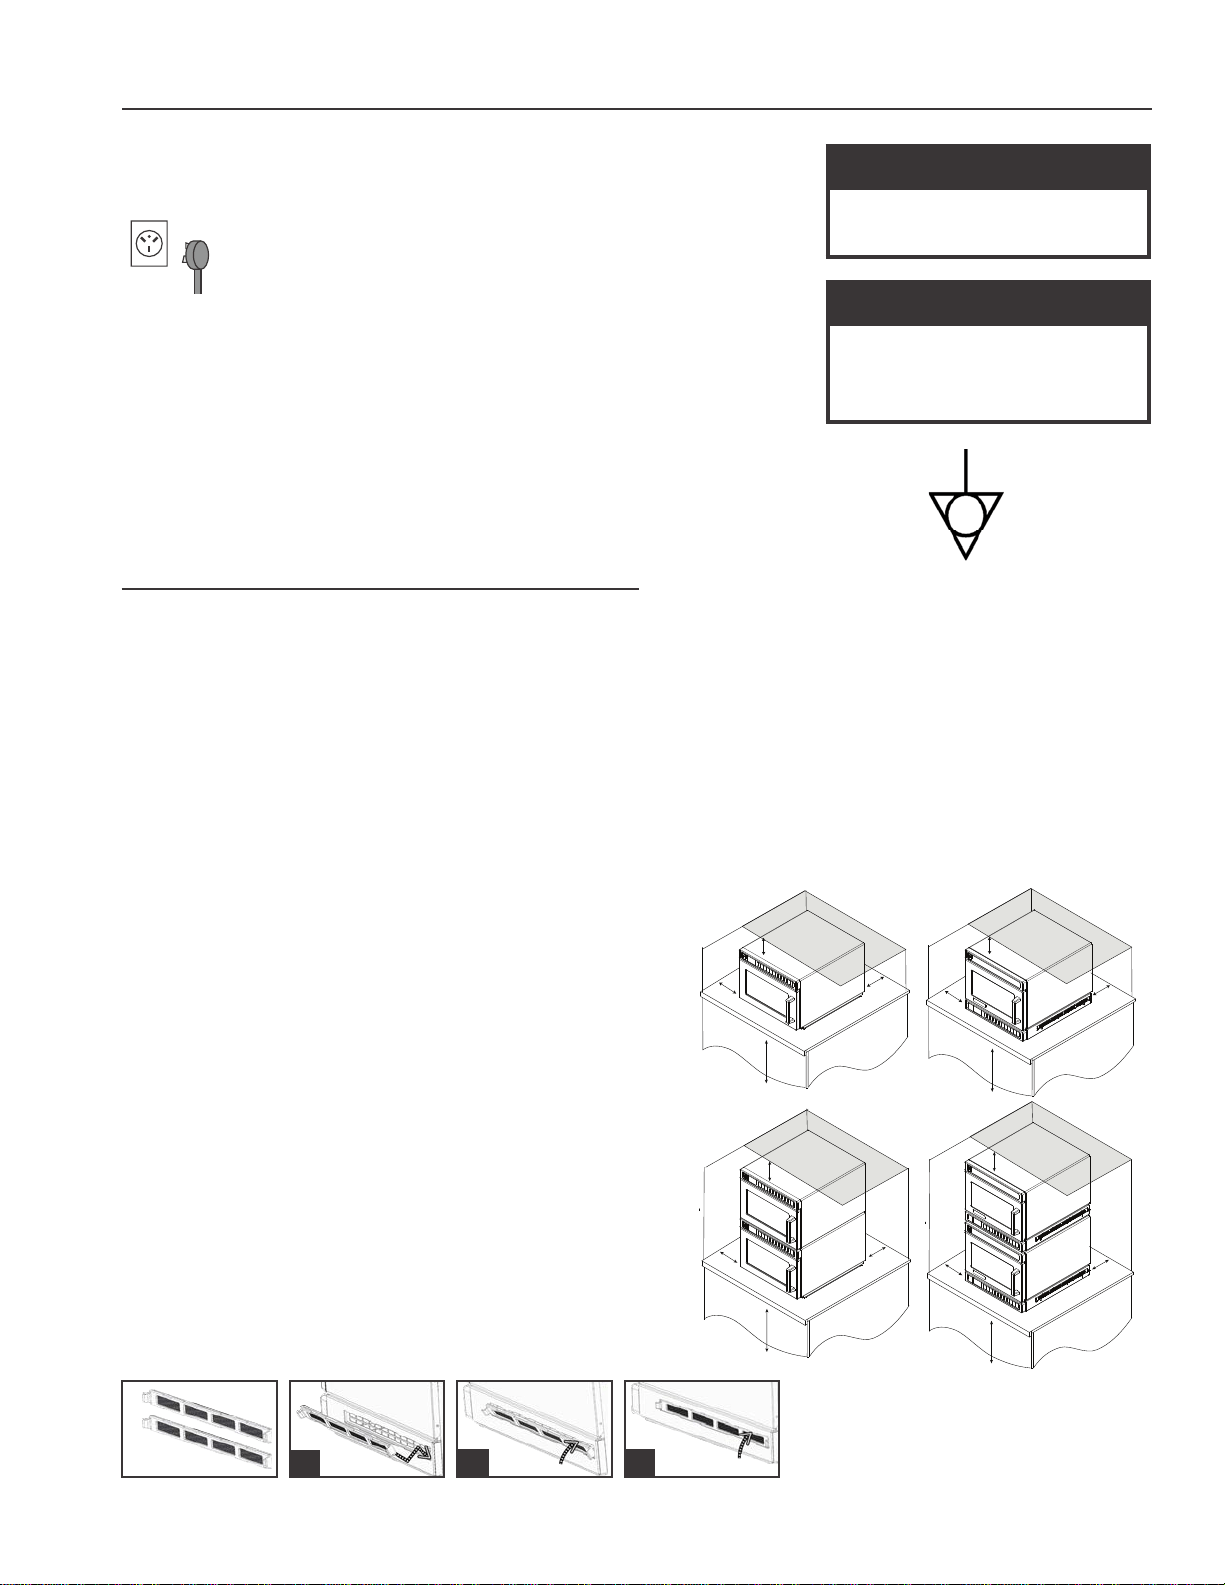
OVEN CLEARANCES
A. Allow at least 2” (5.1 cm) of clearance around top of oven.
Proper air ow around oven cools electrical components.
With restricted air ow, oven may not operate properly and life
of electrical parts is reduced.
B. General market models: There is not an installation clearance
requirement for the back of the oven.
HDC21RB2, MCHDC21, HDC21DQ only: Allow at least 1”
(2.54 cm) of clearance around back of oven.
C. Allow at least 1” (2.54 cm) of clearance around sides of oven.
D. Install oven so oven bottom is at least 3 feet (91.5 cm)
above oor.
2
3
Air Filters
4
Loading ...
Loading ...
Loading ...