Loading ...
Loading ...
Loading ...
29
36
29
36
36
36
41
11
9
10
29
36
29
36
36
36
41
9
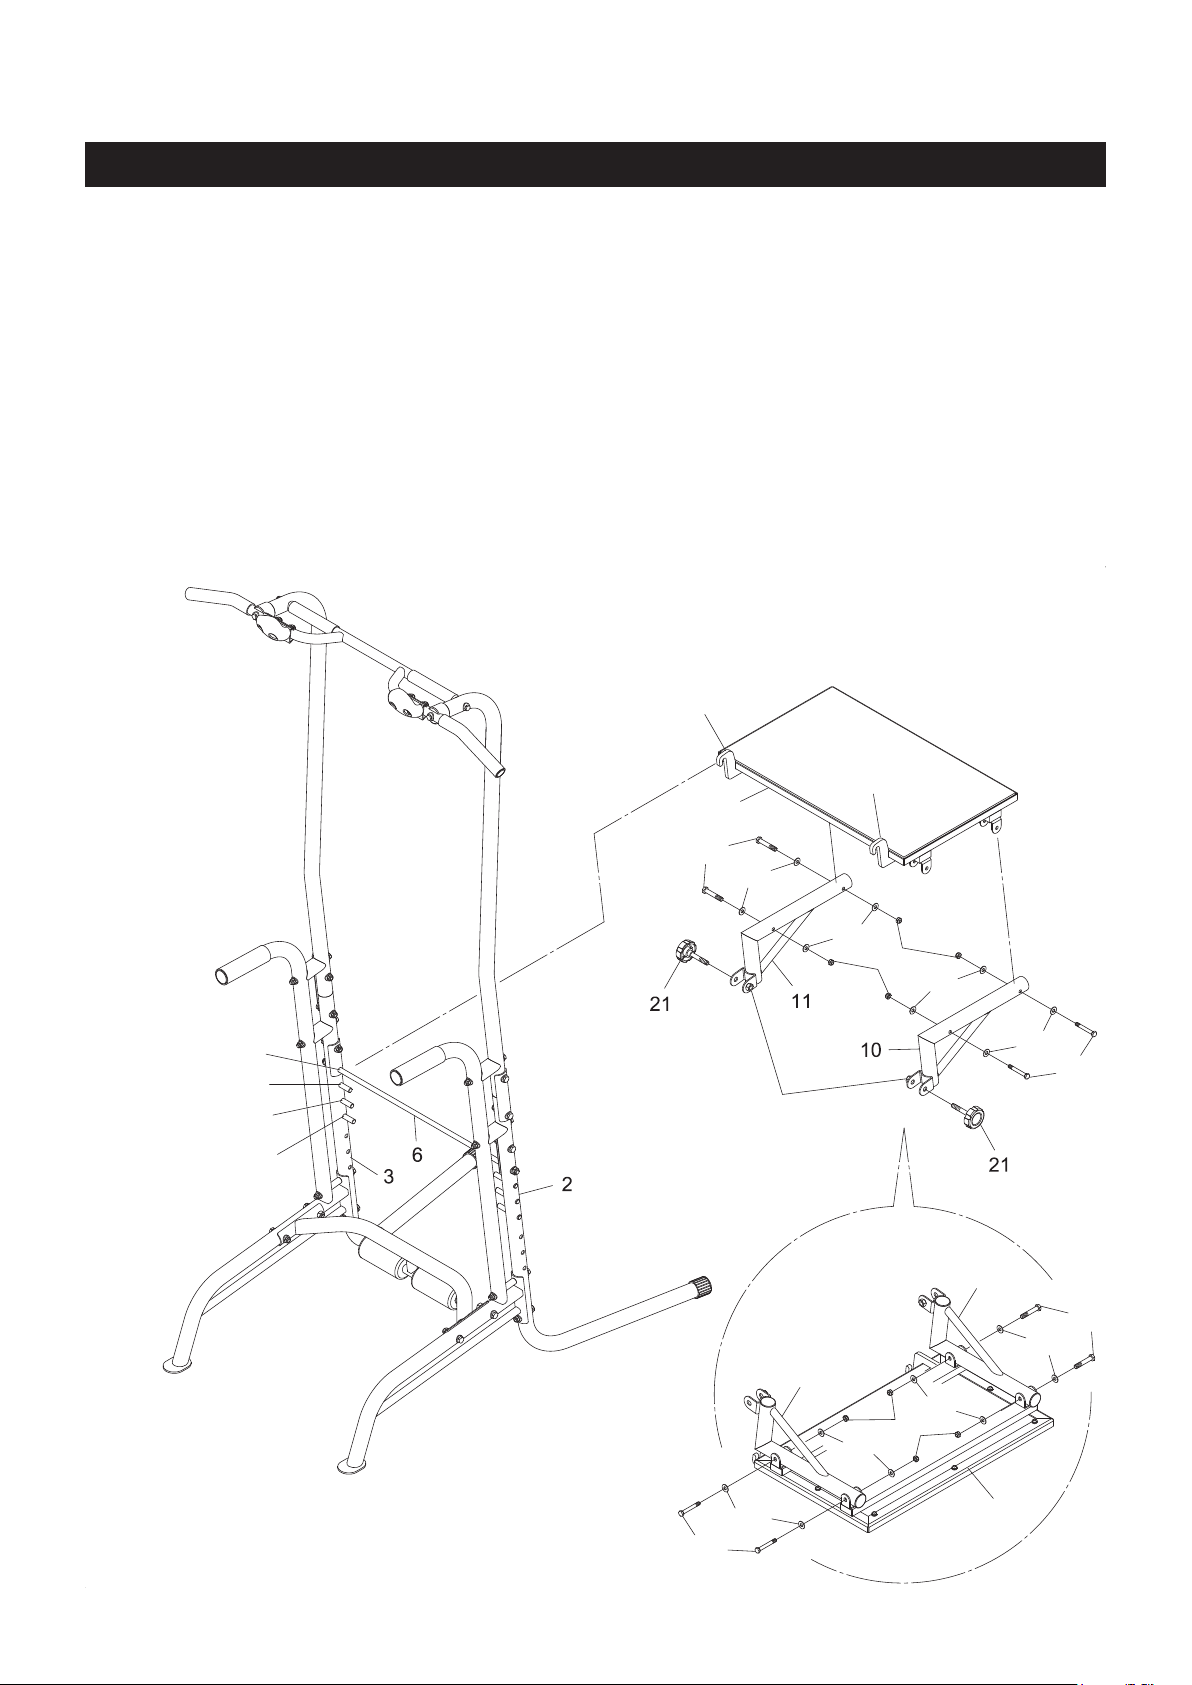
ASSEMBLY INSTRUCTIONS
STEP 9
Refer to the detail view and illustration below. Attach the PLYOBOX SUPPORTS(10, 11) to the
PLYOBOX PLATFORM(9) with HEX BOLTS(M8x1.25x55mm)(29), WASHERS(M8)(36), and NYLOCK
NUTS(M8x1.25)(41). Hook the PLYOBOX PLATFORM(9) onto the lugs on the RIGHT and LEFT MAIN
STANDS(2, 3) and secure with the ADJUSTMENT KNOBS(21).
NOTE: There are three lugs on the RIGHT and LEFT MAIN STANDS(2, 3) to adjust the PLYOBOX
PLATFORM(9) to dierent heights. Refer to the illustration below and check on the positions of
lugs 1, 2, and 3. The lowest lug is to support the hook on the PLYOBOX PLATFORM(9) only,
never try to hook the PLYOBOX PLATFORM(9) onto this lug for use.
WARNING: Make sure ADJUSTMENT KNOBS(21) that came with equipment are fully engaged at all
times.
11
Hook
Hook
Lug
3
Lug
2
Lug
1
This lug is to support
the hook only.
Welded Nuts
face in.
Loading ...
Loading ...
Loading ...