Installation
ON
OFF
ON
OFF
ON
OFF
Turning OFF power.
• Turn power OFF at circuit breaker (or remove fuse).
11
Removing wallplate and
switch.
• Remove the wallplate and switch mounting screws.
• Carefully remove switch from wall (do not remove wires).
22
Disconnecting switch wires.
33
Wiring.
• For installations involving more than one control in a wallbox, refer to
Multigang Installations before beginning.
44
55
ON
OFF
ON
OFF
ON
OFF
Turning ON power.
• Turn power ON at circuit breaker (or replace fuse).
66
Lutron Electronics Co., Inc.
7200 Suter Road
Coopersburg, PA 18036-1299, U.S.A.
Made and printed in the U.S.A.
7/09 P/N 030-1041-03 Rev. A
To learn about the Advanced Features of
Maestro
Wall Controls including locked preset
and timer bypass disable, please visit: www.lutron.com/maestro/advfeatures or call
the
Lutron Technical Support Center
at 1.800.523.9466.
?
Technical Assistance
If you have questions concerning the installation or operation of this product,
call the
Lutron Technical Support Center
. Please provide exact model
number when calling.
U.S.A. and Canada (24 hrs/7days)
1.800.523.9466
México
+1.888.235.2910
Other countries 8am – 8pm ET
+1.610.282.3800
Fax +1.610.282.6311
http://www.lutron.com
030-1041-03
030-1041-03
Screw Terminals:
Turn screws to loosen.
Push-in Terminals:
Insert screwdriver.
Pull wire out.
Wiring the Timer:
• Using the wire connector provided,
connect the green ground wire on
the Timer to the bare copper or
green ground wire in the wallbox.
• Connect either of the wires removed
from the switch to one of the brass
screw terminals on the Timer, or
insert fully into the push-in terminal.
• Connect the remaining wire removed
from the switch to the other brass
screw terminal on the Timer, or insert
fully into the push-in terminal.
Ground
Green wire
Brass screw
Live
120 V~
60 Hz
Neutral
Brass
Brass
Green wire
Ground
Wallbox
Timer
Reference Wiring Diagram
Brass screw
Important Note:
Your wall switch may have two wires attached to the same screw (see illustrations
below for examples). Tape these two wires together before disconnecting. When wiring,
connect wires to the Timer the same way they were connected to the switch.
One wire in
the push-in
terminal hole
and one to
the screw.
One
continuous
wire to the
screw.
Looped Wire:
Turn screw to
loosen.
Turn screws
to loosen.
Lutron Technical Support Center 1.800.523.9466 24 hrs / 7 days www.lutron.com
Multigang Installations
When installing more than one control in the same wallbox, it may be necessary to
remove all inner side sections prior to wiring (see below). Using pliers, bend side
sections up and down until they break off. Repeat for each side section to be removed.
Removal of Timer side sections reduces maximum load capacity. Refer to chart below
for maximum Timer capacity.
Breaking Side Sections
Limited Warranty
(Valid only in U.S.A., Canada, Puerto Rico, and the Caribbean.)
Lutron will, at its option, repair or replace any unit that is defective in materials or manufacture within
one year after purchase. For warranty service, return unit to place of purchase or mail to Lutron at
7200 Suter Rd., Coopersburg, PA 18036-1299, postage pre-paid.
THIS WARRANTY IS IN LIEU OF ALL OTHER EXPRESS WARRANTIES, AND THE IMPLIED
WARRANTY OF MERCHANTABILITY IS LIMITED TO ONE YEAR FROM PURCHASE. THIS WARRANTY
DOES NOT COVER THE COST OF INSTALLATION, REMOVAL OR REINSTALLATION, OR DAMAGE
RESULTING FROM MISUSE, ABUSE, OR DAMAGE FROM IMPROPER WIRING OR INSTALLATION.
THIS WARRANTY DOES NOT COVER INCIDENTAL OR CONSEQUENTIAL DAMAGES. LUTRON’S
LIABILITY ON ANY CLAIM FOR DAMAGES ARISING OUT OF OR IN CONNECTION WITH THE
MANUFACTURE, SALE, INSTALLATION, DELIVERY, OR USE OF THE UNIT SHALL NEVER EXCEED THE
PURCHASE PRICE OF THE UNIT.
This warranty gives you specific legal rights, and you may have other rights which vary from state to
state. Some states do not allow the exclusion or limitation of incidental or consequential damages, or
limitation on how long an implied warranty may last, so the above limitations may not apply to you.
This product is covered under one or more of the following U.S. patents: 7,190,125; 7,365,282;
7,546,473 and corresponding foreign patents. U.S. and foreign patents pending. Lutron, Claro, Maestro
and Satin Colors are registered trademarks, and FASS is a trademark of Lutron Electronics Co., Inc.
NEC is a registered trademark of the National Fire Protection Association, Quincy, Massachusetts.
© 2009 Lutron Electronics Co., Inc.
No Sides
Removed
600 W 5 A
600 VA / 450 W
3 A
1 Side
Removed
500 W
500 VA / 400 W
3 A
2 Sides
Removed
400 W
400 VA / 300 W
3 A
English
Maximum Load
Do Not Remove
Outside Sections
Each Control Has
Inside Section
Removed
Middle Control Has Two
Side Sections Removed
Important Notes
Please read before installing.
1. CAUTION! To avoid overheating and possible damage to other equipment, do not
use to control receptacles, fluorescent lighting fixtures, or motor-operated
appliances.
2. Install in accordance with all national and local electrical codes.
3. Do not use for loads switched from 2 or more locations.
4. DO NOT use Maestro
® controls for compact fluorescent (Energy Saver) lamps.
5. When no “grounding means” exist within the wallbox then the NEC
® 2008, Article
404.9 allows a control without a grounding connection to be installed as a
replacement, as long as a plastic, noncombustible wallplate is used. For this type
of installation, cap or remove the green ground wire on the control and use an
appropriate wallplate such as Lutron’s Claro® or Satin Colors® series wallplates.
6. Protect Timer from dust, dirt, and paint when spackling or painting.
7. Do not use where total load current is less than 0.3 A 40 W or greater than 5 A
(see Timer Capacity Chart for details).
8. Operate between 32 °F (0 °C) and 104 °F (40 °C).
9. Timer may feel warm to the touch during normal operation.
10. Recommended wallbox depth is 2 ½ in (64 mm) minimum.
11. For safety reasons, do not use to control fixtures that are the only source of
illumination for an area.
12. When controlling a combined fan and light load, the total load may not exceed 3 A.
13. Clean Timer with a
soft damp cloth only
. Do not use any chemical cleaners.
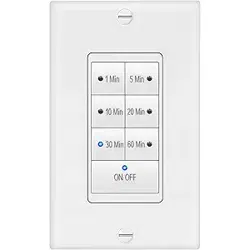
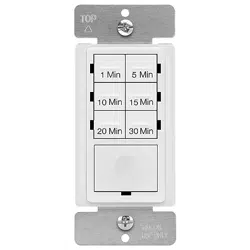
Countdown Timer
MA-T51
120 V 60 Hz 5 A Lighting* or 3 A Fan
MA-T530G 120 V 60 Hz 5 A Lighting* or 3 A Fan
Important Wiring Information
When making wire connections, follow the recommended strip lengths and
combinations for the supplied wire connector. Note: All wire connectors provided are
suitable for
copper wire only.
For aluminum wire, consult an electrician.
Wire Connector:
Use to join one 12 AWG or 14 AWG
(2.5 or 1.5 mm
2
) ground wire with one
18 AWG (0.7 mm
2
) control ground wire.
Twist wire
connector
tight.
Push-in Terminals: Insert wires fully.
NOTE: Push-in terminals are for use with 14 AWG
(1.5 mm
2
)
solid copper wire only.
DO NOT use stranded or
twisted wire.
Screw Terminals: Tighten securely.
Screw terminals are for use with 12 or 14 AWG
(2.5 or 1.5 mm
2
)
solid copper wire only.
DO NOT use
stranded or twisted wire.
Trim or strip wallbox wires to the length indicated by the strip gauge on the back of the control
OR
Symptom
Load does not turn ON
or no LEDs turn ON.
Possible Cause
• Front Accessible Service Switch (FASS
TM) on
Timer is pulled out to OFF
• Light bulb(s) burned out.
• Breaker is off or tripped.
• Wiring error. Call
Lutron Technical Support Center
Troubleshooting
IMPORTANT NOTICE:
To replace bulb, remove power by pulling the
FASS
switch out on the Control.
For any procedure other than routine bulb replacement, power must be
disconnected at the main electrical panel.
Load Type
Halogen/Incandescent
120 V~
Magnetic Low Voltage**
General Purpose Fan
Mounting Control(s) to wallbox.
• Form wires carefully into wallbox, mount and align control(s).
• Install the wallplate(s).
Load turns on and off
repeatedly.
• Load draws less than 0.3 A or 40 W
• Improper load connected
Light or
Fan
**Note: The maximum lamp wattage is determined by the efficiency of the transformer, with 70–85% as
typical. For actual transformer efficiency, contact either the fixture or transformer manufacturer. The total VA
rating of the transformer(s) shall not exceed the VA rating of the timer.
Note: Do not overtighten mounting screws. Permanent damage
can be caused by overtightening mounting screws.
Snap on Claro
wallplate.
Start screws.
Align control and
tighten screws.
*See Timer Capacity Chart.
Timer Capacity Chart
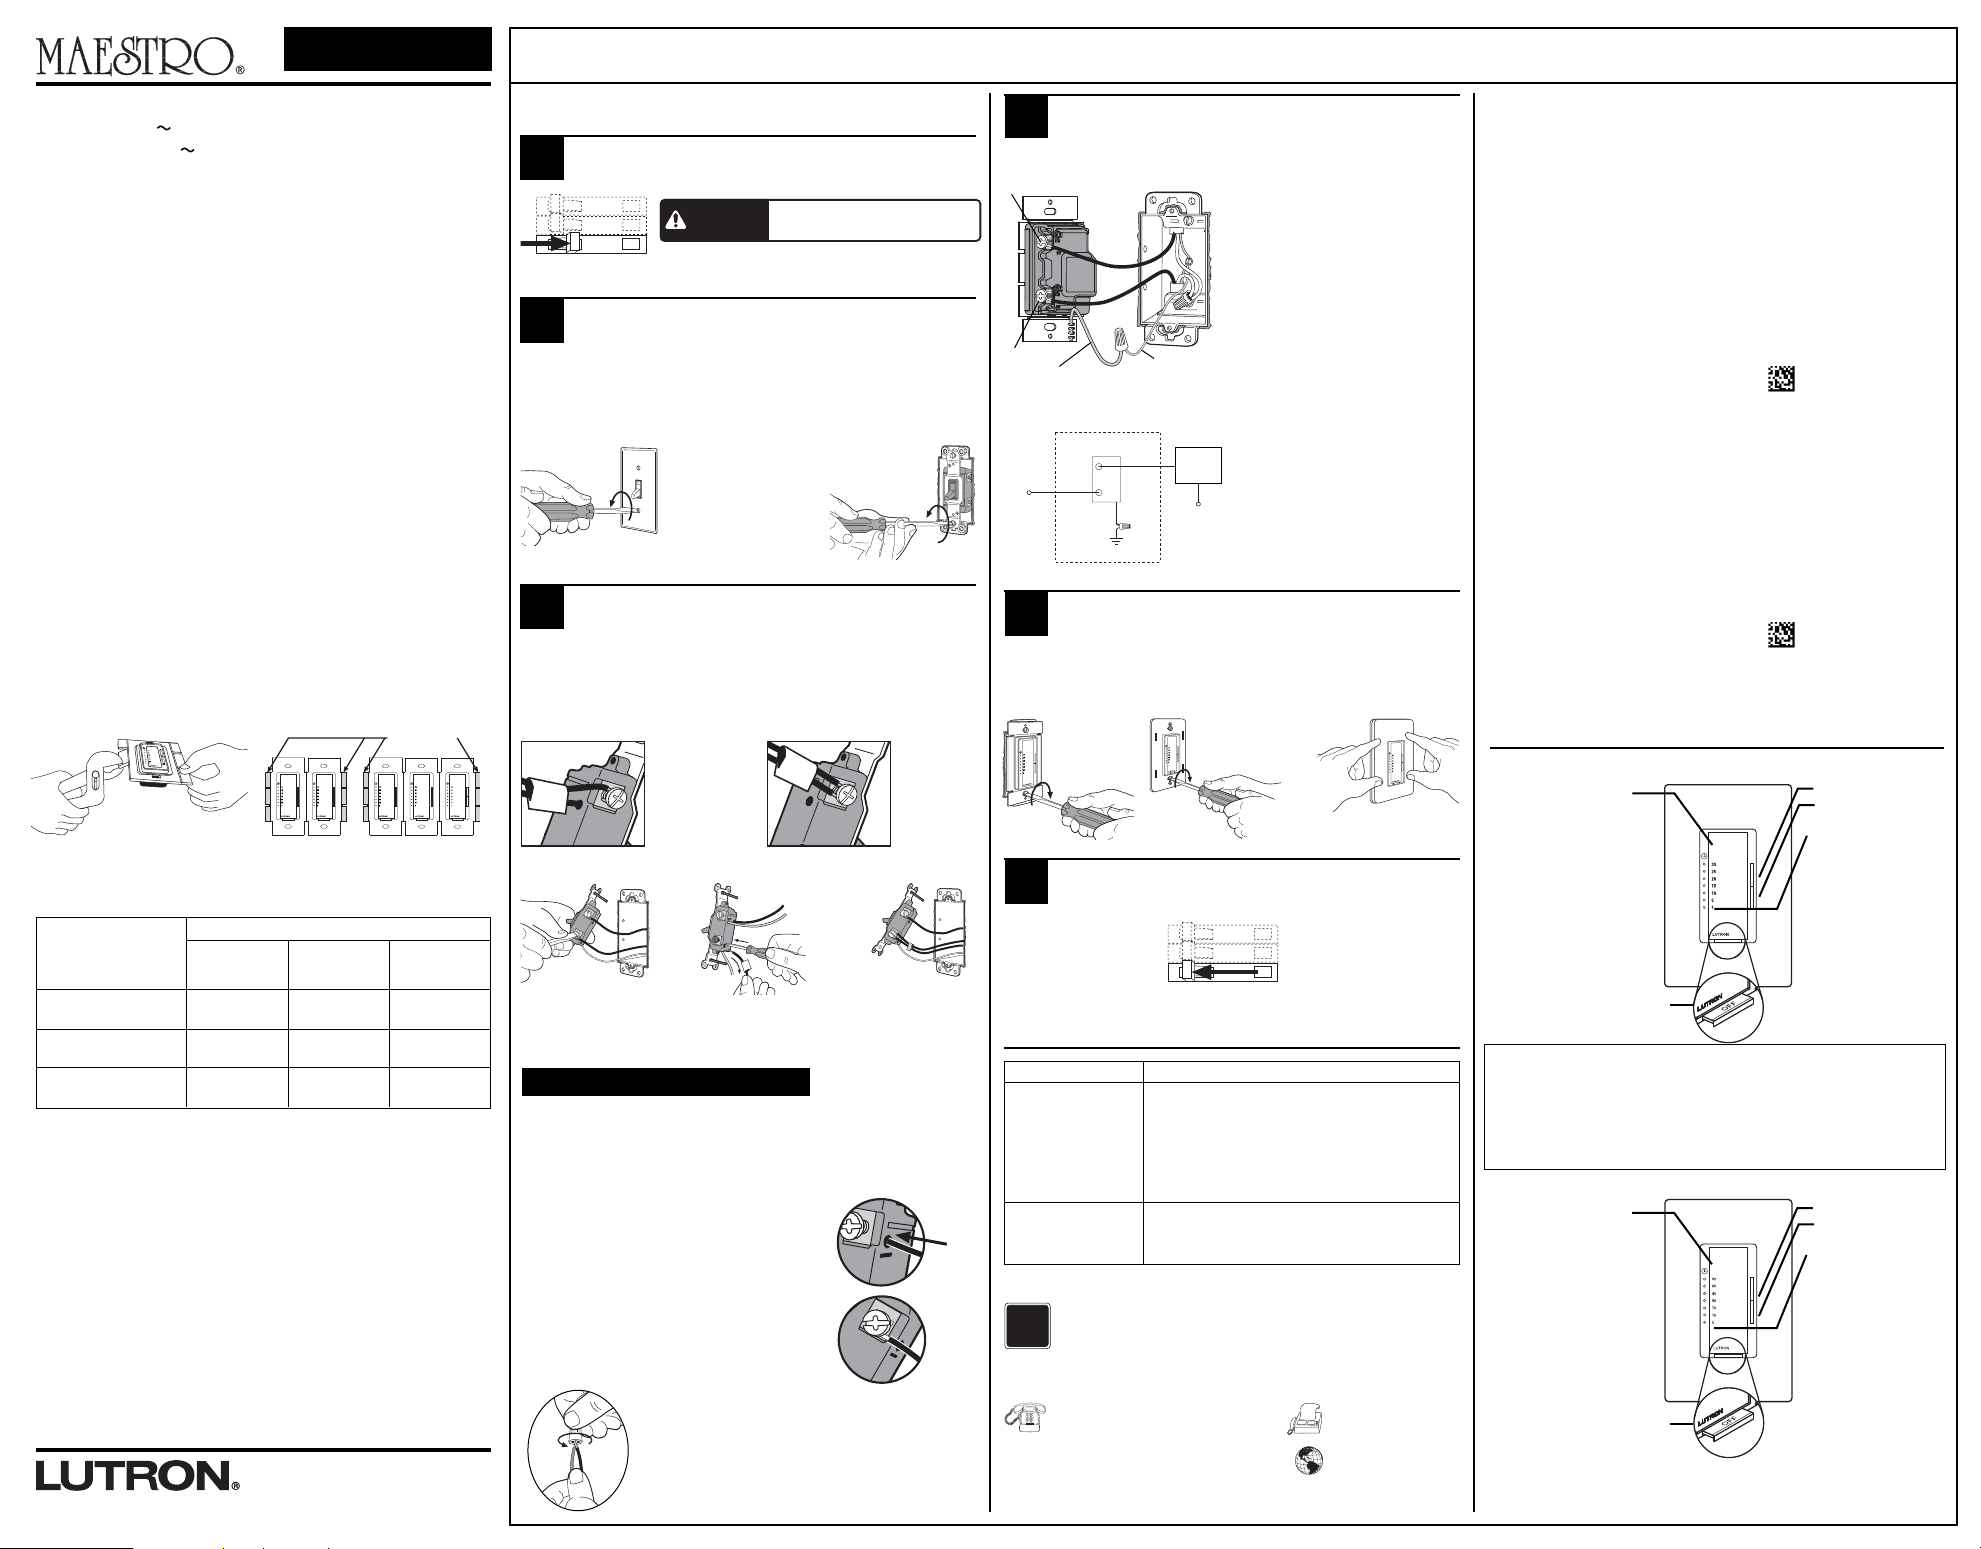
Operation
Tap Button Options
• Tap once when unit is off
Controlled load turns ON
and countdown timer begins.
When time expires, load turns OFF.
• Tap once when unit is on -
Controlled load turns OFF
and countdown timer resets.
• Tap twice quickly -
Controlled load turns on with
30 minute countdown timer.
Press to increase time.
Press to reduce time.
LEDs
• Orange LEDs indicate
timer duration or
remaining time in
minutes.
• Bottom LED blinks
slowly to indicate
1 minute of time
remaining.
FASS
- Front Accessible
Service Switch
One Minute Indication:
When only one minute of time is remaining, the load will briefly turn off and on to give
an indication the timer is about to turn off.
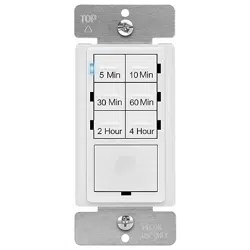
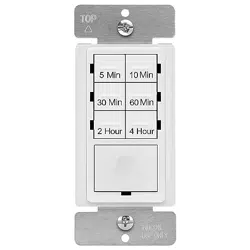
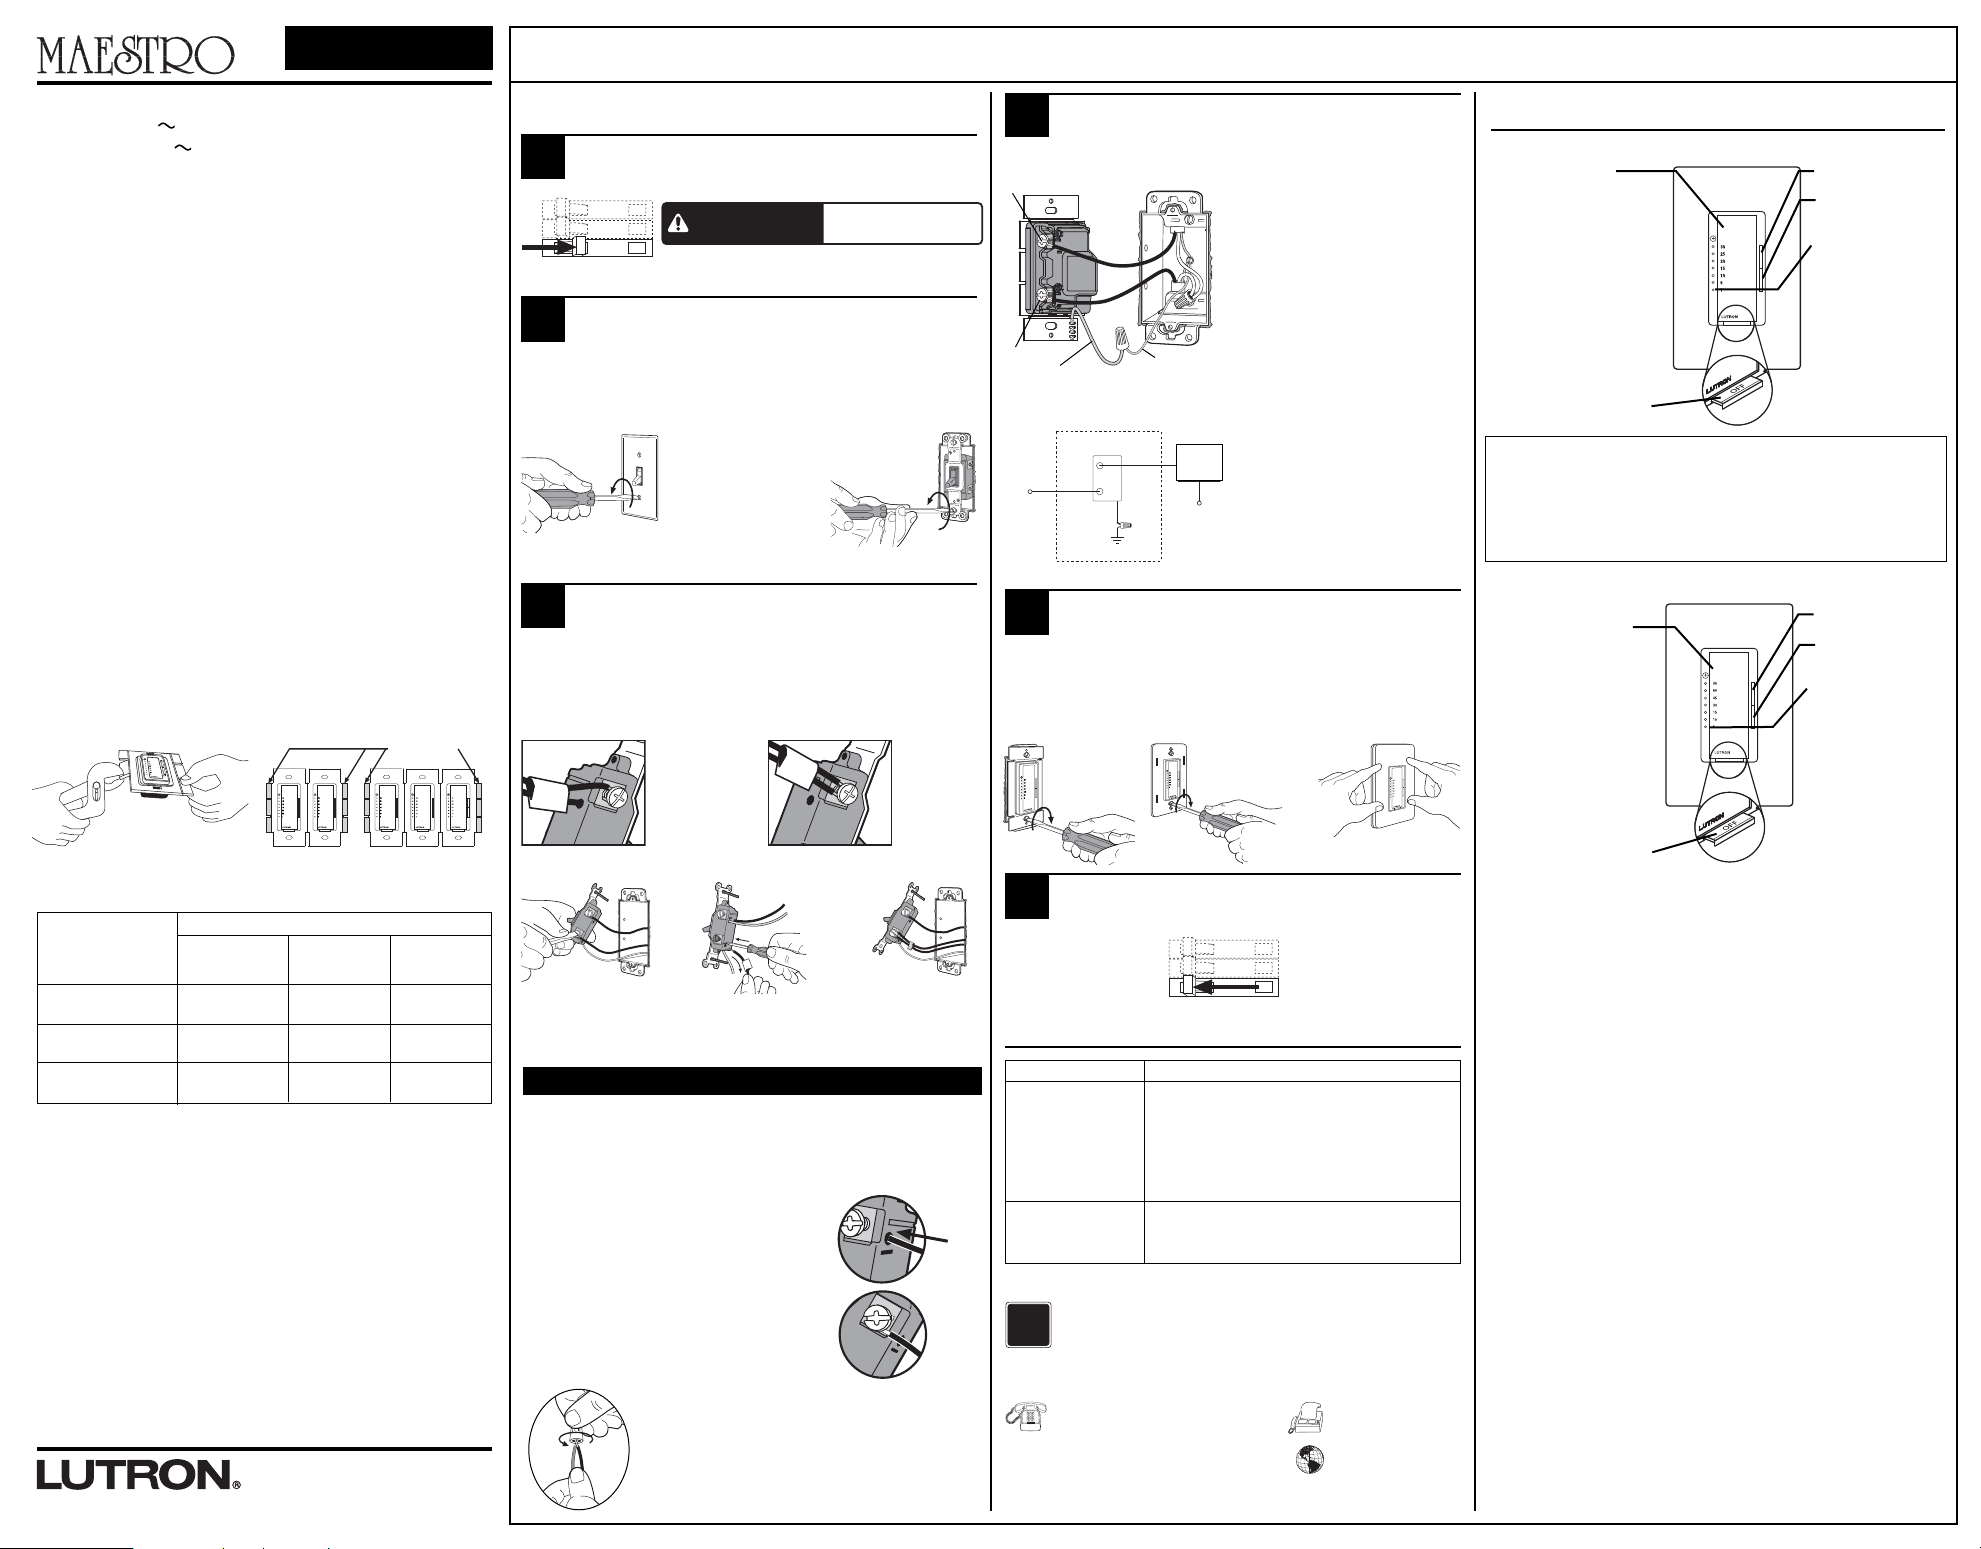
MA-T530G
Tap Button Options
• Tap once when unit is off
Controlled load turns ON
and countdown timer begins.
When time expires, load turns OFF.
• Tap once when unit is on -
Controlled load turns OFF
and countdown timer resets.
• Tap twice quickly -
Controlled load turns on
without a time limit.
Press to increase time
Press to reduce time
LEDs
• Orange LEDs indicate
timer duration or
remaining time in
minutes.
• Top green LED labeled
On has no time limit
• Bottom LED blinks
rapidly to indicate 1
minute of time
remaining.
FASS
- Front Accessible
Service Switch
MA-T51
WARNING
Shock Hazard. May result in serious injury or
death. Turn off power at circuit breaker before
installing the unit.
Installation
ON
OFF
ON
OFF
ON
OFF
Couper le courant OFF.
• Couper le courant au disjoncteur (ou retirer le fusible).
11
Retrait de la plaque murale
et de l’interrupteur.
• Retirer la plaque murale et les vis de montage de l’interrupteur
• Retirer délicatement l’interrupteur du mur (Ne pas enlever les fils).
22
Déconnexion des fils de
l’interrupteur.
33
Câblage.
• Pour les installations impliquant plus d’une commande dans un boîtier
mural, se référer à Installations à jumelage multiple avant de commencer.
44
55
ON
OFF
ON
OFF
ON
OFF
Rétablir le courant (ON).
• Rétablir le courant (ON) au disjoncteur (ou remplacer le fusible).
66
Lutron Electronics Co., Inc.
7200 Suter Road
Coopersburg, PA 18036-1299, U.S.A.
Réalisé et imprimé aux États-Unis
7/09 P/N 030-1041-03 Rev. A
Pour connaître les fonctionnalités avancées Advanced Features des Commandes
Murales
Maestro
incluant le verrouillage préréglé et la désactivation de chevauchement
de la minuterie, S.V.P. visiter : www.lutron.com/maestro/advfeatures ou appeler le
Centre d’assistance et de support technique de Lutron
au 1.800.523.9466.
?
Assistance Technique
Pour toute question concernant l’installation ou le fonctionnement de ce
produit, appeler le
Centre d’assistance et de support technique Lutron
.Le
numéro de modèle exact vous sera demandé lors de l’appel.
États-Unis et Canada (24 hres / 7 jours)
1.800.523.9466
Mexique
+1.888.235.2910
Autres pays 8 h à 20 h, Heure de l’Est
+1.610.282.3800
Téléc. : +1.610.282.6311
http://www.lutron.com
Bornes à Vis :
Dévisser pour
dégager.
Bornes à Pression:
Insérer le tournevis.
Sortir le fil.
Câblage du Minuteur:
• En utilisant le connecteur de fil
fourni, connecter le fil vert de mise à
la terre du minuteur au fil nu en
cuivre ou au fil de mise à la terre
vert situé dans le boîtier mural.
• Connecter l’un des fils enlevés de
l’interrupteur à l’une des bornes à vis
de laiton du minuteur, ou insérer
complètement dans la borne à
pression.
• Connecter le fil restant débranché de
l’interrupteur précédemment en
place à l’autre borne à vis de laiton
de du Minuteur, ou insérer
complètement dans la borne
enfichable.
Mise à la terre
Fil vert
Vis de laiton
Phase
120 V~
60 Hz
Neutre
Laiton
Laiton
Fil vert
Mise à
la terre
Boîtier mural
Minuterie
Diagramme de Câblage de Référence
Vis de laiton
Remarque importante :
Votre interrupteur mural peut avoir deux fils attachés à la même vis (voir illustrations ci-
dessous pour exemples). Enrubannez ces deux fils ensemble avant de débrancher. Au
moment de câbler, connecter les fils au Minuteur de la même façon qu’ils étaient
connectés à l’interrupteur qui est remplacé.
Un fil dans la
borne à
pression et
un fil à la vis.
Un fil continu
à la vis.
Fil en Boucle :
Dévisser pour
dégager.
Dévisser pour
dégager.
Installations à Jumelage Multiple
Si vous installez plus d’une commande dans le même boîtier mural, il peut être
nécessaire d’enlever toutes les Sections intérieures avant de faire le câblage (voir ci-
dessous). Utiliser des pinces et plier vers le haut et ensuite vers le bas jusqu’à ce
qu’elles se détachent. Répéter pour chaque côté à enlever. La suppression des Sections
latérales des minuteurs réduit leur charge maximale admissible. Se référer au tableau
ci-dessous pour déterminer la charge maximale admissible des Minuteurs.
Rupture des Sections Latérales
Garantie Limitée
(Valide seulement aux États-Unis, Canada, Porto Rico et les Caraïbes.)
Lutron, à son choix, réparera ou remplacera tout équipement jugé défectueux quant aux matériaux ou à la
fabrication pendant une durée d’un an suivant la date d’achat. Pour le service garantie, retourner l’appareil au
détaillant ou à Lutron au 7200 Suter Rd., Coopersburg, PA 18036-1299, par poste affranchie.
CETTE GARANTIE REMPLACE TOUTE AUTRE GARANTIE EXPRESSE ET LA GARANTIE IMPLICITE DE
QUALITÉ MARCHANDE EST LIMITÉE À UNE DURÉE D’UN AN SUIVANT L’ACHAT. CETTE GARANTIE NE
COUVRE PAS LES FRAIS D’INSTALLATION, DE RETRAIT OU DE RÉINSTALLATION, NI LES DOMMAGES
RÉSULTANT D’UN MAUVAIS USAGE, D’ABUS, D’UN CÂBLAGE OU D’UNE INSTALLATION INADÉQUATS.
CETTE GARANTIE NE COUVRE PAS LES DOMMAGES INDIRECTS OU CONSÉCUTIFS. LA RESPONSABILITÉ
DE LUTRON QUANT À TOUTE RÉCLAMATION POUR DOMMAGES DÉCOULANT DE OU LIÉS À LA
FABRICATION, LA VENTE, L’INSTALLATION, LA LIVRAISON OU L’USAGE NE DEVRA EN AUCUN CAS
EXCÉDER LE PRIX D’ACHAT.
Cette garantie vous accorde des droits légaux précis et il se peut que vous ayez aussi d’autres droits, selon les
États ou Provinces. Certains États ne permettent pas de limiter ou d’exclure les dommages indirects ou
consécutifs ni de limite quant à la durée de la garantie implicite, alors les limites ci-dessus peuvent ne pas vous
concerner.
Ce produit est couvert par un ou plusieurs brevets américains suivants 7,190,125; 7,365,282; 7,546,473 et
les brevets internationaux correspondants. Brevets en instance aux É.-U. et à l’étranger. Lutron, est une marque
déposées enregistrées et Claro, Maestro, Satin Colors, et FASS sont des marques commerciale de Lutron
Electronics Co., Inc. Le NEC est une marque déposée enregistrée de la National Fire Protection Association,
Quincy, Massachusetts. © 2009 Lutron Electronics Co., Inc.
Aucune Section
Enlevée
600 W 5 A
600 VA / 450 W
3 A
1 Section
Enlevée
500 W
500 VA / 400 W
3 A
2 Sections
Enlevées
400 W
400 VA / 300 W
3 A
Français
Charge Maximale
Ne Pas Enlever les
Sections Externes
La Section Intérieure
de Chaque Contrôleur
est Enlevée
Les Deux Sections
Latérales ont été Enlevées
sur le Contrôle du Milieu
Notes Importantes
Veuillez lire avant de procéder à l’installation.
1. ATTENTION! Pour éviter toute surchauffe ou dommage à d’autres équipements, ne pas
utiliser pour la commande de prises, de luminaires fluorescents et d’appareils motorisés.
2. Effectuer l'installation conformément à tous les codes d’électricité locaux et nationaux.
3. Ne pas utiliser pour les charges commandées à partir de 2 endroits ou plus.
4. NE PAS utiliser les contrôles Maestro
™
pour la commande de lampes fluorescentes
compactes (Économiseur d’Énergie).
5. En cas “d’absence de mise à la terre“ dans la boîte murale, l’article 404.9 du code
NEC
®
2008 permet l’installation d’une commande sans prise de terre comme pièce de
remplacement à condition d’utiliser une plaque murale en matière plastique non
combustible. Pour ce type d’installation, capuchonner ou enlever le fil de terre vert de la
commande et utiliser une plaque murale adéquate, telles que les plaques murales de la
série Claro
™
ou Satin Colors
™
de Lutron.
6. Lors de peinture de pièces ou retouches de plâtre, protéger la commande contre la
poussière et les saletés.
7. Ne pas utiliser lorsque le courant de charge est inférieur à 0,3 A 40 W ou supérieur à
5 A (pour plus d’information, consulter le Tableau de Charge Maximale Admissible).
8. Utiliser entre 0 °C (32 °F) et 40 °C (104 °F).
9. Le minuteur peut être chaud au toucher en fonctionnement normal.
10. La profondeur minimale recommandée d’une boîte murale est de 2 ½ po (64 mm)
11. Pour des raisons de sécurité, ne pas utiliser pour la commande d’un appareil d’éclairage
qui est la seule source d’éclairage d’une pièce.
12. Pour la commande combinée de plusieurs charges, celle du ventilateur et de l’éclairage,
le courant de charge total ne doit pas excéder 3 A.
13. Nettoyer le Minuteur uniquement avec un linge
doux et humide
. N’employer aucun
nettoyant chimique.
Minuteur Compte à Rebours
MA-T51
120 V 60 Hz 5 A Éclairage* ou Ventilateur 3 A
MA-T530G 120 V 60 Hz 5 A Éclairage* ou Ventilateur 3 A
Renseignements Importants sur le Câblage
Pour le branchement, suivre les directives de longueurs de dénudation et de
combinaisons des fils pour les connecteurs de fil fournis. Remarque : Tous les
connecteurs de fil fournis sont adéquats pour
des fils de cuivre seulement.
Pour des
fils en aluminium, consulter un électricien.
Capuchon de Connexion :
Utiliser pour raccorder un fil de terre 2,5 ou
1,5 mm
2
(12 AWG ou 14 AWG) avec un fil
de terre de contrôle 0,7 mm
2
(18 AWG).
Visser
fermement le
connecteur.
Bornes de connexion : Insérer les fils complètement.
REMARQUE : N’utiliser les bornes à pression qu’avec des
fils en cuivre massif 1,5 mm
2
(14 AWG)
.
NE PAS utiliser de
fil toronné ou torsadé.
Bornes à vis: Serrer fermement.
Les bornes à vis sont utilisées avec des fils de cuivre
massif 2,5 ou 1,5 mm
2
(12 ou 14 AWG)
seulement.
NE PAS utiliser de fil toronné ou torsadé.
Couper ou dénuder les fils de la boîte murale à la longueur indiquée au guide margeur à
l’endos du contrôle.
OU
Symptôme
La Charge ne s’allume
pas ou les DEL ne
s’allument pas.
Cause Possible
• Interrupteur de Service à Accès Frontal (FASS
TM) allumé (on)
Le Minuteur est tiré dans la position (OFF)
• Ampoule(s) grillée(s).
• Disjoncteur coupé ou déclenché.
• Erreur de câblage. Appeler le
Centre d’assistance et
de support technique Lutron
Dépistage de Fautes
NOTICE IMPORTANTE :
Pour remplacer une ampoule, couper l’alimentation et tirer sur l’interrupteur de contrôle
FASS
.
Pour toute manœuvre autre qu’un remplacement habituel d’ampoule, le courant doit être
coupé à partir du tableau de distribution.
Type de Charge
Halogène/Incandescent
120 V~
Magnétique à basse
tension**
Ventilateur à Usage
Général
Montage du/des commandes(s)
dans le boîtier mural.
• Disposer délicatement les fils dans le boîtier mural, monter et aligner le(s)
commandes(s).
• Installer la/les plaque(s) murale(s).
La charge allume et
éteint à répétition (on) et
(off).
• La charge consomme moins de 0,3 A ou 40 W
• Connexion de la charge incorrecte
Lampe ou
Ventilateur
**Remarque : La puissance maximale d’une ampoule est déterminée par l’efficacité du transformateur, soit
typiquement 70–85%. Pour connaître l’efficacité réelle du transformateur, contacter soit le manufacturier
du luminaire ou celui du transformateur. La calibration en VA du/des transformateur(s) ne doit pas excéder
la calibration VA du minuteur.
Remarque : Ne pas trop serrer les vis de montage. Trop serrer les
vis peut causer des dommages permanents.
Mettre en place la
plaque murale Claro.
Insérer les vis.
Aligner la
commande et
solidifier les vis.
*Voir le tableau de charge maximale admissible
Tableau de Charge Maximale Admissible du Minuteur
Fonctionnement
Options du bouton
• Presser une fois quand
l’appareil est éteint off
La charge est mise en fonction
(ON) et le compte à rebours du
minuteur commence.
Quand le temps est expiré, la charge
est mise hors fonction (OFF).
• Presser une fois quand l’unité
est en fonction (on) - La charge
sera mise hors fonction (off), et la
minuterie du compte à rebours se
réinitialisera.
• Presser deux fois rapidement -
La Charge se met en fonction (on)
avec indicateur de temps de 30
minutes.
Presser pour augmenter
le délai.
Presser pour réduire la
durée.
DEL
• Les DEL oranges
indiquent la durée de la
minuterie ou le temps
restant en minutes.
• La DEL du bas clignote
doucement pour
indiquer qu’il reste 1
minute de temps.
FASS
- Interrupteur de
Service à Accès Frontal
Indication Une Minute :
Lorsqu’il reste une minute de temps, la charge s’allumera et s’éteindra pour indiquer
que le minuteur s’apprête à couper.
MA-T530G
Options du bouton
à tape
• Presser une fois quand
l’unité est éteinte off
La Charge contrôlée se met en
fonction (ON) et le compte à
rebours commence.
Quand le temps est expiré, la charge
se met hors fonction (OFF).
• Presser une fois quand l’unité
est en fonction (on) - La charge
sera mise hors fonction (OFF),
et la minuterie du compte à
rebours se réinitialisera.
• Presser deux fois rapidement -
La Charge se met en fonction
(on) sans limite de temps.
Presser pour augmenter
le délai.
Presser pour réduire la
durée.
DEL
• Les DEL orange
indiquent la durée de la
minuterie ou le temps
restant en minutes.
• La DEL du haut verte
marquée (On) indique
(durée illimitée).
• La DEL du bas clignote
rapidement pour
indiquer qu’il reste 1
minute de temps.
FASS
- Interrupteur de
Service à Accès Frontal
MA-T51
TM
Centre d’assistance et de support technique Lutron 1.800.523.9466 24 heures / 7 jours www.lutron.com
AVERTISSEMENT
Danger d’électrocution. Peut causer le
décès de la personne ou de graves lésions.
Couper le courant (off) au disjoncteur
avant de procéder à l’installation.