Loading ...
Loading ...
Loading ...
The36"ProfessionalTileGasCooktop,allowsyou
toinsertdecorativetilesintothebezelassembly.
Thisallowsyoutocoordinatethetilesinthebezel
withthetilesinyourkitchen,oryoumaychooseto
insertdecorativeholidaytiles.Followtheinstructions
belowtoinserttheappropriatesizetile:
4 5
1
\
)
2
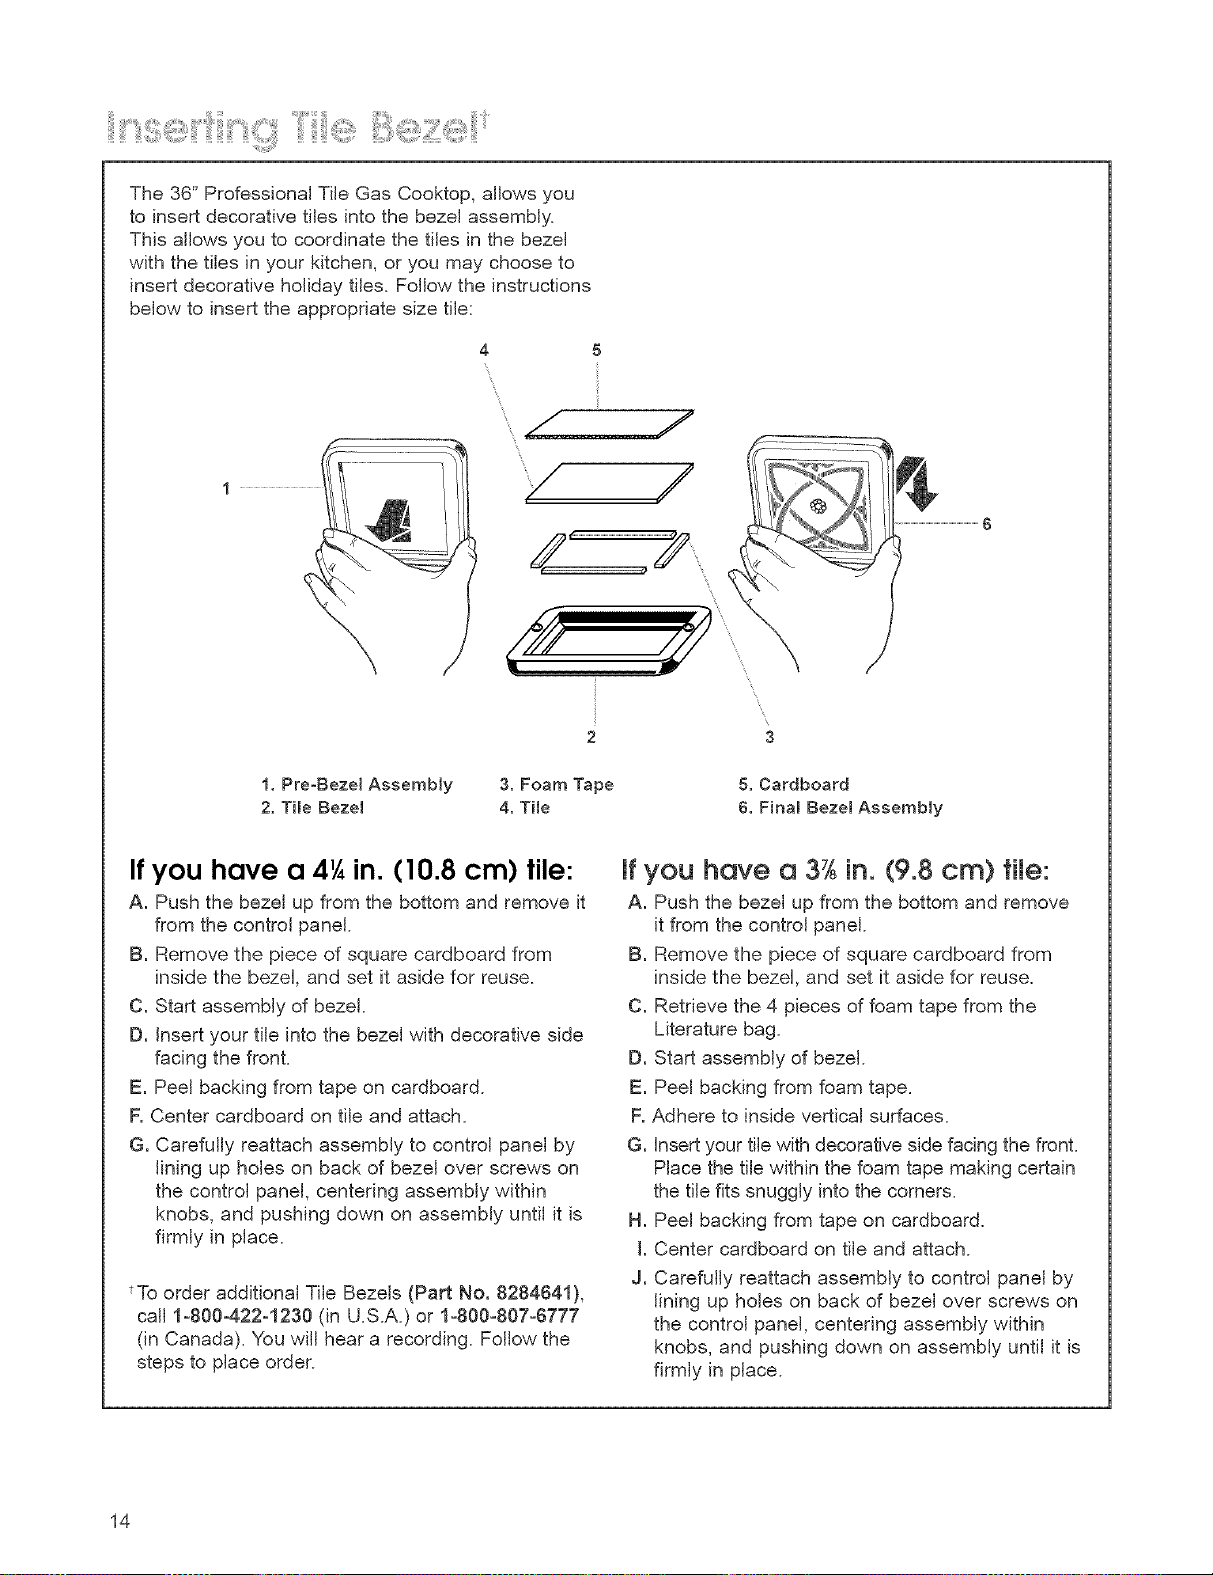
1, Pre-Beze_ Assembly 3. Foam Tape
2, Tile Bezel 4. THe
5. Cardboard
6. Final Bezel Assembly
If you have a 4'/4in. (10.8 cm) tile:
A. Push the bezel up from the bottom and remove it
from the control panel.
B. Remove the piece of square cardboard from
inside the bezel, and set it aside for reuse.
C. Start assembly of bezel.
D. Insert your tile into the bezel with decorative side
facing the front.
E. Peel backing from tape on cardboard.
F. Center cardboard on tile and attach.
G. Carefully reattach assembly to control panel by
lining up holes on back of bezel over screws on
the control panel, centering assembly within
knobs, and pushing down on assembly until it is
firmly in place.
tTo order additional Tile Bezels (Part No. 8284641},
call 1-800-422-1230 (in U.S.A.) or 1-800-807-6777
(in Canada). You will hear a recording. Follow the
steps to place order.
you have a 3'/8in. (9.8 ore) file:
A. Push the bezel up from the bottom and remove
it from the control panel.
B. Remove the piece of square cardboard from
inside the bezel, and set it aside for reuse.
C. Retrieve the 4 pieces of foam tape from the
Literature bag.
D. Start assembly of bezel.
E. Peel backing from foam tape.
F. Adhere to inside vertical surfaces.
G. Insert your tile with decorative side facing the front.
Place the tile within the foam tape making certain
the tile fits snuggly into the corners.
H. Peel backing from tape on cardboard.
L Center cardboard on tile and attach.
J. Carefully reattach assembly to control panel by
lining up holes on back of bezel over screws on
the control panel, centering assembly within
knobs, and pushing down on assembly until it is
firmly in place.
14
Loading ...
Loading ...
Loading ...