Loading ...
Loading ...
Loading ...

ADJ Products, LLC - www.adj.com - Pocket Pro Instruction Manual Page 20 ADJ Products, LLC - www.adj.com - Pocket Pro Instruction Manual Page 21
The UC IR (sold separately) infrared remote gives you control of
various functions. To control the fixture you must aim the remote at
the front of the fixture and be no more than 30 feet away.
The Airstream IR Transmitter (sold separately) remote transmit-
ter plugs into the headphone jack of your iOS phone or tablet. To
control your IR fixture you must raise the volume to the maximum on
your iOS phone or tablet and aim the transmitter at the fixture sen-
sor and be no more than 15 feet away. After you have purchased the
Airstream IR transmitters, the app is a free download from the app
store for your iOS phone or tablet. The app comes with 3 pages of
control depending on the fixture you are using. Please see below for
IR functions including the corresponding app page.
Works with App page 1.
STAND BY - Pressing this button will blackout the fixture.
FULL ON - This button is invalid for this fixture.
FADE/GOBO - Press this button to enter Gobo mode. Use the 1-8
buttons to select your desired gobo. See gobos on the next page,
then number buttons correspond to the gobo.
“DIMMER +” and “DIMMER -” - Use these buttons to adjust the out-
put intensity and to adjust the strobe speed.
STROBE - Press and hold this button to activate strobe mode.
Release the button and press and hold this button again to activate
random strobe.
COLOR - Press this button to enter Dimmer mode. Use the 1-8
buttons to select your desired color. See the DMX colors on the
next page. Adjust the output intensity using the “DIMMER +” and
“DIMMER -” buttons.
1-8 - When in either Gobo mode or Color mode, these buttons will
allow you to select either a gobo or color.
SOUND ON & OFF - These buttons activate and deactivate the
sound active mode.
SHOW 0 - Press this button to activate show mode. Use buttons 1-9
to find your desired show.
Pocket Pro Remote Operation Pocket Pro Master-Slave Set Up
Master-Slave Operation This function will allow you to link up to 16
units together and operate without a controller. The units will be sound
activated. In Master-Slave operation one unit will act as the controlling
unit and the others will react to the controlling units programs. Any unit
can act as a Master or as a Slave.
1. Using approved DMX data cables, daisy chain your units togeth-
er via the XLR connector on the rear of the units. Remember the
Male XLR connector is the input and the Female XLR connector
is the output. The rst unit in the chain (master) will use the female
XLR connector only - The last unit in the chain will use the male
XLR connector only. For longer cable runs we suggest a termina-
tor at the last fixture.
2. On the Master unit press the MENU button until “Slave Mode” is
displayed, and press ENTER. Use the UP and DOWN buttons to
scroll to the “Master” setting and press ENTER.
3. After setting the Master unit to the master setting find your
desired operating mode.
4. On the slave units press the MENU button until “Slave Mode” is
displayed, and press ENTER. Choose either “Slave 1” or
“Slave 2” and press ENTER. See page 10 for more info.
5. The slave units will now follow the Master unit.
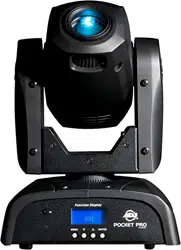
Pocket Pro Manual Focus
The focus can manually focused using the focus wheel located on the
bottom front of the moving head. Rotate the focus wheel back and
forth until you get your perfect focus.
Loading ...
Loading ...
Loading ...