Loading ...
Loading ...
Loading ...
INSTALLATION
Check the appliance is electrically safe when you have nished.
31
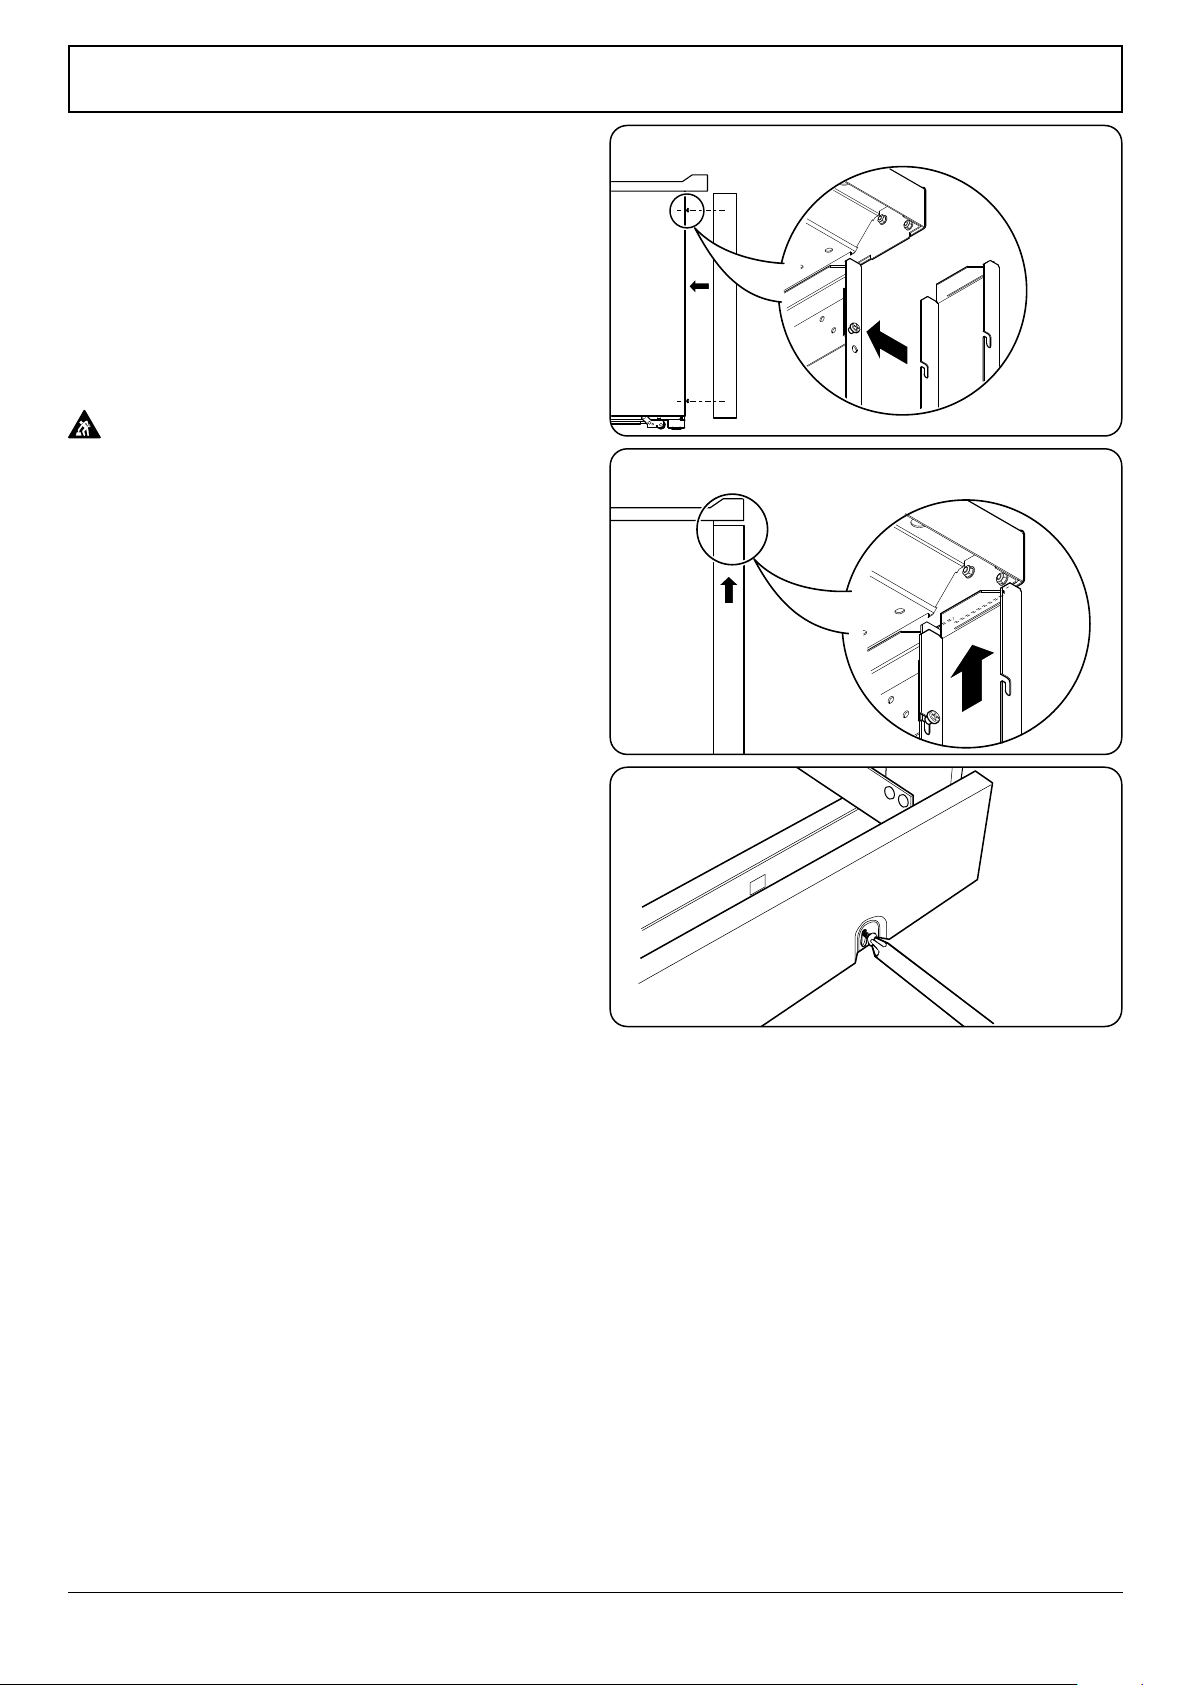
Fig. 10.23
Fig. 10.24
Fig. 10.25
Final fitting
Installing the toe kick
Remove the 3 screws for the toe kick mounts along the front
bottom edge of the range (Fig. 10.25). Fasten the toe kick
using these screws (alternative color screws can be found in
the loose parts pack).
Refitting the oven door
To ret the door, slide the hinges back into their slots. Rotate
the locking ‘U’ clips back to t onto the hinges.
Door is very heavy - take care.
Range operational checks
Oven check
Turn on the oven and check that the oven fans start to turn
and that the oven starts to heat up. Turn o the oven.
Oven light check
Press the oven light switch and check that the lights are
working.
NOTE: The oven light bulbs are not included in the warranty.
Moving the range for servicing
Follow these procedures to remove appliance for servicing:
Turn o the circuit breaker. Unplug the electrical supply cord.
The range is very heavy, so take great care. We recommend
two people maneuver the range. Ensure that the oor
covering is rmly attached, or removed to prevent it being
disturbed when moving the range around. You will need the
leveling tool.
Before attempting to move the range, see ‘Moving the range’
Refitting the range
Reverse the above procedure to ret.
If the range is removed for any reason, make sure that the
anti-tip device is re-engaged properly when the range
is replaced. Failure to take this precaution could result in
tipping of the range and may cause injury.
Customer care
Please complete your details in this guide, inform the user
how to operate the range and hand over the Instructions.
Thank you
Loading ...
Loading ...
Loading ...