Loading ...
Loading ...
Loading ...

30
LPG Conversion (Continued)
3.) Convert Burner Valves for LP/Propane Gas. One 5/64” flat screw driver is needed for
the Bypass Adjustment on Burner Valve.
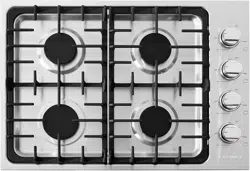
a. Please take off the burner knobs to get access to the burner valve part. There's a hole
located at bottom right of the burner valve, providing access to the adjustment of burner
valve bypass orifice. Take out the bezel if needed. The hole is part of the micro-switch
(the black part) sticking to the burner valve. Use the screw driver to go across the micro-
switch and reach the bypass orifice on the burner valve. Bypass orifice could help to
control the flame.
b. Put the knob back, adjust the flame by rotating the knob. The original location of
bypass is for NG. If converted to LP, adjust the vertical direction of the adjustment shaft
groove is LP.If converted from LP to NG, adjust the horizontal direction of the shaft
groove is NG.
Originally, the Bypass is located at NG Position and it's not screwed to the bottom
(tightest)
For LP conversion of bypass, not bypass orifice needs to be changed. Screw the Bypass
Orifice to bottom (clockwise).
c. Save the main bypass jets, in the plastic bag labeled main jets . When you are using
your top burners, if the flame needs to be adjusted accordingly to fit your need, please
adjust the bypass orifices on the burner valve. Put back the knob on and adjust the flame
by rotating the bypass via a small flat screw driver. Check the flame's condition to get the
best performance.
4.) Reconnect Gas and Electrical Supply to Cooktop. Leak testing of the appliance shall
be conducted according to the installation instructions provided with the cooktop.
Checking for Manifold Gas Pressure
If it is necessary to check the manifold gas pressure, remove the burner cap, inner ring, outer
burner head and burner base of the right front top burner and connect a manometer (water
gauge) or another pressure test device to the burner orifice.
a. Use a rubber hose with inside diameter of approximately ¼” and hold the end of the
tube tight over the orifice.
b. Turn the gas valve on.
c. For a more accurate pressure check, have at least two other top burners burning. Be
sure that the gas supply (inlet) pressure is at least one inch above the specified manifold
pressure. The gas supply pressure should never be over 14” water column.
d. When properly adjusted, the manifold water column pressure is 10” for LP/Propane gas
or 5” for Natural Gas.
LIQUEFIED PETROLEUM GAS CONVERSION
Loading ...
Loading ...
Loading ...