Loading ...
Loading ...
Loading ...
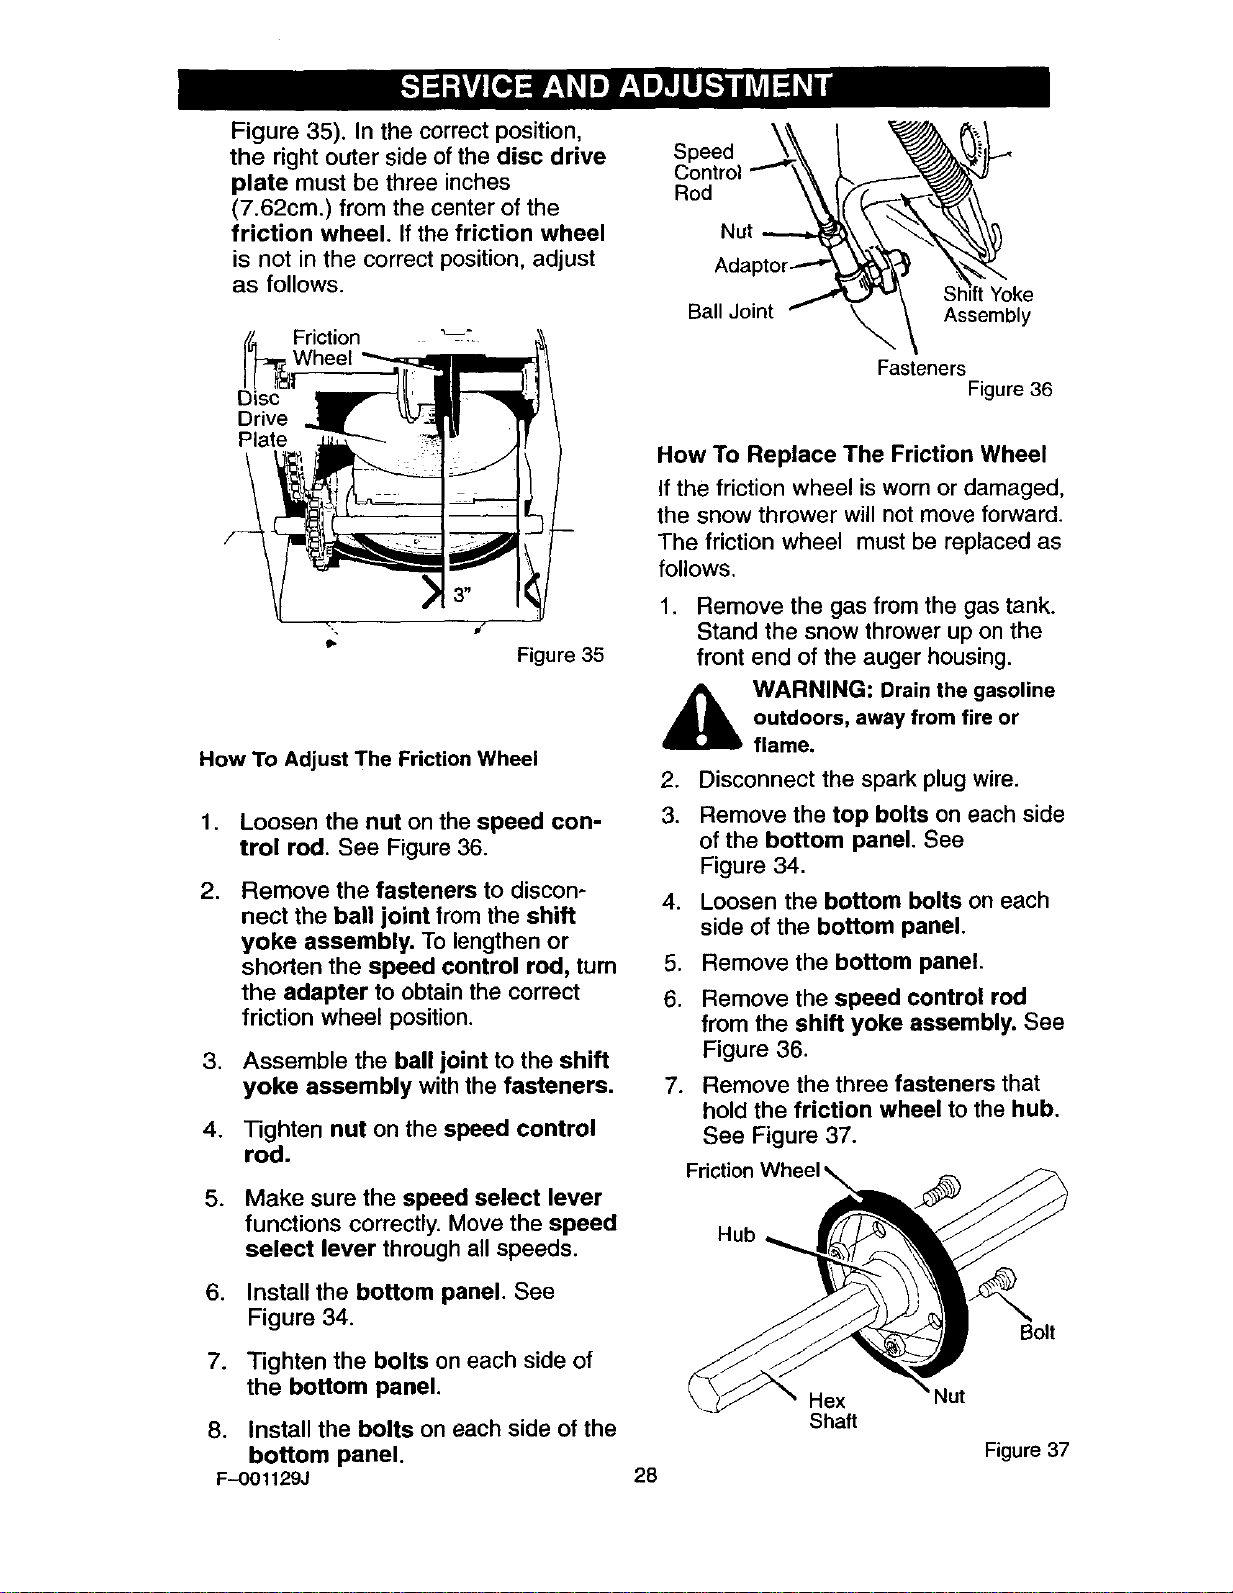
Figure 35). In the correct position,
the right outer side of the disc drive
plate must be three inches
(7.62cm.) from the center of the
friction wheel. If the friction wheel
is not in the correct position, adjust
as follows.
Friction
, Wheel
Disc
Drive
Plate
Figure 35
How To Adjust The Friction Wheel
.
2.
,
4.
5.
,
Loosen the nut on the speed con-
trol rod. See Figure 36.
Remove the fasteners to discon-
nect the ball joint from the shift
yoke assembly. To lengthen or
shorten the speed control rod, turn
the adapter to obtain the correct
friction wheel position.
Assemble the ball joint to the shift
yoke assembly with the fasteners.
Tighten nut on the speed control
rod.
Make sure the speed select lever
functions correctly. Move the speed
select lever through all speeds.
Install the bottom panel. See
Figure 34.
7. Tighten the bolts on each side of
the bottom panel.
8. Install the bolts on each side of the
bottom panel.
F-001129J
Speed
Control
Rod
Nut
Ball Joint
Yoke
Assembly
Fasteners
Figure 36
How To Replace The Friction Wheel
If the friction wheel is worn or damaged,
the snow thrower will not move forward.
The friction wheel must be replaced as
follows.
1. Remove the gas from the gas tank.
Stand the snow thrower up on the
front end of the auger housing.
_ ARNING: Drain the gasoline
outdoors, away from fire or
flame.
2. Disconnect the spark plug wire.
3. Remove the top bolts on each side
of the bottom panel. See
Figure 34.
4. Loosen the bottom bolts on each
side of the bottom panel.
5. Remove the bottom panel.
6. Remove the speed control rod
from the shift yoke assembly. See
Figure 36.
7. Remove the three fasteners that
hold the friction wheel to the hub.
See Figure 37.
Friction
Hub
Bolt
28
Hex Nut
Shaft
Figure 37
Loading ...
Loading ...
Loading ...