
the AquaStation
™
Purifier Hot
Instruction Book - Suits all LWA200 Models
2
BREVILLE
RECOMMENDS
SAFETY FIRST
At Breville we are very safety
conscious. We design and
manufacture consumer
products with the safety of you,
our valued customer, foremost
in mind. In addition, we ask
that you exercise a degree of
care when using any electrical
appliance and adhere to the
following precautions. Misuse
can cause potential injuries.
MAIN TECHNICAL SPECIFICATIONS
Product Model LWA200BSS
Filter Model LWA063WHT
Filter Life 90 days or approximately
200L, whichever comes first
Rated Voltage 220-240V
Rated Frequency 50Hz
Rated power consumption 1850W-2200W
Applicable water source Municipal tap water: 5~40°C
Product Dimensions
(LxWxH)
Approx. 381 x 137 x 286
Weight (kg) Approx. 2.8
Tested against: NSF/ANSI Standard 42 for
the reduction of chlorine (taste and odour),
& NSF/ANSI 372, lead content.
Tested to remove/reduce microplastics, floating
particles/sediment, pesticides, chlorine, limescale
& heavy metals.
Testing was performed under standard laboratory
conditions. The contaminants or other substances
removed or reduced by this filter are not
necessarily in all users’ water. Filter performance
may vary based on local water conditions.
IMPORTANT
SAFEGUARDS
READ ALL INSTRUCTIONS
BEFORE USE AND SAVE
FOR FUTURE REFERENCE
• Carefully read all instructions
before operating and save for
future reference.
• Remove and safely discard
any packaging material and
promotional labels before using
the AquaStation™ Hot for the
first time.
• Always ensure the appliance is
properly assembled before use.
2 Breville Recommends Safety First
8 Components
11 Features
13 Assembly
16 Operation
19 Tea Insights
20 Descaling
22 Care, Cleaning & Storage
23 Troubleshooting
Contents

3
Follow the instructions provided
in this book.
• The AquaStation™ Hot must be
used only with the Breville filter
supplied or replacement product
code LWA063.
• This appliance has been
designed specifically for the
purpose of filtering and heating
drinking quality water only.
Under no circumstances should
this appliance be used to heat
any other liquids.
• Do not place the appliance
near the edge of a bench or
table during operation. Ensure
that the surface is level, clean
and free of water and other
substances.
• Do not operate the appliance on
a sink drain board.
• Do not operate the appliance in
an enclosed space, or within a
cupboard.
• Never immerse the appliance,
power cord or power plug in
water, or allow moisture to come
into contact with these parts.
• Do not move the appliance
while it is switched on.
• Always ensure the appliance
returns to standby mode, then
turn the power off at the power
outlet and remove the power
plug from the power outlet
before attempting to move the
appliance, when the appliance
is not in use and before
cleaning and storing.
• Do not remove the water tank
from the power base during
operation.
• If the water tank is removed
from the power base during
water dispensing, the appliance
will automatically stop.
• Always fill the water tank with
water between the minimum
(MIN) and maximum (MAX)
as marked on the water tank.
• Too little water will result in the
appliance not operating and
‘Fill Tank’ will display on the
LCD screen. Filling above the
maximum mark (MAX) may
result in water splashing from
the water tank.
• Ensure the water level is
always above the MIN level for
optimum dispensing flow rate.
• The lid should always be
correctly fitted on the water
tank except when refilling.
• Do not place the appliance
in direct sunlight. Colour
fading and discolouration
may occur when the appliance
is consistently exposed to
sunlight.
• Care should be taken when
handling the appliance during
and after use, ensuring that the

4
appliance's spout and other
parts and surface areas are not
touched as these may still be
hot due to residual heat after
hot water dispensing.
• Allow the appliance to cool
down before moving or
cleaning any parts.
• Use in a well ventilated area.
This appliance emits hot
steam.
• Condensation from steam may
form on the LCD screen and
control panel; this is normal.
• Use caution when using the
descale feature as hot steam
may be released. Before
descaling, ensure the drip tray
is emptied and repositioned.
Refer to ‘Decaling’ section for
instructions.
• This appliance is intended to
filter tap water only. Do not put
water of unknow quality into
the appliance. Use only cold or
room temperature water.
Do not use for the preparation
of baby formula.
• Do not fill the water tank with
hot water. Water added to the
water tank should not be less
than 5°C or more than 40°C.
If water in the tank is outside
these temperatures, discard
and fill with cold tap water.
• Do not leave the appliance
unattended during operation.
• Do not remove filter whilst the
appliance is operating.
• Surface is subject to residual
heat after use.
WARNING
• Do not operate the appliance
on an inclined plane. Do not
move appliance unless the
appliance is turned off and
unplugged from the power
outlet.
• Keep the appliance and all
parts clean. Follow the cleaning
instructions provided in this
book.
• Any procedure not listed in
this instruction book should
be performed at an authorised
Breville Service Centre.
IMPORTANT SAFEGUARDS
FOR ALL ELECTRICAL
APPLIANCES
• Fully unwind the power cord
before use.
• Connect only to a 230V or
240V power outlet.
• The appliance must be used on
a properly grounded outlet. If
you are not sure, please consult
a qualified electrician.

5
• Do not, under any
circumstances, modify the
power plug or use a power plug
adapter.
• Do not place this appliance on
or near a heat source, such as a
hot plate, oven or heaters.
• Position the appliance at a
minimum distance of 20cm
away from walls, curtains and
other heat or steam sensitive
materials and provide adequate
space above and on all sides for
air circulation.
• Do not let the power cord hang
over the edge of a bench or
table, touch hot surfaces or
become knotted. Keep away
from hot gas or electric burners,
or where it could touch a heated
oven.
• This appliance is for household
use only. Do not use this
appliance for anything other
than its intended use. Do not
use in moving vehicles or boats.
Do not use outdoors. Misuse
may cause injury
• This appliance can be used
by children aged from 8 years
and above and persons with
reduced physical, sensory or
mental capabilities or lack of
experience and knowledge
if they have been given
supervision or instruction
concerning use of the
appliance in a safe way and
understand the hazards
involved.
• Children should be supervised
to ensure that they do not play
with the appliance.
• Always turn the appliance to
the OFF position, switch off at
the power outlet and unplug
at the power outlet when the
appliance is not in use.
• Before cleaning, always turn the
appliance to the OFF position,
switch off at the power outlet,
unplug at the power outlet
and remove the power cord, if
detachable, from the appliance
and allow all parts to cool.
• To protect against electric
shock, do not immerse the
power cord, power plug or
appliance in water or any other
liquid or allow moisture to
come in contact with the parts,
unless it is recommended in
the cleaning instructions.
• Any maintenance other than
cleaning should be performed
at an authorised Breville
Service Centre
• It is recommended to regularly
inspect the appliance. To
avoid a hazard, do not use the
appliance if power cord, power
plug or appliance becomes

6
damaged in any way. Return the
entire appliance to the nearest
authorized Breville Service
Centre for examination and/or
repair.
• The installation of a residual
current device (safety switch)
is recommended to provide
additional safety protection
when using electrical
appliances. It is advisable that
a safety switch with a rated
residual operating current not
exceeding 30mA be installed in
the electrical circuit supplying
the appliance. See a qualified
electrician for professional
advice.
• During electrical storms,
the appliance should be
disconnected from the power
source at the wall socket to
prevent any electrical surges
that may arise during the storm
and which may inadvertently
cause damage to the appliance
and its electronic componentry.
• Cleaning and user maintenance
shall not be made by children
without supervision.
SPECIFIC INSTRUCTIONS
FOR WATER FILTER
• Filter cartridge should be kept
out of reach of children.
• Store any unused filter
cartridges in a dry place sealed
in the original packaging.
• Protect filter cartridges from
heat and direct sunlight. Only
remove from packaging before
using.
• Do not use a filter cartridge that
is damaged.
• Do not open filter cartridge
housing to access the material
inside.
• If you are absent for a prolonged
period of time, empty and clean
the water tank and replace the
filter cartridge before next use.
• Refer to the filter installation
instructions found in the
'Assembly' section of these
instructions.

7
FOR HOUSEHOLD USE ONLY
SAVE THESE INSTRUCTIONS
BREVILLE ASSIST™ PLUG
• Your Breville appliance comes
with a unique Assist™ Plug,
conveniently designed with a
finger hole in the power plug
for easy and safe removal from
the power outlet. For safety
reasons, it is recommended
you plug your Breville
appliance directly into its own
electrical outlet on a dedicated
circuit separate from other
appliances. If the electric
circuit is overloaded with other
appliances, your appliance
may not function properly. Use
in conjunction with a power
strip or extension cord is not
recommended.
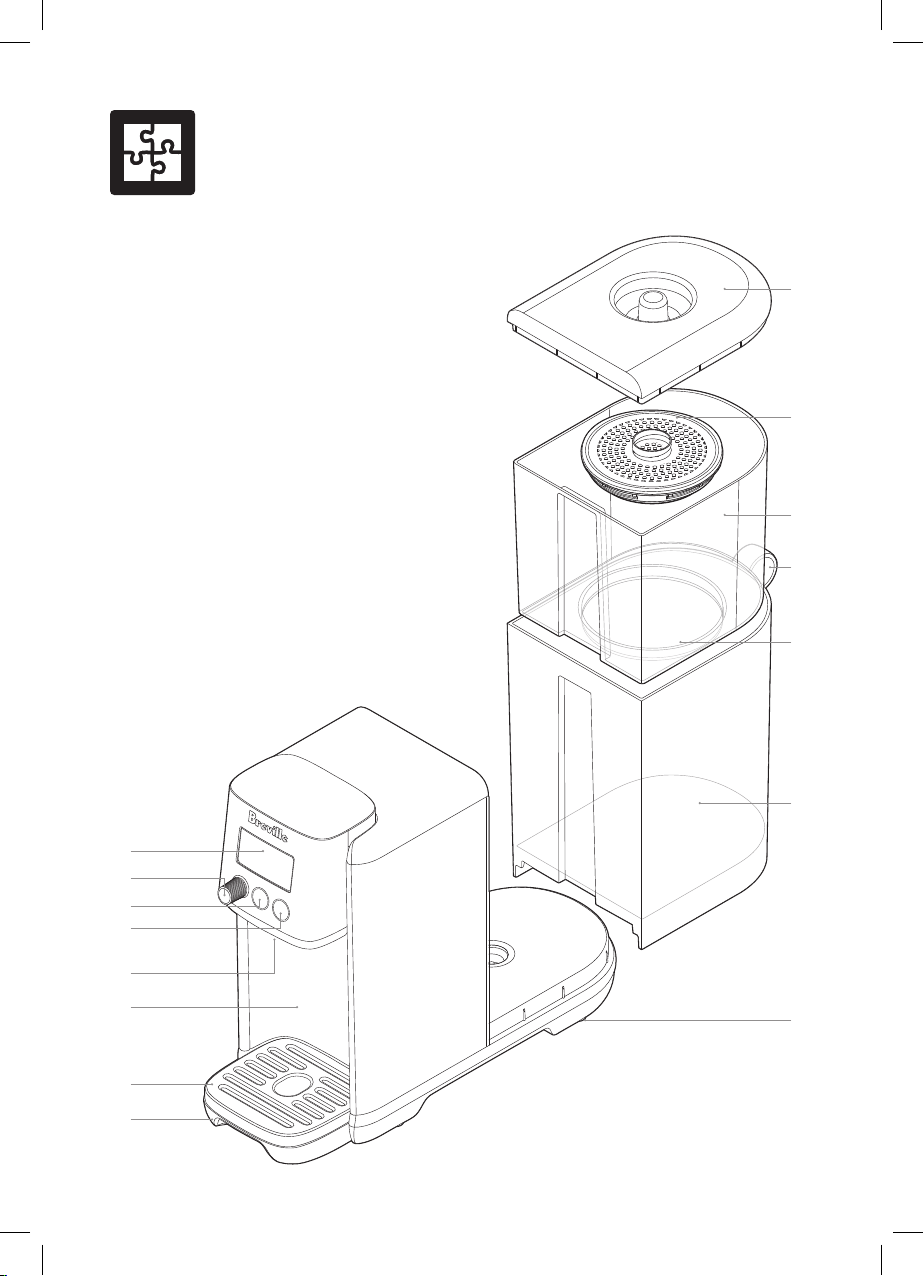
8
Components
A
C
D
F
E
M
N
O
L
H
I
J
K
G
B
A. Water tank lid with easy-grip handle
B. The Activ360™ 4-Stage Filter with pull
ring for easy removal
C. Upper water tank (Pre-Filtered)
D. Water tank ring to remove and carry
E. Filter holder
F. Lower water tank (Filtered)
G. Non-marking, non-slip feet
H. Removable drip tray
I. Detachable tray grill for cleaning
J. Dispensing area. 14cm cup clearance
height with tray in place, 17.5cm height if
drip tray removed
K. Dispensing spout
L. HOT button
M. START/STOP button with indicator lights
N. FUNCTION/SELECT DIAL
O. LCD screen
Not Shown
• Breville Assist™ Plug
9
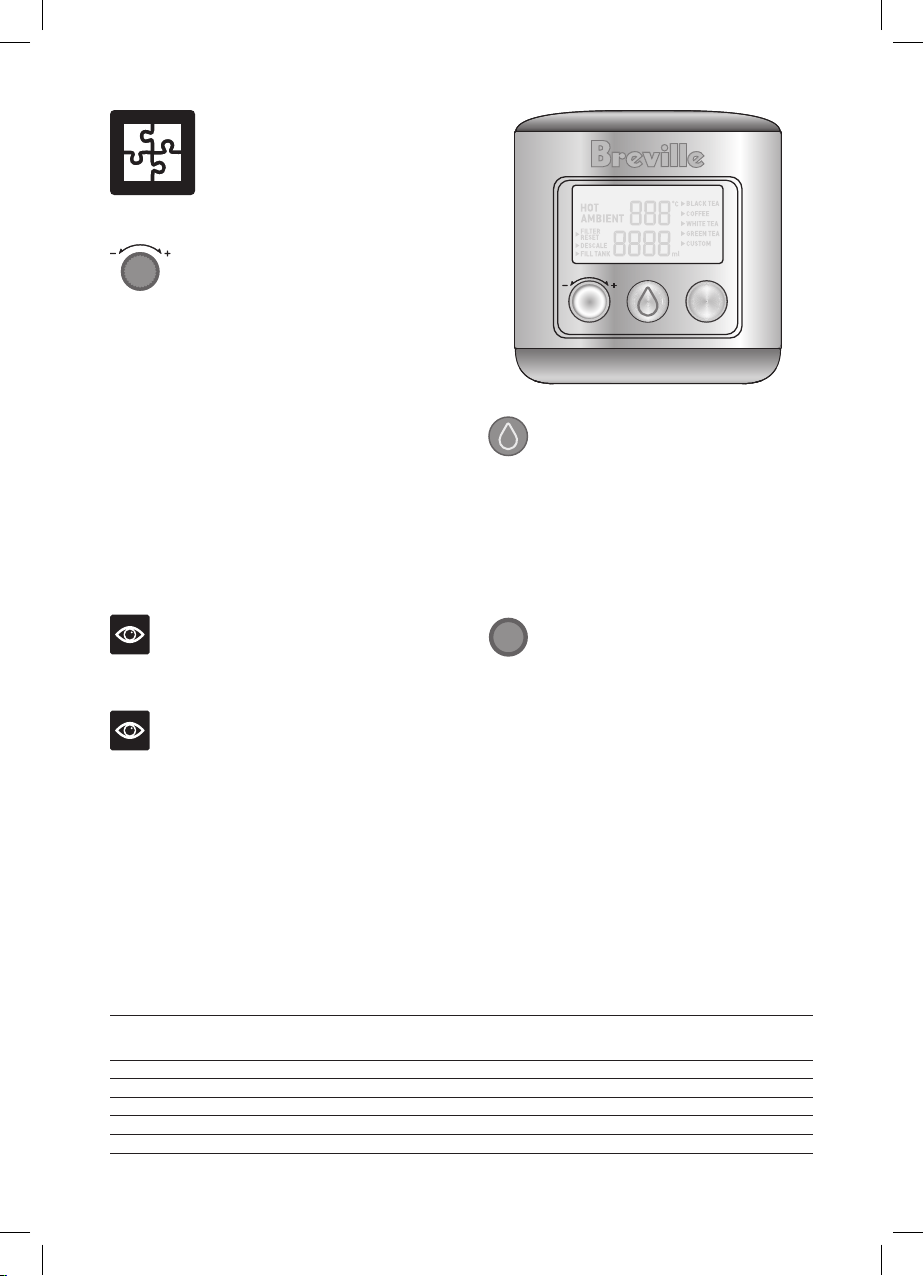
Control Panel
START | STOP HOTFUNCTION
FUNCTION
FUNCTION DIAL/SELECT
Turn/Press FUNCTION dial to adjust/select
from the following:
MENU - When using HOT, turn dial to select
between pre-programmed menu options and
the custom setting; press the dial to confirm
selection
TEMP - when using Custom, turn dial
clockwise to increase temp and anti-clockwise
to decrease temperature; press the dial to
confirm selection.
VOLUME - when using Ambient or Custom,
turn dial clockwise to increase volume and
anti-clockwise to decrease volume; press the
dial to confirm selection.
NOTE
TEMP & VOLUME cannot be adjusted once
water dispensing commences.
NOTE
The FUNCTION dial light will illuminate solid
white when the purifier is switched on at the
power (to indicate the purifier is operational).
The light ring will turn off when water is
dispensing or when the purifier enters standby
mode after 5 minutes of non-use.
LCD SCREEN PROGRAM TABLE
Function Flow
Rate
per Min
^Preset
Temp °C
^Temp
Range °C
Temp +/-
Increments
Preset
Volume
MLS
Volume
Range
MLS
Volume +/- Increments
from 50-250mL increase
by 25mL, from 250-500mL
increase by 50mL, from
500mL+ increase by 100mL
Ambient 1L Temp of Water
inside Water
Tank
Temp of Water
inside Water
Tank
N/A 250mL 100-500 25mL
Black Tea 400mL 100°C N/A N/A 250mL 100-500 25mL
Coffee 400mL 95°C N/A N/A 250mL 100-500 25mL
White Tea 400mL 85°C N/A N/A 250mL 100-500 25mL
Green Tea 400mL 80°C N/A N/A 250mL 100-500 25mL
Custom 400mL N/A 45-100 5°C 250mL 100-1200 25mL
^Temperature is measured at the heating element, not from the spout.
START | STOP
START/STOP BUTTON
Press to start or stop dispensing water
(ambient or hot water dispensing). The
water droplet light illuminates solid white
while dispensing, and will flash if hot water is
selected as a reminder that dispensing will not
commence until START/STOP is pressed.
HOT
HOT WATER BUTTON
Press once to access the hot water menu. The
HOT button light will illuminate and the hot
water menu will appear on the LCD screen.
The hot beverage menu offers programmed
ideal brew temperatures recommended for
black, white, green tea, coffee and custom.
Custom allows for manual selection of
temperature (45-100 degrees Celsius) and
volume (100mls to 1.2L).
10
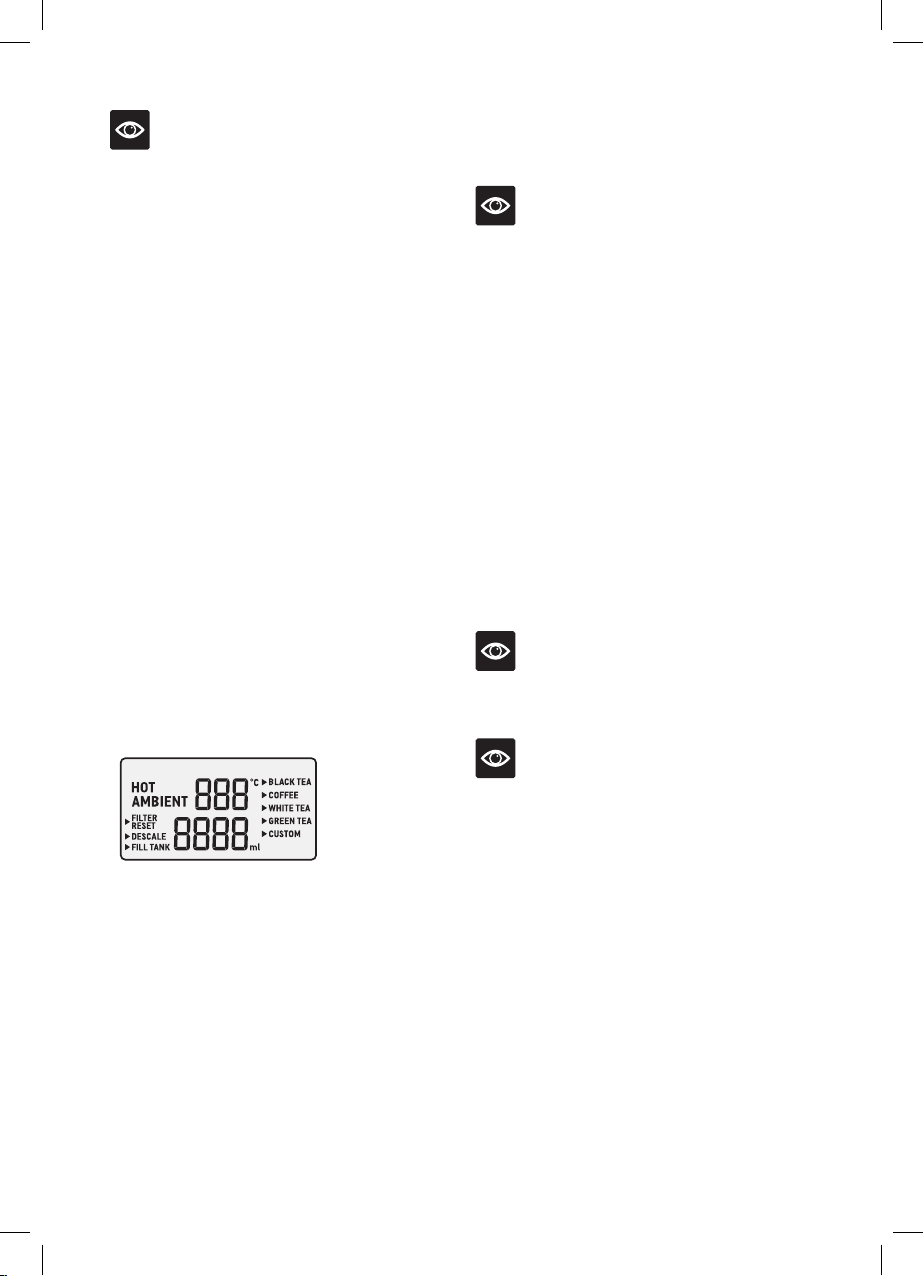
LCD SCREEN DISPLAY MENU
HOT
Appears on the screen only when the HOT
button has been selected.
AMBIENT
Displays on the screen as the default for when
in standby mode.
FILTER RESET
Appears on the screen as a reminder to change
the filter cartridge once the filter life timer has
counted down.
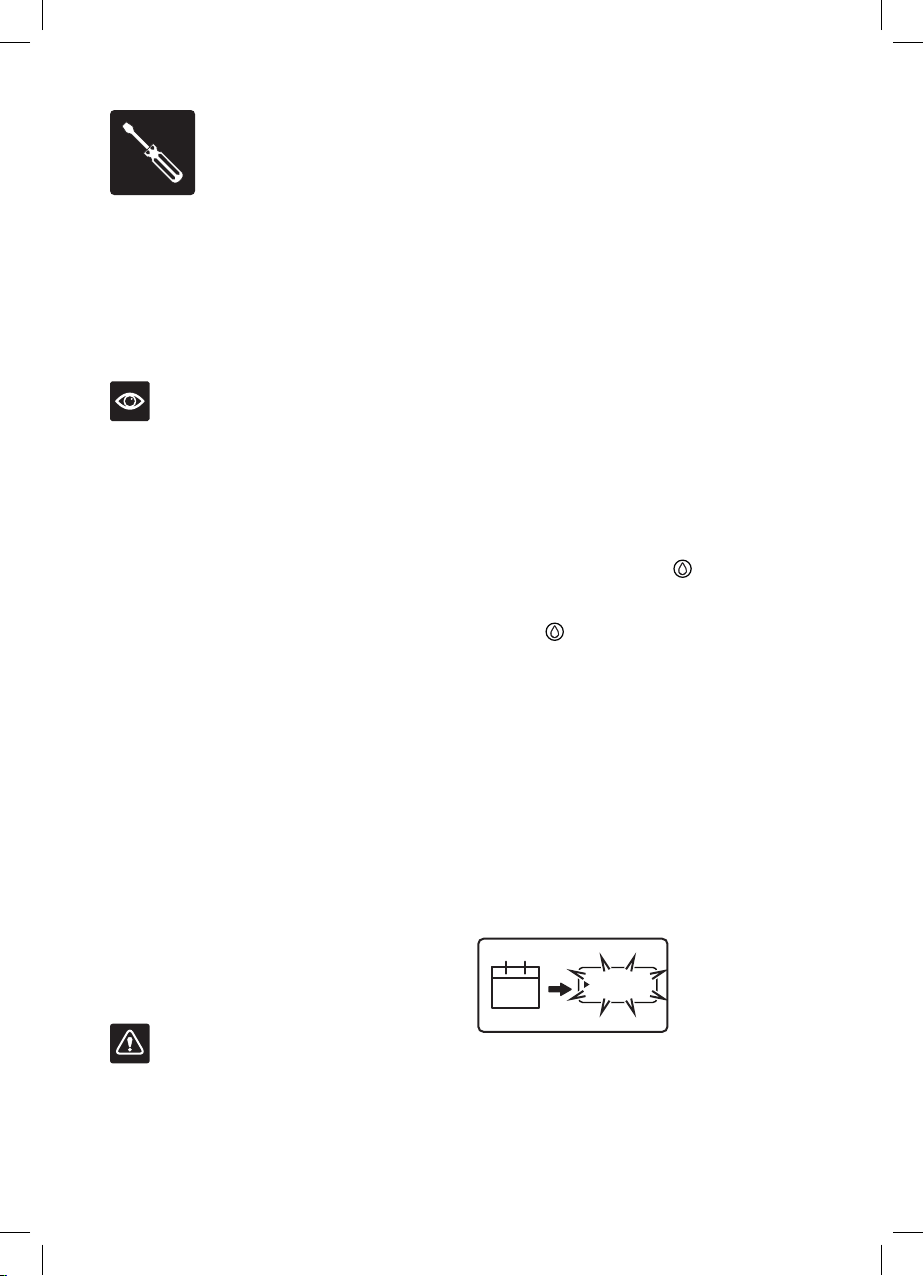
DESCALE
Appears on the screen every 6 months as a
reminder to descale the machine.
NOTE
To descale more often than the programmed
descale reminders, press and hold the HOT
button for 3 seconds until Descale appears on
the screen.
To quit descale mode, press and hold the HOT
button again for 3 seconds.
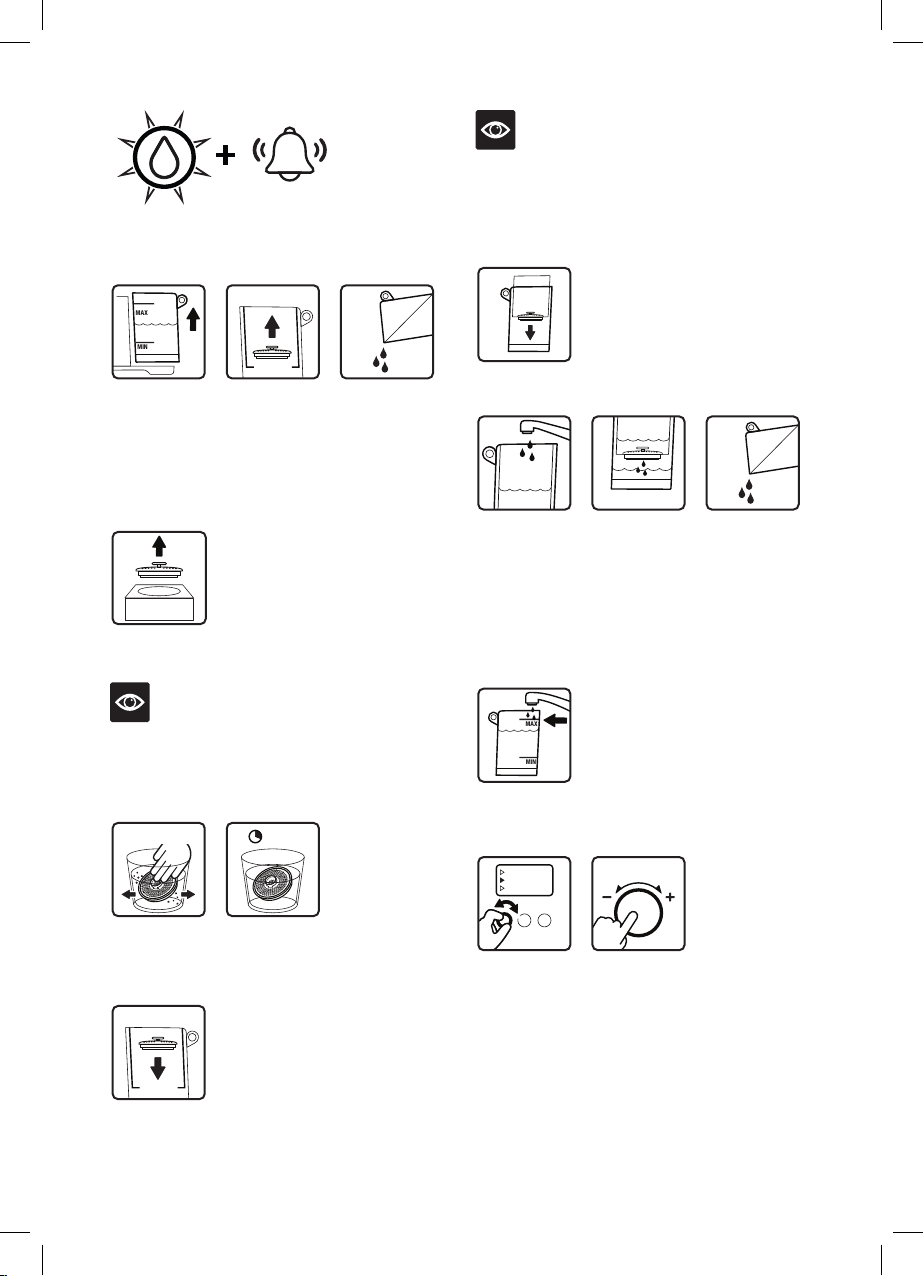
FILL TANK
Appears on the screen when the water tank
level is low. The purifier will not dispense water
until the tank is refilled.
The unit will beep 3 times and FILL TANK
will flash on the LCD screen. The water droplet
light on the START/STOP button will turn to
solid red to alert the user that the water tank
needs to be filled.
Once the unit has been filled, FILL TANK will
no longer illuminate on the LCD screen.
NOTE
Take care when removing the water tank from
the base after use as residual water may drip.
NOTE
• The purifier will not dispense any water while
the tank is below the minimum water level.
• Ensure the water level is always above the
MIN level for optimum flow rate.
TEMP (°C) CONTROL & VOLUME (MLS)
When CUSTOM menu is selected, setting the
temperature (between 45°C-100°C) and the
volume of water dispensed (between 100mL-
1.2L) can be manually adjusted.
For AMBIENT, only the volume of water can
be manually adjusted (between 100-500ml).
HOT BEVERAGE MENU
Press the HOT button to enter the MENU.
Turn the FUNCTION dial to navigate the
menu, then press the dial to select.
NOTES
• Hot water temperature settings are measured
at the heating element, not the dispensed
temperature at the spout or in the cup.
• This appliance is not calibrated for
commercial or scientific use. Temperatures
may vary +/-2°C, which is within range for
optimal brewing for each hot beverage menu.
• The appliance is calibrated at sea level hot
water temperatures. High altitude locations
will have an impact on hot water temperatures
due to low atmospheric pressure.
• When dispensing ambient water, if
START/STOP is not pressed to stop
dispensing, the purifier will automatically stop
after 60 seconds.
• Ambient water temperature will vary. The
temperature dispensed will be influenced by
the external factors surrounding the purifier
itself. An increase in the air temperature will
cause water tank temperature to increase as
well.
• If the water temperature in the tank becomes
too warm, discard and replace with cold tap
water. Water temperature in the tank should
not be dispensed if above 40°C.

11
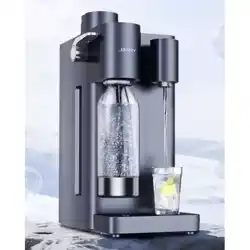
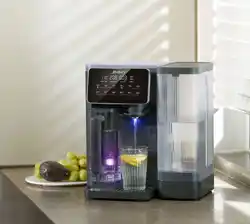
WHAT IS THE AQUASTATION™
WATER PURIFIER HOT?
The Breville AquaStation™ Hot water purifier
when used with the Active360™ 4-stage fast
flow water filtration system, provides cleaner,
great tasting ambient or hot filtered water.
4 distinct levels of filtration, removes
contaminants from water that can cause bad
taste and odour, which may potentially be
harmful to your health.
1. Stage 1- Pre-Sediment Mesh Filter
Filters microplastics and floating particles
2. Stage 2- Ion-Exchange Resin Filter
Filters limescale and metals
3. Stage 3- Activated Carbon Filter
Filters Pesticides and Chlorine
4. Stage 4- Post Filter
Filters fine particles
* 4-stage fast flow filtration tested and/or
certified to remove/reduce microplastics,
floating particles/sediment, pesticides, chlorine,
limescale & heavy metals.
For more information, visit Breville.com
No Plumber Required
The water purifier will start to work as soon
as assembled, water added and connected to
a power source; then simply press to dispense
filtered water. No need to plumb into mains
water.
Filter Life Counter
The AquaStation™ water purifier reminds
you to replace the filter every 90 days or
approximately 200L of water*, whichever
comes first, to ensure the best filtration
performance.
You may choose to change your filter more
frequently in areas with poor water quality.
Filter Reset Replacement Alert
FILTER RESET will flash on the screen to
indicate when it is time to change the filter.
Once the filter is replaced, reset the filter time
to start the filter life countdown.
*The filter change alert is set at 90 days or
approximately 200L of water, whichever
comes first, with performance based on typical
municipal drinking water quality, however,
water quality may vary considerably from one
area to the next which may affect the life of the
water filter and more frequent replacement may
be required.
Last Setting Memory
The purifier will return to the last used default
hot beverage menu selected.
CUSTOM setting will return to the last set
temp and volume unless the power is turned
off.
Removable & Magnetic Drip Tray
The drip tray can easily be removed to
accommodate different sizes of cups and
bottles. The magnetic edge helps to keep the
tray in place.
Water Level Sensor
The water tank is equipped with a floating
sensor which will automatically stop
dispensing when the water level becomes too
low and the Fill Tank indicator will illuminate.
One-way Tank Valve
The water tank has been designed with a
one-way valve so that it can be removed from
the purifier even if water is still in the tank.
Be mindful however that there may be some
residual water droplets when removed from the
base of the purifier.
Features
12
BPA Free*
All parts that come into direct contact with
water are made of BPA Free* materials
* Breville makes its BPA Free claim for this
product based on independent laboratory
testing performed for all the food contact
plastic materials of the product per EU
Commission regulation No 10/2011. BPA Free
Material is used in all parts that come into
contact with food.
WATER QUALITY
As far as contained in tap water, the
contaminants or other substances reduced by
the Activ360™ water filter are not necessarily
in all users' water. Tap water may contain
impurities and heavy metals such as lead,
copper, chlorine, limescale, pesticides and
other contaminants like microplastics which all
lead to impaired taste.
CAUTION
Do not use with water that is microbiologically
unsafe or with water of unknown quality
without adequate disinfection before or after
the system. This product should only be
used with water that has been adequately
chlorinated or disinfected. For use with
municipal cold water only.
13
Assembly
BEFORE FIRST USE
• Remove and safely discard any packaging
material or promotional labels attached
to your water purifier and filter. Check for
any missing or damaged parts as per the
components list.
NOTE
As an important part of our quality control
process, your water purifier has been
individually tested.As a result, you may notice
a small amount of condensation or water
droplets on the inside of the water tank. There
is no need for concern. Please remove and
discard the red silicone rubber cap off the
spout before use.
• Remove the Activ360™ 4-Stage filter from the
water tank and set aside.
• Do not wash the filter or insert into the
upper water tank until ‘Flushing the Breville
AquaStation’ and ‘Preparing the Activ360
Filter’ instructions are completed as found in
this book.
• Place the water purifier on a dry, flat level
surface.
• Wash the water tank lid, upper (pre-filtered)
water tank, lower (filtered) water tank in warm
soapy water with a soft, non-abrasive cloth.
Rinse and dry thoroughly with a clean, soft,
lint-free cloth and return to the purifier.
• Assemble the water tank back onto the power
base.
• Plug the power plug into a 230/240V power
outlet and turn on the power outlet.
IMPORTANT
When moving the water purifier, always lift
from the base using two hands and set down
gently on a flat and level surface.
FLUSHING THE BREVILLE
AQUASTATION
It is important to flush and rinse the dispensing
system before using the water purifier for the
first time. Before first use, it is recommended
to carry out the below steps without the
Activ360™ Water Filter in place.
1. Fit only the larger lower (filtered) water tank
into place on the base of the purifier with
the lid removed.
2. Fill the lower tank with cold tap water to the
MAX level. Never fill past the MAX level.
3. Place a 1L container under the dispensing
spout
4. Press the START/STOP
button once to
start dispensing ambient water until the
container is full, then press the START/
STOP
button once again to stop
dispensing. Discard the collected water.
5. Repeat steps 3-5 until all the water in the
lower tank has been dispensed. The water
purifier will stop dispensing automatically
when the water level is too low or
automatically after 60 seconds.
6. Proceed to the next step, ‘Preparing the
Activ360™ Filter’.
PREPARING THE ACTIV360™ FILTER
Flushing the filter is required every time you
insert a new filter cartridge.
10m
1L
90d
FILTER RESET
SHAKE FILTER
FILTER RESET
FUNCTION
MAX
MIN
MAX
MIN
NEW FILTER
Filter Reset will flash continuously on the
screen to notify after 90 days or 200L of water
filtered as an alert that it is time to replace the
filter cartridge.
14
10m
1L
3x
MAX
MIN
MAX
MIN
90d
SHAKE FILTER
NEW FILTER
3s
3 beeps will sound and the water droplet light
will flash continuously in red.
10m
1L
90d
FILTER RESET
SHAKE FILTER
FILTER RESET
FUNCTION
MAX
MIN
MAX
MIN
NEW FILTER
1. Lift the water tank from the purifier, remove
the lid and set aside. Lifting by the ring,
remove the filter cartridge from the filter
holder and discard any remaining water
inside the water tanks, then separate the
upper tank from the lower tank.
10m
1L
90d
FILTER RESET
SHAKE FILTER
FILTER RESET
FUNCTION
MAX
MIN
MAX
MIN
NEW FILTER
2. Remove the new filter cartridge from its
packaging.
NOTE
It is normal for the filter to appear moist when
removed from its wrapping. This is
condensation from the hygienic steam
sterilisation process.
10m
1L
90d
FILTER RESET
SHAKE FILTER
FILTER RESET
FUNCTION
MAX
MIN
MAX
MIN
NEW FILTER
3. Immerse the filter in a bowl of tap water and
gently shake until there are no air bubbles.
Soak filter in the tap water for 10 minutes.
10m
1L
90d
FILTER RESET
SHAKE FILTER
FILTER RESET
FUNCTION
MAX
MIN
MAX
MIN
NEW FILTER
4. Once soaked, insert the filter into the filter
holder of the upper tank and push down
firmly to secure in place.
NOTE
Make sure the filter is tightly fitted. If the filter
is not pressed in tightly, unfiltered tap water
may flow around the filter into the lower water
tank, or the filter may float up.
10m
1L
90d
FILTER RESET
SHAKE FILTER
FILTER RESET
FUNCTION
MAX
MIN
MAX
MIN
NEW FILTER
5. Place the upper tank into the lower tank.
10m
1L
90d
FILTER RESET
SHAKE FILTER
FILTER RESET
FUNCTION
MAX
MIN
MAX
MIN
NEW FILTER
6. To flush and activate the new filter
cartridge, add 1L of water to the upper water
tank, allowing the water to filter through.
Remove the water tanks and discard the
collected water. Repeat this step once more
so the filter is fully flushed with 2L of water
before use.
10m
1L
90d
FILTER RESET
SHAKE FILTER
FILTER RESET
FUNCTION
MAX
MIN
MAX
MIN
NEW FILTER
7. Once flushed, fill the water tank with tap
water up to the MAX line.
10m
1L
90d
FILTER RESET
SHAKE FILTER
FILTER RESET
FUNCTION
MAX
MIN
MAX
MIN
NEW FILTER
8. Turn the FUNCTION dial until the
indicator reaches FILTER RESET, then
press the FUNCTION dial once to reset the
filter counter. FILTER RESET will no longer
appear on the screen.
9. The purifier is now ready to use.
15
NOTE
When preparing the Activ360™ filter for the
first time use of your AquaStation™, there is no
need to action step 8 for filter reset; once the
filter is installed, the purifier will automatically
begin the filter life counter.
IMPORTANT
• A dirty filter may reduce the performance of
the water purifier.
• The filter is not washable.
• Use only the original Breville filter
specifically intended for use with the
AquaStation water purifiers.
• Filter replacement alert is set to 90 days or
approximately 200L of water, whichever
comes first, however, for higher-than-normal
consumption or poor water quality, more
frequent changing may be required. If you
need to change your filter before the filter
replacement alert activates at 90 days or
approximately 200L, press and hold the
FUNCTION DIAL for 3 seconds, FILTER
RESET will flash on the screen, press the
function dial once to reset the filter once you
have changed the filter cartridge.
NOTE
To exit FILTER RESET mode without reseting
the filter, press and hold the FUNCTION DIAL
once again for 3 seconds.
• Water quality varies considerably from one
area to the next and has an effect on the life
of the water filter cartridge. For optimum
performance, the filter change alert will
activate after 90 days.
NOTE
• No filter or an incorrectly fitted filter may
cause the water purifier to operate less
effectively and/or may cause damage to the
water purifier.
• The filter must be fitted in the filter holder
with the pull ring facing upwards.
• From time to time, small floating black
particles may escape from the filter into the
water. This is a natural carbon fibre which is
food grade safe and not harmful to health.
NOTE
For replacement water filters, visit Breville.com
or contact Breville Customer Service.
16
Operation
OPERATING YOUR
AQUASTATION PURIFIER HOT
1. Ensure the upper pre-filtered water tank is
assembled inside the lower filtered water
tank, and that the water filter cartridge is
correctly fitted into position.
2. Plug into a 230/240V power outlet. The
purifier will beep, the water droplet light
will flash 3 times, the LCD screen will
illuminate, and AMBIENT will display on
the LCD screen to indicate the purifier is in
standby mode.
3. Use the pull ring at the back of the water
tank to assist in lifting it up and away from
the base of the purifier. Fill the pre-filtered
water tank with cold tap water to the MAX
level. Never fill past the MAX level. Once
water has filtered into the filtered water
tank, top up the tanks until the water level is
set to the MAX level.
4. Ensure the water tanks are assembled to the
purifier and place a cup of choice onto the
drip tray, or alternatively, remove the drip
tray to accommodate large glasses.
NOTE
Always ensure the water tanks are filled to the
MAX level for optimum flow of water from the
spout. Ensure the water tanks are filled above
MIN water level, or as soon as the FILL TANK
alert appears on the LCD display.
If the water level falls below the MIN tank
marking, the water sensor will automatically
stop dispensing and the Fill Tank indicator will
appear on the screen.
Regularly check and discard any water that
might accumulate in the drip tray.
TURNING OFF THE PURIFIER
Turn off at the power outlet.
IMPORTANT
Turning the purifier off at the power outlet will
delete the 'last setting' memory function.
NOTE
Discard any filtered water that has been left
sitting for several days or more. This will
ensure you have cleaner, great-tasting water.
If your filter has been unused for a long period
of time, it is recommended to resoak the filter
for 10 minutes before use and clean the water
tanks as per the cleaning instructions found in
this book.
STANDBY MODE
When the unit is plugged into the power outlet,
the water droplet light will flash 3 times, the
display screen will illuminate and AMBIENT
will appear on the display screen to indicate
the purifier is ready for use.
The purifier will automatically go into energy-
saving standby mode after 5 minutes if not
used. The water droplet light will turn off when
in standby mode.
To awaken the purifier, press any button or
press/turn the FUNCTION dial once; one long
beep will sound, the water droplet light will
illuminate white and flash rapidly 3 times to
indicate that the purifier is ready to use.
17
Ambient Water in Operation
- Without setting volume
1. Press the START/STOP button to instantly
dispense filtered ambient water. Press
START/STOP button once more to stop
dispensing water.
NOTE
If the START/STOP button is not pressed a
second time to stop dispensing water, the unit
will automatically stop after 60 seconds.
NOTE
Always ensure the correct sized cup/glass is
placed under the spout to collect the selected
volume of dispensed water.
Ambient Water in Operation
- When setting volume
1. Rotate the FUNCTION dial clockwise/anti-
clockwise for the default volume to appear
on the LCD screen; the 250ml default
volume will flash on the screen. Rotate the
FUNCTION dial clockwise or anticlockwise
to adjust the volume, then press the dial to
confirm the selection.
2. Press START/STOP button once to start
dispensing filtered ambient water at
the set volume. AMBIENT will flash on
the LCD screen, the water droplet light
will illuminate white to indicate water is
dispensing, and the FUNCTION dial light
will turn off.
3. Water will automatically stop dispensing
once the set volume has been reached and
the water droplet light will turn off. The
purifier will return to standby mode.
Hot Menu - Black Tea, Coffee,
White Tea & Green Tea
1. Press the HOT water button once; the red
light around the HOT button will illuminate
and HOT will display on the screen. The hot
beverage programmed menu will appear on
the screen with the indicator beside the first
menu option. The default temp and volume
will appear on the LCD screen.
NOTE
The water droplet white light will flash until
START/STOP is pressed to start dispensing.
2. Turn the FUNCTON dial to scroll through
the pre-set menu options. The top digits
on the LCD screen indicate the hot water
temperature and the bottom digits indicate
the volume for the menu option chosen.
3. Press START/STOP button once to
dispense at the default volume (250ml), or
to adjust volume, press the FUNCTION
dial once. The Volume digits on the LCD
screen will begin to flash. Rotate the
FUNCTION dial clockwise or anticlockwise
to adjust the volume, then press the dial to
confirm the selection.
4. Press START/STOP button once to begin
dispensing the filtered hot water at the set
temp and volume. The red light around the
HOT button will be remain on, the selected
menu option and the word HOT will flash
on the LCD screen. The water droplet white
light will illuminate solid while water is
dispensing.
5. Water will automatically stop dispensing
once the set volume has been reached. The
red light around the HOT button and the
water droplet light will both turn off. The
purifier will return to standby mode.
18
NOTE
This appliance is not calibrated for commercial
or scientific use. Temperatures may vary
by +/-2°C, which is within range for optimal
brewing for each tea menu. Hot temperatures
are indicative of temperature at the heating
element, not at the spout or in the cup.
NOTE
The appliance is calibrated at sea level hot
water temperatures. High altitude locations
will have an impact on hot water temperatures
due to low atmospheric pressure.
Hot Menu - Custom
This setting allows for customising of temp
and volume to suit any hot beverages.
1. Press the HOT water button once; the red
light ring will illuminate with the indicator
beside the first pre-set option on the hot
beverage menu, and the default temp and
volume will appear on the LCD screen.
NOTE
The water droplet white light will flash until
START/STOP is pressed to start dispensing.
2. Turn the FUNCTION dial until the
indicator on the LCD screen reaches
CUSTOM. Press the dial to confirm
selection.
3. When the TEMP digits on the LCD screen
begin to flash, rotate the FUNCTION dial
clockwise or anticlockwise to adjust the
temperature between 45-100°C. Press the
dial to confirm the selection.
4. When the Volume digits on the LCD screen
begin to flash, rotate the FUNCTION dial
clockwise or anticlockwise to adjust the
volume between 45-100°C. Press the dial to
confirm the selection.
5. Press START/STOP button once to start
dispensing the filtered hot water at the
customised temperature and volume. The
red light around the HOT button will be
remain on, the selected menu option and
the word HOT will flash on the LCD screen.
The water droplet white light will illuminate
solid while water is dispensing.
6. Water will automatically stop dispensing
once the set volume has been reached. The
red light around the HOT button and the
water droplet light will both turn off. The
purifier will return to standby mode.
NOTE
• The purifier will return to the last custom
setting used.
• To change your CUSTOM setting at any
time, repeat steps 1 -4 above.
• If the purifier is disconnected from the power,
the CUSTOM memory will reset to default.

19
TEA TYPES
There are four main types of tea from the
tea plant camellia sinensis. The picking and
processing methods determine the type of tea
finally produced.
Black Tea
Black tea is the most common type of tea
worldwide. It is made by fermenting the
harvested leaves for a couple of hours before
heating or drying. This oxidation darkens the
leaves and increases the amount of caffeine. Of
all the teas, black tea has the strongest colour
and flavour.
White Tea
White tea is the rarest and the most exclusive
tea. White tea consists of the whitish buds of
the tea plant which are steamed then left to dry
naturally. This tea is low in caffeine and has a
slightly sweet flavour.
Green Tea
Green tea makes up approximately ten percent
of the world’s tea. The leaves are picked, rolled
and dried before they can go brown. Green
tea has a distinctive aroma and has a slight
astringent taste.
Oolong Tea
Oolong Tea is semi fermented, which means
leaves are processed immediately after picking.
They only have a short period of oxidation
which turns the leaves from green to red/
brown. Its leaves have a floral, fruity quality
and hence have a delicate fruity taste. It is
recommended not to drink Oolong tea with
milk, sugar or lemon.
Herbal Infusions or Tisanes
Herbal infused teas are not produced from
the tea plant, but from flowers, leaves, roots
or seeds. Common herbal beverages are
chamomile, peppermint, fennel, rose hip, and
lemon verbena.
Herbal infusions that do not contain tea will
generally not become bitter with extended
brews. These can often be brewed with boiling
water 3 times without jeopardising the taste.
Blends
Tea producers make blends by combining
different types of teas, often in order to achieve
flavour consistency from one season to the
next. Common black tea blends include
English Breakfast, Earl Grey, Irish Breakfast,
and Russian Caravan.
Brewed tea leaves make an ideal garden
fertilizer and help condition the soil.
TEA STORAGE
• Teas stored inside a vacuum sealed bag can
be stored for up to two years, depending on
the quality and grade of tea. Once opened, tea
should be stored in an airtight container and
kept in a dry and dark place.
• Once opened, black teas will last longer than
green and oolong teas, but all tea needs to be
stored in ideal conditions.
• You can tell when tea is past its best if it has
lost its aroma and will create either a bitter or
dull tasting cup.
TIPS FOR OPTIMAL TEA BREWING
• Water quality affects taste. For best results
use filtered water.
• Finer tea particles and leaves will infuse more
quickly than whole leaves. As a result, finer
tea particles often release too much tannin
too quickly, creating a harsher taste. Adjust
the brewing time until desired strength is
achieved.
Suggested Water to Tea Ratio
CUPS / mL Tea (Teaspoons)
Approx. 2 Cups/500mL 2 tsp
Approx. 3 Cups/750mL 3 tsp
Approx. 4 Cups/1000mL 4 tsp
Approx. 5 Cups/1200mL 5 tsp
Tea Insights
20
After regular use, hard water can cause
mineral build up in and on many of the inner
functioning components, reducing the water
flow, water temperature, power of the unit and
the taste of the water.
For safe and efficient operation of your purifier,
it is important to descale regularly.
Breville recommends conducting a descaling
cycle no longer than 6 month intervals.
6M
DESCALE
DESCALE
1L
1L
1L
1L
MAX
MIN
DESCALE
2
DESCALE
FUNCTION
FUNCTION
DESCALE
MAX
MIN
1L
1L
1L
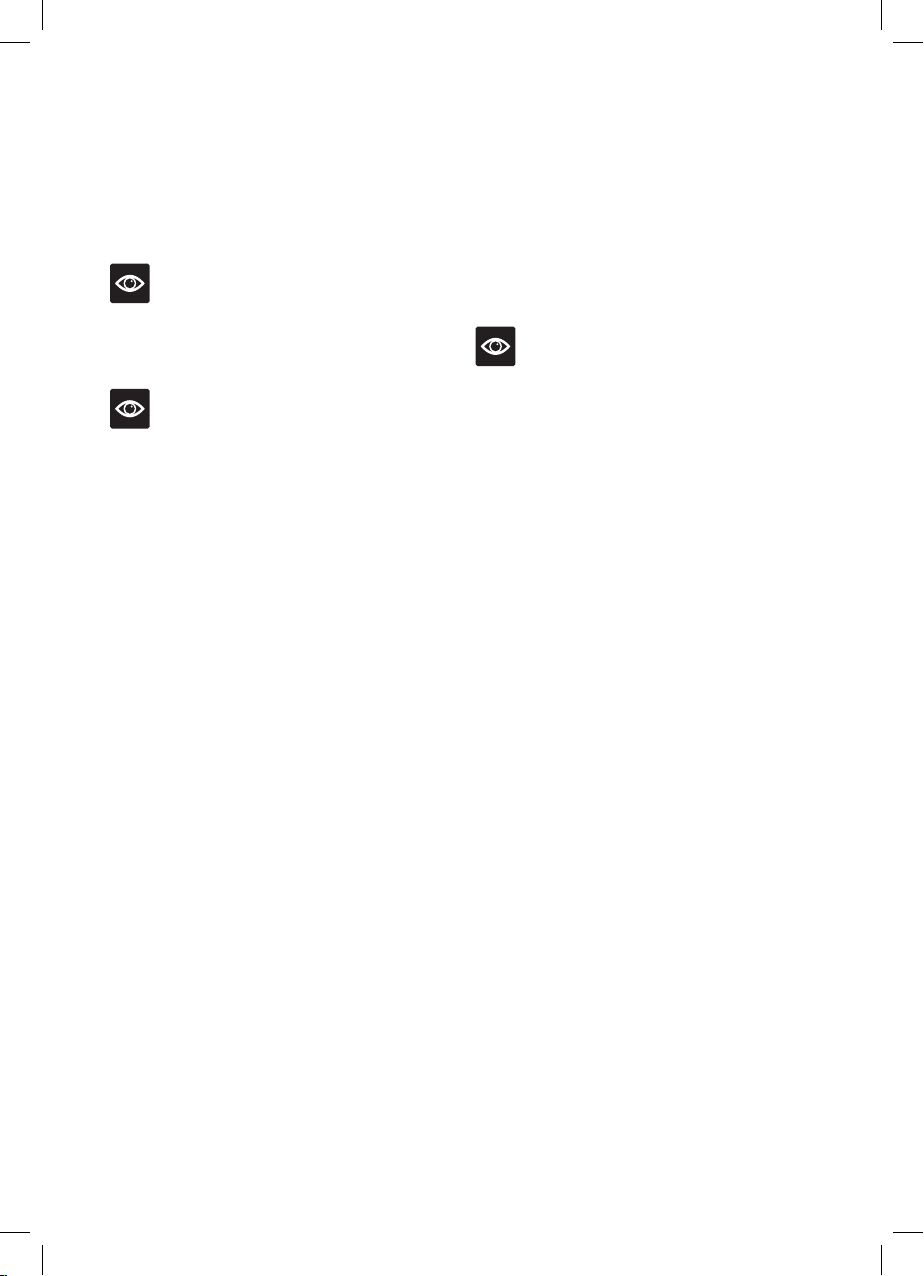
To assist, every 6 months , the LCD screen will
display a DESCALE alert.
Descaling is a 3 step process. Once the descale
cycle is complete, 2 rinse cycles will follow.
DESCALE will flash on the LCD screen during
the entire process.
6M
DESCALE
DESCALE
1L
1L
1L
1L
MAX
MIN
DESCALE
2
DESCALE
FUNCTION
FUNCTION
DESCALE
MAX
MIN
1L
1L
1L
1. To descale, remove the water tanks from
the base and remove the filter. Discard any
remaining water in the water tank.
6M
DESCALE
DESCALE
1L
1L
1L
1L
MAX
MIN
DESCALE
2
DESCALE
FUNCTION
FUNCTION
DESCALE
MAX
MIN
1L
1L
1L
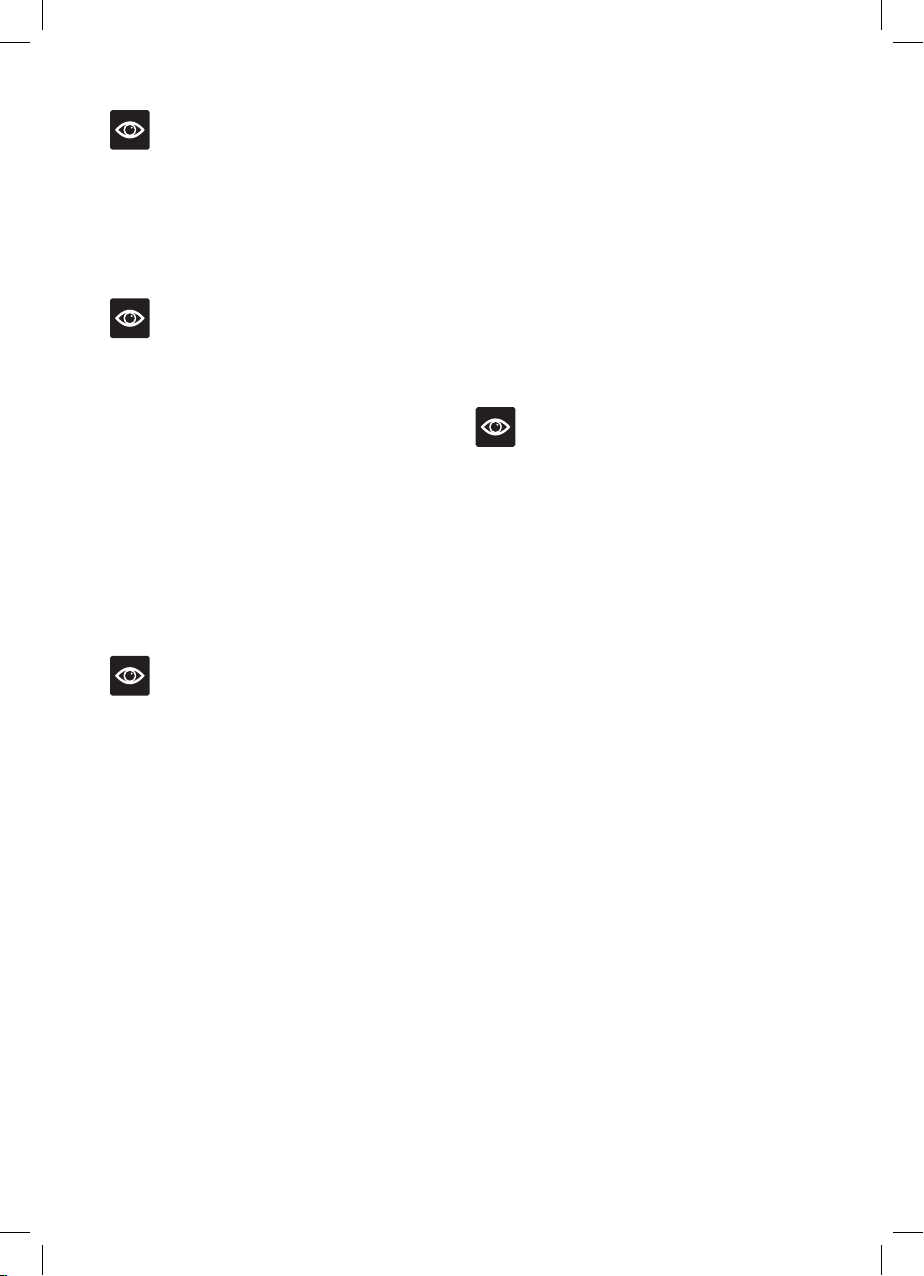
2. Place 100mLs of Breville descale solution or
100grams of descale powder into the water
tank and fill with tap water to the marked
DESCALE line (1L). Reassemble the water
tank to the base. Turn the FUNCTION dial
until the indicator reaches DESCALE.
*Descale solutions sold separately.
6M
DESCALE
DESCALE
1L
1L
1L
1L
MAX
MIN
DESCALE
2
DESCALE
FUNCTION
FUNCTION
DESCALE
MAX
MIN
1L
1L
1L
6M
DESCALE
DESCALE
1L
1L
1L
1L
MAX
MIN
DESCALE
2
DESCALE
FUNCTION
FUNCTION
DESCALE
MAX
MIN
1L
1L
1L
3. Remove the drip tray and place a
1L container under the spout. Press
FUNCTION dial to start the descaling
cycle. DESCALE on the LCD screen with
begin to flash.
6M
DESCALE
DESCALE
1L
1L
1L
1L
MAX
MIN
DESCALE
2
DESCALE
FUNCTION
FUNCTION
DESCALE
MAX
MIN
1L
1L
1L
4. Descaling is a 3 step process. Once the
descale cycle is complete, 2 rinse cycles
will follow. DESCALE will flash on the
LCD screen during the entire process.
During descaling, the 1L of water with
added solution will dispense from the tank
automatically. DESCALE will flash on the
LCD screen.
NOTE
Following the descaling solution, 1 & 2 will
appear on the LCD screen indicating each
rinse cycle.
6M
DESCALE
DESCALE
1L
1L
1L
1L
MAX
MIN
DESCALE
2
DESCALE
FUNCTION
FUNCTION
DESCALE
MAX
MIN
1L
1L
1L
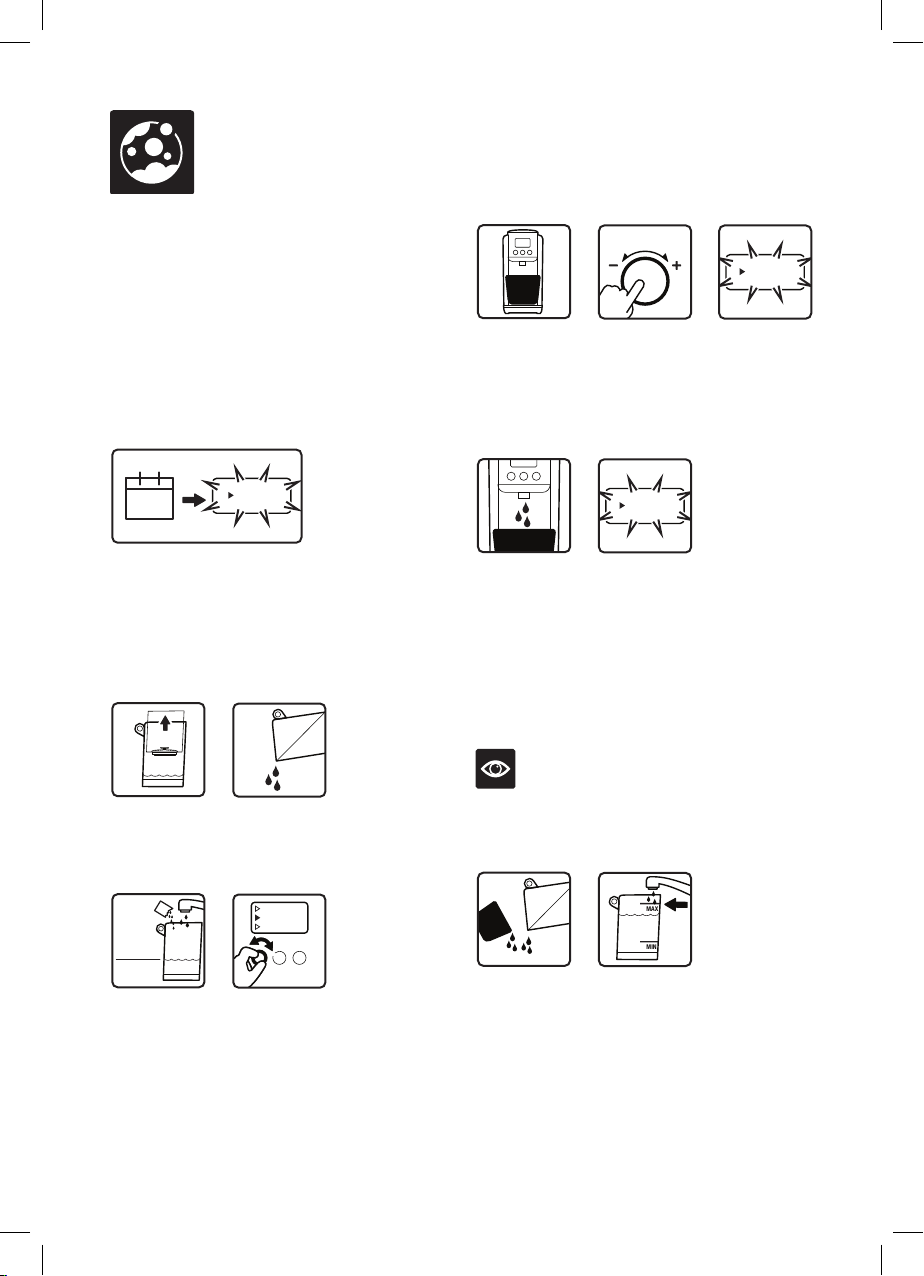
5. Empty the 1L collection container and
discard any remaining descale solution
from the water tank. Fill water tank with tap
water to the MAX line.
Descaling
21
NOTE
Descaling water is not safe for plants, the
descale solution is citric acid, Citric acid
is below 4.0, meaning that it is acidic and
potentially corrosive. Therefore, applying
enough citric acid to a plant's water or soil
will create an environment unsuitable for
the plant.
6M
DESCALE
DESCALE
1L
1L
1L
1L
MAX
MIN
DESCALE
2
DESCALE
FUNCTION
FUNCTION
DESCALE
MAX
MIN
1L
1L
1L
6. Return water tank back to the base and
place the 1L container under the spout.
6M
DESCALE
DESCALE
1L
1L
1L
1L
MAX
MIN
DESCALE
2
DESCALE
FUNCTION
FUNCTION
DESCALE
MAX
MIN
1L
1L
1L
6M
DESCALE
DESCALE
1L
1L
1L
1L
MAX
MIN
DESCALE
2
DESCALE
FUNCTION
FUNCTION
DESCALE
MAX
MIN
1L
1L
1L
1
7. Press the FUNCTION button to start 1st
rinse. 1 on the LCD screen will begin to flash
to indicate that the 1st cycle is in progress.
The water will automatically dispense.
6M
DESCALE
DESCALE
1L
1L
1L
1L
MAX
MIN
DESCALE
2
DESCALE
FUNCTION
FUNCTION
DESCALE
MAX
MIN
1L
1L
1L
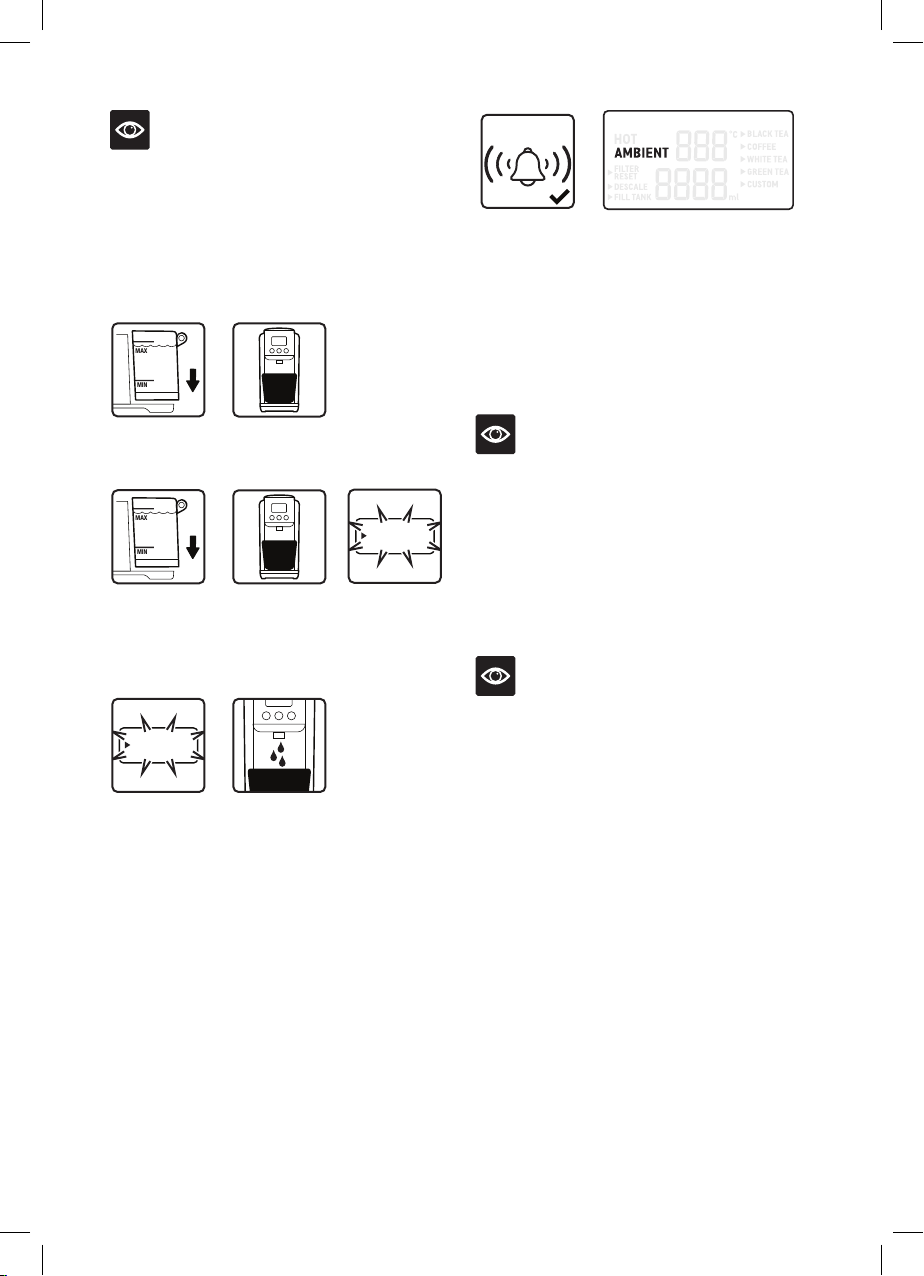
8. Once the 1st rinse cycle is complete, the
purifier will sound a long beep and 2
will appear on the LCD screen. The word
DESCALE will continue blinking on the
LCD screen.
9. Empty the 1L collection container and
then replace under the spout. Press the
FUNCTION button once to start the 2nd
rinse cycle. 2 on the LCD screen will begin
to flash to indicate that the 2nd cycle is in
progress.
6M
DESCALE
DESCALE
1L
1L
1L
1L
MAX
MIN
DESCALE
2
DESCALE
FUNCTION
FUNCTION
DESCALE
MAX
MIN
1L
1L
1L
10. The purifier will automatically stop rinsing
and will sound two long beeps once a
sufficient amount of water has been
dispensed. The purifier will enter standby
mode and DESCALE will no longer appear
on the LCD screen.
11. Remove and clean the drip tray and water
tank.
NOTE
• If descaling is required more regularly than
when the auto DESCALE alert appears on the
screen, press and hold the HOT button for 3
seconds for the word ‘DESCALE’ to appear on
the screen, then follow descale steps 1-11.
• DO NOT turn off the power during descaling
• The descale process cannot be cancelled until
it is finished
NOTE
Breville recommend using the following
Breville descalers:
- Eco Liquid Descaler 2 x 120ml
Model: BES009CLR
visit Breville.com or contact Breville Customer
Service to order.
22
Care, Cleaning &
Storage
CAUTION
To prevent damage to the appliance, do not
use alkaline or abrasive cleaning agents, steel
wool or scouring pads as these can damage the
surface of the unit. Do not place any part of this
appliance in the dishwasher.
CLEANING THE AQUASTATION
1. Remove the plug from the power outlet
before cleaning.
2. Discard any water in the water tanks, then
separate the pre-filtered water tank from
the filtered water tank. Remove the filter
cartridge from the filter holder.
3. Wipe the water tanks with a clean, damp,
lint-free cloth. The filter is not washable.
CLEANING THE OUTER HOUSING
• Wipe with a soft, damp cloth followed by a
soft, dry cloth to polish.
• Alternatively, purchase a stainless steel
cleaner such as Breville's Stainless Steel
Cleaner & Polish and follow directions.
• Do not use abrasive cleansers, pads or cloths
which can scratch the surface.
NOTE
For Breville's Stainless Steel Cleaner & Polish,
visit Breville.com or contact Breville Customer
Service.
CLEANING THE WATER SPOUT
Residue build-up or foreign substances, such
as dust or lint, may accumulate in the water
outlet. Clean the spout periodically using a soft
brush (not included).
CLEANING THE DRIP TRAY
The drip tray should be removed, emptied and
cleaned after each use. Empty the tray before
removing the top grill and cleaning.
1. Remove the drip tray from the purifier and
discard any water.
2. Separate the top grill from the drip tray.
3. Wash the drip tray and grill in warm soapy
water and dry thoroughly.
4. Place the grill back onto the drip tray then
push the assembled drip tray back into
position in front of the purifier using the
magnetic connection.
WARNING
To protect against electric shock, do not
immerse cord, plug or unit in water or any
other liquid or allow moisture to come into
contact with these parts.
STORAGE
Remove the plug from the power outlet.
Follow the ‘Care & Cleaning’ instructions,
ensuring the unit is completely empty, clean
and dry before storing. Stand the unit upright.
Do not store anything on top. If stored for a
long period, we recommend following the
‘Flushing the AquaStation™’ and ‘Preparing the
Activ360 Filter' instructions found in this book
before using the unit again.
ERROR MODE
If your unit displays Er on the LCD Screen,
contact Breville Customer Service. See
Troubleshooting for more details.
23
PROBLEM/Error Code
Displayed on Screen
POSSIBLE CAUSE WHAT TO DO
Slow water flow rate
•
Aging of pump or inlet at the
base of the purifier is clogged
•
Contact Breville Customer Service
Small amounts of black
particles in water tank
•
These are small pieces of
carbon from the filter. These
carbon particles are food grade
and are not harmful. They will
not impair the performance of
your filter or unit.
•
Flush your water purifier and water
filter cartridge. Refer to ‘Flushing the
Breville AQUASTATION™’ (page 12)
and ‘Preparing the Activ360 Filter'
(page 12)
NOTE: Some carbon fibre residual
may still be present after flushing the
water purifier and filter.
START/STOP
Button does not respond
•
The unit is not connected to
the power
•
Plug in to a usable power outlet and
turn power on
Leakage from water tank
•
The water tank is filled beyond
the maximum water level
•
Tank is not firmly pushed into
position
•
Ensure water is only up to the MAX
water level marking. If leakage
continues, please contact Breville
Customer Service
•
Replace the water tank back on the
machine, pressing down to ensure
that it is properly positioned and
attached to the machine.
Odd taste of the water
•
The filtered water is not used for
a long time
•
The filter has reached end of life
•
Discard the remaining water in the
water tank and refill with fresh tap
water. Depending on the length of
time, the filter may require re-flushing
•
Replace with new filter
"FILTER RESET" flashing
on LCD screen.
•
Filter needs to be changed
or filter reset has not been
actioned
•
Change the filter if required, turn the
FUNCTION dial until the indicator
on the LCD screen reaches the
FILTER RESET function and press
ADJUST/SET button once to reset.
LO
•
Water temperature in water
tank less than 5 °C
•
Fill water between 5 °C to 40 °C
HI
•
Water temperature in water
tank is higher than 40 °C
•
Fill water between 5 °C to 40 °C
E03
•
Heating element malfunction
•
Contact Breville Customer Service
E04
•
Dry boil protection
•
Turn the unit off at the power and
Contact Breville Customer Service
If you cannot remedy problems by using the troubleshooting chart above,
contact Breville Customer Service.
Troubleshooting

Breville Customer Service Centre
Breville, the Breville logo, AquaStation and Activ360 are trademarks of Breville Pty Ltd. All other brands may be trademarks of their
respective owners. Breville's products are distributed in New Zealand under licence A.B.N. 98 000 092 928.
Approved by the appropriate electrical supply authorities.
Made in China to our specifications.
Due to continued product improvement, the product illustrated on this carton may vary slightly from the actual product.
LWA200 E22
Australian Customers
Phone: 1300 139 798
Web: www.breville.com
New Zealand Customers
Phone:
0800 273 845
Web: www.breville.com