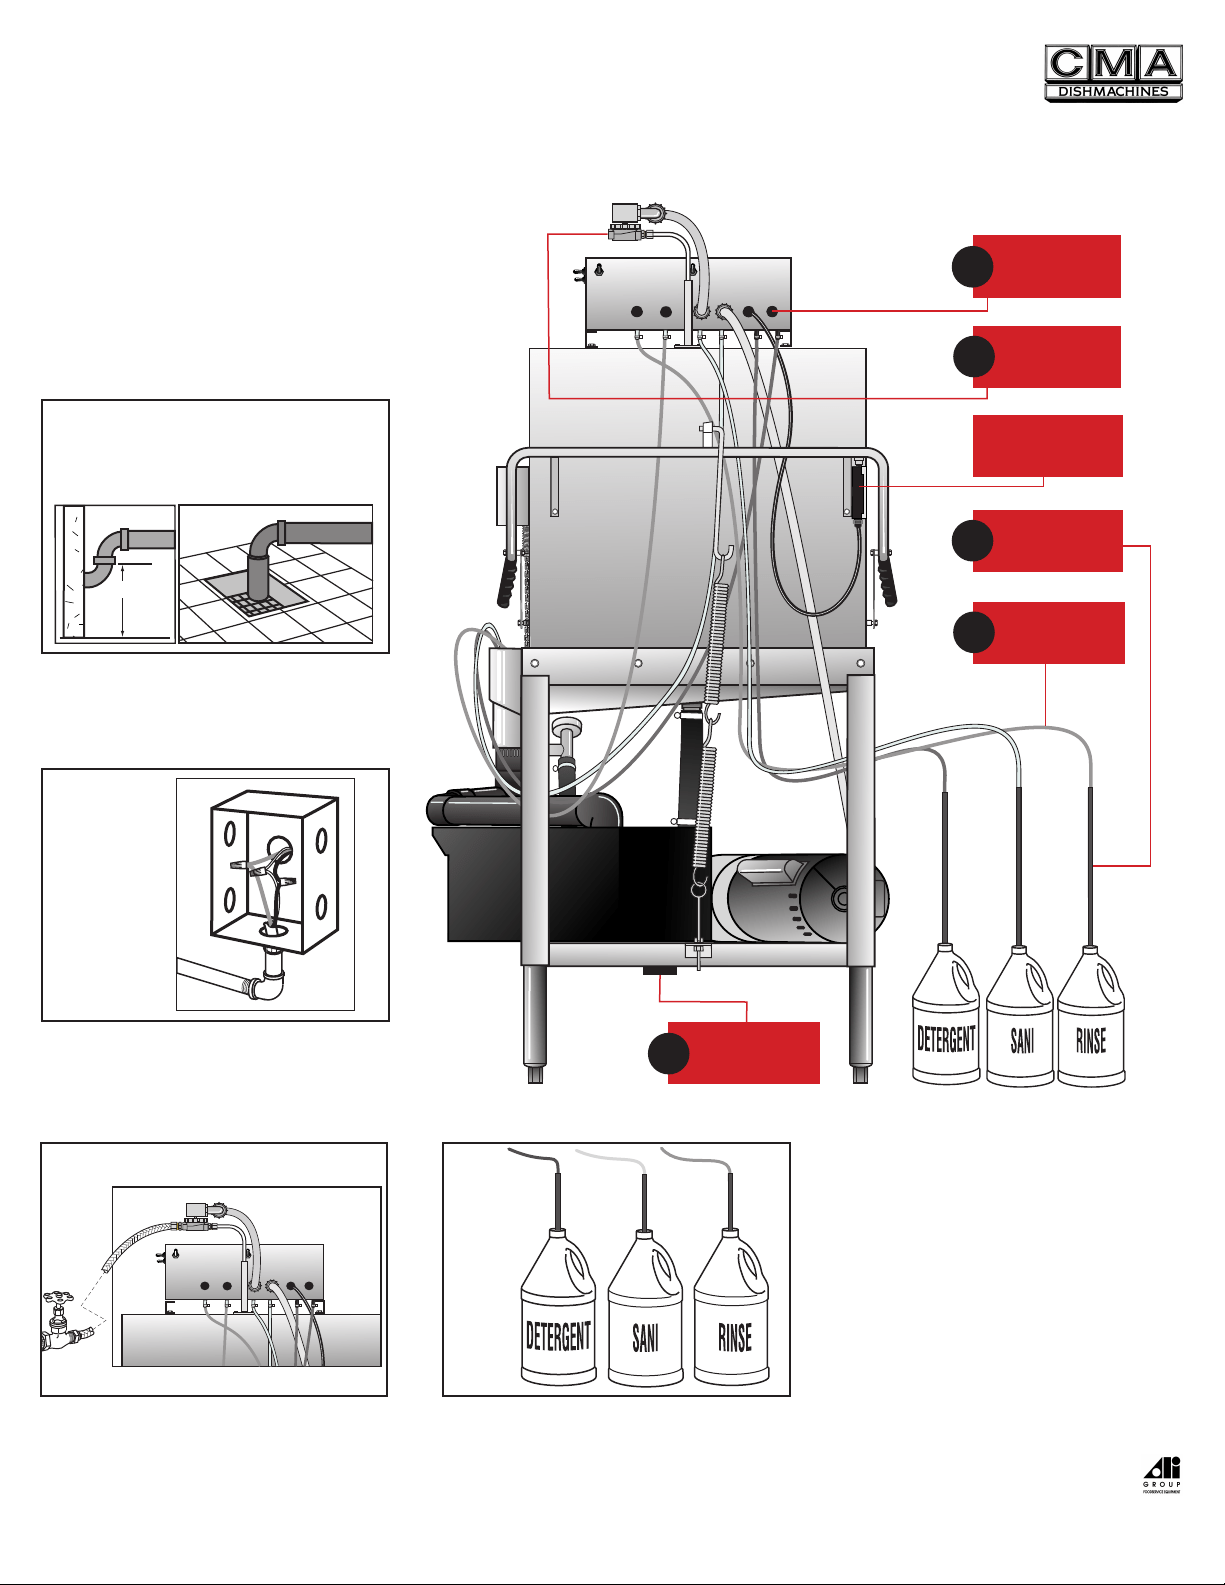
DRAIN HOSE
HARD WIRE
FOUR WIRE
POWER SUPPLY
1
2
3
TUBE
STIFFENER
AUTO START
SWITCH
POWER SWITCH
CHEMICAL
TUBING
2" DRAIN
OUTLET
1/2" WATER
INLET
3
HARD WIRE
POWER SUPPLY
2
4
1
Models EAH, EC, EAH-T, EC-T
Quick Setup
Instructions
800-854-6417
WARNING: Electrical and plumbing connections
need to be made by a licensed service person
and comply with all Federal, State and Local
Health, Electrical, Plumbing and Safety codes.
10-2007
3
STEP
Insert tube stiffener with chemical tubing
into each corresponding chemical
dispensers.
BLUE
RED
WHITE
4
STEP
1
STEP
WALL
DRAIN
8"
FLOOR DRAIN
Connect a 2" drain pipe (not supplied)
from scrap accumulator to floor or
wall drain.
Connect hard wire power supply from
dishmachine to power box.
2
STEP
Connect dishmachine to hot water source
(minimum 120° -140°
temperature
required).
4
4
WHITE
BLUE
RED
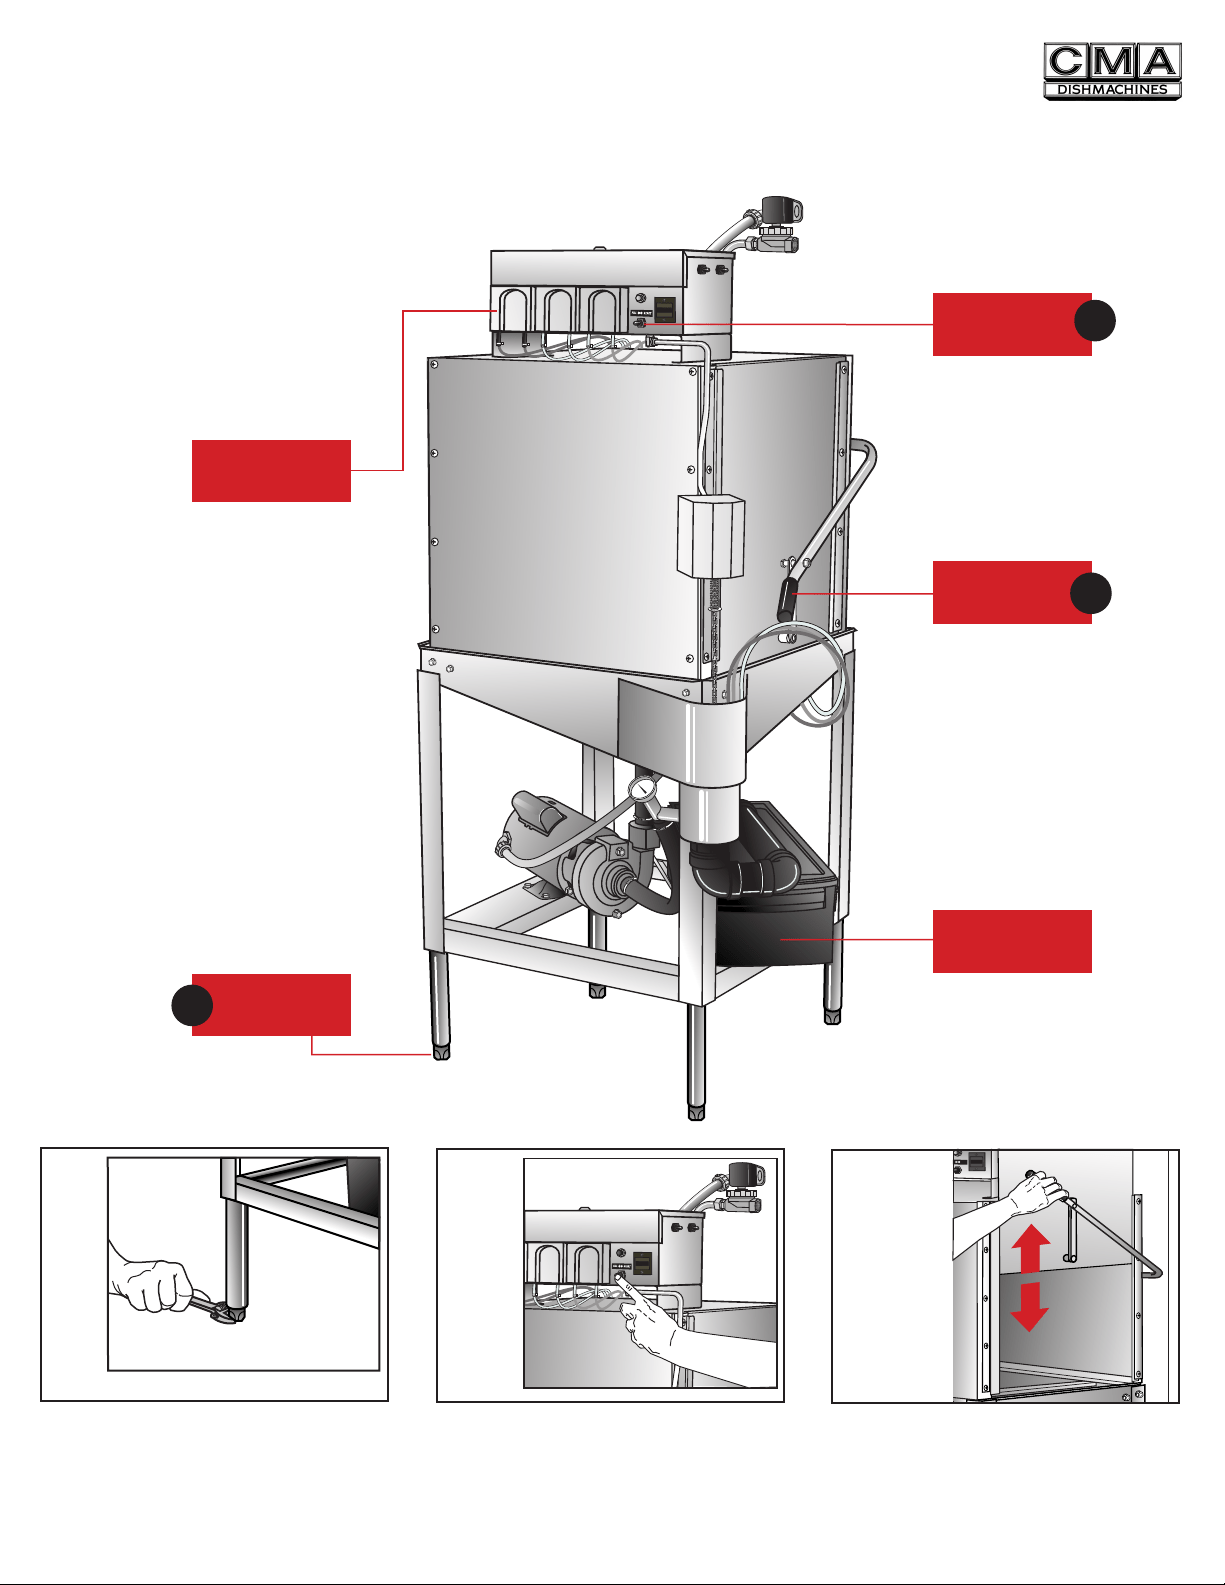
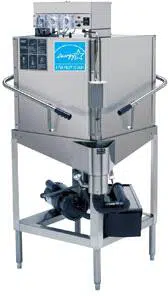
MODEL "E" FRONT VIEW
POLY PRO
TM
SCRAP
ACCUMULATOR
PERISTALTIC
PUMP
FILL/START
SWITCH
6
DOOR HANDLE
7
LEVELING
LEGS
5
800-854-6417
10-2007
WARNING: Electrical and plumbing connections
need to be made by a licensed service person
and comply with all Federal, State and Local
Health, Electrical, Plumbing and Safety codes.
Models EAH, EC, EAH-T, EC-T
Quick Setup
Instructions
000000
Level dishmachine by adjusting leveling
legs. Dishmachine must be level front and
back to ensure proper performance.
5
STEP
000000
6
STEP
FI
LL
000000
START
7
STEP
Open dishmachine doors completely.
Closing the doors will automatically activate
the machine.
Press the "FILL/START" switch. Hold in the
"FILL" position until the water overflows
into the scrap accumulator.