Loading ...
Loading ...
Loading ...
7
Converting Type 1 Pressure
Regulator for Use with LP/Propane
This cooktop arrives from factory adjusted for use with natural gas. If using LP/
propane gas, cooktop must be converted.
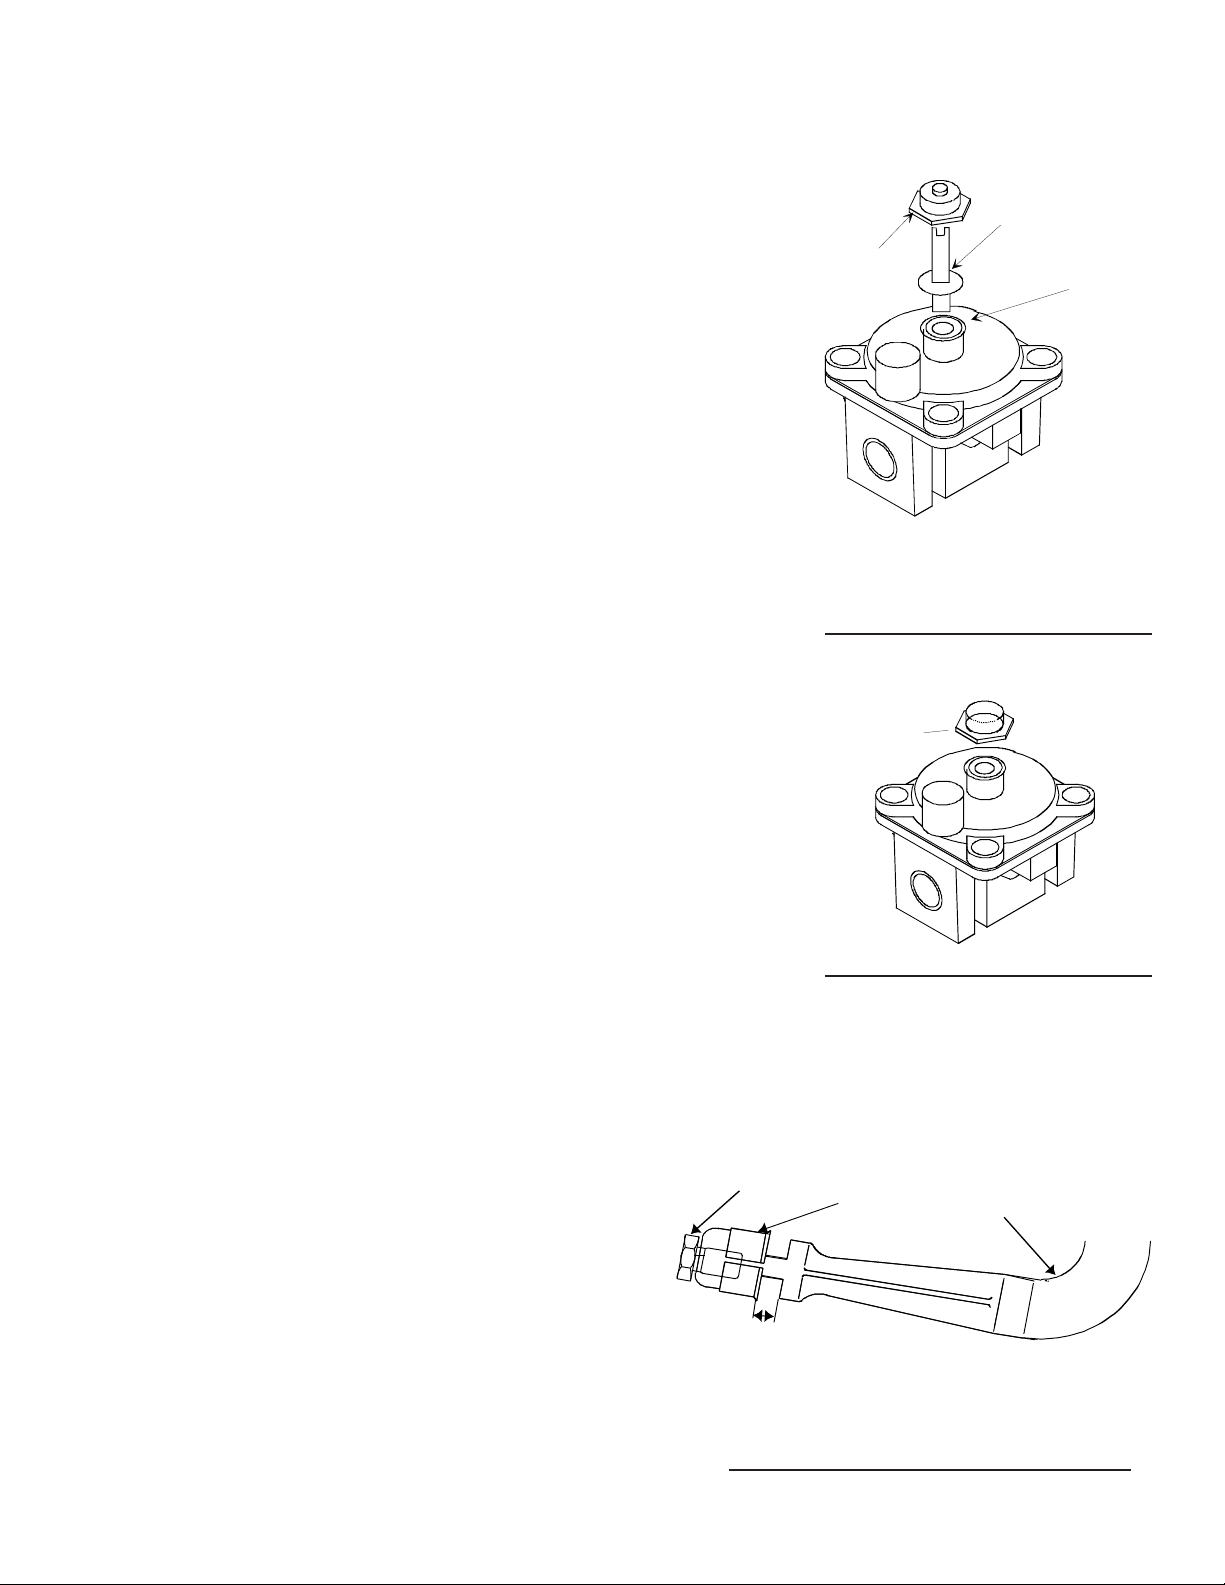
1. Remove pressure regulator cap using
5
/8" wrench.
2. Remove plastic insert from pressure regulator cap.
• Plastic insert fits tightly in cap.
3. Reverse plastic insert and carefully push plastic insert firmly into hole in
pressure regulator cap.
• Insert must show “LPG10” or “LP10”.
4. Place pressure regulator cap on pressure regulator and tighten.
• Insert should not disturb spring in body of regulator.
Installation
A
B
C
A—Cap
B—Plastic Insert (LP setting)
C—Spring Location
Type 1 Pressure Regulator
LP
Cap
Converting Burners for Use with
LP/Propane
1. Remove control knobs, grates, caps, and burner bowls.
2. Remove burners by removing burner screw with phillips
screwdriver. Unplug burners from burner wires.
3. Lift maintop off burner box to expose air shutters.
• Orifice hoods will be visible.
4. Turn orifice hoods clockwise approximately 1
1
/2 to 2
turns (close) until snug against pin.
• Do not overtighten hoods to avoid damaging hoods.
5. Reassemble cooktop.
6. Adjust burner flame if necessary.
• See “Adjusting Surface Burner Flame” section.
Type 2 Pressure Regulator
Converting Type 2 Pressure
Regulator for Use with LP/Propane
1. Remove pressure regulator cap using wrench.
2. Reverse pressure regulator cap.
• Cap must show “LP”.
3. Place pressure regulator cap on pressure regulator and tighten.
A
B
C
1/8" nominal
A—Orifice Hood
B—Air Shutter
C—Venturi Tube
Converting Burners for Use with LP/Propane
Loading ...
Loading ...
Loading ...