Loading ...
Loading ...
Loading ...
“Speed-Seal
™
” Connection
Note: The “Speed-Seal” System should
only be used on 24-Volt sprinkler timers
with Class II circuits. All wiring must
conform to applicable local codes.
1. Disconnect power to your sprinkler
timer
2. Run sprinkler wire (use 16ga–20ga
wire) from your timer to the
manifold assembly
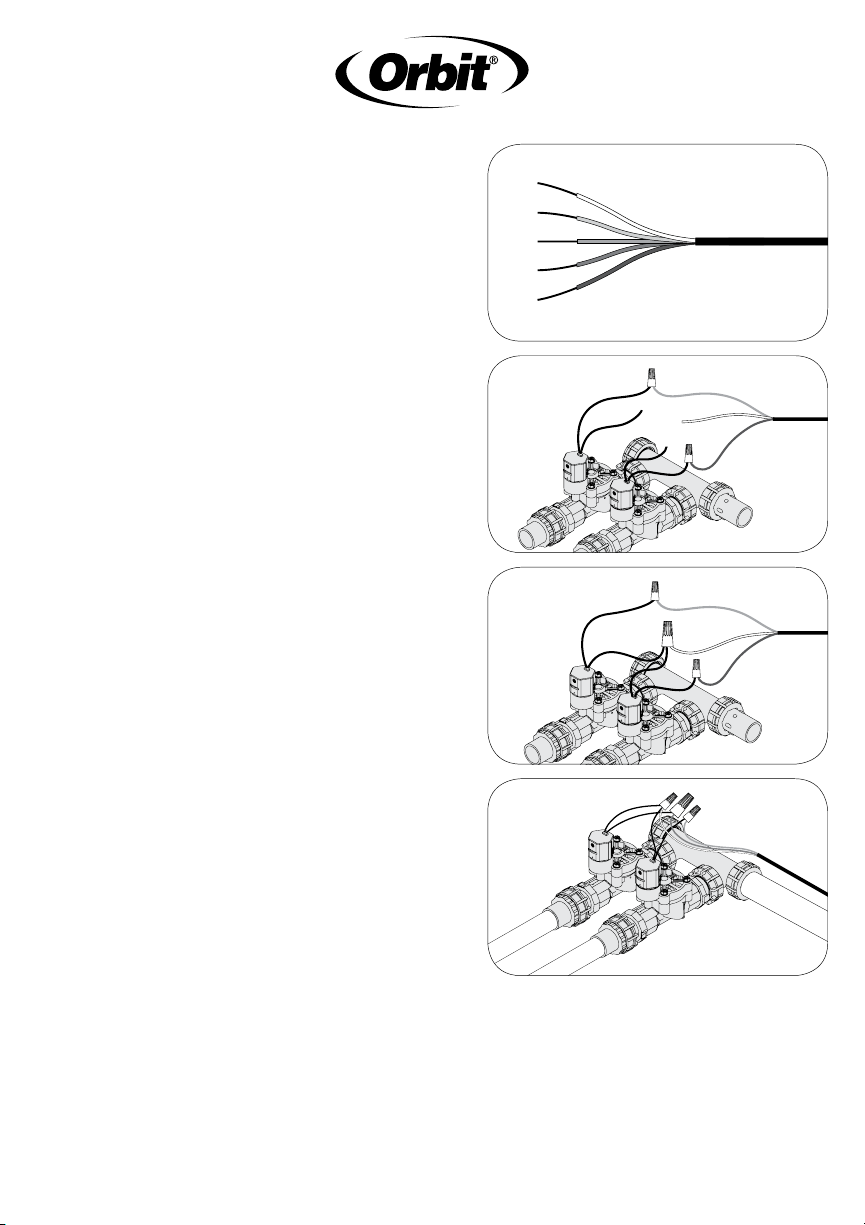
3. Remove 4"–5" of the outer
insulation of the sprinkler wire
Warning: Avoid cutting into the
wires inside
4. Remove 7/8"–1" of insulation from
each individual wire (Figure 6)
5. Insert one wire from the valve and a
colored wire from the timer into the
Speed-Seal connector nut. One wire
should be used for each zone with
an additional wire to be used for a
common (for ease of identification,
use the white wire as the common).
Note: The wire should hold firm
when lightly pulled. If the wire
moves freely, remove the wire and
repeat Step 5. (Figure 7)
6. Take the second wire from each
valve and the white common wire
from the timer and twist them into
the wire nut provided Speed-Seal
connector nuts.
Figure 8
Figure 9
Figure 6
Figure 7
Loading ...
Loading ...
Loading ...