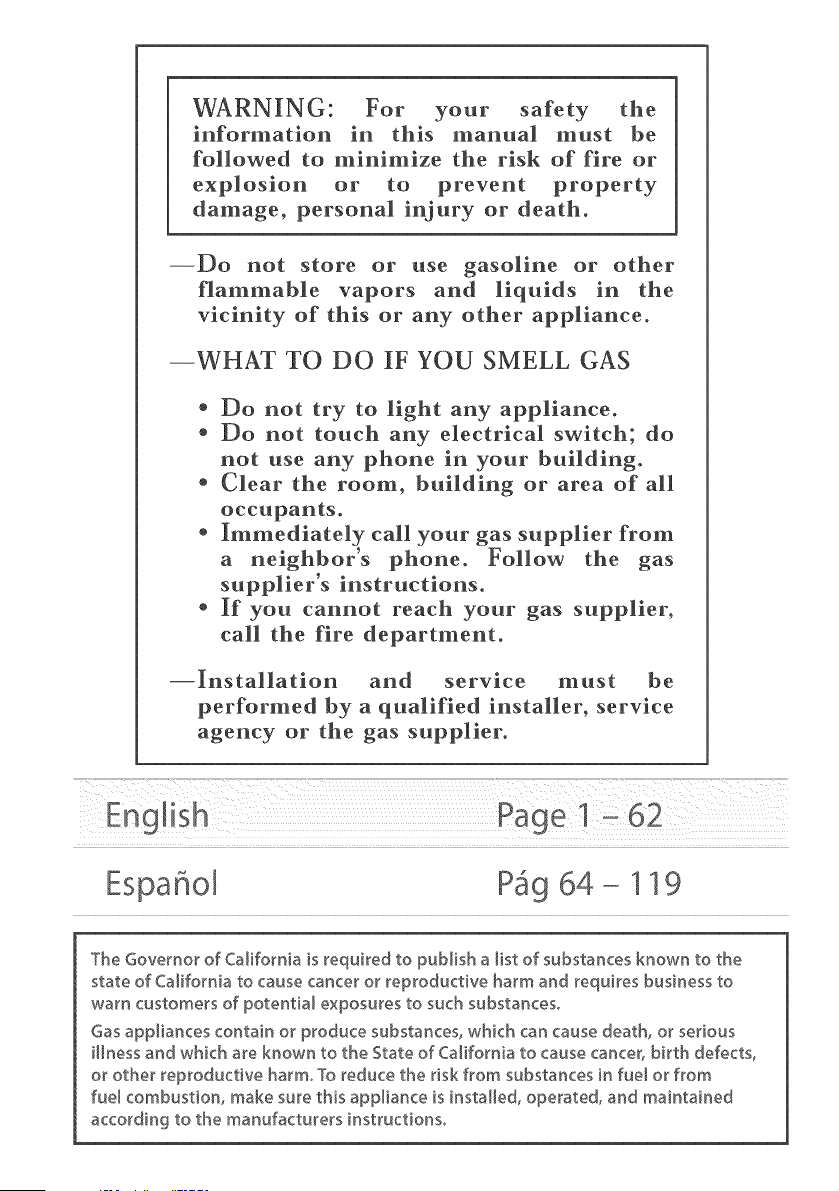
WARNING: For your safety the
information in this manual must be
followed to minimize the risk of fire or
or to
damage, personal injury or death.
--Do not store or use gasoline or other
flammable vapors and in the
vicinity of this or any other appliance.
--WHAT TO DO IF YOU SMELL GAS
* Do not try to light any appliance.
* Do not touch any electrical switch; do
not use any phone in your building°
* Clear the room, building or area of all
* Immediately call your gas supplier from
a s the gas
instructions.
+ If you cannot reach your gas supplier,
call the fire department.
and service must be
performed by a qualified installer, service
agency or the gas supplier.
Espa ol 64- 119
The Governor of Ca[+forn+a +srequ+red to publish a [[s't of substances known to the
state of Ca[+forn+a to cause cancer or reproductive harm and requires bus+hess to
warn customers of potential exposures to such substances_
Gas app[iances contain or produce substances, which can cause death, or serious
illness and which are known to the State of California to cause cancer, birth defects,
or other reproductive harm° To reduce the risk from substances in fuel or from
fuel combustion, make sure th+s app[+ance +s+nsta[[ed, operated, and maintained
accord+ng to the manufacturers +nstruct+ons_
Contents
Introduction
_mportant safety instructions
_nstaHation instructions
The first time you turn your dryer on
Getting started quickly
Operating instructions
AeroSmart controB
Easy touch controls, The d splay screen
Using your dryer
Sort ng and oadng
Lint bucket
Choosing your drying cycle
Changing the drying cycle options
Drying cyce opt ons
Dryng cycle progress
Drying cycles expla ned
Special Care
Care labels
Lid Lock
Power fa lure
Settings Menu
Handwash / Jeans / Freshen Up/Warm Up / Dryclean
Comforter/Pi !ows / Altergy / Shrts/[owes / Soft Toys
Sportswear Lght / Sportswear Heavy / Outdoor Wear /
Protection Equ pment
Alarm Level / Screen Brightness / Key Lock Mode
Bern nders / Hints / Language
Service Contacts/Trouble Shoot ng / Beset Defaults / Replay Intro
Caring for your AeroSmart dryer
Before you call for service
If your AeroSmart dryer beeps for help
Solving ope_at ng problems
So ving dryng problems
Limited warranty
Irnportand
SAVE THESEINSTRUCTIONS
2
3
7
32
34
34
36
36
37
37
38
39
40
41
42
43
46
47
48
50
51
52
52
53
53
54
55
56
57
57
58
59
60
The models shown in this user guide may not be available in all markets and are subject to
change at any time. For current details about model and specification availability in your country,
please go to our website www.fisherpaykel.com or contact your local Fisher & Paykel dealer.
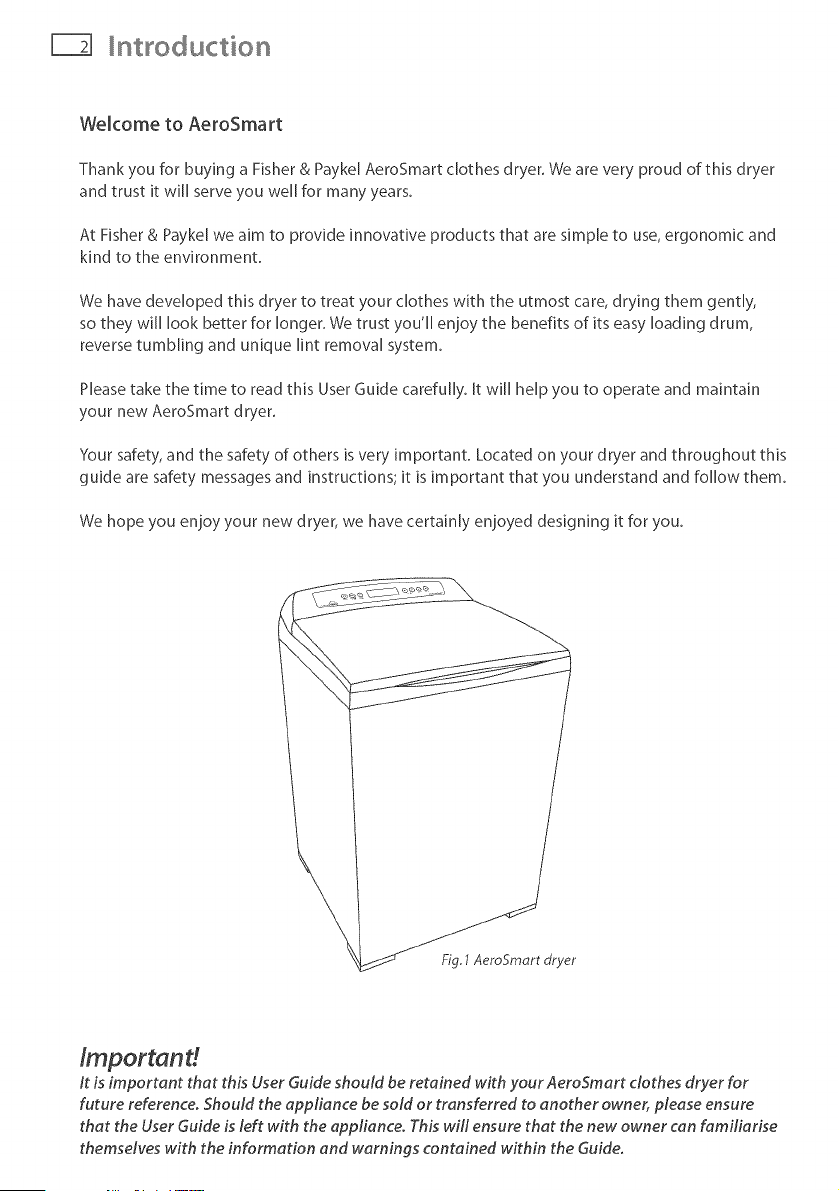
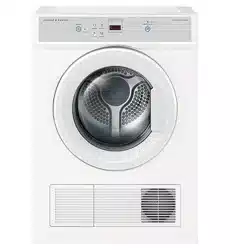
Welcome to AeroSmart
Thank you for buying a Fisher & Paykel AeroSmart clothes dryer. We are very proud of this dryer
and trust it will serve you well for many years.
At Fisher & Paykelwe aim to provide innovative products that are simple to use, ergonomic and
kind to the environment.
We have developed this dryer to treat your clothes with the utmost care, drying them gently,
so they will look better for longer. We trust you'll enjoy the benefits of its easy loading drum,
reverse tumbling and unique lint removal system.
Pleasetake the time to read this User Guide carefully. It will help you to operate and maintain
your new AeroSmart dryer.
Your safety, and the safety of others is very important. Located on your dryer and throughout this
guide are safety messages and instructions; it is important that you understand and follow them.
We hope you enjoy your new dryer, we have certainly enjoyed designing it for you.
\
Fig. 1 AemSmdrt dryer
Importand
It is important that this User Guide should be retained with your AeroSmart clothes dryer for
future reference. Should the appliance be sold or transferred to another owner, please ensure
that the User Guide is left with the @pliance. This will ensure that the new owner can familiarise
themselves with the information and warnings contained within the Guide.
mportant safety instructions
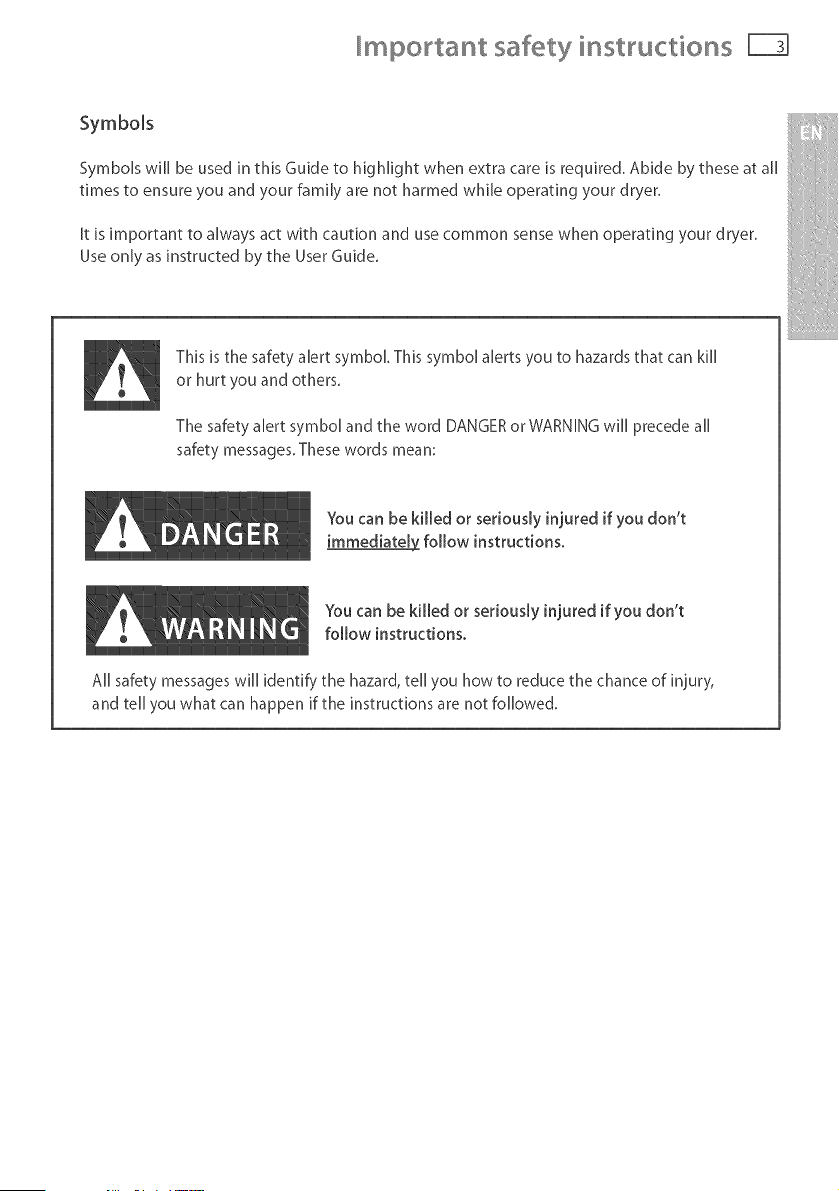
Symbols
Symbols will be used in this Guide to highlight when extra care is required. Abide by these at all
times to ensure you and your family are not harmed while operating your dryer.
It is important to always act with caution and use common sense when operating your dryer.
Use only as instructed by the User Guide.
Thisis the safety alert symbol. This symbol alerts you to hazardsthat can kill
or hurt you and others.
The safety alert symbol and the word DANGERor WARNINGwill precede all
safety messages.Thesewords mean:
You can be killed or seriously injured if you don't
immediateJ_z follow instructions.
You can be killed or seriously injured if you don't
follow instructions.
All safety messages will identify the hazard, tell you how to reduce the chance of injury,
and tell you what can happen if the instructions are not followed.
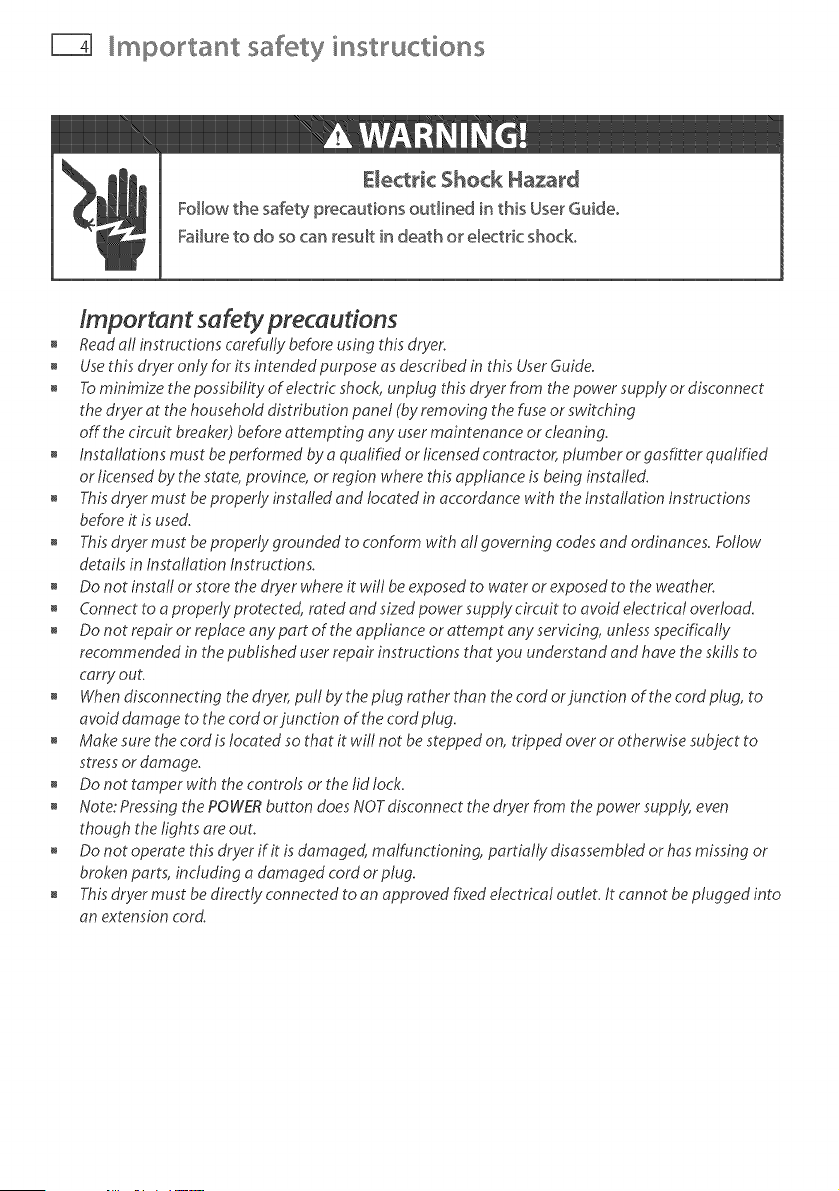
mportant safety instructions
E_ectri¢ Shock Hazard
Follow the safety precautions outlined in this User Guide.
Failure to do so can resuR in death or e_ect_ic shock.
Important safety precaudons
Read aft instructions carefully before using this dryer.
Use this dryer only for its in tended purpose as described in this User Guide.
Tominimize the possibility of electric shock, unplug this dryer from the power supply or disconnect
the dryer at the household distribution panel (by removing the fuse or switching
off the circuit breaker) before attempting any user maintenance or cleaning.
Installations must be performed by a qualified or licensed contractor, plumber or gasfitter qualified
or licensed by the state, province, or region where this appliance is being installed.
This dryer must be properly installed and located in accordance with the Installation Instructions
before it is used.
This dryer must be pr_per_y gr_unded t_ c_nf_rm with a_ g_verning c_des and _rdinances. F_w
details in Installation Instructions.
Do not install or store the dryer where it will be exposed to water or exposed to the weather.
Connect to a properly protected, rated and sized power supply ckcuit to avoid electrical overload.
Do not repair or replace any part of the appliance or attempt any servicing, unless specificaf/y
recommended in the pubfished user repak instructions that you understand and have the skills to
carry out.
When disconnecting the dryer, pull by the plug rather than the cord or junction of the cord plug, to
avoid damage to the cord or junction of the cord plug.
Make sure the cord is located so that it will not be stepped on, tripped over or otherwise subject to
stress or damage.
Do not tamper with the controls or the lid lock.
Note: Pressing the POWER button does NOT disconnect the dryer from the power supply, even
though the lights are out.
Do not operate this dryer if it is damaged, malfunctioning, partially disassembled or has missing or
broken parts, including a damaged cord or plug.
This dryer must be directly connected to an approved fixed electrical outlet. It cannot be plugged into
an extension cord.
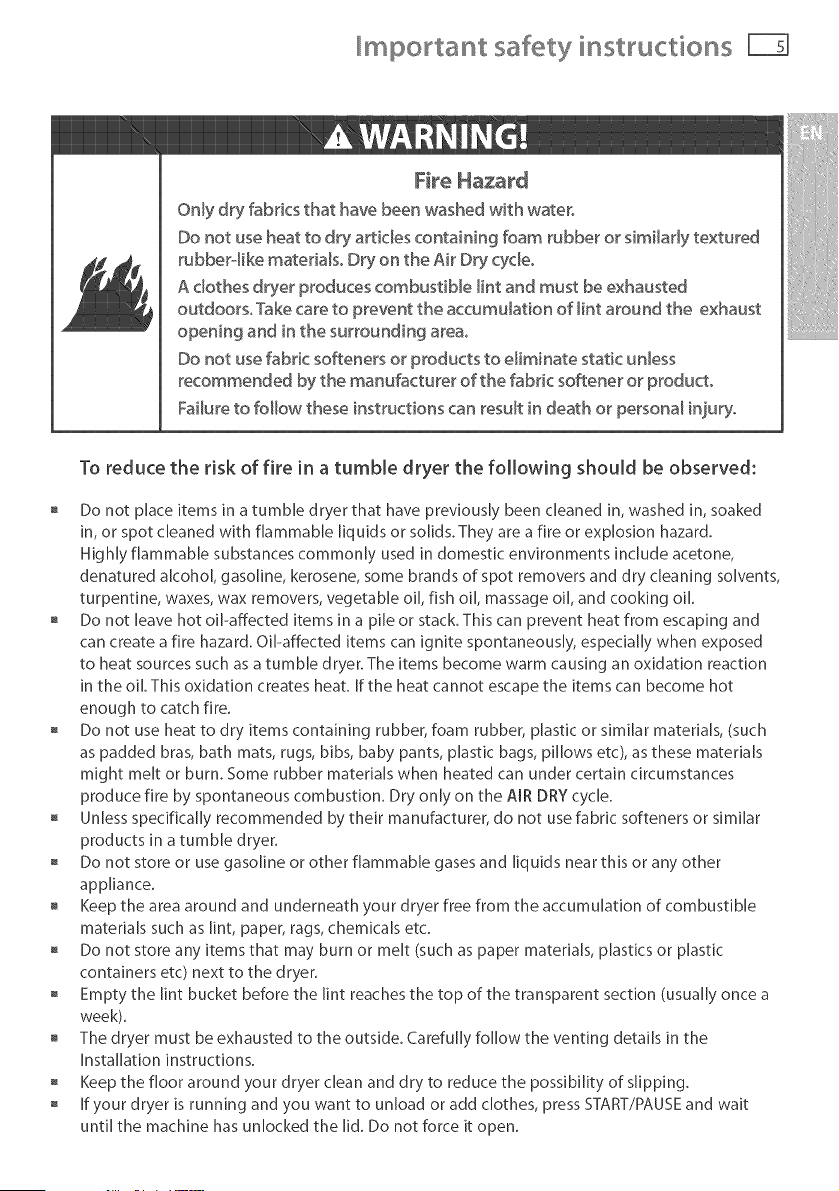
mportant safety instructions
I
Fire Hazard
Only dry fabrics that have been washed with water°
Do not use heat to dry articles containing foam rubber or similarly textured
rubber4ike materia[so Dry on the Air Dry cydeo
A clothes dryer produces combustible lint and must be exhausted
outdoorsoTake care to prevent the accumulation of Hnt around the exhaust
opening and in the surrounding area°
Do not use fabric softeners or products to eliminate static unless
recommended by the manufacturer of the fabric softener or product°
Failure to follow these instructions can result in death or personal injury°
To reduce the risk of fire in a tumble dryer the following should be observed:
Do not pJace items in a tumbJe dryer that have prevJousJy been cJeaned in, washed in, soaked
in, or spot cJeaned with f[ammabJe [iquids or soJids. They are a fire or expJosJon hazard.
HJghJy fJammabJe substances commonly used in domestic environments [ncJude acetone,
denatured a[coho[, gasoJine, kerosene, some brands of spot removers and dry cJeanJng soJvents,
turpentine, waxes, wax removers, vegetabJe oil, fish oi[, massage oi[, and cooking oil
Do not leave hot oi[-affected items in a pJJeor stack. This can prevent heat from escaping and
can create a fire hazard. Oil-affected items can ignite spontaneously, especially when exposed
to heat sources such as a tumbJe dryer. The items become warm causing an oxidation reaction
in the oil This oxidation creates heat. If the heat cannot escape the items can become hot
enough to catch fire.
Do not use heat to dry items containing rubber, foam rubber, pJastJc or similar materJaJs, (such
as padded bras, bath mats, rugs, bibs, baby pants, pJastJc bags, pJ[Jows etc), as these materials
might meJt or burn. Some rubber materiaJs when heated can under certain circumstances
produce fire by spontaneous combustion. Dry onJy on the AiR DRY cycJe.
UnJess specJficaJ[y recommended by their manufacturer, do not use fabric softeners or similar
products in a tumbJe dryer.
Do not store or use gasoJine or other flammabJe gases and liquids near this or any other
appJiance.
Keep the area around and underneath your dryer free from the accumuJatJon of combustJbJe
materials such as lint, paper, rags, chemJcaJs etc.
Do not store any items that may burn or meJt (such as paper materials, pJastJcs or pJastJc
containers etc) next to the dryer.
Empty the lint bucket before the lint reaches the top of the transparent section (usually once a
week).
The dryer must be exhausted to the outside. CarefuJ[y foJ[ow the venting details in the
[nstaJJat[on instructions.
Keep the floor around your dryer dean and dry to reduce the possibility of slipping.
if your dryer is running and you want to unload or add clothes, press START/PAUSE and wait
until the machine has unlocked the lid. Do not force it open.
mportant safety instructions
Do not reach into the appliance if the drum is moving.
Close supervision is necessary if this dryer is used by or near children. Do not allow children to
play inside, around or with this dryer or any other appliance.
Never climb on, climb into, or stand on the dryer top, lid or drum.
Undergarments that contain metal reinforcements should not be placed directly in the dryer.
Damage to the dryer can result if the metal reinforcements come loose during drying.
The interior of the appliance and exhaust duct should be cleaned periodically by qualified
service personnel.
Before the appliance is removed from service or discarded remove the lid and the drum door to
the drying compartment.
SAVE THESEINSTRUCTIONS
iiilIIiI_I=IIII _iliiilliiilllililiiilllliiiiiiliill¸_i_i_!_i!=_=i_i_i_ii_i_!_i_ii_i_i_ii_i__i_ill
Installation instructions 771 iii:'
Read the important safety instructions on pages ] - 6 before you start installing the dryer,
Checktomakesureyouhaveallthetoolsandpartsnecessarytocorrectly_nstallthisapp,ance.
roo_oqo_od
= W' nut driver or socket wrench
= Phillips screwdriver ):
Fiat-blade screwdriver
= Adiustab[e wrench 8" or 10" (200 mm or 250 ram)for gas connections
Pipejoint compound (pipe dope or tape) for gas pipe connections that is resistant to _!i[
LP Propane, Butane and Natural Gas (Gas models only)
Level
Caulking gun and compound (for installing new exhaust vent)
= Gloves
Safety glasses
= Knife
pied su_p
2 feet inserts for front feet.
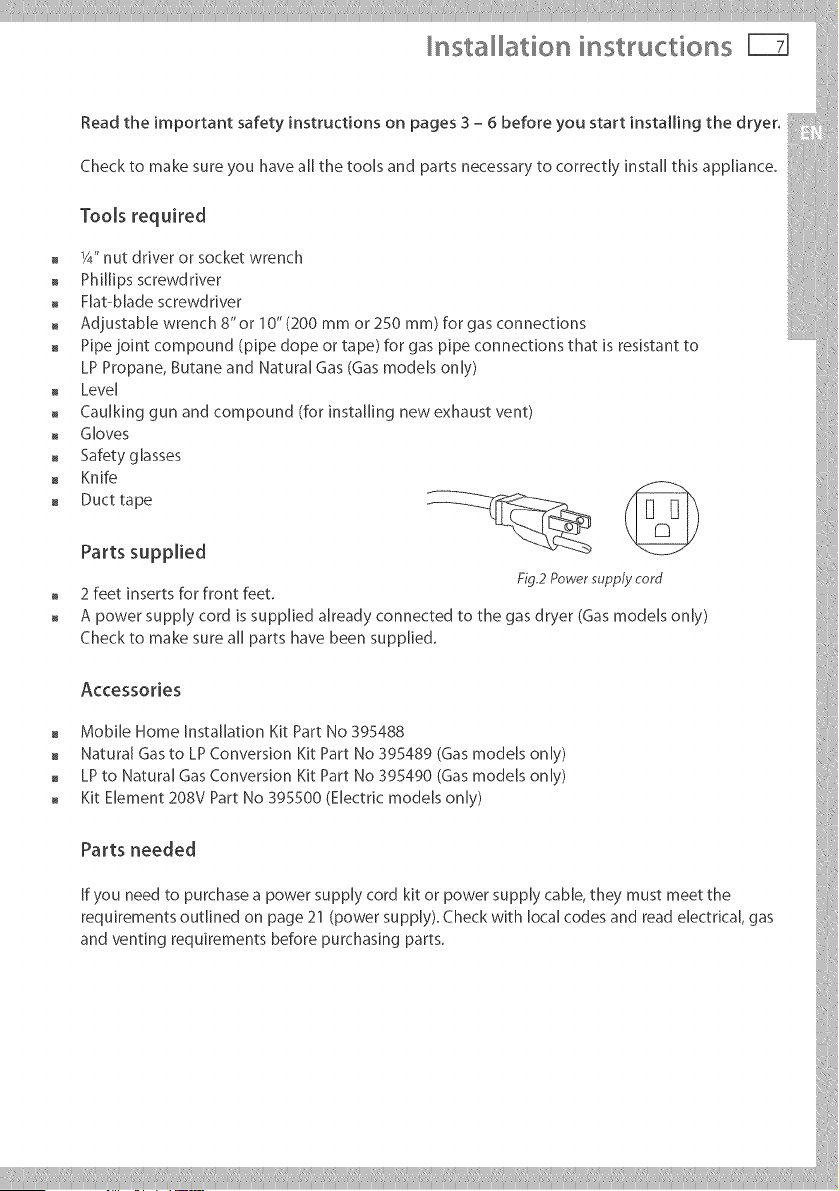
A power supply cord is supplied already connected to the gas dryer (Gas models only)
Check to make sure a[[ parts have been suppled.
Accessories ::i:
Mobile Home Installation Kit Part No 395488
Natural Gas to LP Conversion Kit Part No 395489 (Gas models on[),) ]1
= LPtoNaturalGasConversionKitPartNoSgS490{Gasmodelsonlyt
= KitElement208VPartNoSgSS00{Hectricmodelsonlyt
if you need to purchase a power supply cord kit or power supply cable, they must meet the
requirements outlned on page 21 (power supply). Check with local codes and read electrical, gas
and venting requirements before purchasing parts.
nsta ation instructions
To the installer
The correct installation of the dryer is your responsibility.
Be sure you read the following instructions carefully before you start to install the dryer. These
instructions should be left with the home owner for future reference.
It is your responsibility to:
Observe all governing codes and ordinances.
Check code requirements. Some codes limit or do not permit installation of clothes dryers in
garages, closets, mobile homes or sleeping quarters. Contact your local building inspector.
Adhere to these installation instructions.
Allow for spacing requirements with side by side installations (refer page 9).
Make sure you have all items necessary for correct installation.
Properly install the dryer.
Contact a qualified installer to ensure that the electrical and gas installation meets all national
and local codes and ordinances. (See page 4).
Location requirements
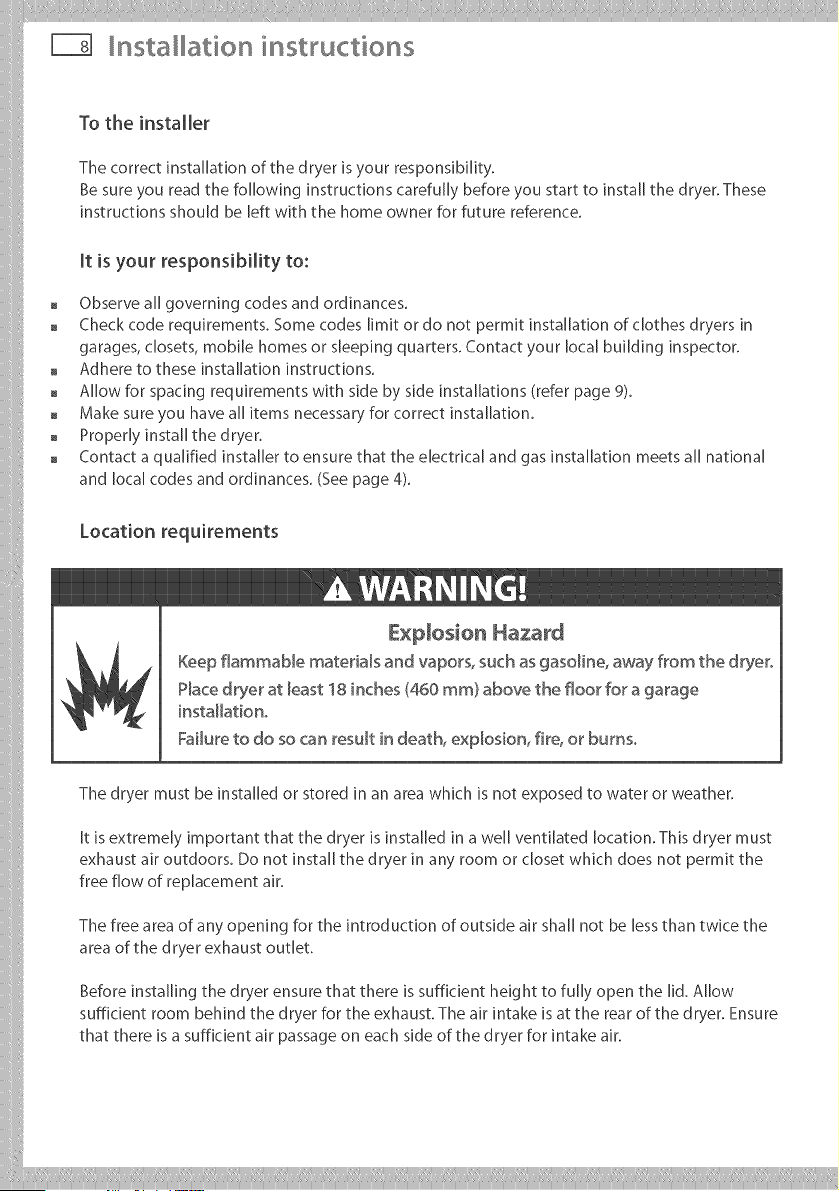
£×D[os[on Hazard
Keep flammaMe materials and vapors, such as gasoline, away from the dryer°
Place dryer at [east 18 inches (460 ram} above the floor for a garage
instaHat[ono
Failure to do so can result in death, explosion, fire, or burns.
The dryer must be installed or stored in an area which is not exposed to water or weather.
it is extremely important that the dryer is installed in a well ventilated location. This dryer must
exhaust air outdoors. Do not install the dryer in any room or closet which does not permit the
free flow of replacement air.
The free area of any opening for the introduction of outside air shall not be less than twice the
area of the dryer exhaust outlet.
Before installing the dryer ensure that there is sufficient height to fully open the lid. Allow
sufficient room behind the dryer for the exhaust. The air intake is at the rear of the dryer. Ensure
that there is a sufficient air passage on each side of the dryer for intake air.
nsta ation i structions
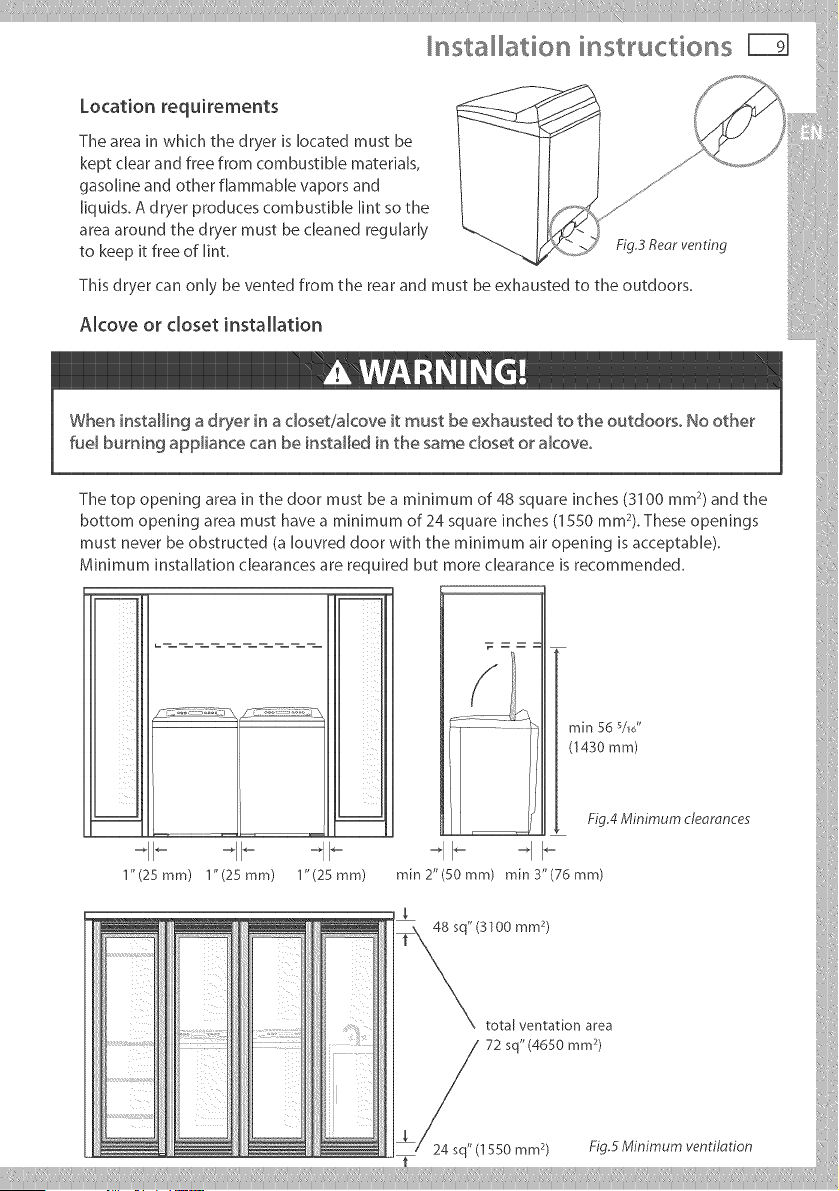
Location requirements
The area in which the dryer is located must be
kept clear and free from combustible materials,
gasoline and other flammable vapors and
liquids. A dryer produces combustible lint so the
area around the dryer must be cleaned regularly
to keep it free of lint,
Fig.3 Reer venting
This dryer can only be vented from the rear and must be exhausted to the outdoors.
Alcove or closet installation
When installing a dryer in a closet!alcove it must be exhausted to the outdoors° No other
fue_ burning appliance can be installed in the same closet or akoveo
The top opening area in the door must be a minimum of 48 square inches (31 O0 mm 2) and the
bottom opening area must have a minimum of 24 square inches (1550 ram2). These openings
must never be obstructed (a [ouvred door with the minimum air opening is acceptable).
Minimum installation clearances are required but more clearance is recommended.
_nsta_ation instructions
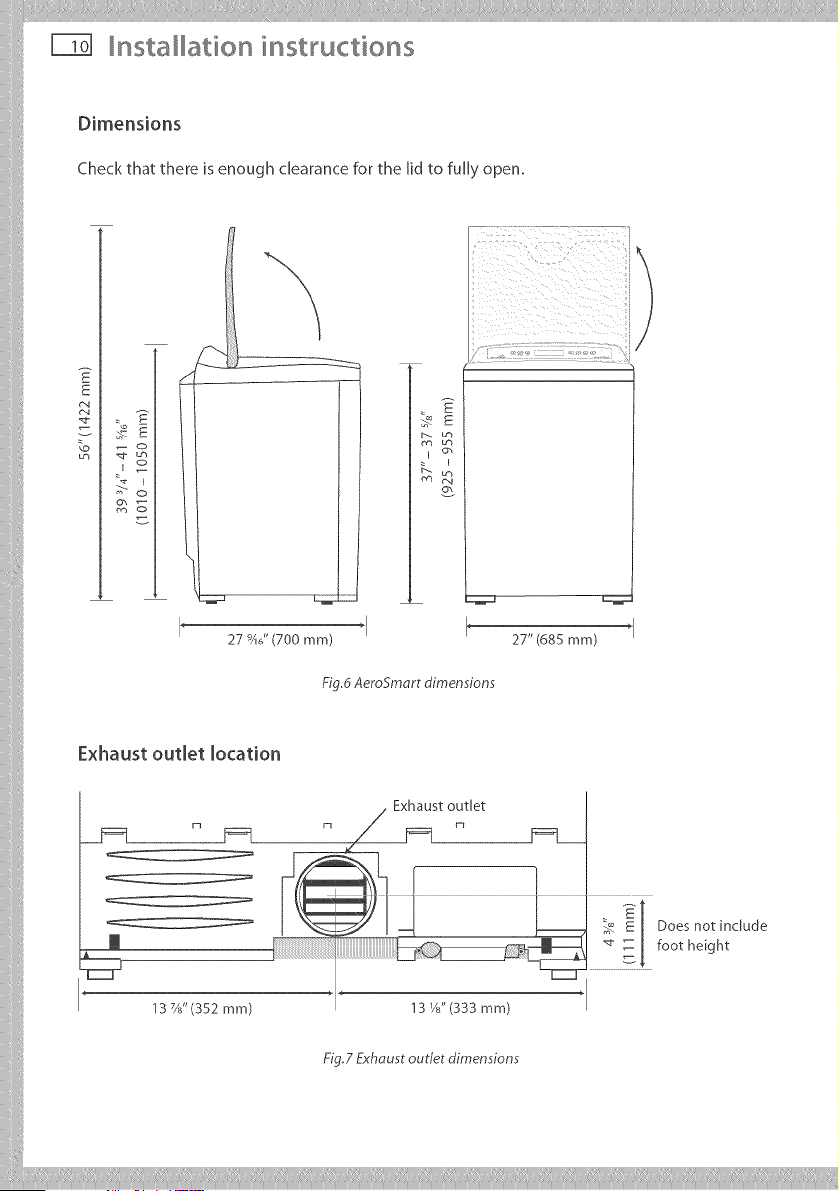
Dimensions
Check that there is enough clearance for the lid to fully open.
o
_g
27 9AJ' (700 mm)
E
_E
Lm
cm
27" (685 mm)
Fig.6 AeroSrndrt dimensions
Exhaust outlet location
rq
13 7/J' (352 mm)
_1 Exhaust outJet
t
13 Ya"(333 ram)
Fig.7 Exhdusr outlet dimensions
Installation instructions [q?l l_
Mobile home installation
The installation of the dryer in a mobile home must conform to the Manufactured Home
Construction and Safety Standard Title 24 CFR, Part 3280 {formerly the Federal Standard for
Mobte Home Construction and Safety, Title 24 HUD (Part 280), 1975} for the United States or }
Standard CAN/CSA -Z240MH for Canada.
When installing a dryer in a mobile home, provisions for anchoring the dryer to the floor must
be made.
A Mobile Home anchoring installation kit is available with instructions (see Accessories page
7). Locate in an area that has adequate outside make up air (a minimum of 72 square inches of
unobstructed opening is required).
MobilehomeinstaUationsmustbeexhaustedtotheoutdoorswiththeexhaustduct
terminationsecurelyfastenedtothemobilehomestructure,usingmaterialsthatwUlnot
supportcombustion.
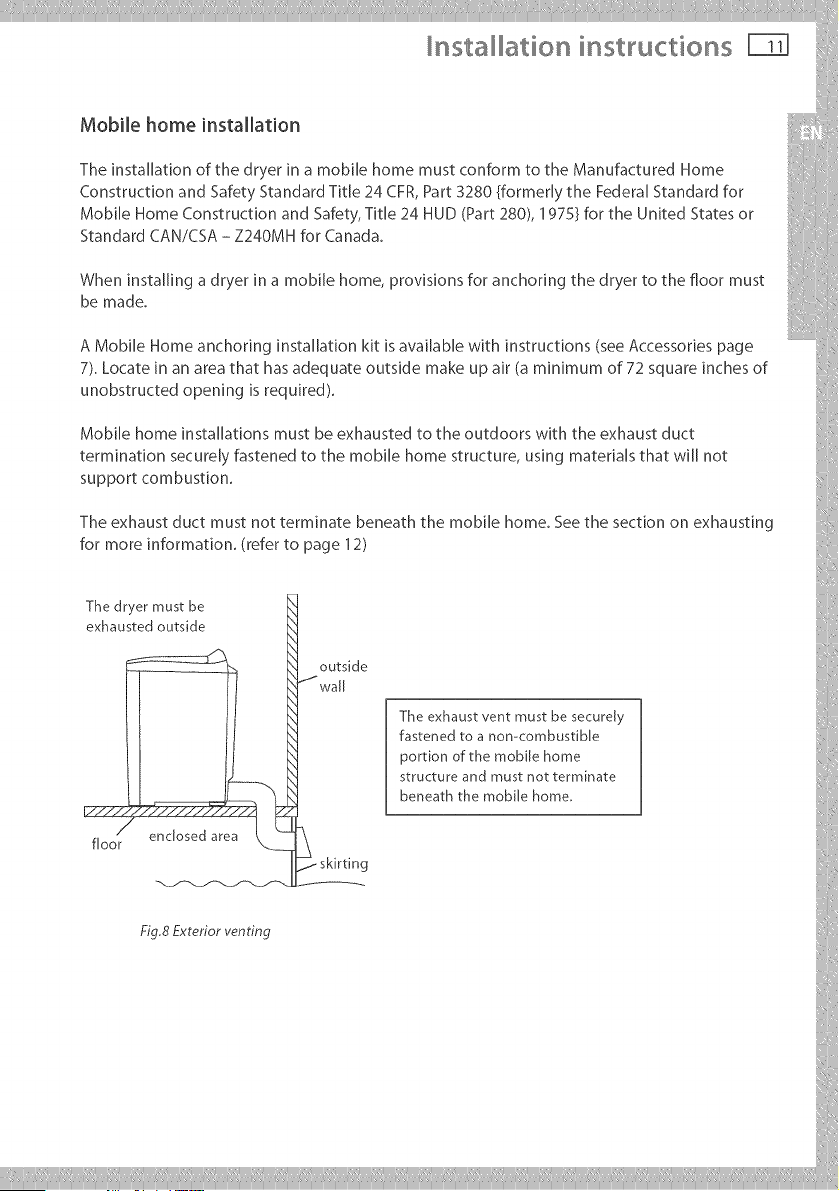
The exhaust duct must not terminate beneath the mobile home. See the section on exhausting
for more information. (refer to page 12)
iiiiiiiii
The dryer must be £ ....
exhausted outside
__outs,de
II w='
t ! [X_ The exhaust vent must be securdy
l J I k_ fastened to a non-combustible
I I I _t portion of the mob/e home
I I l k't structure and must not terminate i
I J I --_ k'_ beneath the mobiJe home,
/ enclosedarea[ _h,
f_oor "--d \ i
nsta ation instructions
Fire Hazard
The dryer must be vented to the outdoors.
Use rigid or thick wall flexiMe metal exhaust duct°
Do not use a plastic exhaust duct°
Do not use a meta_ foil exhaust duct°
Failure to follow these instructions can result in death or fire°
The dryer must be exhausted to the outdoors. This w[[[ prevent the build up of lint and moisture
in the room in which it is located and reduce the risk of fire.
This appliance must always be vented to the outdoors.
Exhaust ducting products can be purchased from your local Appliance store or Hardware store.
Plastic or metal foil flexible duct can kink, sag, be punctured, reduce airflow, extend drying
times and affect dryer operation.
A minimum of 4 inch (100 mm) thick wail flexible metal or rigid galvanised metal duct must be
used. Using ducts larger than 4 inches (100 ram) diameter may result in more lint accumulating.
Using straight rigid metal ducting will minimize lint accumulation. Thick wall flexible metal
ducting may be used but care must be exercised to avoid sharp bends which may squash the
duct and cause blockages. Do not use plastic ducting or thin wail flexible metal ducting.
Use duct tape to secure joints. Do not use screws as they collect [int.
Keep ducting as short and straight as possible. Do not exceed the maximum exhaust duct
lengths stated later in these installation instructions.
Do not exhaust the dryer into any other duct, chimney or gas vent, a wail, a ceiling or any
concealed space in a building. Do not exhaust the dryer under a house or mobile home or a
porch, or into a window well or other area that wi[[ accumulate [int.
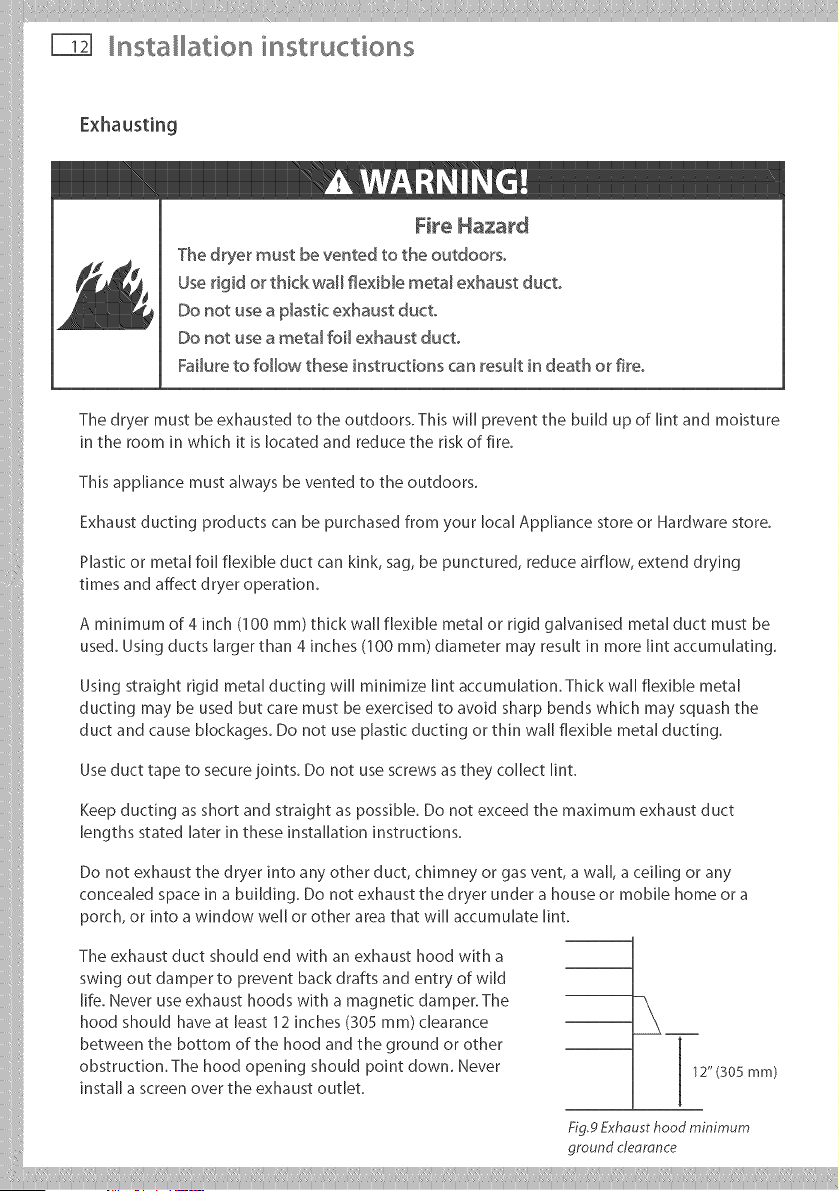
The exhaust duct should end with an exhaust hood with a
swing out damper to prevent back drafts and entry of wild
life. Never use exhaust hoods with a magnetic damper. The
hood should have at least 12 inches (305 ram) clearance
between the bottom of the hood and the ground or other
obstruction. The hood opening should point down. Never
install a screen over the exhaust outlet.
12" (305 mm)
Fig.9Exhousthood minimum
ground cteoronce
Installation instructions
Exha u sting
To reduce condensation, insulate any ducting which passes through unheated areas. Slope the
duct gently downwards to the hood, to drain condensation and reduce lint build up. Avoid sag :[i
or loops in the duct as they may collect and store water and accumulate lint.
tefore using an existing exhaust duct system for a dryer ensure that:
No phstic or other potentially combustible duct or flexible metal foil ducting has been used.
= The duct is not pierced, kinked or crushed.
= The duct does not exceed the maximum recommended length for the new dryer.
= The exhaust hood damper opens and closes freely and with suffident movement.
= Static pressure in the exhaust ducting does not exceed 1 inch (250Pa), or is not less than 0
inches of water column (ie. negative pressure), when measured with a manometer in the first 6
inches of the duct, with the dryer running on Air Dry (no heat)setting.
The exhaust duct system meets all relevant local, state and national codes.
All ducting should be inspected and cleaned at least once a year to remove accumulated lint.
Frequently check that the damper on the exhaust hood moves sufficiently and opens and
shuts freely.
MobHe Home Installations
A Mobile Home Installation Kit is available (see Accessories page 7). ....
i
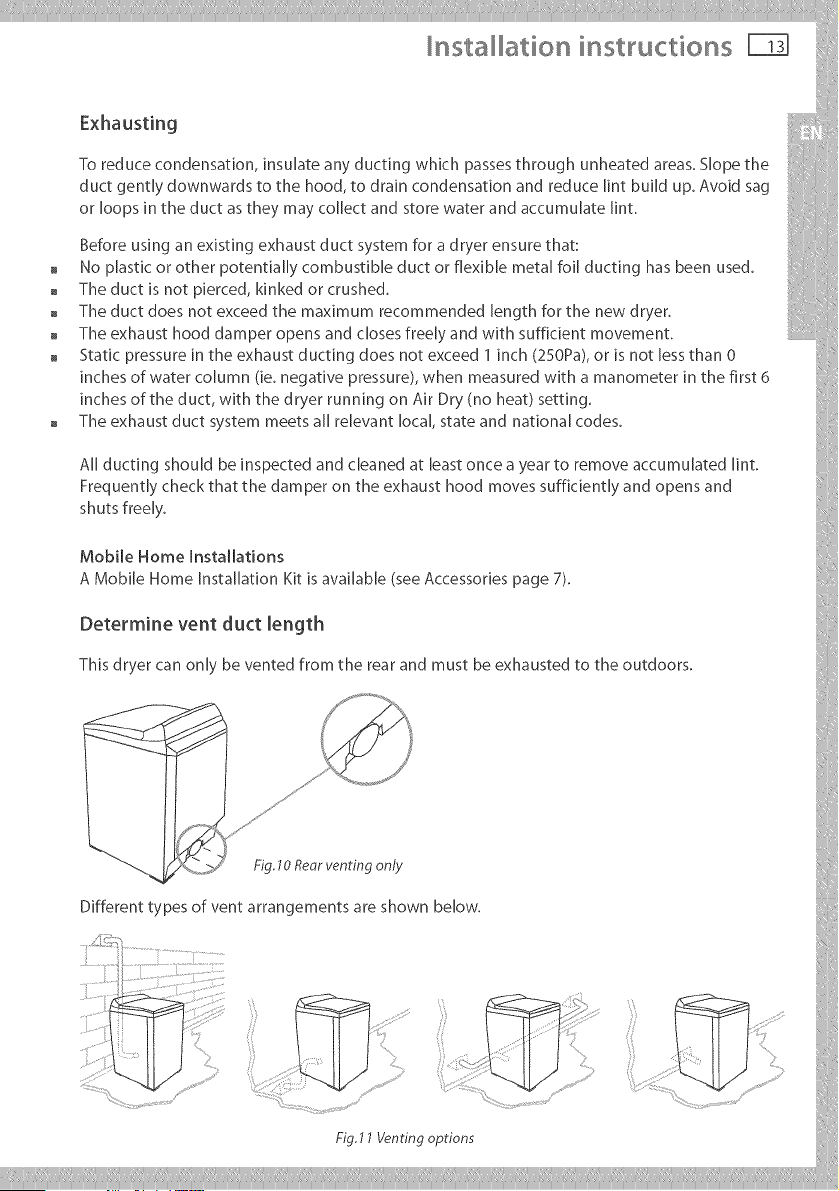
Determine vent duct length
This dryer can only be vented from the rear and must be exhausted to the outdoors.
[
) i
f
f JJ
/",_ _4' Fig lOReorventingon/y
ifferenttypesofventarrangementsareshownbelow,
go
nsta ation instructions
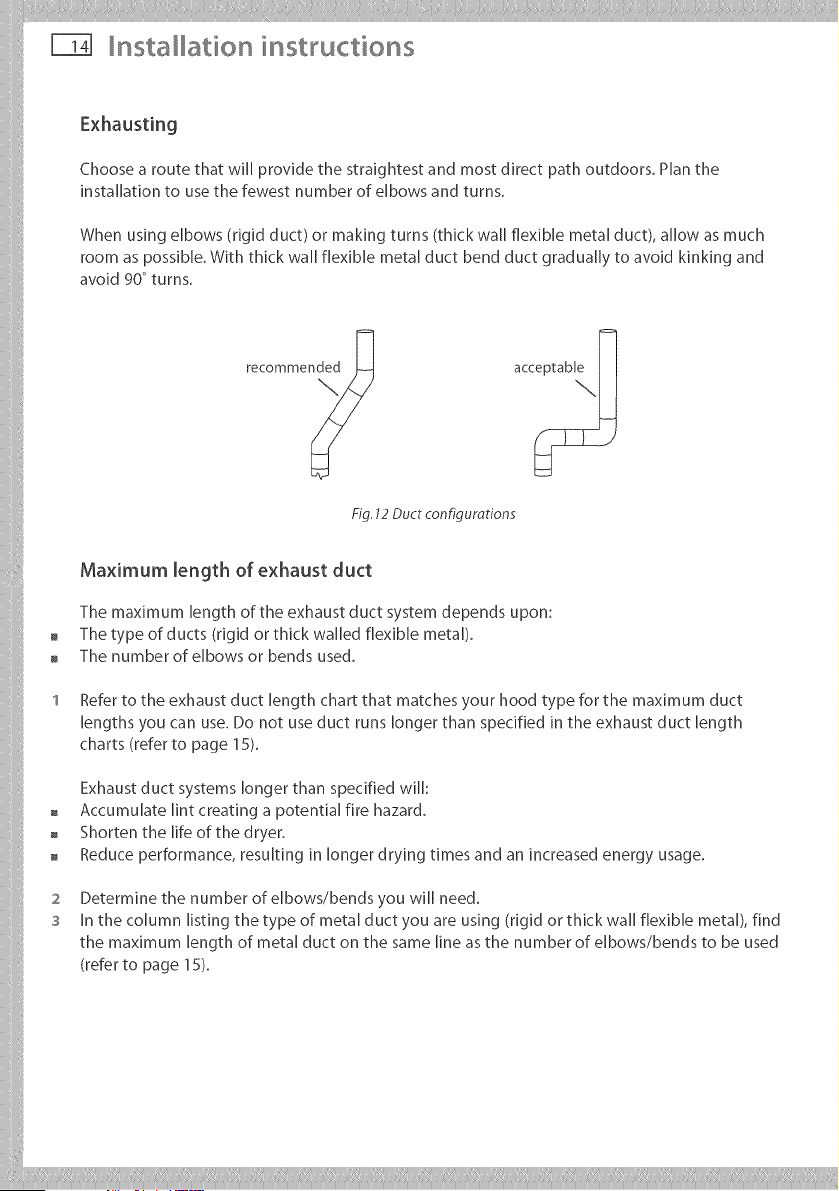
Choose a route that will provide the straightest and most direct path outdoors. Plan the
installation to use the fewest number of elbows and turns.
When using elbows (rigid duct) or making turns (thick wall flexible metal duct), allow as much
room as possible. With thick wall flexible metal duct bend duct gradually to avoid kinking and
avoid 90°turns.
Fig. 12 Duct configurations
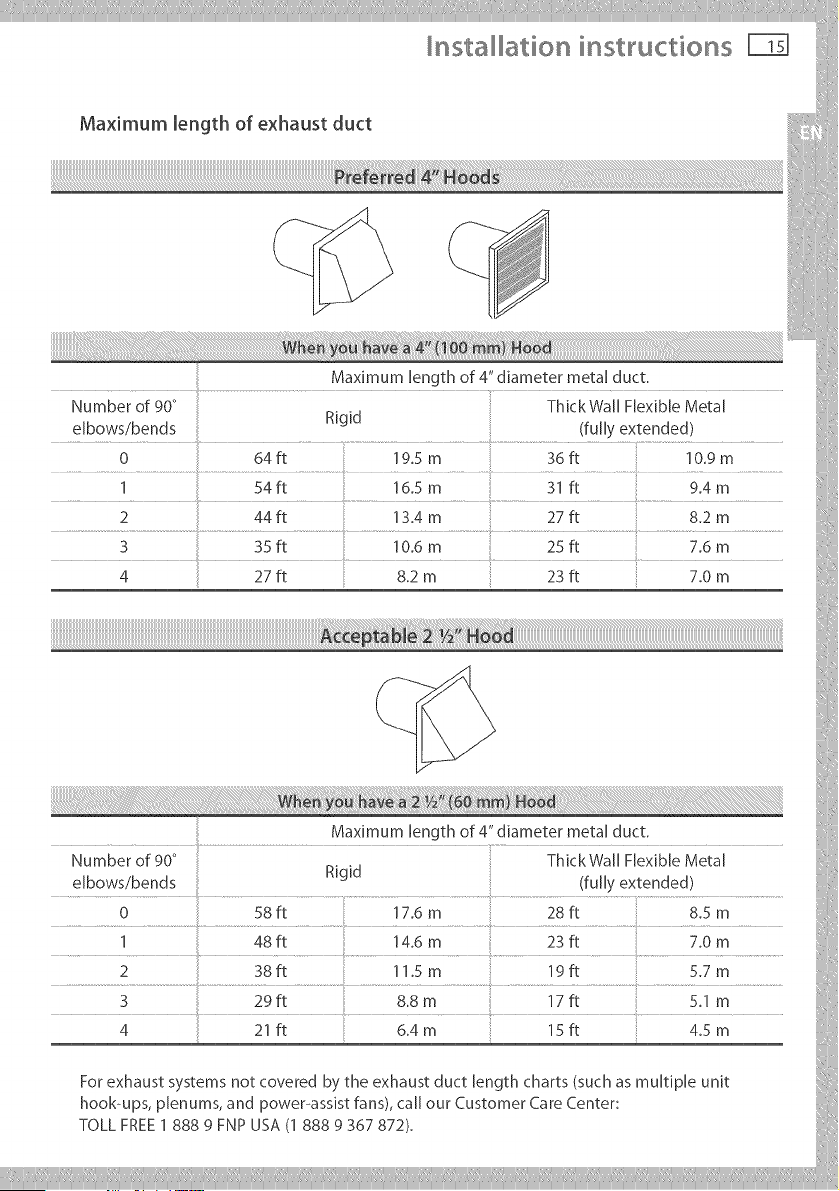
Maximum length of exhaust duct
The maximum length of the exhaust duct system depends upon:
The type of ducts (rigid or thick walled flexible metal).
The number of elbows or bends used.
1 Refer to the exhaust duct length chart that matches your hood type for the maximum duct
lengths you can use. Do not use duct runs longer than specified in the exhaust duct length
charts (refer to page 15).
Exhaust duct systems longer than specified will:
Accumulate lint creating a potential fire hazard.
Shorten the life of the dryer.
Reduce performance, resulting in longer drying times and an increased energy usage.
2
3
Determine the number of elbows/bends you will need.
[n the column listing the type of metal duct you are using (rigid or thick wall flexible metal), find
the maximum length of metal duct on the same line as the number of elbows/bends to be used
(refer to page 15).
nsta ation instructions
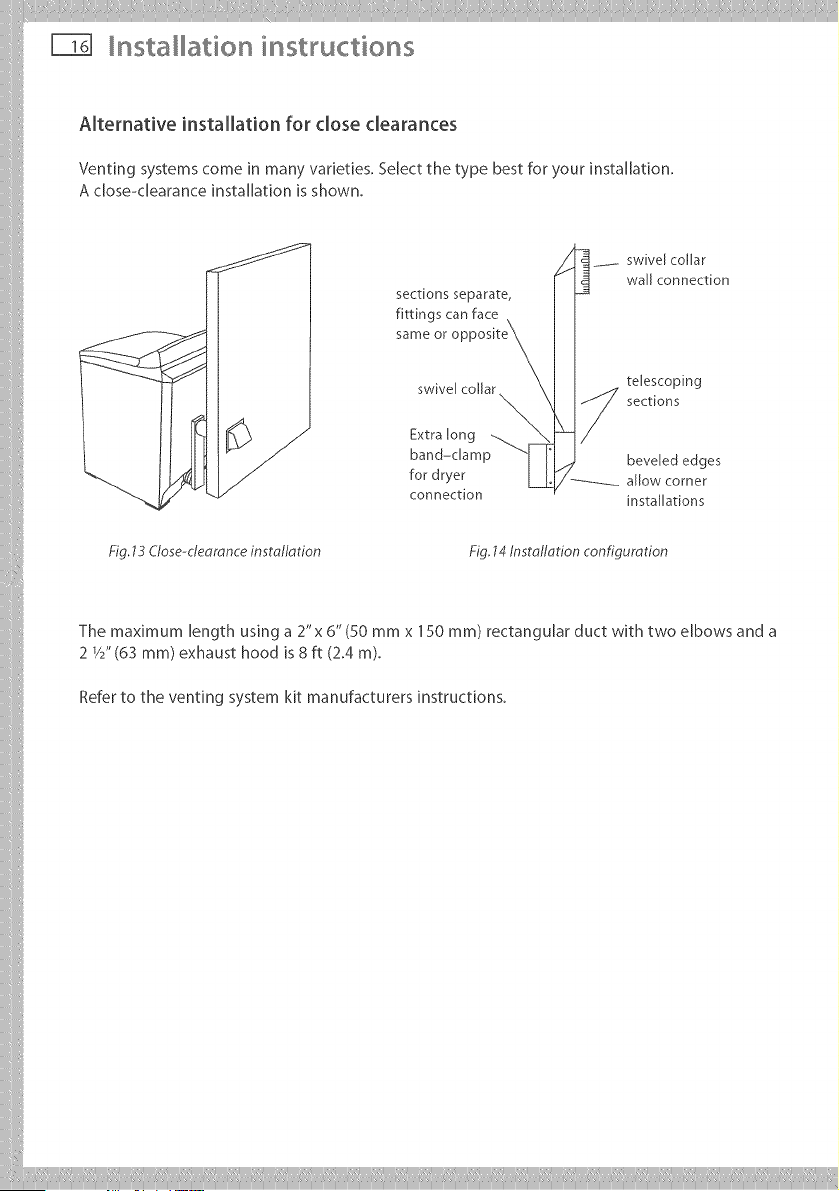
Alternative installation for close clearances
Venting systems come in many varieties. Select the type best for your installation.
A close-clearance installation is shown.
sections separate,
fittings can face
same or o
swiver collar _,
Extra long
band-cramp
for dryer
connection
swivel collar
wall connection
telescoping
_ sections
beveled edges
allow corner
installations
fig, 13 Close-cleorance installation Fig. 14 Installation configuration
The maximum length using a 2"x 6" (50 mmx 150 ram) rectangular duct with two elbows and a
2 1/S'(63 ram) exhaust hood is 8 ft (2.4 m).
Refer to the venting system kit manufacturers instructions.
nsta ation instructions FqT[
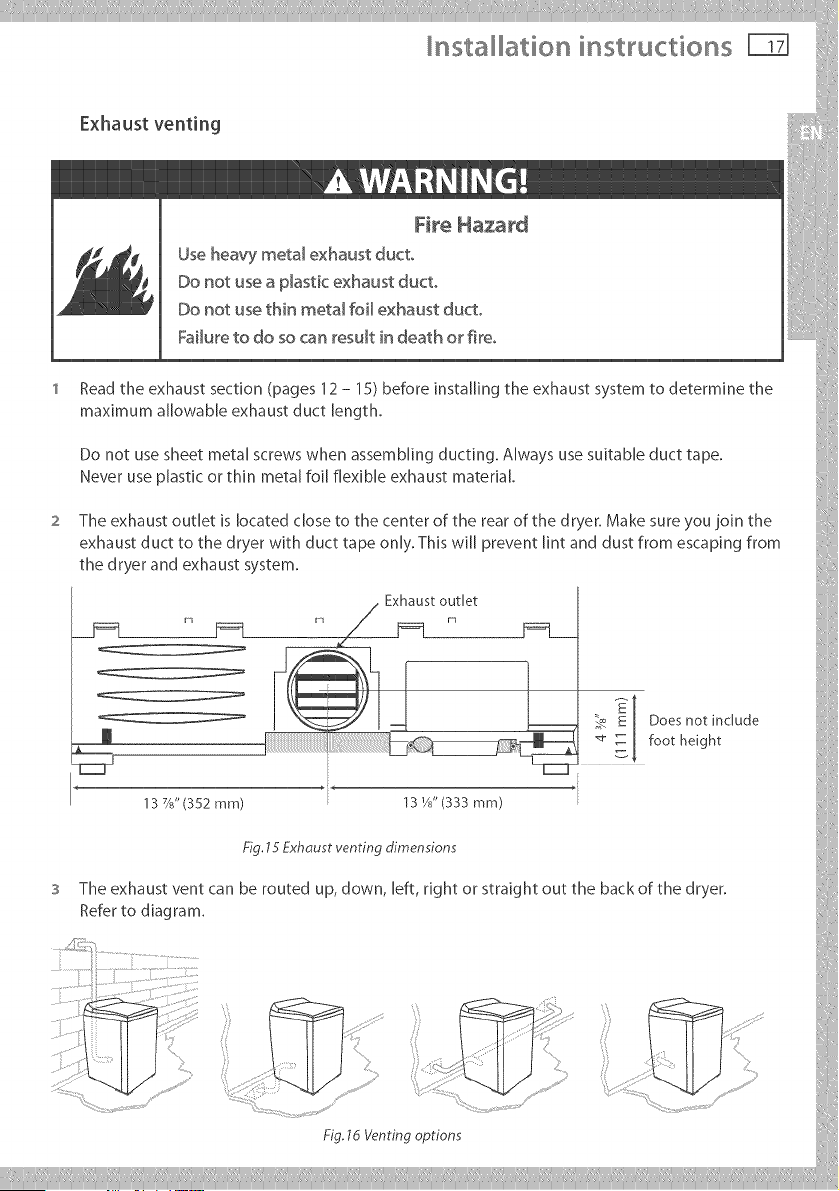
Exhaust venting
Fke Hazard
Use heavy metal exhaust duct°
Do not use a p_astic exhaust duct°
Do not use thin meta_ foi_ exhaust duct°
Failure to do so can result in death or fire°
1 Read the exhaust section (pages 12 - 15) before installing the exhaust system to determine the
maximum allowable exhaust duct length.
Do not use sheet metal screws when assembling duct[ng. Always use suitable duct tape.
Never use plastic or thin metal foil flexible exhaust material
2 The exhaust outlet is located close to the center of the rear of the dryer. Make sure you join the
exhaust duct to the dryer with duct tape only. This wi[[ prevent lint and dust from escaping from
the dryer and exhaust system.
_nsta_ation instructions
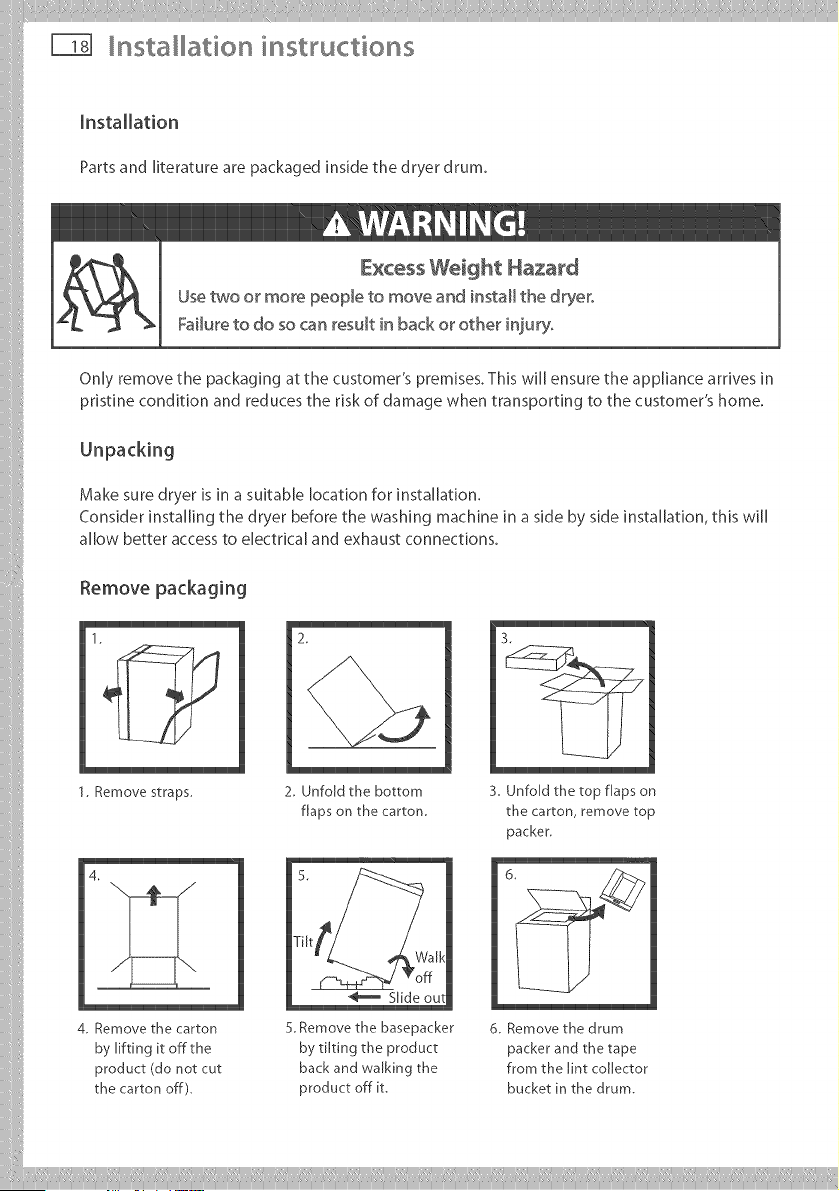
Installation
Parts and literature are packaged inside the dryer drum.
_ !_v_v/_'l _t_ m_ L_
Excess Weight Hazard
Use two or more people to move and install the dryer°
Fa4ure to do so can result in back or other injury°
Only remove the packaging at the customer's premises. This wi[[ ensure the appliance arrives in
pristine condition and reduces the risk of damage when transporting to the customer's home.
Make sure dryer is in a suitable location for installation.
Consider installing the dryer before the washing machine in a side by side installation, this wi[[
allow better access to electrical and exhaust connections.
Remove packaging
1.
1. Remove straps.
4, Remove the carton
by lifting it off the
product (do not cut
the carton off),
2.
2, Unfold the bottom
flaps on the carton.
5. Remove the basepacker
by tilting the product
back and warking the
product off it.
3.
3, Unfold the top flaps on
the carton, remove top
packer.
6 Remove the drum
packer and the tape
from the lint collector
bucket in the drum.
Installation instructions FT_ l_
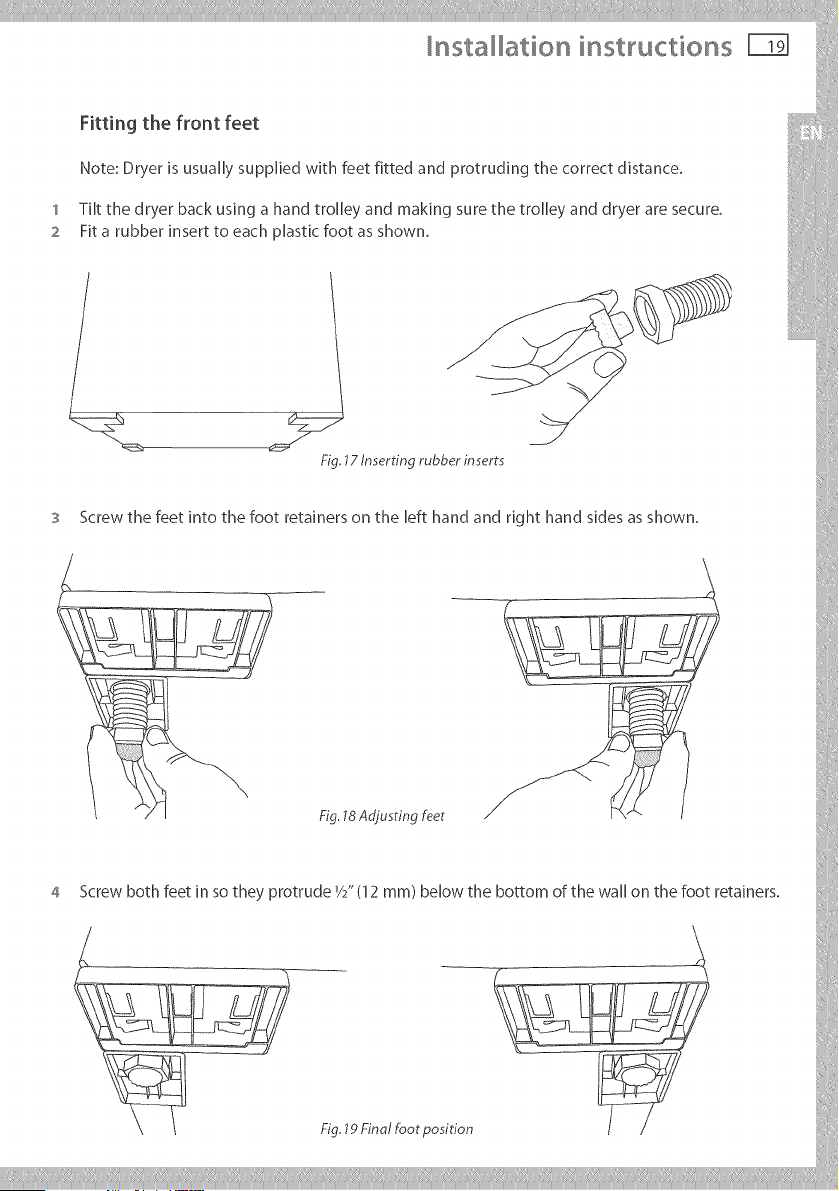
Fitting the front feet
.ote:Dryer_susuallysuppl_edw_thfeetf_ttedandprotrudingthecorrectd_stance.
I Tiltthe dryer back using a band trolleyand making surethe trolleyand dryerare secure.
2 Fita rubber insertto each plasticfootas shown. __ _
Screw the feet into the foot retainers on the [eft hand and right hand sides as shown.
lg 78Adjusting feet
4 Screwb_thfeet_ns_theypr_trude/2_(12mm)be[_wtheb_tt_m_fthewa[[_nthef_t_eta_ners__
9F,n=,foot_o i_
nsta ation instructions
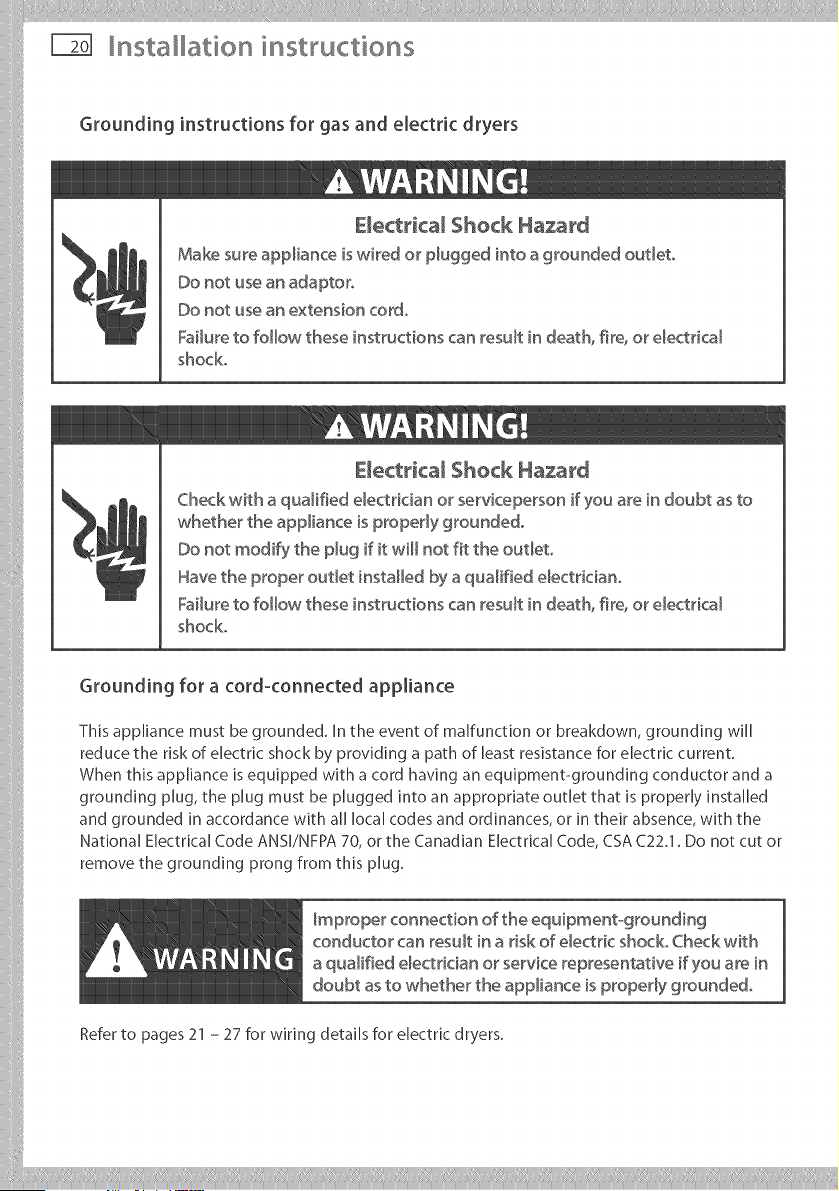
Grounding instructions for gas and electric dryers
Electrical Shock Hazard
Make sure appliance is wired or plugged into a grounded outleto
Do not use an adaptor.
Do not use an extension cord.
Failure to follow these instructions can result in death, fire, or electrical
shock.
i
Electrical Shock Hazard
Check with a qualified electrician or serviceperson if you are in doubt as to
whether the appliance is propedy grounded.
Do not modify the plug if it will not fit the outbto
Have the proper out_et installed by a qualified e[ectriciano
Failure to follow these instructions can result in death, fire, or electrical
shock.
Grounding for a cord_connected appliance
This appliance must be grounded. In the event of malfunction or breakdown, grounding will
reduce the risk of electric shock by providing a path of least resistance for electric current.
When this appliance is equipped with a cord having an equipment-grounding conductor and a
grounding plug, the plug must be plugged into an appropriate outlet that is properly installed
and grounded in accordance with all local codes and ordinances, or in their absence, with the
National Electrical Code ANSI/NFPA 70, or the Canadian Electrical Code, CSA C22.1. Do not cut or
remove the grounding prong from this plug.
_mproper connection of the equipment-grounding
conductor can result in a risk of e_ectric shocks Check with
a qualified e_ectrician or service representative if you are in
doubt as to whether the appliance is properly grounded°
Refer to pages 21 - 27 for wiring details for electric dryers.
nsta ation instructions FTfl
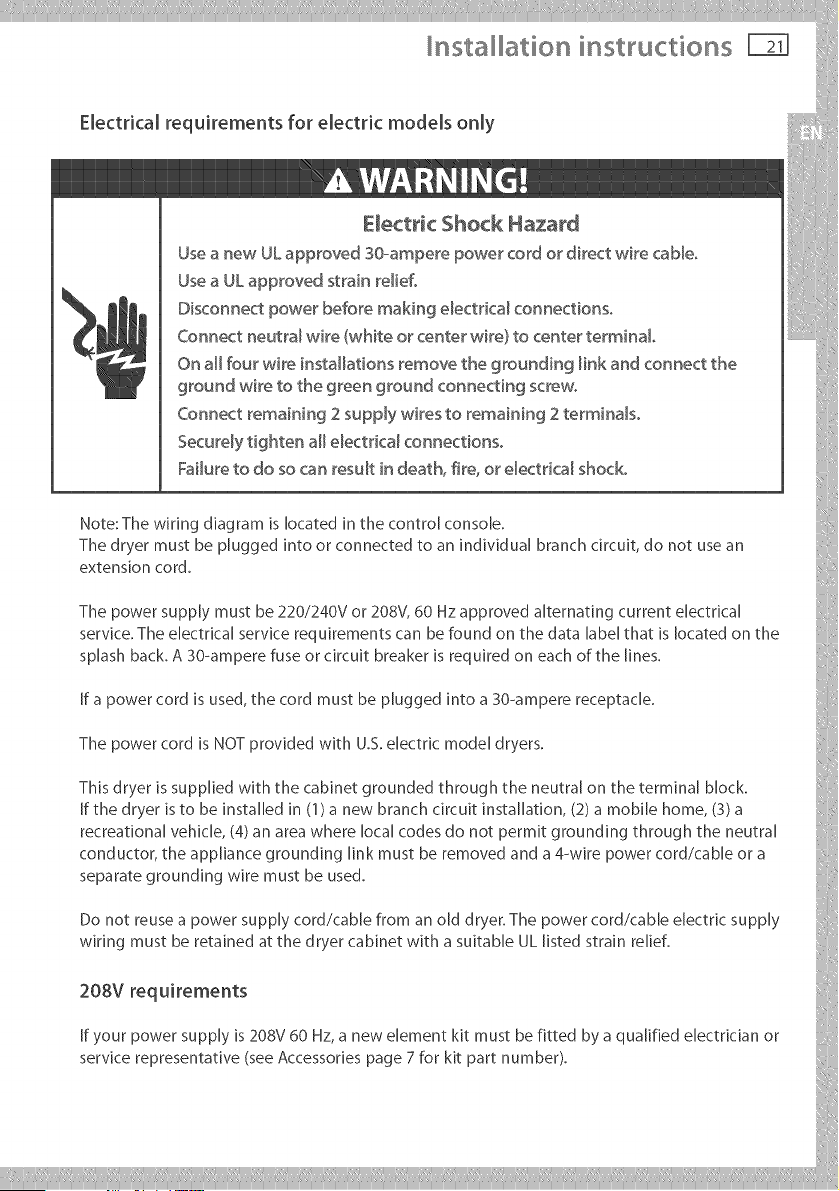
Electrical requirements for electric models only
Electric Shock Hazard
Use a new UL approved gO-_amperepower cord or direct wire came°
Use a UL approved strain re_iefo
Disconnect power before making e_ectrica[ connections°
Connect neutra_ wire (white or center wire) to center terminal
On aHfour wire installations remove the grounding _ink and connect the
ground wire to the green ground connecting screw.
Connect remaining 2 supply wires to remaining 2 termina[so
Securely tighten aHe_ectrica[ connections°
Failure to do so can result in death, fire, or electrical shock.
Note: The wiring diagram is [ocated in the contro[ consoJe.
The dryer must be pJugged into or connected to an individual branch circuit, do not use an
extension cor&
The power supply must be 220/240V or 208V, 60 Hz approved alternating current electrical
service.The electrical service requirements can be found on the data [abd that is located on the
splash back. A 30-ampere fuse or circuit breaker is required on each of the lines.
If a power cord is used, the cord must be plugged into a 30-ampere receptacle.
The power cord is NOT provided with U.S.electric mode[ dryers.
This dryer is supplied with the cabinet grounded through the neutral on the terminal block.
If the dryer is to be installed in (1) a new branch circuit installation, (2) a mobile home, (3) a
recreational vehicle, (4) an area where local codes do not permit grounding through the neutral
conductor, the appliance grounding [ink must be removed and a 4-wire power cord/cable or a
separate grounding wire must be used.
Do not reuse a power supply cord/cable from an old dryer. The power cord/cable electric supply
wiring must be retained at the dryer cabinet with a suitable UL listed strain relief.
208V requirements
If your power supply is 208V60 Hz, a new element kit must be fitted by a qualified electrician or
service representative (see Accessoriespage 7 for kit part number).
nsta ation instructions
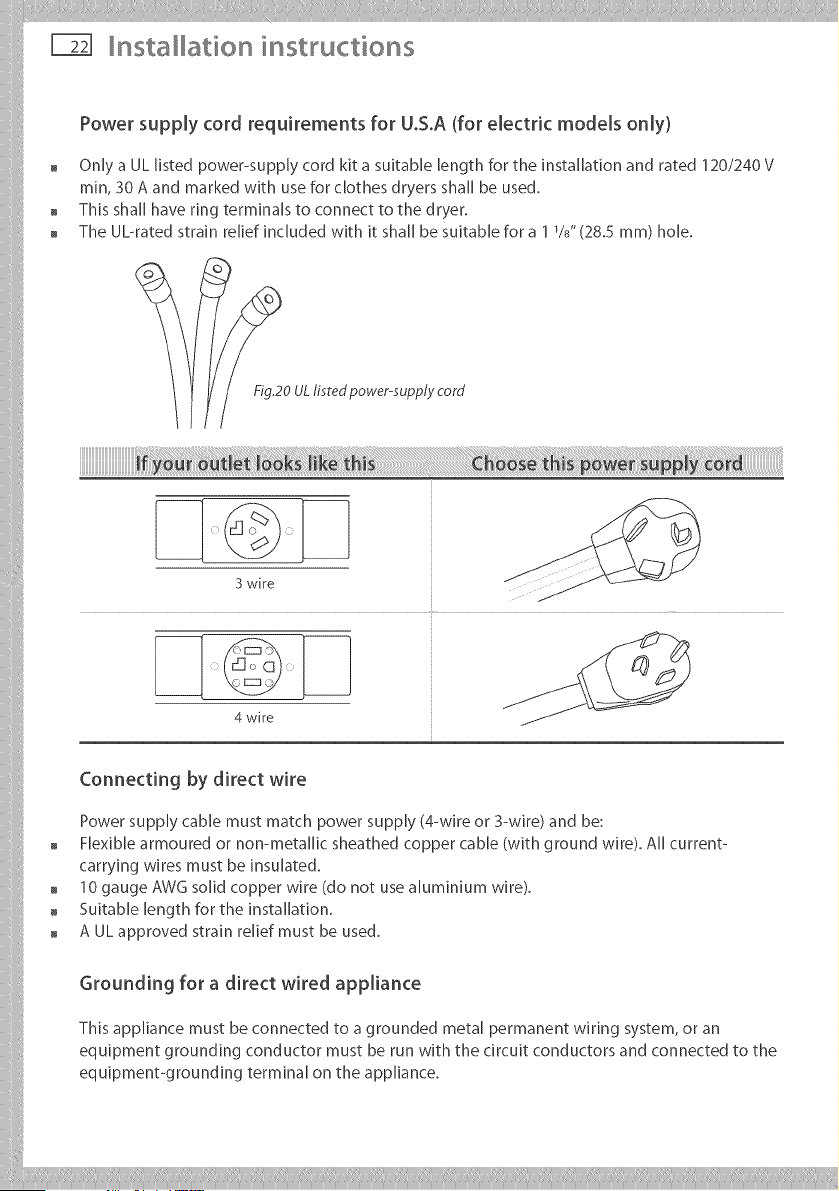
Power supply cord requirements for U°S°A(for electric models only)
Only a UL listed power-supply cord kit a suitable length for the installation and rated 120/240 V
rain, 30 A and marked with use for clothes dryers shall be used.
This shall have ring terminals to connect to the dryer.
The UL-rated strain relief included with it shall be suitable for a 1 1/8"(28.5 ram) hole.
i_! 0 UL listed power-supply cord
3 wire
4 wire
Connecting by direct wire
Power supply cable must match power supply (4-wire or 3-wire) and be:
Flexible armoured or non-metallic sheathed copper cable (with ground wire). All current-
carrying wires must be insulated.
10 gauge AWG solid copper wire (do not use a[uminium wire).
Suitable length for the installation.
A UL approved strain relief must be used.
Grounding for a direct wired appliance
This appliance must be connected to a grounded metal permanent wiring system, or an
equipment grounding conductor must be run with the circuit conductors and connected to the
equipment-grounding terminal on the appliance.
Installation instructions _ l_
Electrical connections (ele_trk models only)
Please read Electrical requirements and grounding instructions on pages 20 - 21 first° i
Electric models of the dryer are manufactured for a 3-wire connection system. The dryer frame : :
is grounded by a [ink to the neutral conductor on the dryer terminal block, if local codes do
not permit grounding through the neutral, the grounding Ink from the terminal block must be i
removed and a separateground wire must be used.
The grounding [ink on the dryer must be removed for all 4wvire installations incJuding new,
remodeled construction, or mobile homes.
TheseElectricalConnection_nstructionsprovidefor_nstaU_ngthedryer_nthefo,ow_ng ...........................
situations:
, 3-wire connection where local codes permit grounding through the neutral.
. B-wire connection plus separate grounding connector where local codes do not permit
grounding through the neutral.
, 4-wire connection.
Each ofthe above connectionscan be made with an approved power supply cord or by direct ]:
wiring. Each connection instruction identifies the appropriate Power Supply Cord and covers },1}
requirementsfordirectwiring.
For 3-wire connections by power cords :: ....
3-wire power supply cord must have three 10 AWG copper wires and match a 3-wire receptacle
of NMEA Type10-3OR.
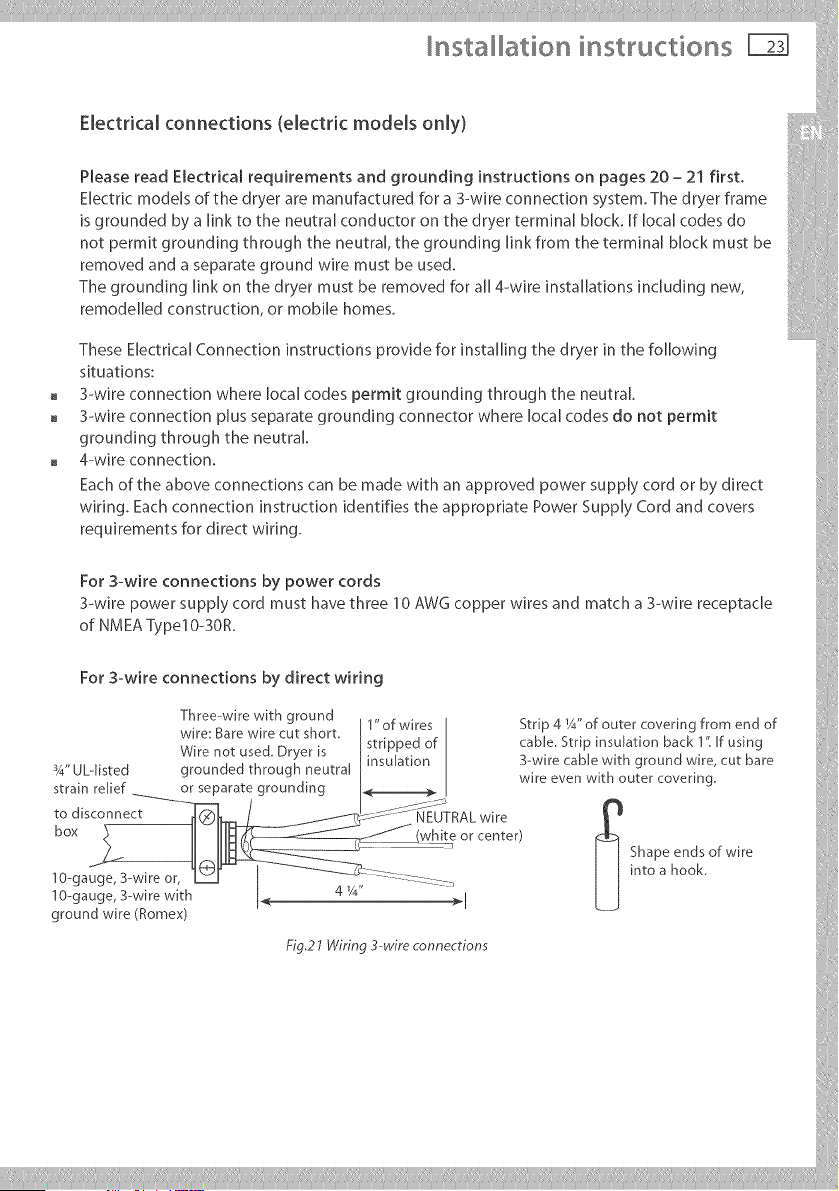
For 3-wi re con nections by di rect wi ring '//:
T}}ree_vmrewith ground 11"of wires I Strip 4 VZ'of outer covering from end of
wre uare w re cut snort i . . . . . . _ .
.......... _ m...... str pped of cad e Str p nsu at on PaCK1' TUSng
_x ,- . _ -_ A x.k k . _ Jinsulation I 3-wire came with grouno wire cut bare
-_4'UL-IIs[eu grounueu u,roug, neuda, • ... . • ' i
• . . i i wire even wire outer covering ,i
strain relief or separate grounding I_ J
box <_ I[ _ I[_ (white or center) ¢:_ }
_t,_ j j Shapeends ofwire
10-ga%e 3-wlreor, _ j __- -_----::-: __ I J mto a hook
• , 4 Y_" - i
10-gauge, B-wi2rewit:h l< 4 1/4" >1 k_J }i
grouna wire t_omex) ::{
FU,_wu_n__-wu__o,_,_rions ii
nsta ation instructions
Electrical connections (electric models only)
For 4-wire connections by power cords
4-wire power supply cord must have four 10 AWG copper wires and match a 4-wire receptacle
of NMEA Type14-30R. The fourth wire (ground conductor) must be identified by a green cover
and the neutral wire by a white cover.
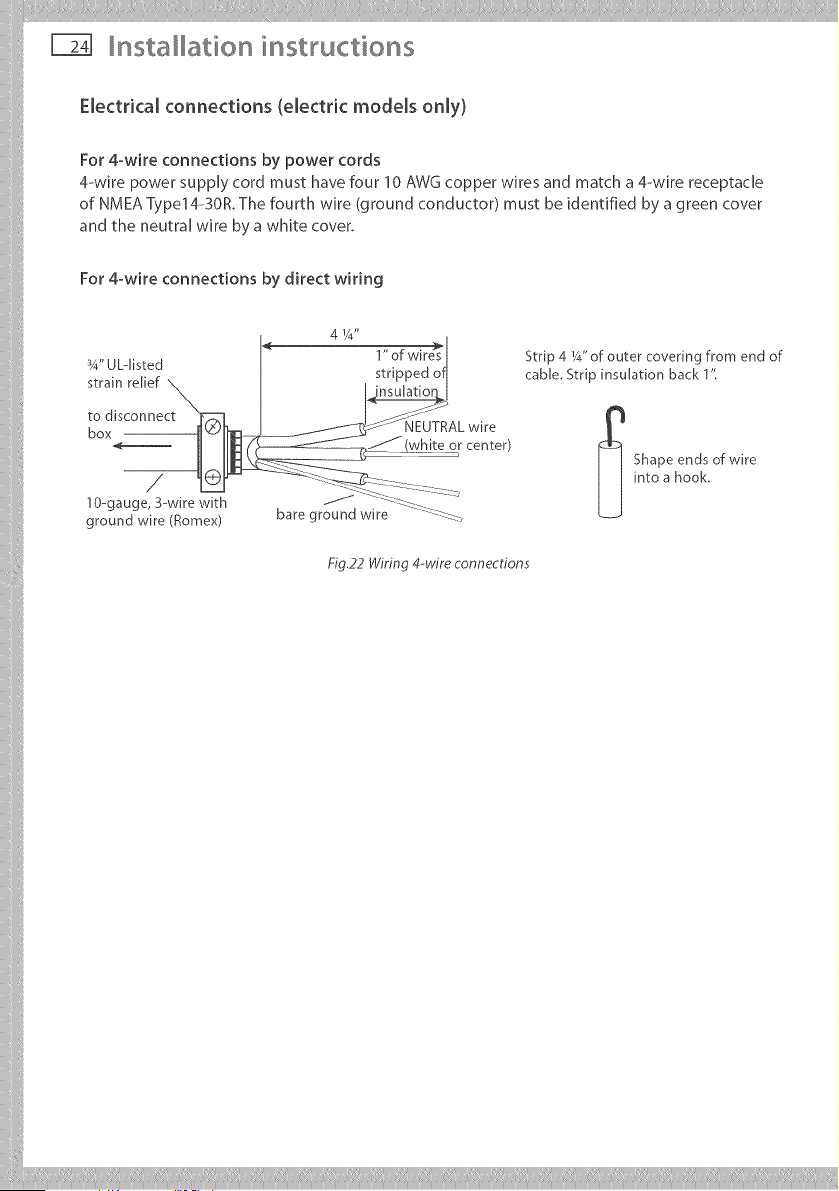
For 4-wire connections by direct wiring
[< 4W'
3/4"ULdisted [ 1 of wires [
.... / s_rippea orl
strain relier N / _ nsulatio I
/(}2hire or center)
lO-gauge, B-wire with / -_--<-- ........ ......
ground wire (Romex) bare ground wire .......
Fig.22 Wiring 4-wire connections
Strip 4 I/4" of outer covering from end of
came. Strip insuJation back 11
_ hapeends of wire
into a hook.

Installation instructions _ l_
3-wire connections
For use where local codes permit grounding through the Neutral wire. _ :i
Use approved 3-wire Power Supply Cord or a 3-wire CaMe for Direct Wiring as described on
page 23. i
1 Remove the terminal Mock cover plate.
2 Insert the power cord with a UL listed strain relief through the hole provided in the cabinet near
the terminal block, Do not tighten strain relief screw until wiring connections are complete.
Note: a strain relief must be used. i::1
( ' stral
{ )
power supply cord to the center terminal screw of the terminal block. Tighten screw. ::
4 ConnocttheotherwirestotheupperandlowerterminalblockscrewsmarkedwiththeletterL ....
Tighten screws. {:
S Refit terminal block cover by inserting the two tabs first on the rear panel of the dryer. Secure
coverwithsecuringscrew.
6 Tightenstrainreliefscrews.
,..... iii
Fig.25Set!itting terminal block cover Fig.26 Tightening strain relief screws { _ /( )
Installation instructions
'I
2
3
4
5
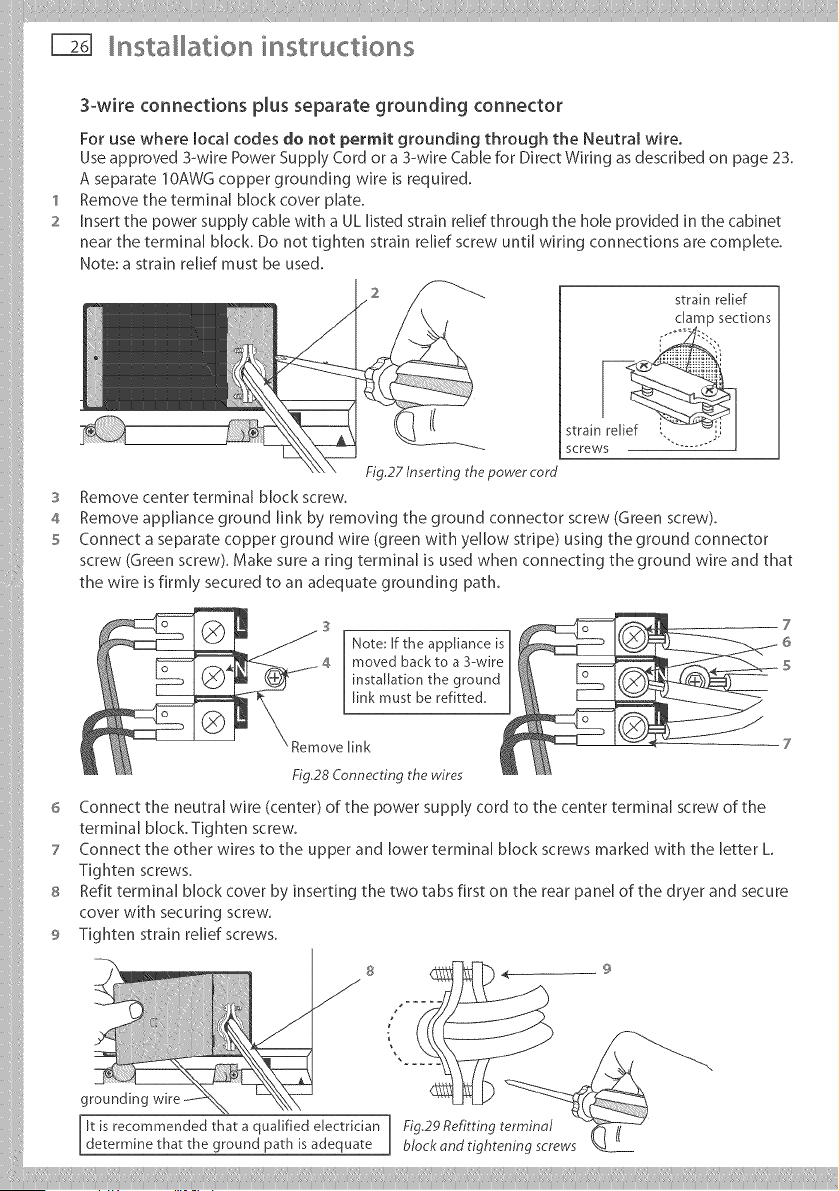
3-wire connections plus separate grounding connector
For use where [ocam codes do not permit grounding through the Neutral wire.
Use approved 3-wire Power Supply Cord or a 3-wire CaMe for Direct Wiring as described on page 23.
A separate I OAWG copper grounding wire is required.
Remove the terminal block cover plate.
insert the power supply cable with a UL listed strain relief through the hole provided in the cabinet
near the terminal block, Do not tighten strain relief screw until wiring connections are complete.
Note: a strain relief must be used.
strain relief
clamp sections
(( strain re[i_
screws
Fig.27 Inserting the power cord
Remove center terminal block screw.
Remove appliance ground [ink by removing the ground connector screw (Green screw).
Connect a separate copper ground wire (green with yellow stripe) using the ground connector
screw (Green screw). Make sure a ring terminal is used when connecting the ground wire and that
the wire is firmly secured to an adequate grounding path.
Note: If the appliance is
moved back to a 3-wire
installation the ground
link must be refitted,
7
5
Remove link
Fig,28 Connecting the wires
6 Connect the neutral wire (center) of the power supply cord to the center terminal screw of the
terminal block. Tighten screw.
7 Connect the other wires to the upper and lower terminal block screws marked with the letter L
Tighten screws.
8 Refit terminal block cover by inserting the two tabs first on the rear panel of the dryer and secure
cover with securing screw.
9 Tighten strain relief screws.
S
i
9
It is recommended that a qualified electrician 1 Fig,29 Refitting terminal
determine that the ground path is adequate I blockand tightening screws
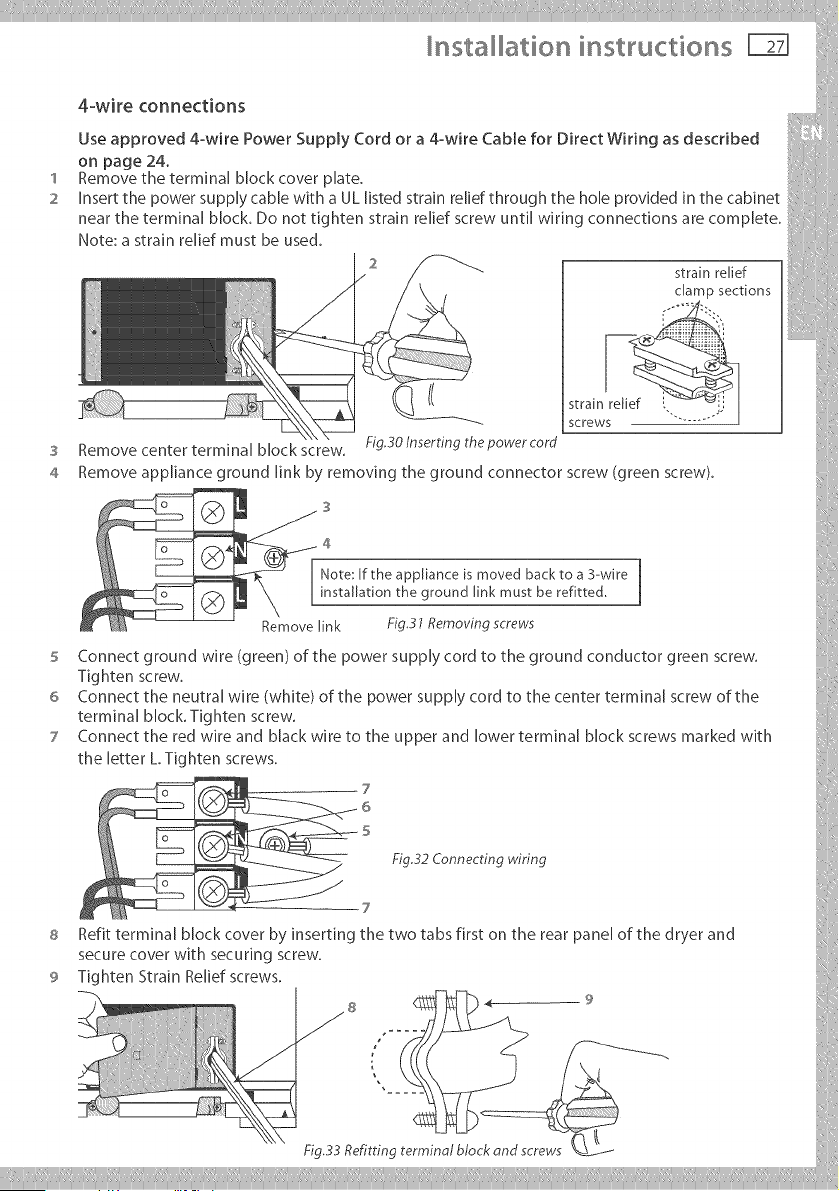
s Connect ground wire (green) of the power supply cord to the ground conductor green screw.
Tighten screw,
6 Connect the neutral wire (white) of the power supply cord to the center terminal screw of the
terminal block. Tighten screw, i
7 Connect the red wire and black wire to the upper and lower terminal block screws marked with
t h e letter k Tig hte n screws,
7
6 !_'i
F, .32Connecr,n !::::
7
8 Refit terminal block cover by inserting the two tabs first on the rear panel of the dryer and '_
secure cover with securing screw.
TightenStrainReliefscrews.
Installation instructions
Gas requirements (gas models only)
The installation must conform with LocalCodes, or in the absence of LocalCodes,to the
National Fuel GasCode ANSI Z223.1/NFPA54 or the Canadian Natural Gasand Propane
installation Code, CSAB149.1.
E×D[osion Hazard
hstalations must be performed by a qualified or licensed contractor_
plumbe_) or gasfitter qualified or licensed by the state, province, or region
where this appliance is being instaled.
Use a new AGA or CSA approved gas supply line°
hstal a shut-off vaive in an accessible place°
Only use a gas shut-off valve approved for use within the state, province, or
region where this appliance is being instaled°
Securely tighten al gas connections.
If connecting to LP Gas, have a qualified person make sure gas pressure
does not exceed 13" (330 ram} water column.
Fa/ure to folow these instructions can result in death, explosion, or fire.
Gas type
Your dryer must have the correct burner for the type of gas in your home. Burner information
is located on the rating plate located on the rear of the console. If this information does not
agree with the type of gas available in your home, contact your local Fisher & Payke[ supplier or
service center.
Natural gas
This dryer is supplied ready for use with Natural Gas.
it is design certified by UL international for LP (Propane or Butane) Gaseswith the appropriate
conversion.
LP gas conversion
if the dryer is to be operated on LP (Liquid Propane or Butane) Gas, the dryer must be
converted. To do so, use only the approved Fisher & Payke[ conversion kit [isted in Accessories
on page 7. Do not use with a different gas without consuJtJng the serving gas suppJier.
The dryer must be converted for safe and proper performance by qualified service or installation
personeL
Conversion kits for Natura[ and LP Gas are avaiJabJe from your [oca[ Fisher & Payke[ DeaJer
(see Accessories page 7). If other conversions are required, check with your [oca[ gas utJJity for
specific information concerning conversion requirements.
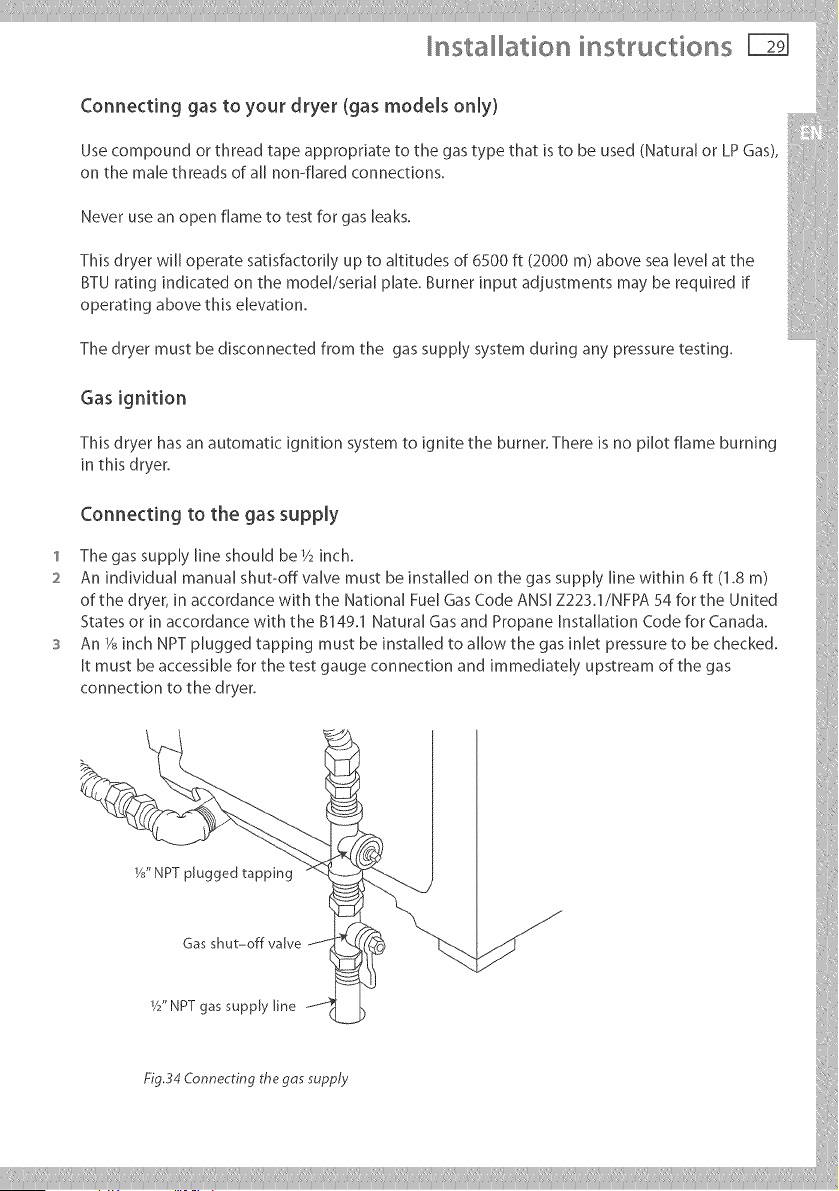
ofthedryer,inaccordancewiththeNationalFuelGasCodeANSIZ223.1/NFPA54fortheUnited
StatesorinaccordancewiththeB149.1NaturalGasandPropaneInstalhtionCodeforCanada.
3 An_,_inchNPTpluggedtappingmustbeinstalledtoallowthegasinletpressuretobechecked.
Itmustbeaccessiblefor the test gauge connection and immediately upstream of the gas
connection to the dryer.
I/Z'NPT gas supplyline
nsta ation instructions
Connecting gas to your dryer (gas models only)
4 A listed connector in compliance with ANSI Z21.24/CSA6.10 must be used to connect the dryer
to the gas supply.
5 If flexible tubing is used, an elbow should be installed on the pipe at the back of the dryer for
the flexible tube to be connected to. This will minimize damage to the tube when the dryer is
moved back. Use a flexible tubing connection kit that has designed for use on a clothes dryer.
This kit should have the unions necessary to join to the ends of the tubing. Be sure to follow all
instructions supplied with the kit.
6 Copper tubing should not be used for Natural Gas and if used for LP Gas, it must be LP Gas
compatible.
7 Disconnect and discard old flexible tubing.
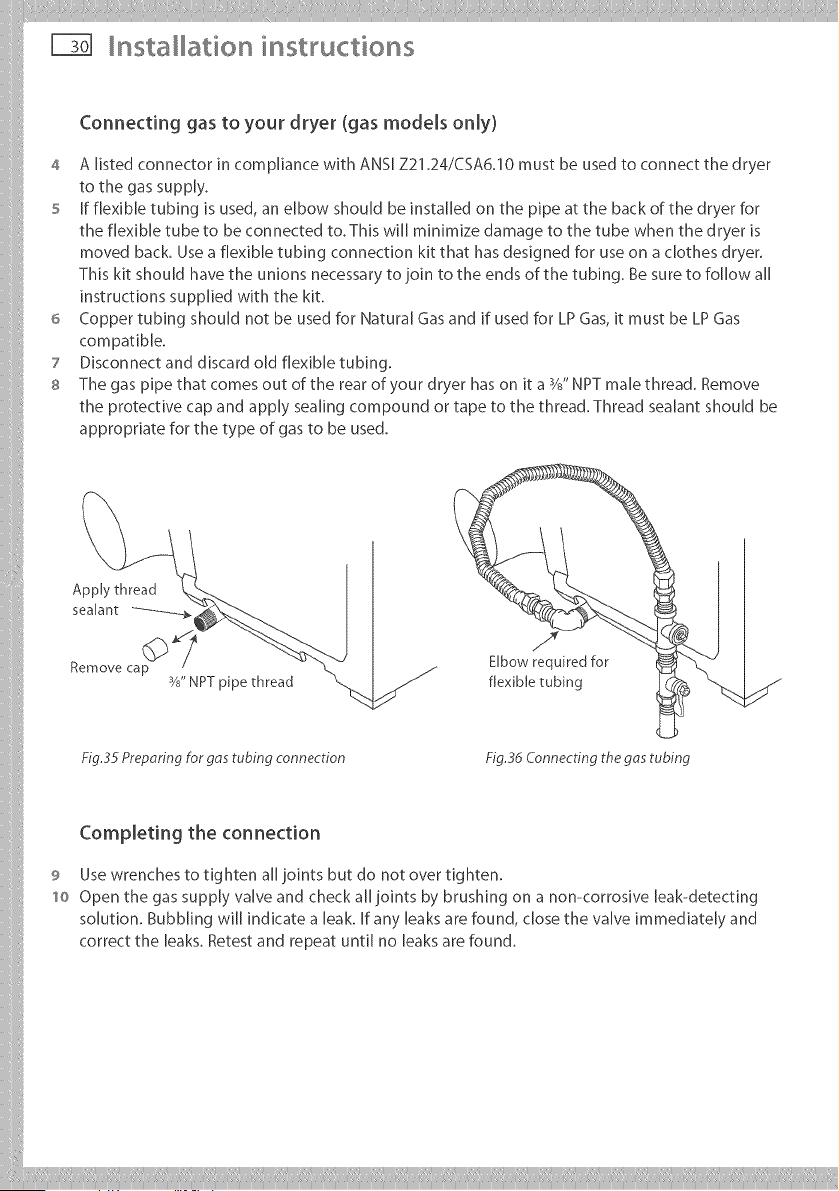
8 The gas pipe that comes out of the rear of your dryer has on it a s/?, NPT male thread. Remove
the protective cap and apply sealing compound or tape to the thread. Thread sealant should be
appropriate for the type of gas to be used.
_'NPT pipe thread k_._
f
Elbow required for
flexible tubing
Fig.35 Preparing for gas tubing connection Fig.36 Connecting the gos tubing
Completing the connection
9 Use wrenches to tighten all joints but do not over tighten.
lo Open the gas supply valve and check all joints by brushing on a non-corrosive leak-detecting
solution. Bubbling will indicate a leak. If any leaks are found, close the valve immediately and
correct the leaks. Retest and repeat until no leaks are found.
Installation instructions 1-71 l_
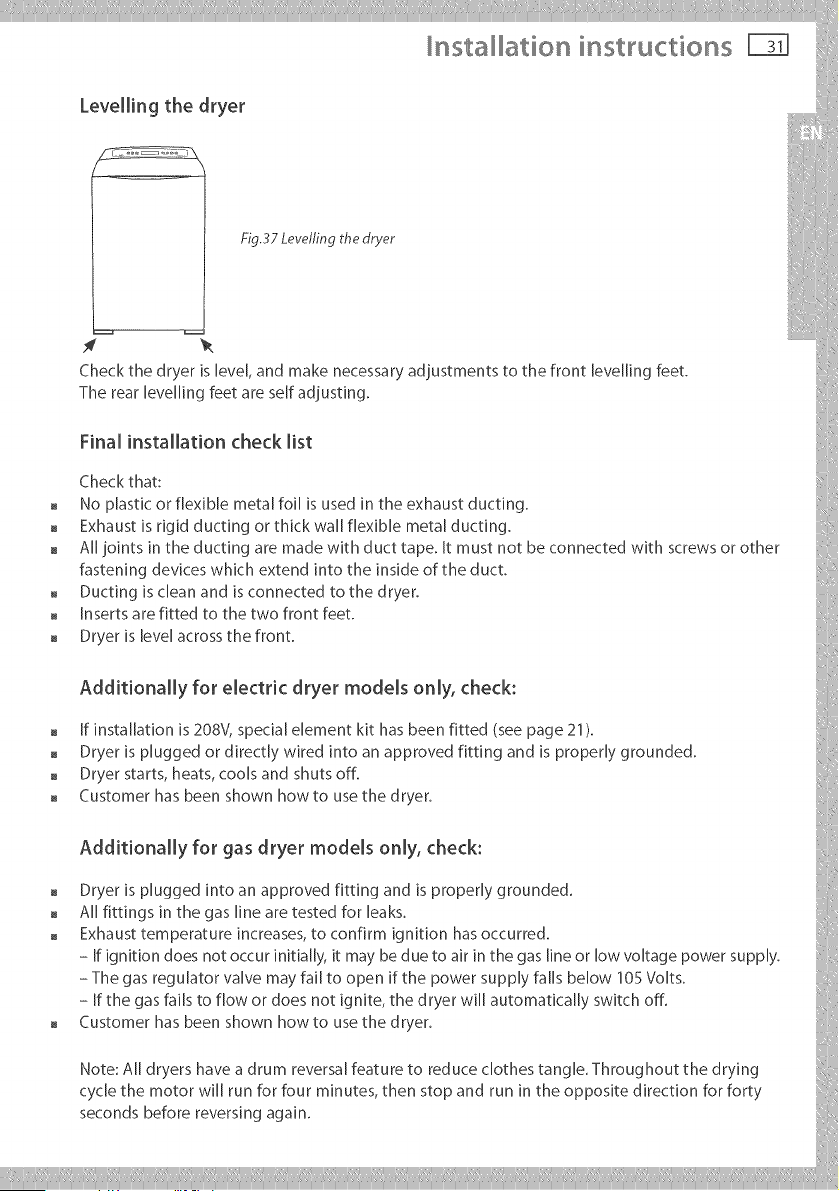
Levelling the dryer
Check the dryer is level, and make necessary adjustments to the front leveling feet.
Therearlevellingfeetareselfadiusting.
Final installation check list
Check that:
, No plastic or flexible metal foil is used in the exhaust ducting.
, Exhaust is rigid ducting or thick wall flexible metal ducting.
, All joints in the ducting are made with duct tape. It must not be connected with screws or other
= Ducting is clean and is connected to the dryer. ....
, Inserts are fitted to the two front feet. }
, Dryer_s_eve_acrossthefront.
Additionaly for electric dryer models only, check:
o If installation is 208V, specialelement kit has been fitted (seepage 21 ).
° Dryer is plugged or directly wired into an approved fitting and is properly grounded.
° Dryerstarts,heats,coolsandshutsoff.
° Customerhasbeenshownhowtousethedryer.
Additionally for gas dryer models only, check:
o Dryer isplugged intoan approved fittingand isproperlygrounded.
o All fittings in the gas line are tested for leaks.
o Exhaust temperature increases, to confirm ignition has occurred.
- If ignition does not occur initially, it may be due to air in the gas lne or low voltage power supply.
- Thegasregulatorvalvemayfa_ltoopen_fthepowersupplyfallsbelow_0_Volts.
- If the gas fails to flow or does not ignite, the dryer will automatically switch off.
° Customerhasbeenshownhowtousethedryer.
note:s, dryershaveadrumreversalfeaturetoreduceclothestangle.Throughoutthedrying
cycle the motor will run for four minutes, then stop and run in the opposite direction for forty
seconds before reversing again.
The first time you turn your dryer on
i
r
E_ectri¢ Shock Hazard
Read and follow the Important safety instructions outlined in this User
Guide before operating this app_ianc6 pages 3 - 6_
Failure to do so can result in death, dectric shock, fire or injury to persons°
Close supervision is necessary if this dryer is used by or near children. Do not allow children to
play inside, around or with this dryer or any other appliance.
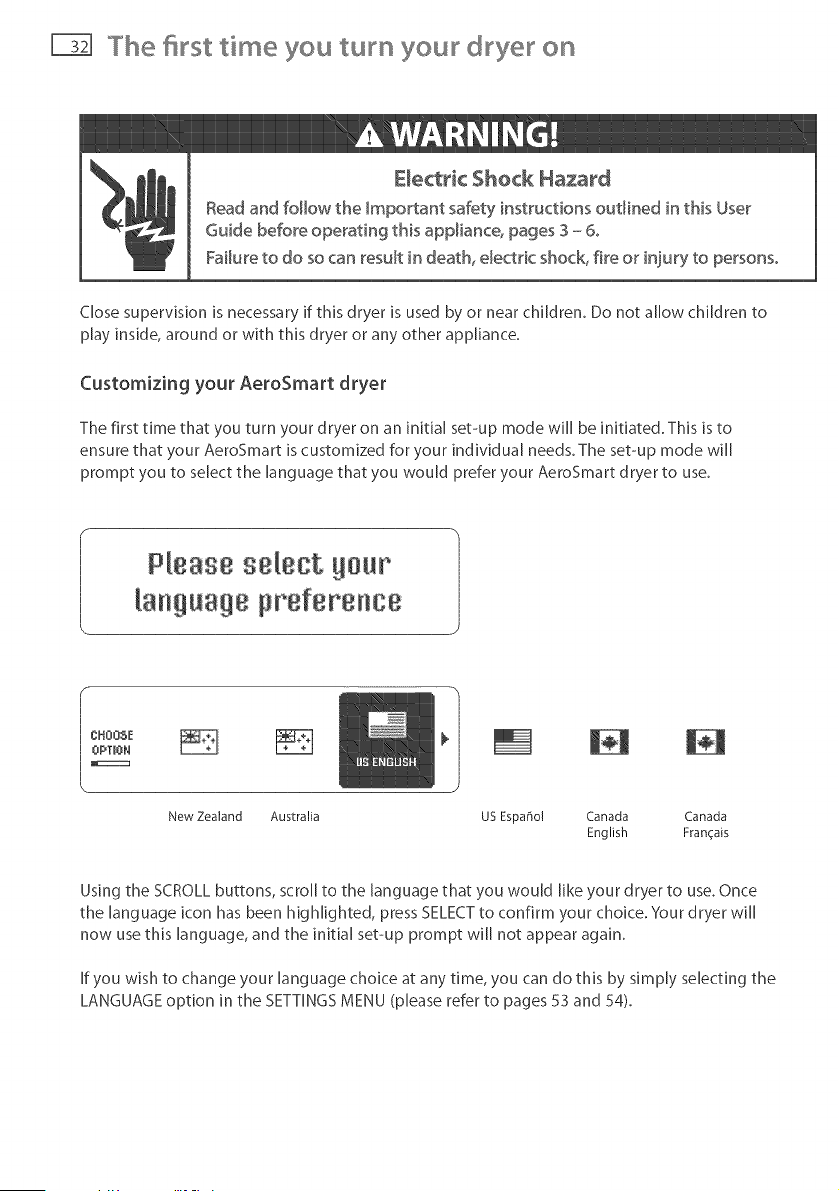
Customizing your AeroSmart dryer
The first time that you turn your dryer on an initial set-up mode will be initiated. This is to
ensure that your AeroSmart is customized for your individual needs. The set-up mode will
prompt you to select the language that you would prefer your AeroSmart dryer to use.
Pleaseselectum r
iang Jag8preference
New Zealand Australia US Espa5o! Canada Canada
English Fran_ais
Using the SCROLL buttons, scroll to the language that you would like your dryer to use. Once
the language icon has been highlighted, press SELECT to confirm your choice. Your dryer will
now use this language, and the initial set-up prompt will not appear again.
If you wish to change your language choice at any time, you can do this by simply selecting the
LANGUAGE option in the SETTINGS MENU (please refer to pages 53 and 54).
Features F£1
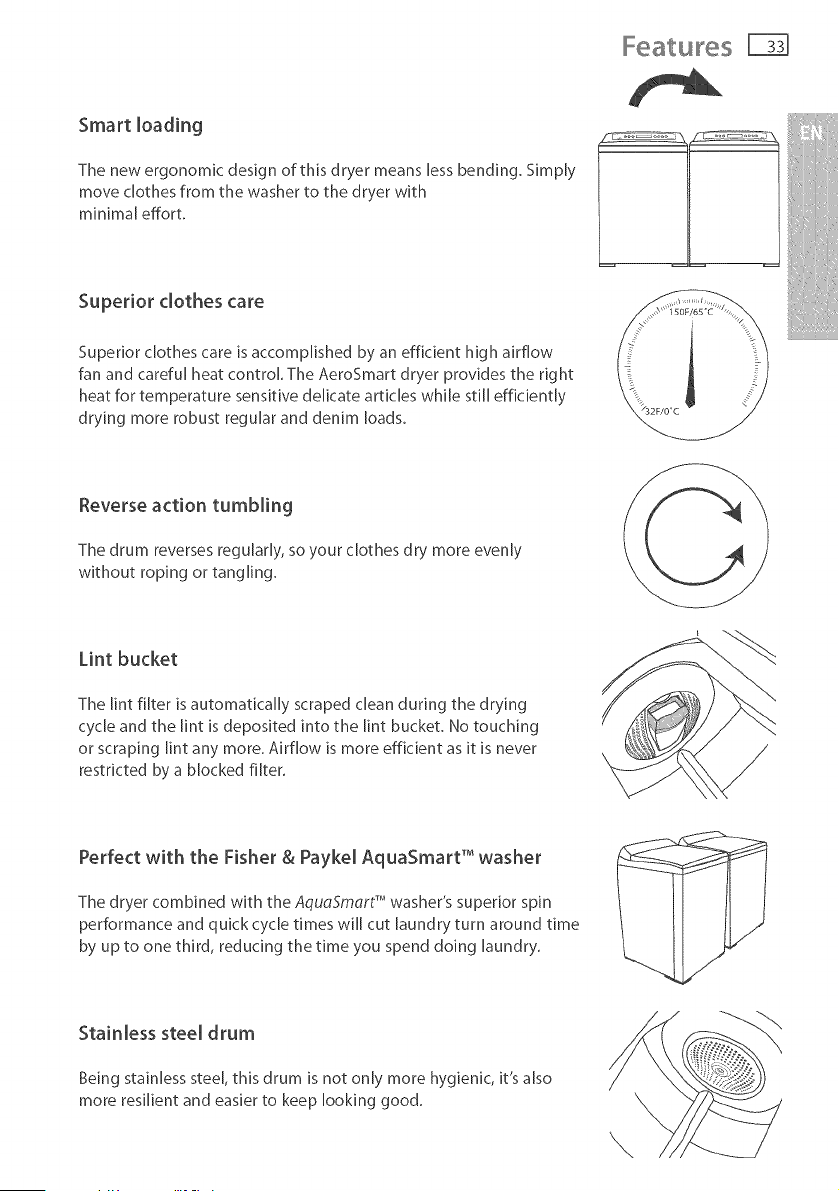
Smart loading
The new ergonomic design of this dryer means less bending. Simply
move clothes from the washer to the dryer with
minimal effort.
Superior clothes care
Superior clothes care is accomplished by an efficient high airflow
fan and careful heat control. The AeroSmart dryer provides the right
heat for temperature sensitive delicate articles while still efficiently
drying more robust regular and denim loads.
Reverse action tumbling
The drum reverses regularly, so your clothes dry more evenly
without roping or tangling.
Lint bucket
The lint filter is automatically scraped clean during the drying
cycle and the lint is deposited into the lint bucket. No touching
or scraping lint any more. Airflow is more efficient as it is never
restricted by a blocked filter.
Perfect with the Fisher & Payke[ AquaSmart TM washer
The dryer combined with the AquoSmard _ washer's superior spin
performance and quick cycle times will cut laundry turn around time
by up to one third, reducing the time you spend doing laundry.
Stainless steel drum
Being stainless steel, this drum is not only more hygienic, it's also
more resilient and easier to keep looking good.
\
6etting started qukk y
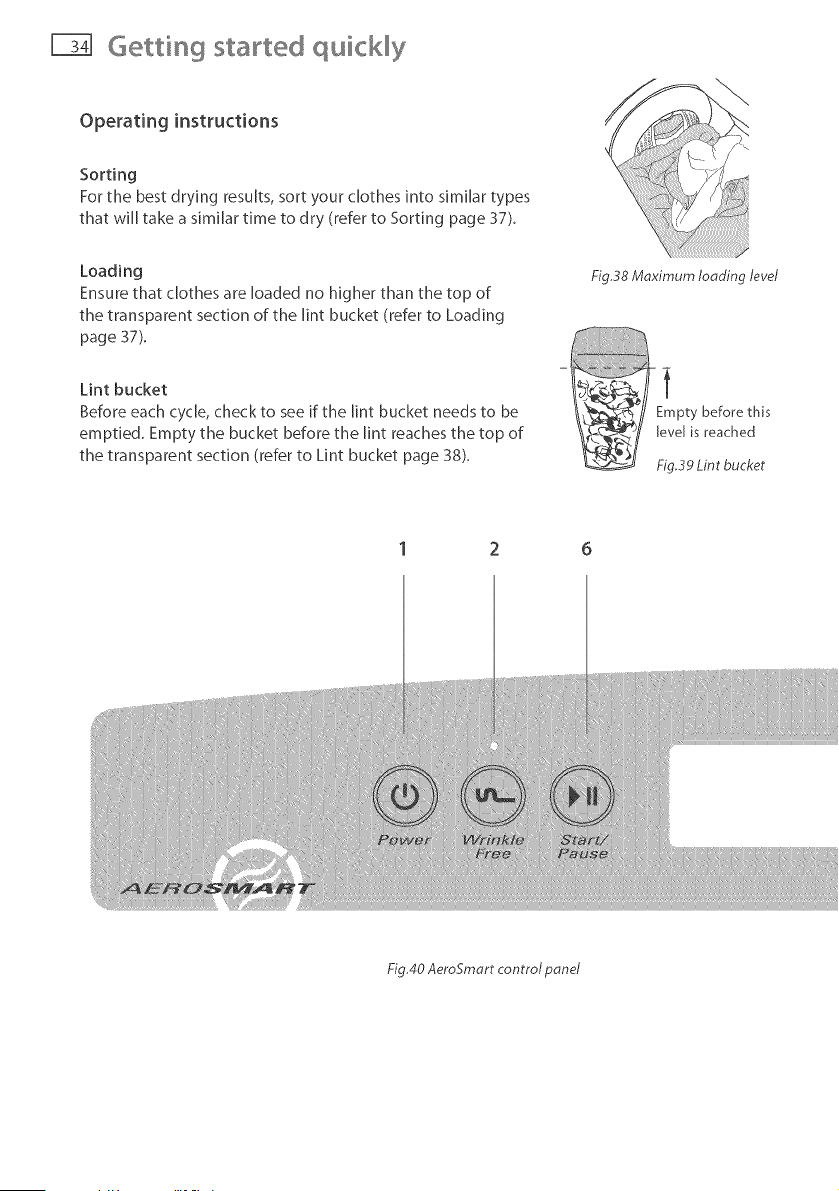
Operating instructions
Sorting
For the best drying results, sort your clothes into similar types
that will take a similar time to dry (refer to Sorting page 37).
Loading
Ensure that clothes are loaded no higher than the top of
the transparent section of the lint bucket (refer to Loading
page 37).
Lint bucket
Before each cycle, check to see if the lint bucket needs to be
emptied. Empty the bucket before the lint reaches the top of
the transparent section (refer to Lint bucket page 38).
Fig.J8 Maximum loading level
Empty before this
JeveJis reached
Fig,39 Lint bucket
Fig.40 AeroSmart control panel
Getting started quickly
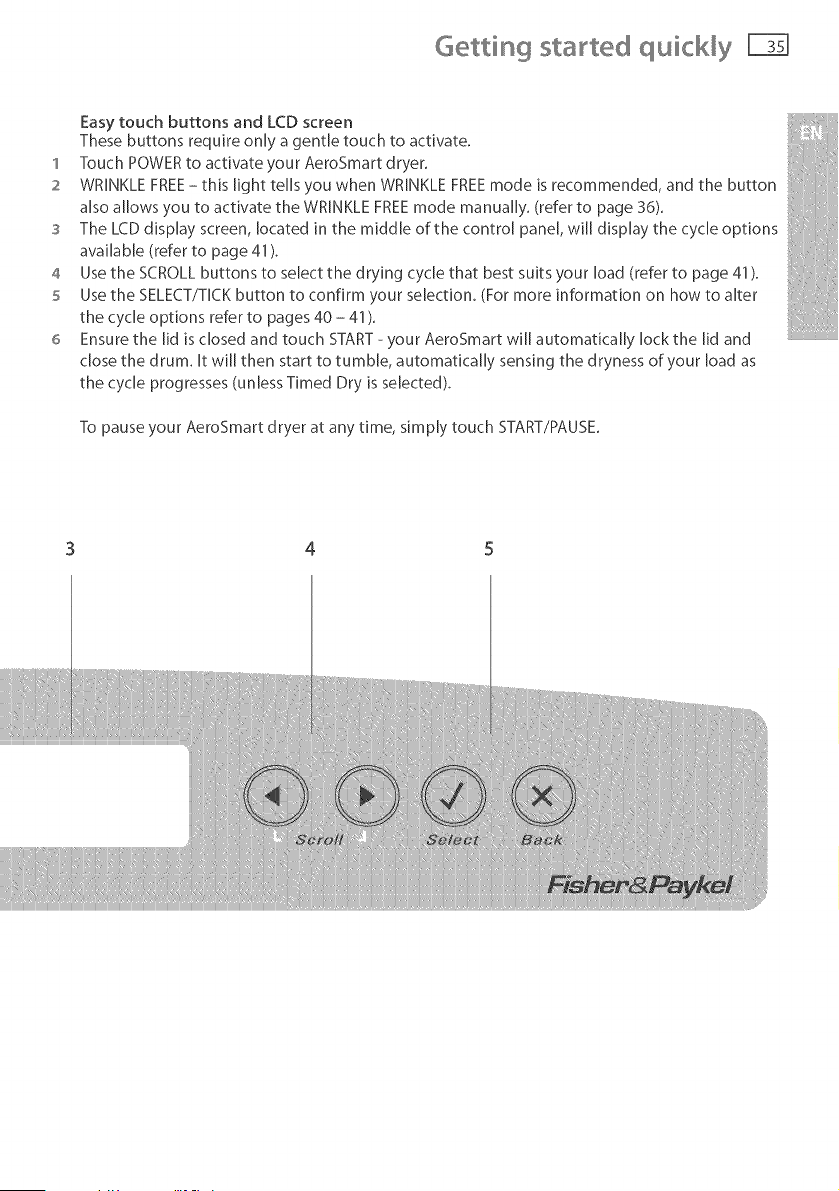
Easy touch buttons and LCD screen
These buttons require only a gentle touch to activate.
1 Touch POWER to activate your AeroSmart dryer.
2 WRINKLE FREE- this light tells you when WRINKLE FREE mode is recommended, and the button
also allows you to activate the WRINKLE FREE mode manually. (refer to page 36).
3 The LCD display screen, located in the middle of the control panel, will display the cycle options
available (refer to page 41 ).
4 Use the SCROLL buttons to select the drying cycle that best suits your load (refer to page 41 ).
5 Use the SELECT/TICK button to confirm your selection. (For more information on how to alter
the cycle options refer to pages 40 - 41 ).
6 Ensure the lid is closed and touch START - your AeroSmart will automatically lock the lid and
close the drum. It will then start to tumble, automatically sensing the dryness of your load as
the cycle progresses (unless Timed Dry is selected).
To pause your AeroSmart dryer at any time, simply touch START/PAUSE.
3 4 5
AeroSma t controls
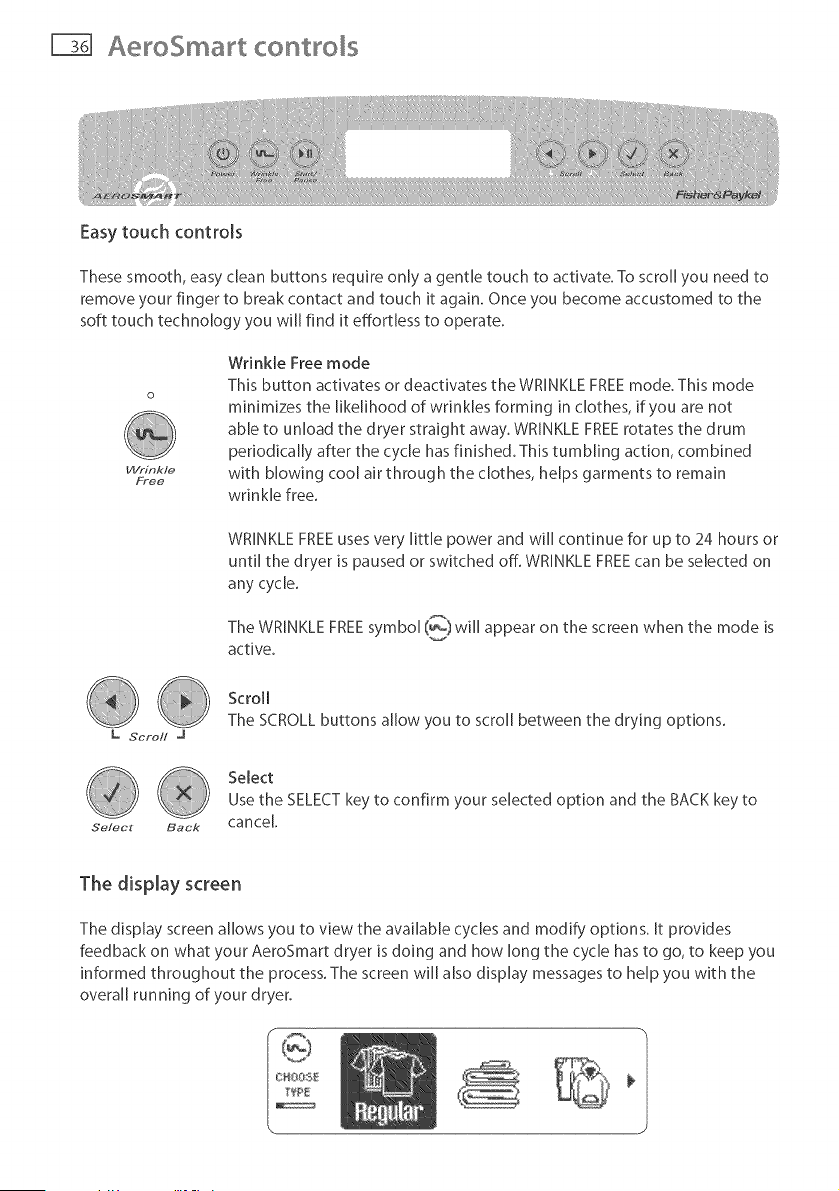
Easy touch controls
These smooth, easy clean buttons require only a gentle touch to activate. To scroll you need to
remove your finger to break contact and touch it again. Once you become accustomed to the
soft touch technology you will find it effortless to operate.
Wrinkle
Free
Wrinkle Free mode
This button activates or deactivates the WRINKLE FREEmode. This mode
minimizes the likelihood of wrinkles forming in clothes, if you are not
able to unload the dryer straight away. WRINKLE FREE rotates the drum
periodically after the cycle has finished. This tumbling action, combined
with blowing cool air through the clothes, helps garments to remain
wrinkle free.
L Scroll J
WRINKLE FREE uses very little power and will continue for up to 24 hours or
until the dryer is paused or switched off. WRINKLE FREEcan be selected on
any cycle.
The WRINKLE FREE symbol (_) will appear on the screen when the mode is
active,
Scroll
The SCROLLbuttons allow you to scroll between the drying options.
Select
Use the SELECT key to confirm your selected option and the BACK key to
cancel.
The display screen
The display screen allows you to view the available cycles and modify options. It provides
feedback on what your AeroSmart dryer is doing and how long the cycle has to go, to keep you
informed throughout the process.The screen will also display messagesto help you with the
overall running of your dryer.
Using you d yer
Check the care labels inside the garments to determine whether the garment manufacturer
recommends tumble-drying.
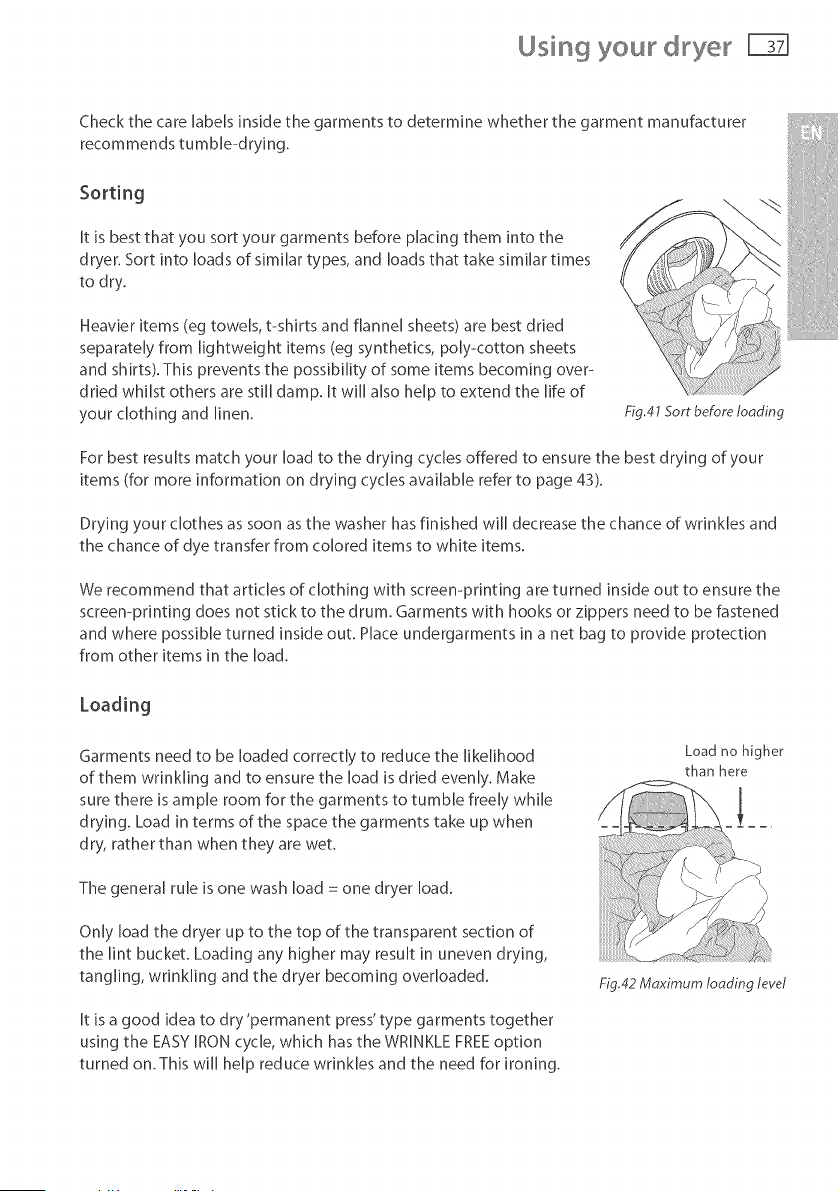
Sorting
It is best that you sort your garments before placing them into the
dryer. Sort into loads of similar types, and loads that take similar times
to dry.
Heavier items (eg towels, t-shirts and flannel sheets) are best dried
separately from lightweight items (eg synthetics, poly<otton sheets
and shirts). This prevents the possibility of some items becoming over-
dried whilst others are still damp. It will also help to extend the life of
your clothing and linen.
! #
£ig.41 Sort before lodding
For best results match your load to the drying cycles offered to ensure the best drying of your
items (for more information on drying cycles available refer to page 43).
Drying your clothes as soon asthe washer has finished will decrease the chance of wrinkles and
the chance of dye transfer from colored items to white items.
We recommend that articles of clothing with screen-printing are turned inside out to ensure the
screemprinting does not stick to the drum. Garments with hooks or zippers need to be fastened
and where possible turned inside out. Place undergarments in a net bag to provide protection
from other items in the load.
Garments need to be loaded correctly to reduce the likelihood
of them wrinkling and to ensure the load is dried evenly. Make
sure there is ample room for the garments to tumble freely while
drying. Load in terms of the space the garments take up when
dry, rather than when they are wet.
The general rule is one wash load = one dryer load.
Only load the dryer up to the top of the transparent section of
the lint bucket. Loading any higher may result in uneven drying,
tangling, wrinkling and the dryer becoming overloaded.
It is a good idea to dry 'permanent press'type garments together
using the EASYIRONcycle, which has the WRINKLEFREEoption
turned on. This will help reduce wrinkles and the need for ironing.
Load no higher
than here
Fig.42 Maximum looding level
Using your dryer
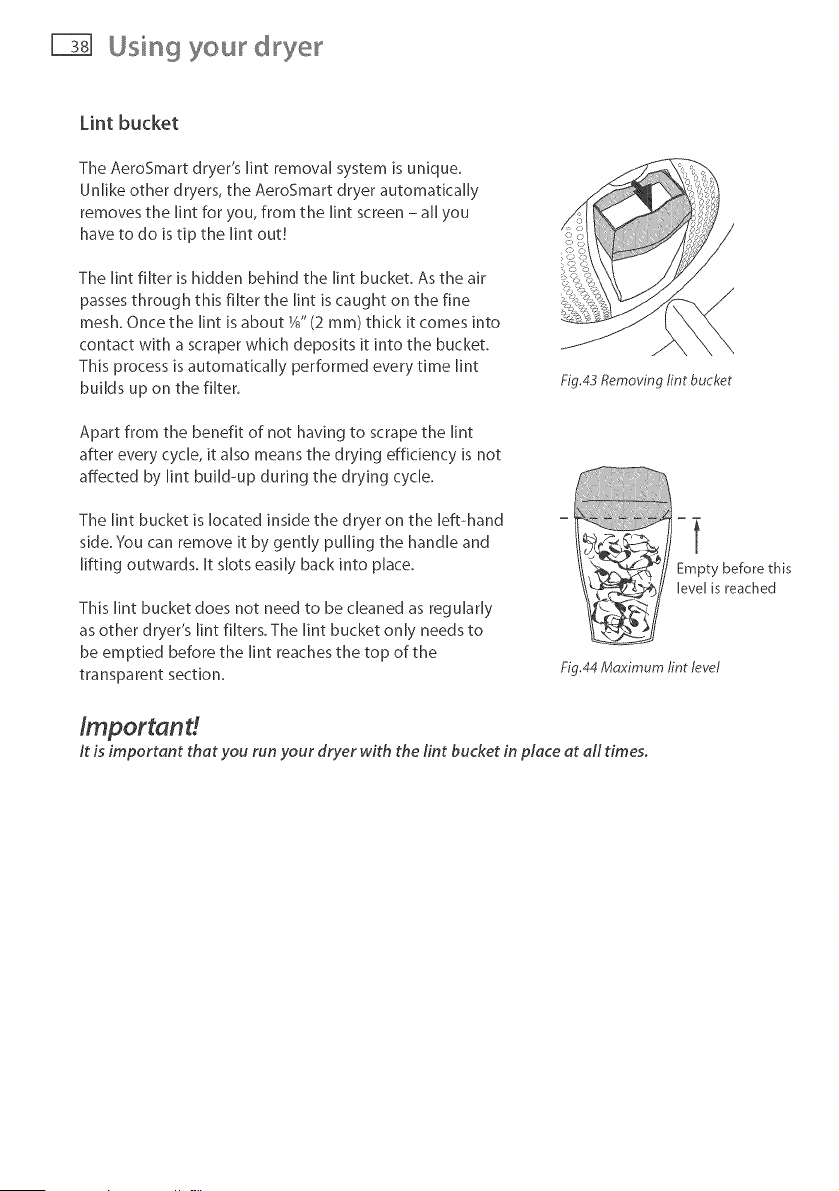
Lint bucket
The AeroSmart dryer's lint removal system is unique.
Unlike other dryers, the AeroSmart dryer automatically
removes the lint for you, from the lint screen - all you
have to do is tip the lint out!
The lint filter is hidden behind the lint bucket. As the air
passes through this filter the lint is caught on the fine
mesh. Once the lint is about 1is"(2 mm) thick it comes into
contact with a scraper which deposits it into the bucket.
This process is automatically performed every time lint
builds up on the filter.
Fig.43 Removing lint bucket
Apart from the benefit of not having to scrape the lint
after every cycle, it also means the drying efficiency is not
affected by lint build-up during the drying cycle.
The lint bucket is located inside the dryer on the left-hand
side. You can remove it by gently pulling the handle and
lifting outwards. It slots easily back into place.
This lint bucket does not need to be cleaned as regularly
as other dryer's lint filters. The lint bucket only needs to
be emptied before the lint reaches the top of the
transparent section.
m m
t
Empty before this
[eve[ is reached
Fig.44 Mdximum lint level
/mportand
It is important thet you run your dryer with the lint bucket in piece et ell times.
Choosing yeu d ying cycle 71
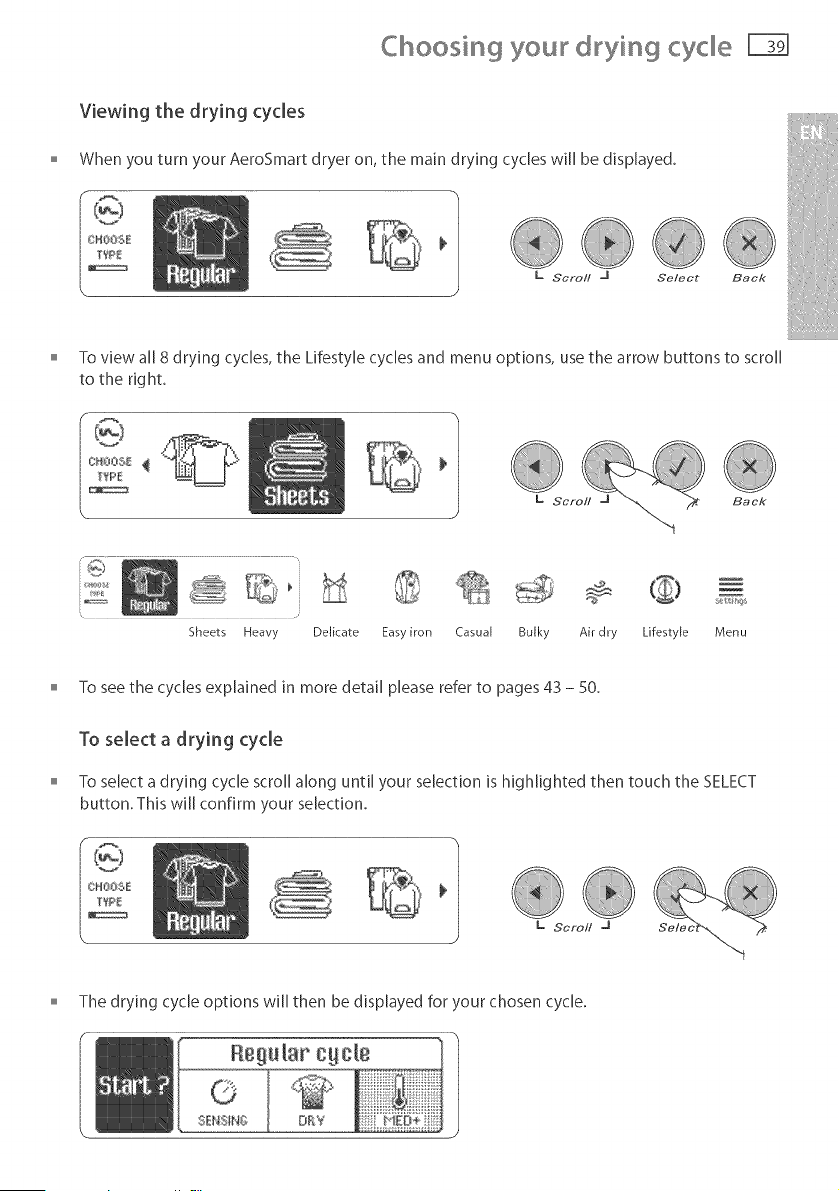
Viewing the drying cycles
When you turn your AeroSmart dryer on, the main drying cycles will be displayed.
k Scroll J Select Back
To view all 8 drying cycles, the Lifestyle cycles and menu options, use the arrow buttons to scroll
to the right,
Sheets Heavy Delicate Easy iron CasuaF Bulky
e;_'q
Air dry LifestyFe Menu
To see the cycles explained in more detail please refer to pages 43 - 50.
To select a drying cycle
To select a drying cycle scroll along until your selection is highlighted then touch the SELECT
button. This will confirm your selection.
The drying cycle options will then be displayed for your chosen cycle.
Changing the drying cycle options
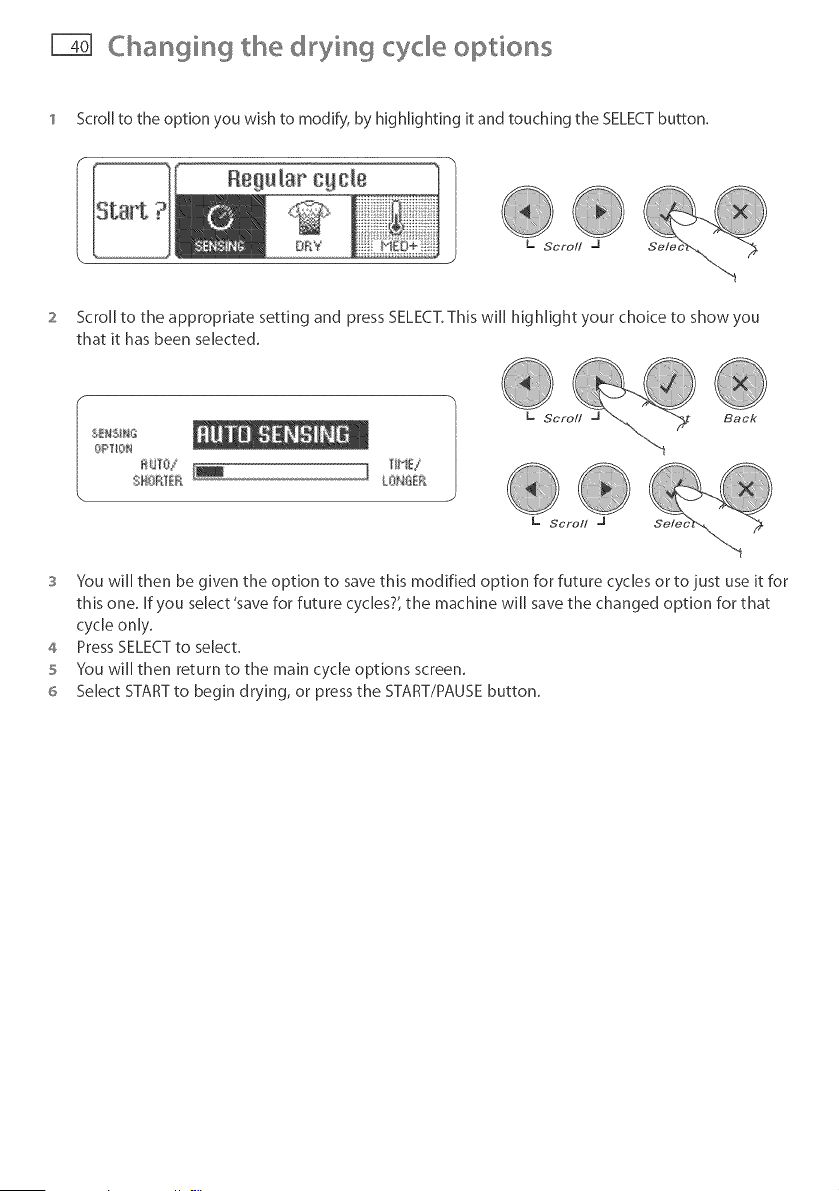
1 Scroll to the option you wish to modify, by highlighting it and touching the SELECTbutton.
Scroll to the appropriate setting and press SELECT.This will highlight your choice to show you
that ]t has been selected.
OPT_O:_a
a_J_O/ _ ] £OiqSE_F_
SHO_'_ER
Back
S You will then be given the option to save this modified option for future cycles or to just use it for
this one. If you select'save for future cycles?', the machine will save the changed option for that
cycle only.
4 Press SELECTto select.
5 You will then return to the main cycle options screen.
6 Select START to begin drying, or press the START/PAUSE button.
Changing the drying cycle options [-T{1
Cycle options
To alter any of the Cycle Options explained below, please refer to page 40 for further instructions.
Auto Sensing
Auto sensing is automatically selected when your AeroSmart dryer is turned on.
AeroSmart's internal computer automatically measures the moisture content of the
load and will turn off when it senses that the clothes have reached the designated
dryness level.
Using the Auto sensing capability of your dryer will ensure the best possible drying
result.
Timed Dry
Timed Dry allows you to select from three time periods - 20, 40 and 80 minutes. A
cooling period of 10 minutes is also included in the 80 and 40 minute cycles and a 5
minute cool down is included in the 20 minute cycle.
if you choose to select Timed Dry, please note that the dryer wi[[ not sense when
your clothes are dry. This may increase the chance of over-drying. We recommend
that you dry your clothes for a slightly shorter time than you think they need, or
check on them regularly (to avoid overdrying).
Auto sensing often provides the best drying results and can lead to lower energy
costs when compared to using the Timed Dry option.
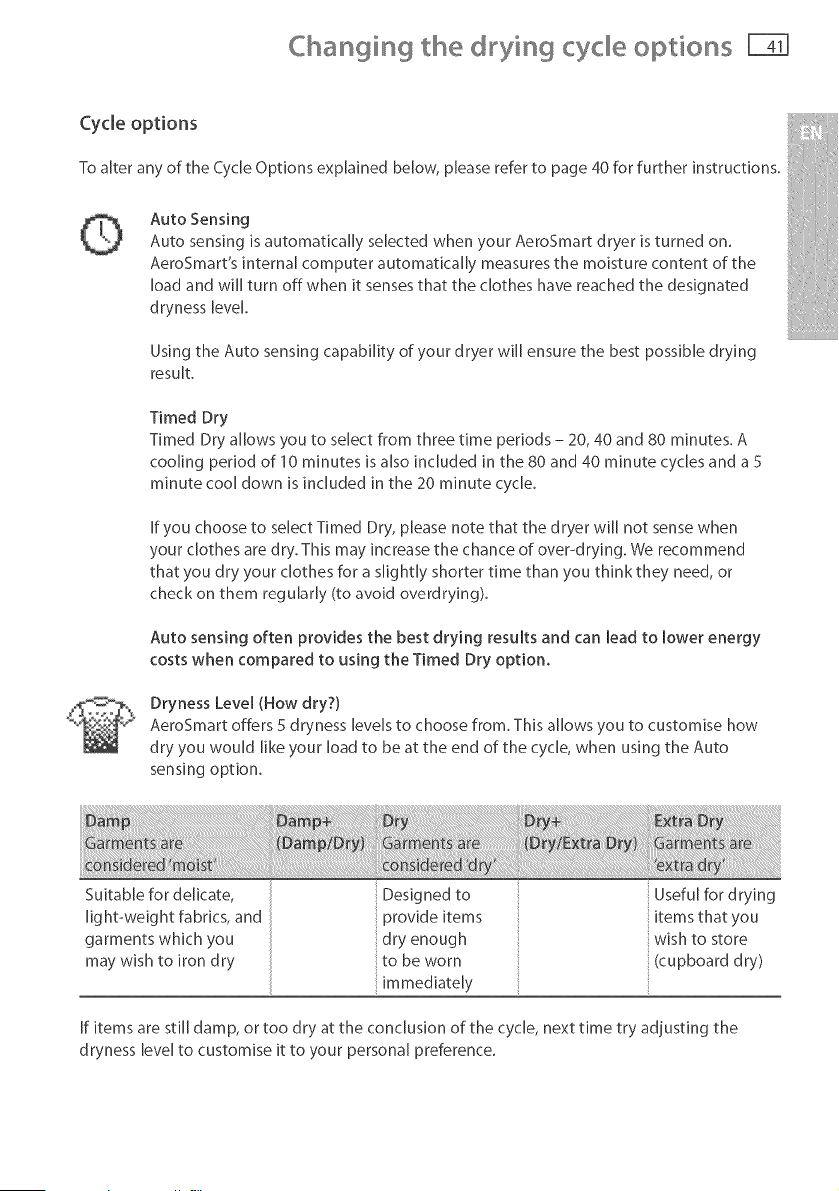
Dryness Level (How dry?)
AeroSmart offers 5 dryness levels to choose from. This allows you to customise how
dry you would like your load to be at the end of the cycle, when using the Auto
sensing option.
Suitable for delicate,
lig ht-weight fabrics, and
garments which you
may wish to iron dry
iprovideitems
idry enough
ito be worn
iimmediately
Useful for drying
items that you
wish to store
(cupboard dry)
If items are still damp, or too dry at the conclusion of the cycle, next time try adjusting the
dryness level to customise it to your personal preference.
Changing the drying cycle options
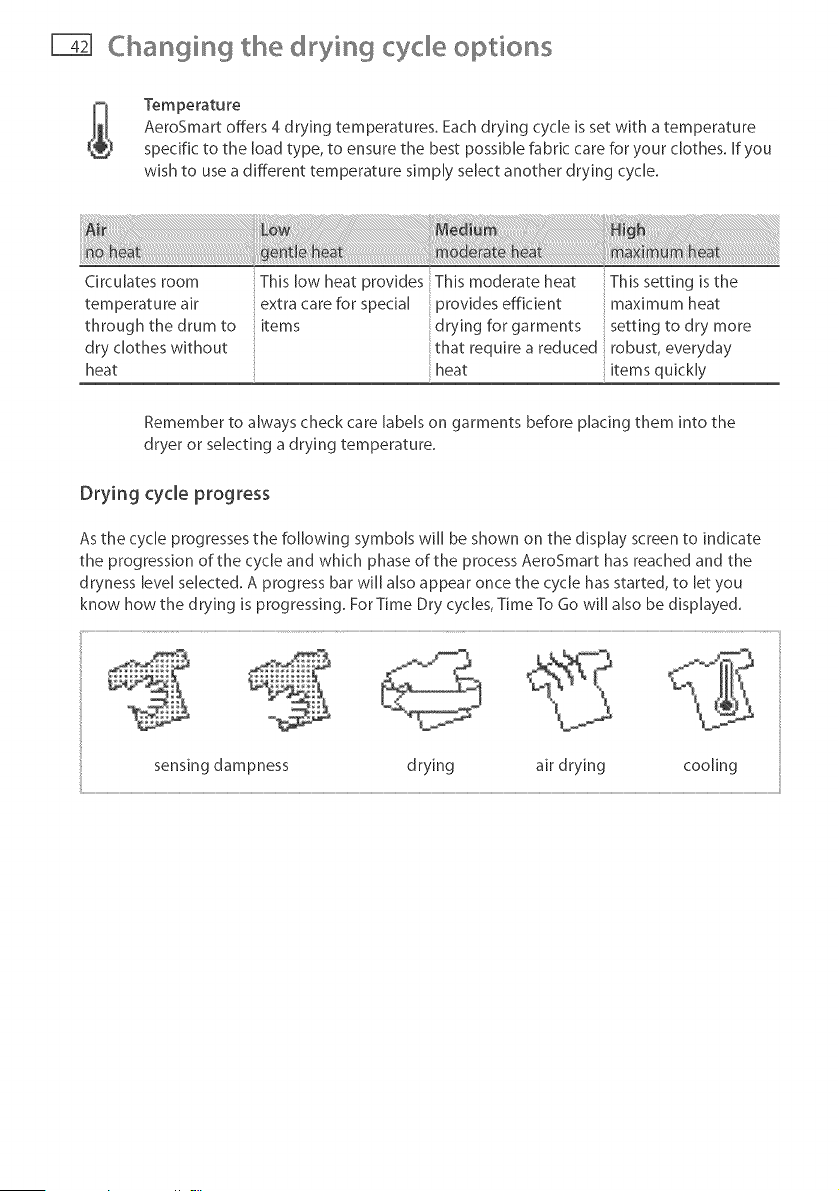
Tern peratu re
AeroSmart offers 4 drying temperatures. Each drying cycle is set with a temperature
specific to the load type, to ensure the best possible fabric care for your clothes. If you
wish to use a different temperature simply select another drying cycle.
Circulates room
temperature air
through the drum to
dry clothes without
heat
::This low heat provides This moderate heat
: extra care for special provides efficient
items drying for garments
that require a reduced
heat
This setting is the
maximum heat
setting to dry more
robust, everyday
items quickly
Remember to always check care labels on garments before placing them into the
dryer or selecting a drying temperature.
Drying cycle progress
As the cycle progresses the following symbols will be shown on the display screen to indicate
the progression of the cycle and which phase of the process AeroSmart has reached and the
dryness level selected. A progress bar will also appear once the cycle has started, to let you
know how the drying is progressing. For Time Dry cycles, Time To Go will also be displayed.
sensing dampness drying air drying cooling
Changing the drying cycle options
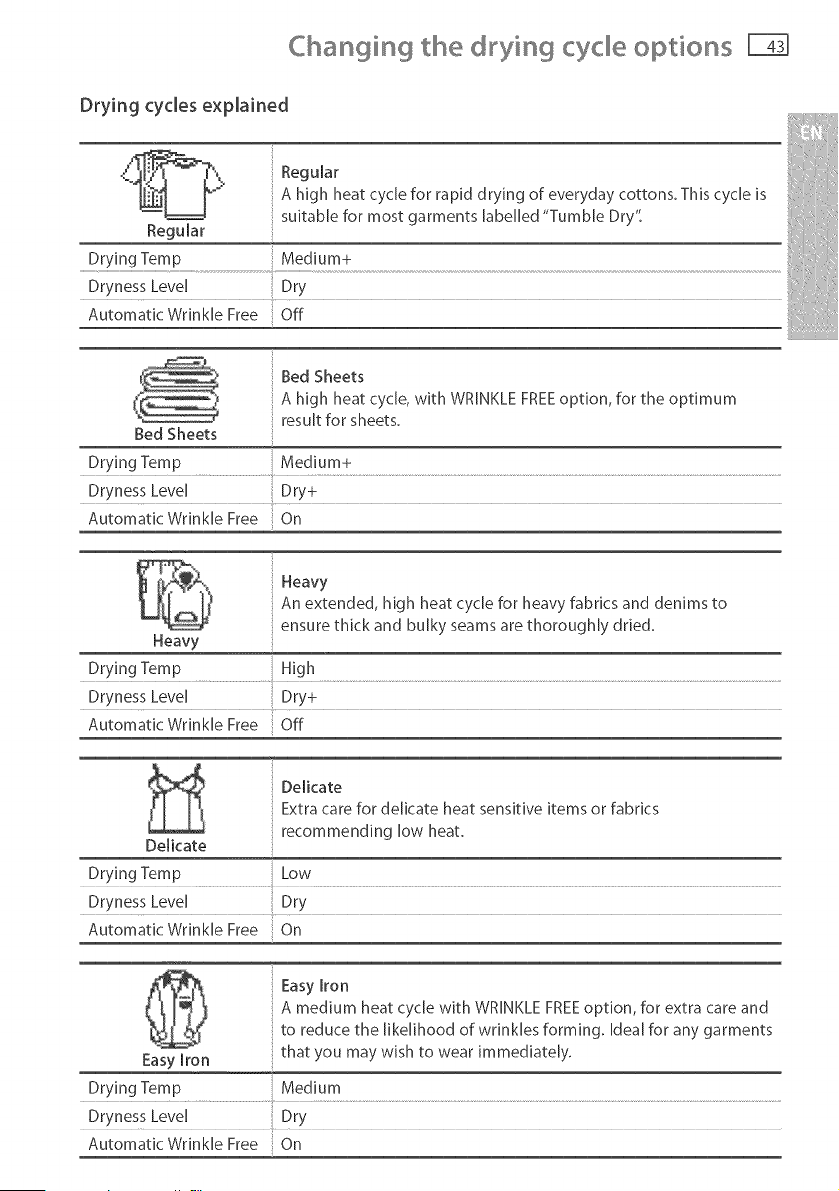
Drying cycles explained
'_, Regular
_1 l_S" A high heat cycle for rapid drying of everyday cottons. This cycle is
, suitable for most garments labelled "Tumble Dry't
KeguBar
Drying Temp : Medium+
Dryness Level .....Dry
Automatic Wrinkle Free Off
Bed Sheets
A high heat cycle, with WRINKLE FREEoption, for the optimum
result for sheets.
Bed Sheets
Drying Temp Medium+
Dryness Level Dry+
Automatic Wrinkle Free On
Heavy
An extended, high heat cycle for heavy fabrics and denims to
ensure thick and bulky seams are thoroughly dried.
Heavy
Drying Temp High
Dryness Level Dry+
Automatic Wrinkle Free Off
Delicate
Extra care for delicate heat sensitive items or fabrics
recommending low heat.
Delicate
Drying Temp Low
Dryness Level Dry
Automatic Wrinkle Free On
Easy iron
A medium heat cycle with WRINKLE FREEoption, for extra care and
to reduce the likelihood of wrinkles forming. Ideal for any garments
Easy iron that you may wish to wear immediately.
Drying Temp Medium
Dryness Level .....Dry
Automatic Wrinkle Free On
Changing the drying cycle options
Drying cycles explained
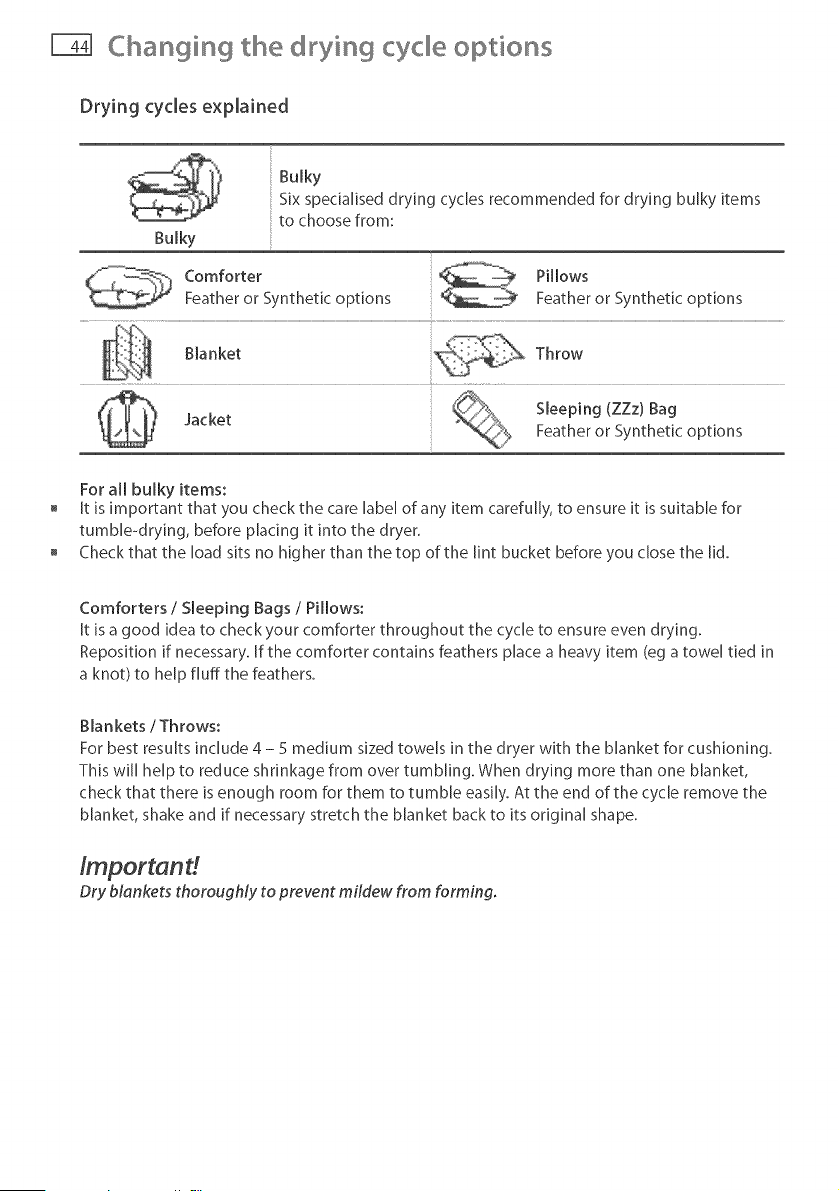
Bulky
Six specialised drying cycles recommended for drying bulky items
to choose from:
Bulky
Comforter Pillows
Feather or Synthetic options Feather or Synthetic options
For all bulky items:
It is important that you check the care label of any item carefully, to ensure it is suitable for
tumble-drying, before placing it into the dryer.
Check that the load sits no hig her than the top of the lint bucket before you close the lid.
Comforters / Sleeping Bags / Pillows:
It is a good idea to check your comforter throughout the cycle to ensure even drying.
Reposition if necessary. If the comforter contains feathers place a heavy item (eg a towel tied in
a knot) to help fluff the feathers.
Blankets / Throws:
For best results include 4 - 5 medium sized towels in the dryer with the blanket for cushioning.
This will help to reduce shrinkage from over tumbling. When drying more than one blanket,
check that there is enough room for them to tumble easily. At the end of the cycle remove the
blanket, shake and if necessary stretch the blanket back to its original shape.
Importand
Dry blenkets thoroughly to prevent mildew from forming_
Changing the drying cycle options
Drying cycles explained
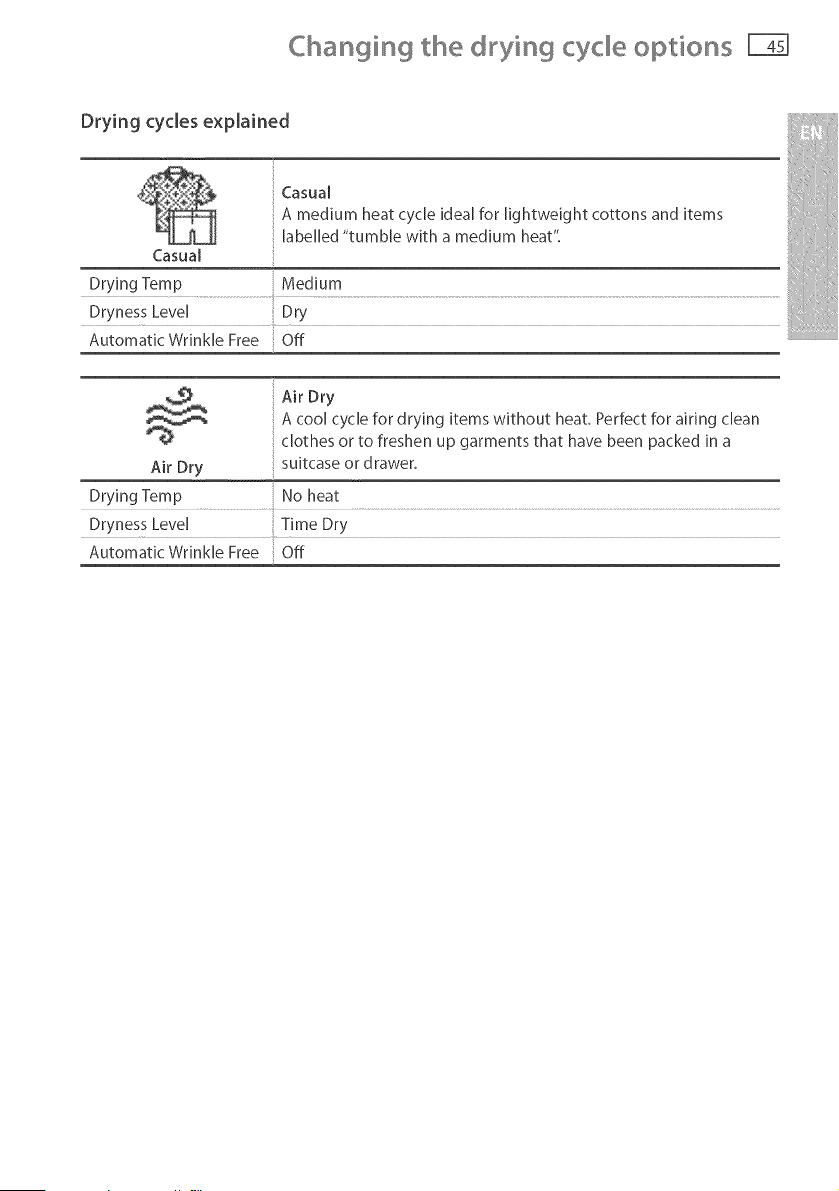
Casual
A medium heat cycle ideal for hghtwe[ght cottons and items
labelled "tumble with a medium heat".
Casual
Drying Temp Medium
Dryness Level .....Dry
Automatic Wrinkle Free Off ................................................
Air Dry
A cool cycle for drying items without heat, Perfect for airing clean
clothes or to freshen up garments that have been packed in a
Air Dry suitcase or drawer.
Drying Temp No heat
Dryness Level Time Dry
Automatic Wrinkle Free Off
Lifestyle cycles
No experience necessary
Your AeroSmart dryer offers you a range of special Lifestyle cycles, to make drying even easier.
These cycles have been specifically designed by our laundry experts, with you in mind. We have
incorporated 70 years of laundry knowledge into 18 easy to use, preprogrammed drying cycles.
This allows you to let the dryer deal with some of the more tricky drying situations you may
encounter, ensuring that you get the same results as a laundry expert, without having to be one.
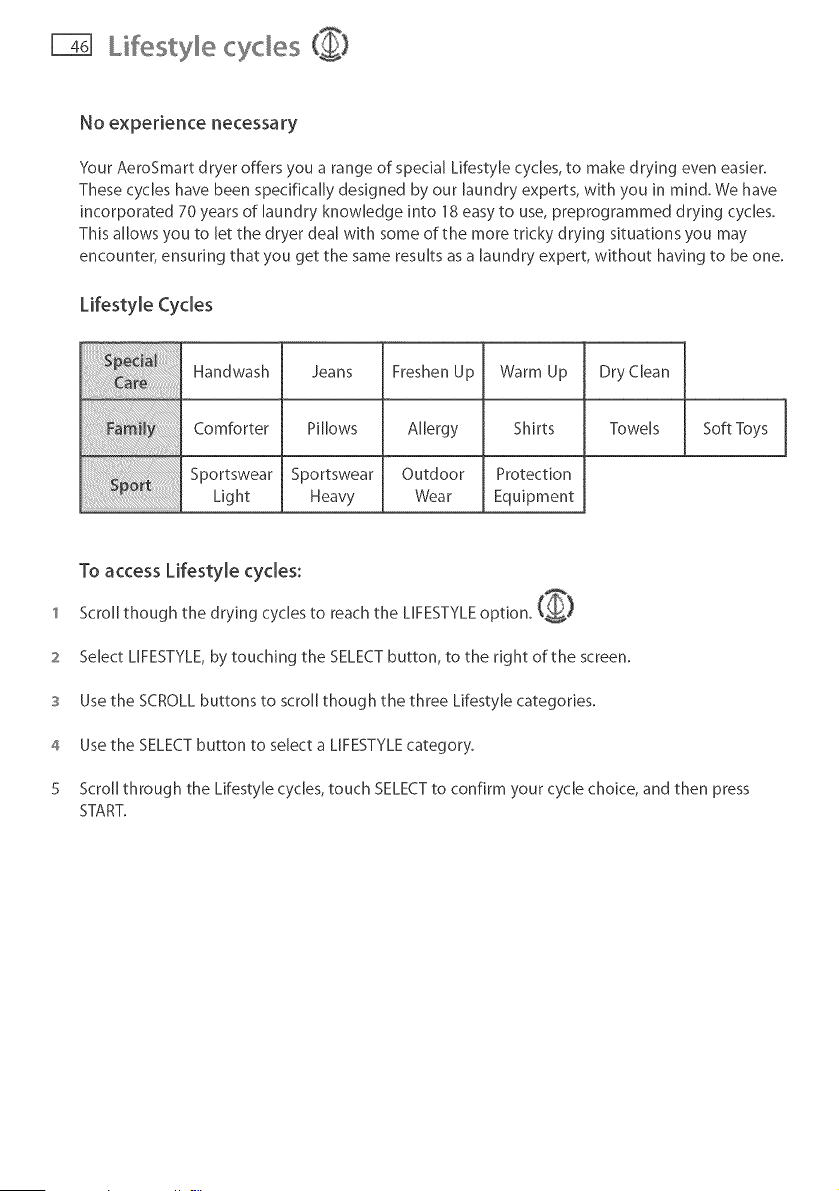
Lifestyle Cycles
Handwash
Comforter
Sportswear
__ Ligh_
Jeans Freshen Up
Pillows Allergy
Sportswear Outdoor
Heavy Wear
Warm Up
Shirts
Protection
Equipment
Dry Clean
Towels Soft Toys
To access Lifestyle cycles:
1 Scroll though the drying cycles to reach the LIFESTYLE option. (i}
2 Select LIFESTYLE, by touching the SELECT button, to the right of the screen.
3 Use the SCROLL buttons to scroll though the three Lifestyle categories.
4 Use the SELECT button to select a LIFESTYLE category.
5 Scroll through the Lifestyle cycles, touch SELECTto confirm your cycle choice, and then press
START.

Lifestyle cycles
The Lifestyle cycles are presented in three distinct categories, to help you to access them
quickly and easily. The following pages explain the unique cycles that are located within these
categories, and how they might be of help.
_ Spedal Care
Special care offers 5 unique cycles to provide extra care for >,our garments.
Handwash
This is an extra gentle cycle for delicate items. Before placing any garments into ................................................
the dryer please check the care label carefully.
Jeans
The JEANS option has been designed for denims and jeans with thick seams that
require additional drying.
Not all jeans require the same type of drying. Some need a more gentle
approach to ensure they stay looking great. This is why we have created two
unique JEANS options:
WORKWEAR - a long, high heat cycle for sturdy everyday denims with bulky seams.
FASHION - a long, medium heat cycle to care for lightweight fashion jeans and
to minimize shrinkage.
%%
Freshen Up
This cycle tumbles for 20 minutes without heat. It has been designed to freshen
clean clothes that have been stored in a cupboard, drawer or in a suitcase. It can
also be used to remove lint from clotNng.
Warm Up
Warm Up heats clothes for 20 minutes so that they are warm to touch. Warm
your pyjamas before bed on a cold night or your towels while you are in the
shower. This cycle is not recommended for heat sensitive items.
Dry Clean
This cycle has been designed for use with in-dryer dry clean products. It uses a
medium heat for 40 minutes and the WRINKLE FREEoption is activated. Follow
the manufacturer's instructions carefully.
Importand
Ensure thet the dry deening product is suiteble for use in e domestic dryer.
Lifestyle cycles C)
Fomily
Some common household laundry situations may require extra knowledge. We have created six
unique FAMILY cycles to help you with those tricky situations.
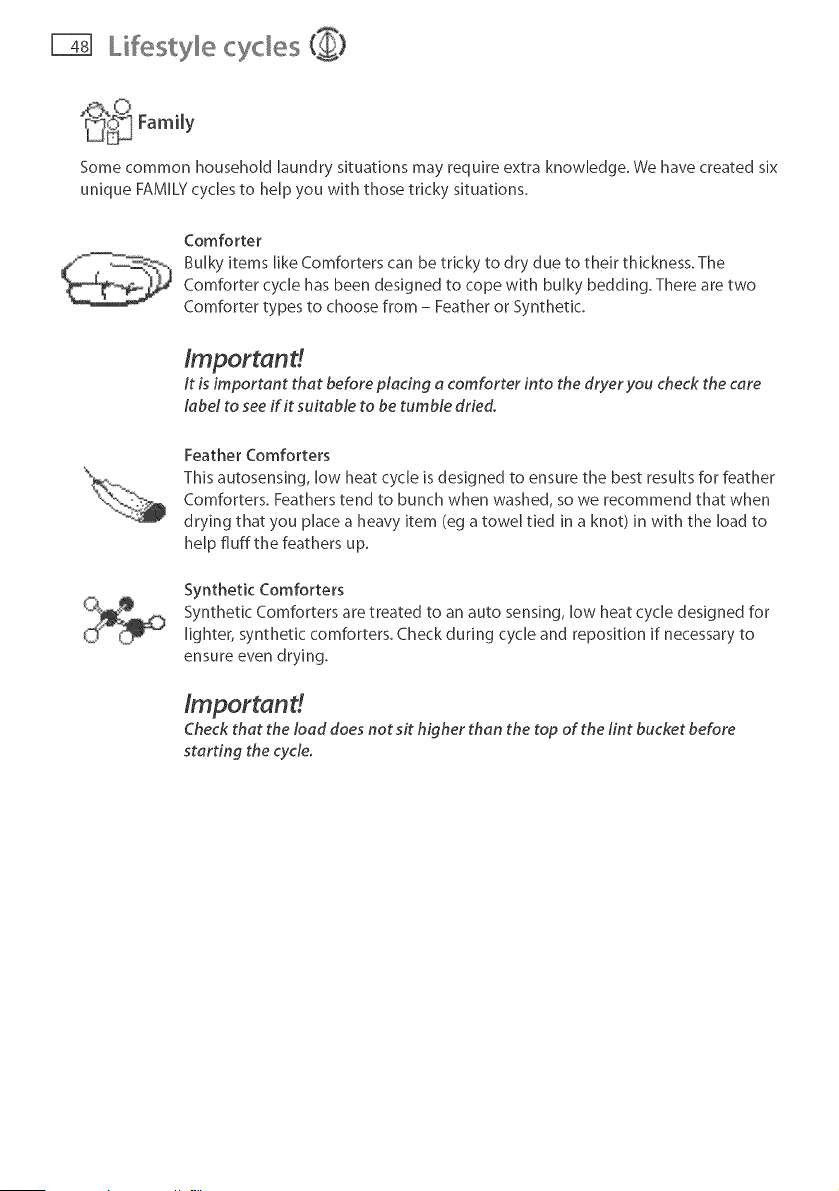
Comforter
Bulky items like Comforters can be tricky to dry due to their thickness. The
Comforter cycle has been designed to cope with bulky bedding. There are two
Comforter types to choose from - Feather or Synthetic.
Important!
It is important that before placing a comforter into the dryer you check the care
label to see if it suitable to be tumble dried,
Feather Comforters
This autosensing, low heat cycle is designed to ensure the best results for feather
Comforters. Feathers tend to bunch when washed, so we recommend that when
drying that you place a heavy item (eg a towel tied in a knot) in with the load to
help fluff the feathers up.
Synthetic Comforters
Synthetic Comforters are treated to an auto sensing, low heat cycle designed for
lighter, synthetic comforters. Check during cycle and reposition if necessary to
ensure even drying.
Importand
Check that the load does not sit higher than the top of the lint bucket before
starting the cycle.
Lifestyle cycles
_ Family
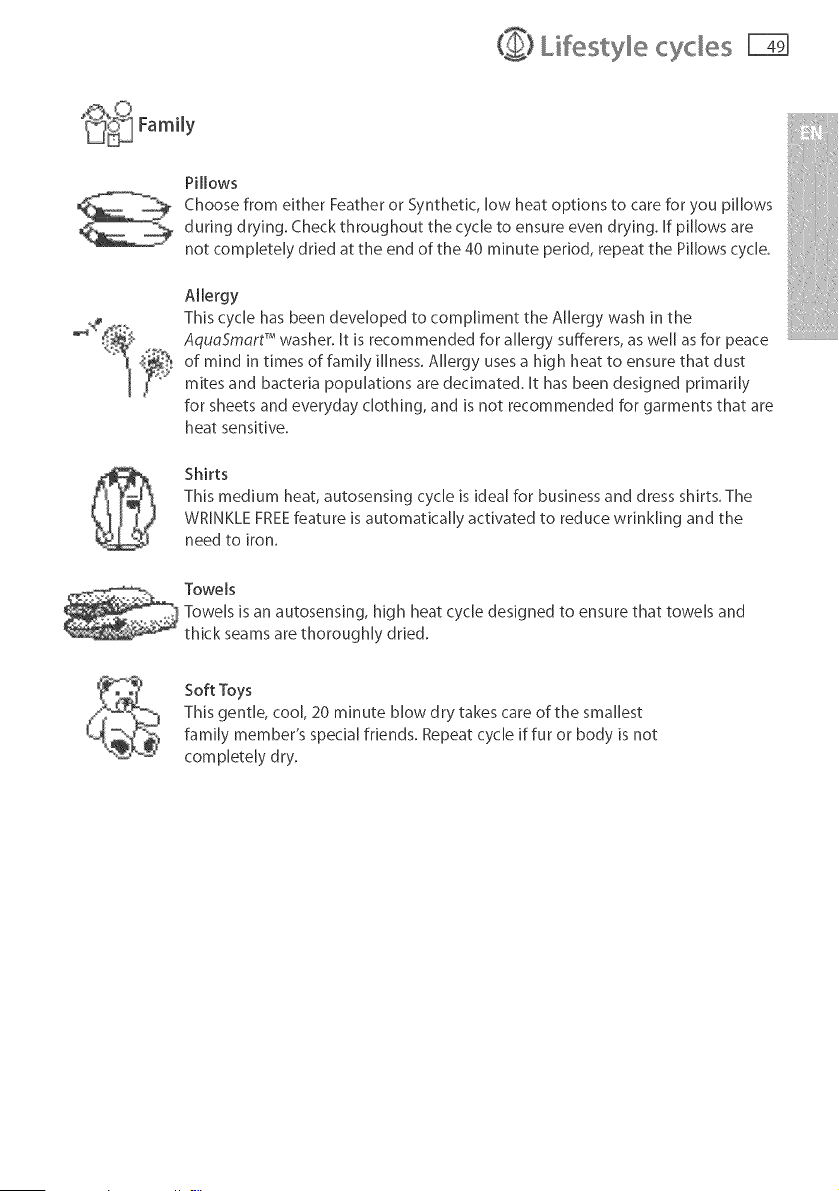
Pillows
Choose from either Feather or Synthetic, low heat options to care for you pillows
during drying. Check throughout the cycle to ensure even drying. If pillows are
not completely dried at the end of the 40 minute period, repeat the Pillows cycle.
Allergy
This cycle has been developed to compliment the Allergy wash in the
AquaSmart TM washer. It is recommended for allergy sufferers, as well as for peace
of mind in times of family illness. Allergy uses a high heat to ensure that dust
mites and bacteria populations are decimated. It has been designed primarily
for sheets and everyday clothing, and is not recommended for garments that are
heat sensitive.
Shirts
This medium heat, autosensJng cycle is ideal for business and dress shkts. The
WRINKLE FREEfeature is automatically activated to reduce wrinkling and the
need to iron.
Towels
Towels is an autosensing, high heat cycle designed to ensure that towels and
thick seams are thoroughly dried.
Soft Toys
This gentle, cool, 20 minute blow dry takes care of the smallest
family member's special friends. Repeat cycle if fur or body is not
completely dry.
Lifestyle cycles C)
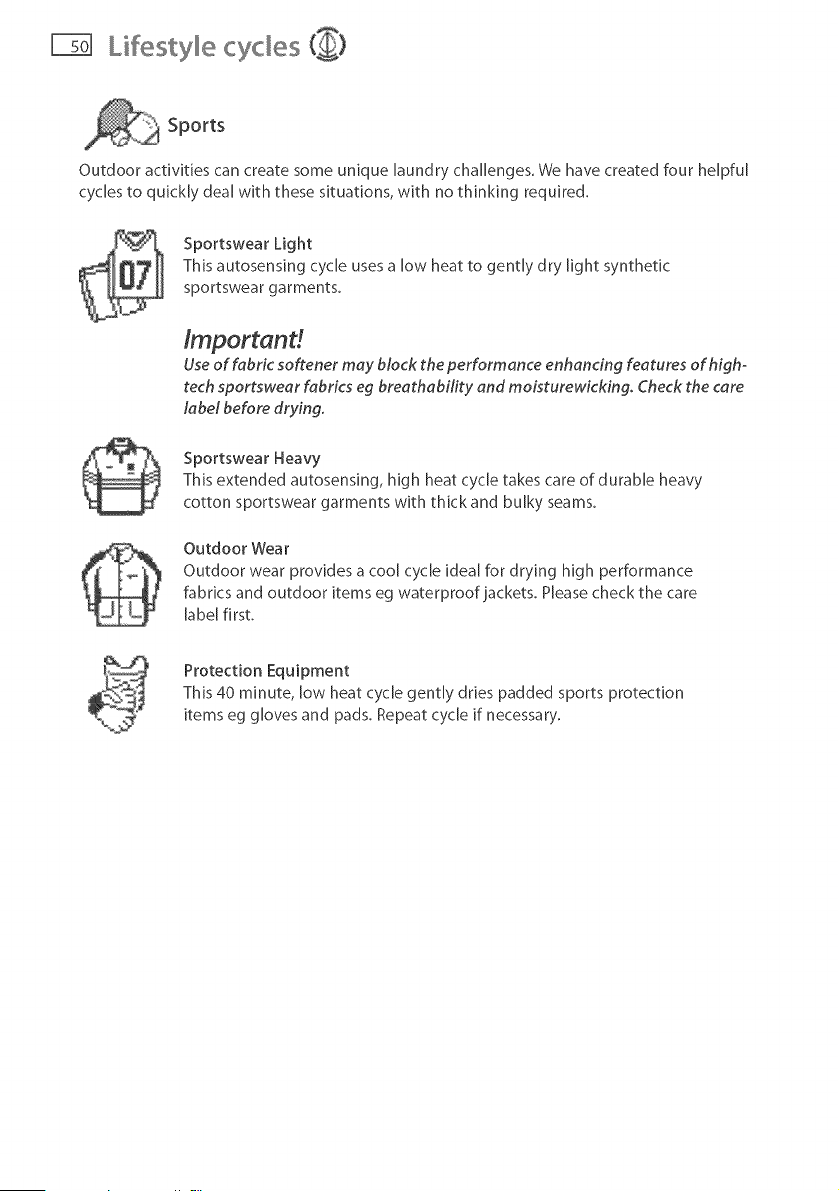
Sports
Outdoor activities can create some unique laundry challenges. We have created four helpful
cycles to quickly deal with these situations, with no thinking required.
Sportswear Light
This autosensing cycle uses a low heat to gently dry light synthetic
sportswear garments.
Irnportand
Use of fabric softener may block the performance enhancing features of high-
tech sportswear fabrics eg breathability end moisturewicking. Check the care
label before drying.
Sportswear Heavy
This extended autosensing, high heat cycle takes care of durable heavy
cotton sportswear garments with thick and bulky seams.
Outdoor Wear
Outdoor wear provides a cool cycle ideal for drying high performance
fabrics and outdoor items eg waterproof jackets. Please check the care
label first.
Protection Equipment
This 40 minute, low heat cycle gently dries padded sports protection
items eg gloves and pads. Repeat cycle if necessary.
Care abe s r-X1
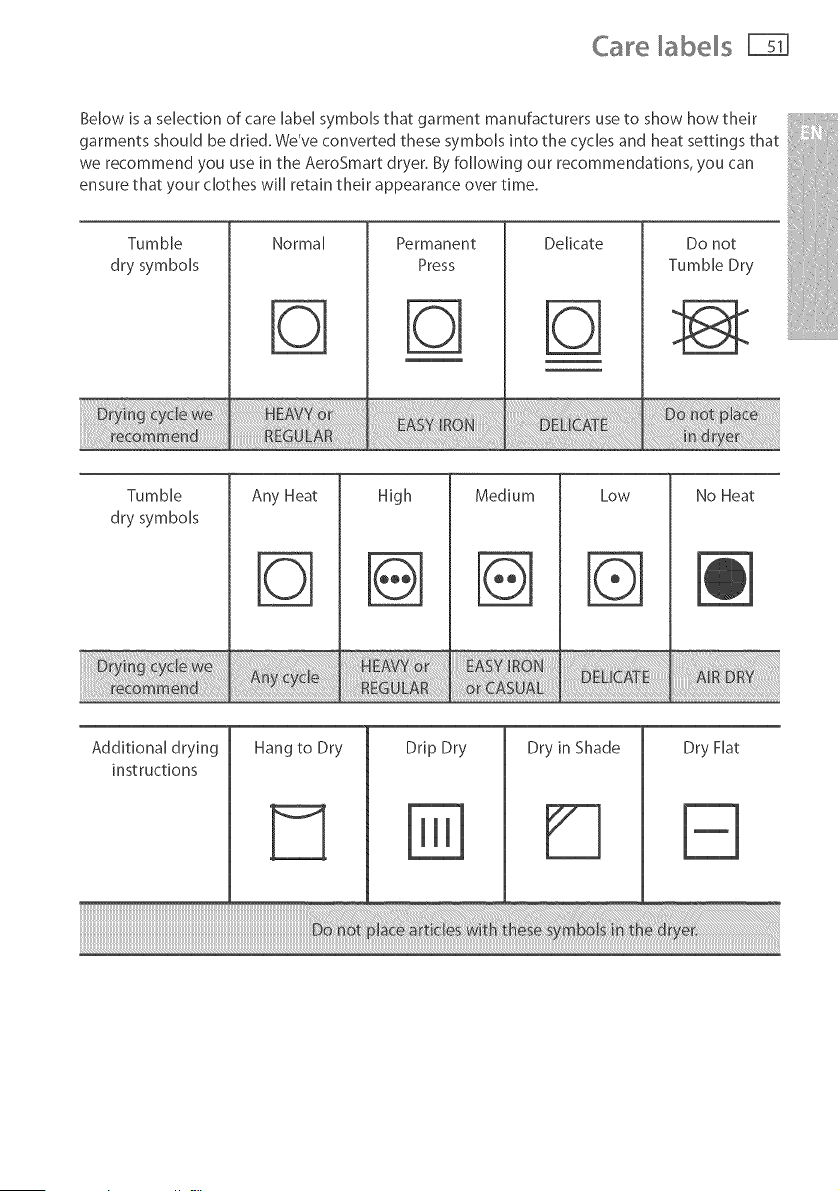
Below is a selection of care label symbols that garment manufacturers use to show how their
garments should be dried. We've converted these symbols into the cycles and heat settings that
we recommend you use in the AeroSmart dryer. By following our recommendations, you can
ensure that your clothes will retain their appearance over time.
Tumble
dry symbols
Normal Permanent
Press
Delicate Do not
Tumble Dry
Tumble
dry symbols
Any Heat High
Medium Low No Heat
Additional drying
instructions
Hang to Dry Drip Dry Dry in Shade Dry Flat
Lid Lock
Your AeroSmart dryer locks its lid at the
start of the drying cycle, providing added
safety for you and your family while it is
operating. This lock ensures the lid cannot
be opened while the drum is rotating.
Ieh_sih_l
llllpllll
flElilLflfl CYCLE
IIYI IElllll
]
Fig,45 Lid locked
A lidlock symbol (padlock) appears in the corner of the screen when locked (it disappears when
unlocked). If the ldlock symbol is flashing the ld is in the process of being unlocked. During this
stage, the lid sttl cannot be lifted.
The lid must be closed before the drying cycle can start. If START/
PAUSE is pressed with the lid open, the machine will beep and a
message will appear in the display screen saying "l can't LOCKTHE LID.
Close lid and press START.",to signal that the lid needs to be closed.
Once the lid has been closed and START/PAUSE is pressed, the LID ,',,,"
LOCK will be activated and the drying cycle will begin. _'"
Power Failure
£ig.4d Lid lock mechonism
If the power is cut while your AeroSmart dryer is operating, the lid will be unlocked, in some
circumstances the drum door may not be automatically opened. If this occurs it is best if the
dryer is not interfered with. When the power is restored the dryer will automatically resume
operating. However if it does not automatically open, first close the lid and start the dryer in the
usual manner, after 5 seconds press START/PAUSE. This wll cause AeroSmart to open correctly
with the lid unlocked.
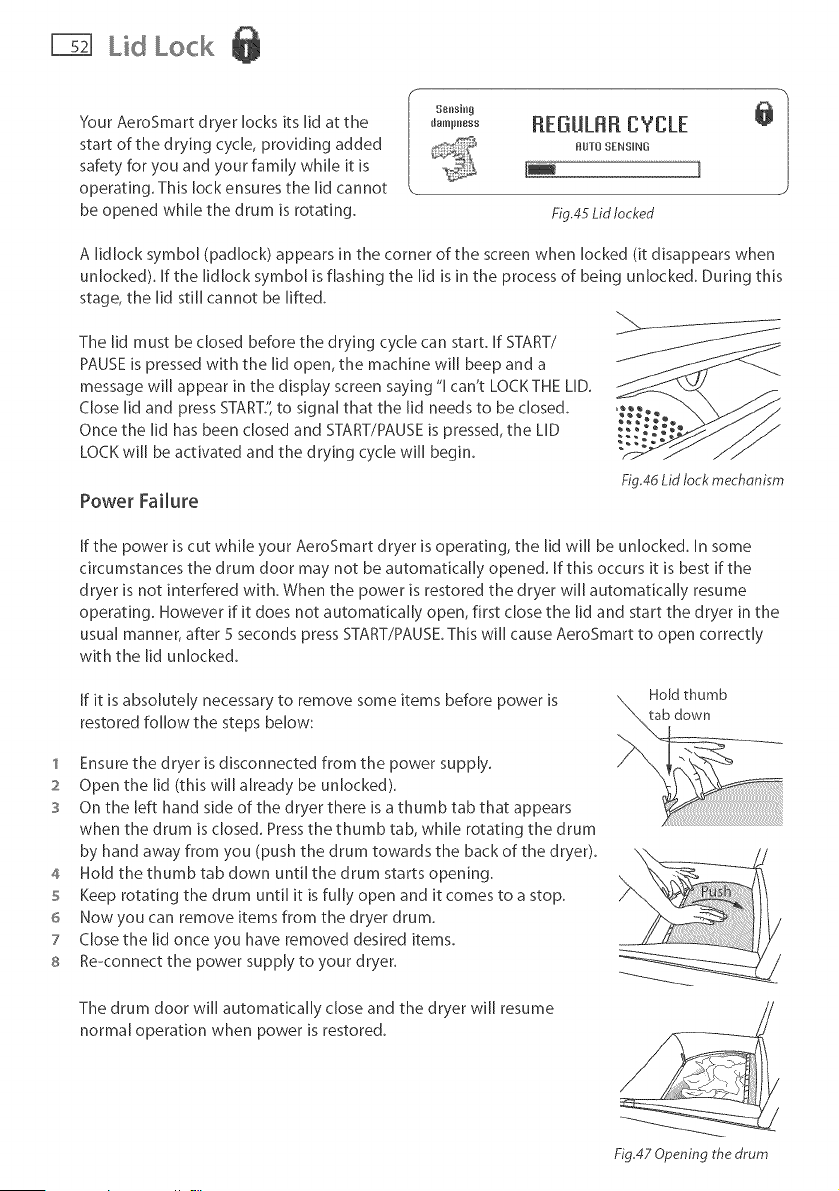
If it is absolutely necessary to remove some items before power is
restored follow the steps below:
1 Ensure the dryer is disconnected from the power supply.
2 Open the lid (this will already be unlocked).
3 On the left hand side of the dryer there is a thumb tab that appears
when the drum is closed. Press the thumb tab, while rotating the drum
by hand away from you (push the drum towards the back of the dryer).
4 Hold the thumb tab down until the drum starts opening.
5 Keep rotating the drum until it is fully open and it comes to a stop.
6 Now you can remove items from the dryer drum.
7 Close the lid once you have removed desired items.
s Re-connect the power supply to your dryer.
The drum door will automatically close and the dryer will resume
normal operation when power is restored.
Hold thumb
Fig,47 Opening the drum
Settings Menu
After using your AeroSmart dryer you may wish to fine-tune some of the options to suit your
individual needs. Any options changed in this menu are a permanent change, unless'Reset
Defaults' is selected (refer to page 55).
To access the Settings Menu:
1 Turn your AeroSmart dryer on.
2 Scroll, to the right, through the drying cycles until you reach the Settings Menu.
3 Press SELECTto enter the menu.
Alarm Beeps
The number of beeps that signal the end of the cycle can be altered. Choose
between no beeps, five or fifteen beeps.
Screen Brightness
You can adjust the brightness of your screen to suit your individual needs.
Key Lock mode
Key lock automatically locks the buttons on your AeroSmart when not in use. This
will avoid accidental button pushes from items left on the lid of the dryer and also
from any little fingers.
To turn Key Lock Mode ON or OFF:
Access the Settings Menu (refer above).
Scroll to the KEY LOCK MODE option, and press SELECT.
Use the SCROLL buttons to select ON or OFF.
Press SELECT to confirm your selection and return to the Settings Menu.
If Key Lock mode is switched ON:
To turn your dryer on, push and hold the POWER button for 3 seconds. This will
activate the display panel. You will then be able to select your drying option and
press START.The buttons will then be locked.
To PAUSE your dryer at any time during the cycle, press the PAUSE button twice.
This wi[[ allow you access to the Cycle Options, then press START to restart your
cycle.The buttons wi[[ then lock.
To STOP your dryer and power off, press the POWER button twice.
If you can't remember how to unlock the buttons, pressany button and the display
screen will remind you.
Settings Men u
Reminders
How many times have you taken your clothes out of the dryer and realised that you
forgot to add the softener sheet when you started the cycle? Or forgotten to remove
your delicates half way through the cycle and now they are ruined?
AeroSmart has three helpful automatic reminders to help you to remember those
important tasks.
1. Remove Delicates Early
Your dryer will beep and display a message when it senses that the load is nearly
dry. You will then be able to remove delicate items and the rest of the load will
continue through the remainder of the cycle.
2. Add Softener Sheets
Reminds you to add softener sheets to your load at the beginning of each cycle.
3, Empty Lint Bucket
After every fifth cycle you will be prompted to remove the lint from the lint bucket
to keep your dryer clean and lint free.
Hints
Hints screens are provided to help to explain each of the drying choices. Your
AeroSmart comes with these hints programmed ON. When you become more
experienced with the way your machine functions, you may wish to turn these hints
OFF. To do this access the SETTINGS MENU, select HINTS and scroll to OFR Press the
SELECT button to confirm your choice.
Language
AeroSmart is clever enough to be able to communicate in more than one language.
To change the language setting:
'_ Scroll to the right of the display screen until you reach the SETTINGS MENU. Use the
SELECT button to confirm your selection.
2 Scroll to the LANGUAGE option and press SELECT.
3 Scroll through the language options available and press SELECT to choose your
preferred language. Your setting will then be saved.
4 [fyouwishtochangethelanguagethedryerissettointhefuture, repeat steps l -3.

Settings Menu
Service Contacts
In the first instance please refer to "Before You Call for Service" on page 57 for help
to try and solve any problem you may encounter. If your problem persists, this
option will direct you to the appropriate contact details for help or service.
Trouble Shooting
Help with some of the more common issuesyou may encounter.
Reset Defaults
If you would like to re-set all settings back to those that were set when your
AeroSmart left the factory select RESET FACTORY DEFAULTS.
Replay Intro
This option allows you to replay the introduction explanation for your dryer. This is
great for a new user who may not be sure how to use their dryer or what features
the dryer has to offer.
Caring for your Aerosmart dryer
Clean your dryer with a soft damp cloth and wipe dry. Do not use scouring cleaners as they can
damage the paint and plastic surfaces.
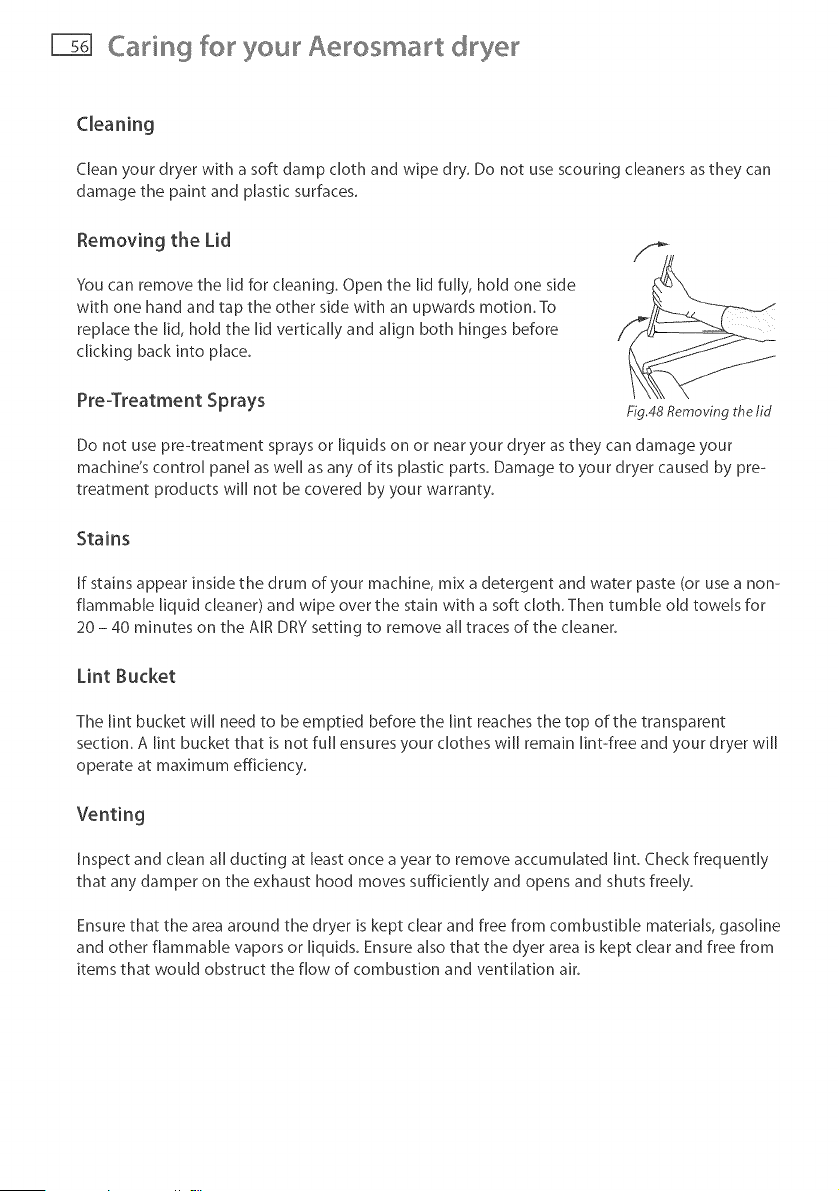
Removing the Lid
You can remove the lid for cleaning. Open the lid fully, hold one side
with one hand and tap the other side with an upwards motion. To
replace the lid, hold the lid vertically and align both hinges before
clicking back into place.
Pre-Treatment Sprays
Fig,48 Removing the lid
Do not use pre-treatment sprays or liquids on or near your dryer as they can damage your
machine's control panel as well as any of its plastic parts. Damage to your dryer caused by pre-
treatment products will not be covered by your warranty.
Stains
If stains appear inside the drum of your machine, mix a detergent and water paste (or use a non-
flammable liquid cleaner) and wipe over the stain with a soft cloth. Then tumble old towels for
20 - 40 minutes on the AIR DRY setting to remove all traces of the cleaner.
Lint Bucket
The lint bucket will need to be emptied before the lint reaches the top of the transparent
section. A lint bucket that is not full ensures your clothes will remain lint-free and your dryer will
operate at maximum efficiency.
Inspect and clean all ducting at least once a year to remove accumulated lint. Check frequently
that any damper on the exhaust hood moves sufficiently and opens and shuts freely.
Ensure that the area around the dryer is kept clear and free from combustible materials, gasoline
and other flammable vapors or liquids. Ensure also that the dyer area is kept clear and free from
items that would obstruct the flow of combustion and ventilation air.
Before you for service FEN
Your AeroSmart dryer is capable of diagnosing its own troubles. If your dryer is displaying a
message on the display screen and is sounding a musical series of beeps every 5 seconds, it
has a problem that you may be able to solve using the checklist below. (it's the same sound
AeroSmart dryer makes when you plug it in).
If you are unable to solve the problem from the checklist below call for service.
:: Close the lid and press START/PAUSE.
If the lid is already closed, open the lid and close it again, then press START/PAUSE.
Disconnect from the power (either by unplugging the dryer or turning off the circuit
breaker that supplies it). Wait 10 seconds, reconnect and try turning it on again.
The machine is unable to close the drum due to clothes interfering with the
closing mechanism. Remove any articles that are interfering with the drum door
and dry these in the next load.
Is your load higher than the top of the lint bucket? Remove some articles and dry
these in the next load.
if your dryer is continually beeping and a message is displayed on the screen, a
fault has occurred which requires repair from a Service Agent.
Pressing the POWER button once will stop the beeping but will still display the fault code. We
recommend leaving the machine in this mode as the fault code will enable the service person
to quickly identify the cause of the problem.
Single beep every second and °°°
1. Turn your machine off at the wall.
2. Wait 1 minute and turn it back on.
3. Checkyour machine is level (refer to installation instructions pages 7 - 31).
4. Remove load and retry.
5. If the fault re-occurs repeat steps 1 and 2.
If the machine still will not work, call your Fisher & Paykel Dealer or Authorised Service Agent to
arrange service (refer to page 62).
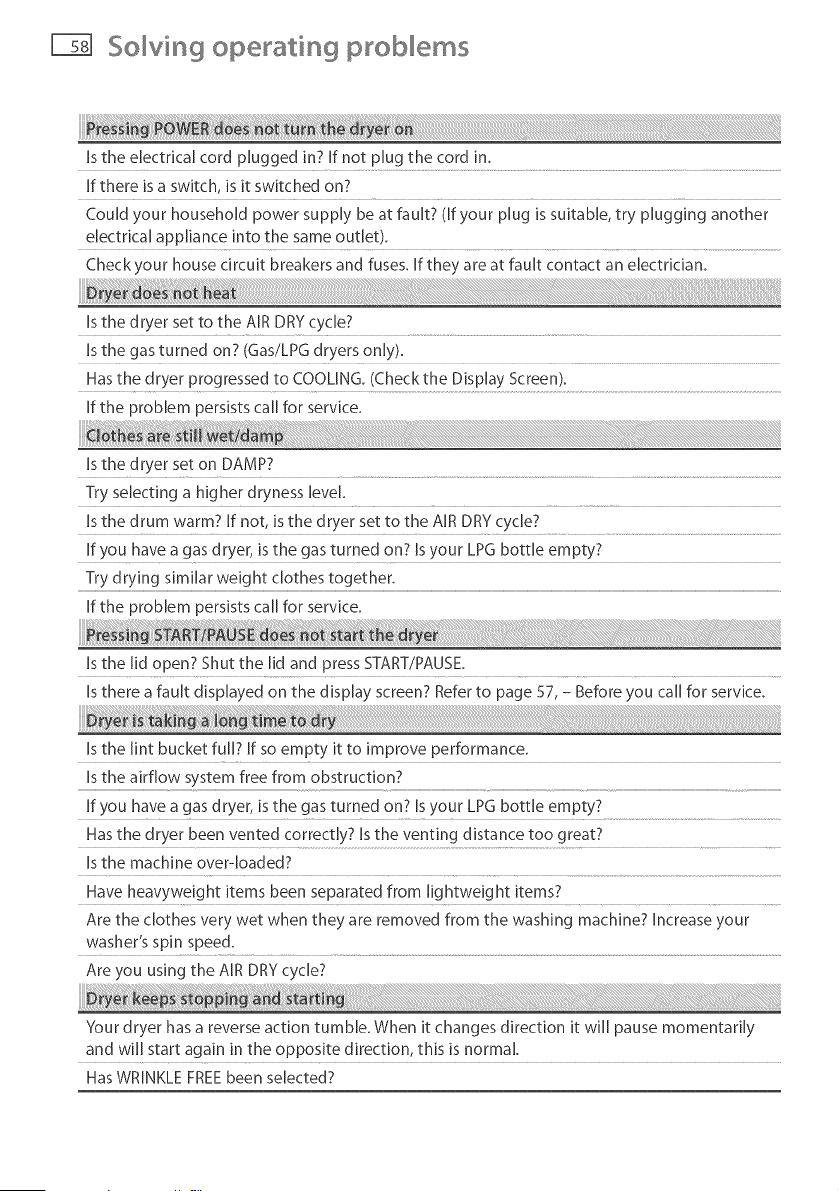
So ving operating problems
Is the electrical cord plugged in? If not plug the cord in.
If there is a switch, is it switched on?
Could your household power supply be at fault? (If your plug is suitable, try plugging another
electrical appliance into the same outlet).
Checkyour house circuit breakers and fuses. If they are at fault contact an electrician.
Is the dryer set to the AIR DRY cycle?
Is the gas turned on? (Gas/LPG dryers only).
Has the dryer progressed to COOLING. (Check the Display Screen).
If the problem persists call for service.
is the dryer set on DAMP?
Try selecting a higher dryness level.
Is the drum warm? If not, is the dryer set to the AIR DRY cycle?
If you have a gas dryer, is the gas turned on? Is your LPG bottle empty?
Try drying similar weight clothes together.
If the problem persists call for service.
Is the lid open? Shut the lid and press START/PAUSE.
Is there a fault displayed on the display screen? Refer to page 57, - Before you call for service.
Is the lint bucket full? If so empty it to improve performance.
B the airflow system free from obstruction?
If you have a gas dryer, is the gas turned on? Is your LPG bottle empty?
Has the dryer been vented correctly? Is the venting distance too great?
Is the machine over-loaded?
Have heavyweight items been separated from lightweight items?
Are the clothes very wet when they are removed from the washing machine? Increase your
washer's spin speed.
Are you using the AIR DRY cycle?
i
Your dryer has a reverse action tumble. When it changes direction it will pause momentarily
and will start again in the opposite direction, this is normal.
Has WRINKLE FREE been selected?

Solving d ying p ob ems
Have your clothes been over-dried? Choose a lower dryness setting.
Haveyou used fabric softener? Placefabric softener sheets in the dryer.
Has the load been over-dried? Choose a lower dryness setting.
Is tumble-drying recommended? Check care labels inside garments.
If you selected TIME DRY - did you set it to dry for too long?
Has the correct temperature been used to dry the garment? Check the care label.
Does the load sit higher than the lint bucket? Your dryer is over-loaded, decrease the load
size.
Did you remove },our clothes as soon as the dryer was finished? Use the WRINKLE FREE
option, if you cannot return to the dryer in time.
Have your clothes been over-dried? Select a lower dryness level. Check your garments care-
labels.
Is the electrical cord plugged in? If not, plug the cord in and switch power on.
A power failure may have occurred. Please refer to page 52 for more information, or contact
your Fisher & Paykel Authorised Service Agent.
Is the WRINKLE FREEoption selected? Press START/PAUSE to open the lid.
Your dryer may be experiencing a low voltage supply. Without enough electricity it cannot
function. Once the line voltage returns to normal the dryer will recommence the interrupted
cycle. If the problem persists call for service.
Limited warranty
When you purchase any new Fisher & Payke[ whiteware product for personal or consumer use
you automatically receive a two year limited warranty covering parts and labor for servicing
within the 48 mainland United States, Hawaii, Washington DC and Canada. in Alaska the limited
warranty is the same except that you must pay to ship the product to the service shop or the
service technician's travel to your home. Products for use in Canada must be purchased through
the Canadian distribution channel to ensure regulatory compliance.
If the product is installed in a motor vehicle, boat or similar mobile facility, you receive the same
two year limited warranty, but you must bring the vehicle, boat or mobile facility containing the
product to the service shop at your expense or pay the service technician's travel to the location
of the product.
Fisher & Paykel undertakes to:
Repair without cost to the owner either for material or labor any part of the product, the serial
number of which appears on the product, which is found to be defective. In Alaska, you must
pay to ship the product to the service shop or for the service technician's travel to your home.
If the product is installed in a motor vehicle, boat or similar mobile facility, you must bring it to
the service shop at your expense or pay for the service technician's travel to the location of the
product. If we are unable to repair a defective part of the product after a reasonable number of
attempts, at our option we may replace the part or the product, or we may provide you a full
refund of the purchase price of the product (not including installation or other charges).
This warranty extends to the original purchaser and any succeeding owner of the product for
products purchased for ordinary single4amily home use.
All service under this limited warranty shall be provided by Fisher& Paykelor its Authorized
Service Agent during normal business hours.
How long does this limited warranty last?
Our liability under this limited warranty expires TWO YEARS from the date of purchase of
the product by the first consumer.
Our liability under any implied warranties, including the implied warranty of merchantability
(an unwritten warranty that the product is fit for ordinary use) also expires ONE YEAR (or such
longer period as required by applicable law) from the date of purchase of the product by the first
consumer. Some states do not allow limitations on how long an implied warranty lasts, so this
limit on implied warranties may not apply to you.
Limited warranty F%TI
c
D
This warranty does not cover:
Service calls that are not related to any defect in the product. The cost of a service ca[[ will be
charged if the problem is not found to be a defect of the product. For example:
1. Correct faulty installation of the product.
2. instruct you how to use the product.
3. Replace house fuses, reset circuit breakers, correct house wiring or plumbing, or replace
light bulbs.
4. Correct fault(s) caused by the user.
5. Change the set-up of the product.
6. Unauthorized modifications of the product.
7. Noise or vibration that is considered normal, for example, drain/fan sounds, regeneration
noises or user warning beeps.
8. Correcting damage caused by pests, for example, rats, cockroaches etc.
Defects caused by factors other than:
1. Normal domestic use or
2. Use in accordance with the product's user guide.
Defects to the product caused by accident, neglect, misuse, fire, flood or Act of God.
The cost of repairs carried out by non-authorized repairers or the cost of correcting such
unauthorized repairs.
Travel fees and associated charges incurred when the product is installed in a location with
limited or restricted access. (eg airplane flights, ferry charges, isolated geographic areas).
Normal recommended maintenance as set forth in the product's user guide.
[f you have an installation problem contact your dealer or installer. You are responsible for
providing adequate electrical, exhausting and other connection facilities.
We are not responsible for consequential or incidental damages (the cost of repairing or
replacing other property damaged if the product is defective or any of your expenses caused if
the product is defective). Some states do not allow the exclusion or [imitation of incidental or
consequential damages, so the above [imitation or exclusion may not apply to you.
Limited warranty
How to get service
Please read your User Guide. If you then have any questions about operating the product,
need the name of your local Fisher & Paykel Authorized Service Agent, or believe the product is
defective and wish service under this limited warranty, please contact your dealer or call us at:
USA
TOLL FREE 1.888.9.FNP.USA (1.888.936.7872)
or contact us through our web site: www.fisherpaykekcom
Canada
TOLL FREE 1.888.9.FNP.USA (1.888.936.7872)
or contact us through our web site: www.fisherpaykekca
You may be required to provide reasonable proof of the date of purchase of the product before
the product will be serviced under this limited warranty.
Commercial use
If you are using the product in a commercial setting (any use other than a single family dwelling),
we agree to repair or replace, without cost to you for parts only, any defective parts, the serial
number of which appears on the product. Our liability for these repairs expires ONE YEAR from
the date of original purchase.
At our option we may replace the part or the product, or we may provide you a full refund of
the purchase price of the product (not including installation or other charges). All service under
this limited warranty shall be provided by Fisher& Paykelor its Authorized Service Agent during
normal business hours.
No other warranties
This limited warranty is the complete and exclusive agreement between you and Fisher & Paykel
regarding any defect in the product. None of our employees (or our Authorized Service Agents)
are authorized to make any addition or modification to this limited warranty.
Warrantor: Fisher & Paykel Appliances, Inc.
If you need further help concerning this limited warrant},, please call us at above number, or
write to:
Fisher & Paykel Appliances, Inc.
5900 Skylab Road
Huntington Beach
CA 92647
This limited warranty gives you specific legal rights, and you may also have other rights which
vary from state to state.

ADVERTENCIA: por su seguridad, deber_i
la informaci6n contenida en este
manual para minimizar el riesgo de incendio,
explosidn o para evitar dafios
personales o incluso la muerte.
--No ahnacene o utilice gasolina o cualquier
otro vapor o liquidos inflamables cerca de
este o cualquier otto electrodom_stico°
--QUE HACER SI HUELE A GAS
* No intente encender
electrodomdstico°
* No toque eldctrico;
no utilice tel_fono dentro de][
edificio°
* Evacue a todos los ocupantes de la
habitacidn, el edificio o de][ firea°
* Llame inmediatamente a su proveedor de
gas desde el tel6fono de alg6n vecino° Siga
las instrucciones que le d_ el proveedor de
gas.
* Si no pudiera entrar en contacto con su
proveedor de gas, llame a los bomberos°
--La instalaci6n y el servicio los deber_i realizar
un t6cnico instalador calificado, una agencia
de servicio o el proveedor de gas.
El Gobemador de California debe pub[icar una [is'ta de sus'tancias reconocidas pot e[
÷stado de California como causantes de c_ncer o pot provocar daffos reproductivos, y
demanda a [as empresas qu÷ advi÷r'tan a sus dientes d÷ [a ÷xposicidn potential a ÷s'te
t[po d÷ sus'tanc[aso
Los e[ec'trodom6s'ticos a gas cont[en÷n o producen sustancias que pueden causar
[a muerte, enfermedades s÷rias y qu÷ son reconocidas pot ÷_Estado de California
como causantes de c_ncer, d÷fectos de nadm[ento o cua[qu[er o'tro t[po de daffo
reproduc'tivoo Para reducir e[ riesgo de sustancias ÷n los combus'tib[es o a partir de [a
combus't[dn de 6s'tos, as÷g_rese de que es'te e[ectrodom6s't[co se ins'tale, s÷ oper÷ y s÷
mantenga de acuerdo con [as ins'trucciones ÷mitidas pot ÷[ fabricante_
Contenido
_ntroducci6n
_nstrucciones de seguridad importantes
Instructivo de instalaci6n
La primera vez que encienda su secadora
Guia R@ida de _nicio
hstrucciones de operac 6n
Controles de su secadora Aerogmart
Controles de f_dl pu[sac[6n, La panta la
Uso de su secadora
Clasificar y cargar
Redp[ente para pelusa
Elegir su ciclo de secado
Modificar las opdones del cido de secado
Opciones del cclo de secado
Avance del cclo de secado
Los cic[os de secado expl cados
Cidos Lifestyle
Traba de la tapa
Fala en el sum n stro eld_ctrico
Men_ de configuraciones
Cuidados de su secadora AeroSmart
Antes de Ilamar a[ servido t_cnico
S su secadora Aerogmart emite pit dos de ayuda
Soluci6n de problemas operat vos
Soluc 6n de probtemas de secado
Garantia limitada
66
67
71
96
98
98
100
100
I01
I01
102
103
I04
I05
106
107
110
111
111
112
113
114
114
115
116
117
ilmportante!
GUARDE ESTE tNSTRUCTtVO
Los modelos ilustrados en esta guJa del usuario pudieran no estar disponibles en todos los
mercados y est_in sujetos a cambio en cualquier momento. Para obtener informaci6n actualizada
acerca de [a disponibilidad de modelos y especificaciones en su pais en particular, favor de visitar
nuestro sitio www.fisherpaykel.com, o p6ngase en contacto con un distribuidor Fisher & Paykel
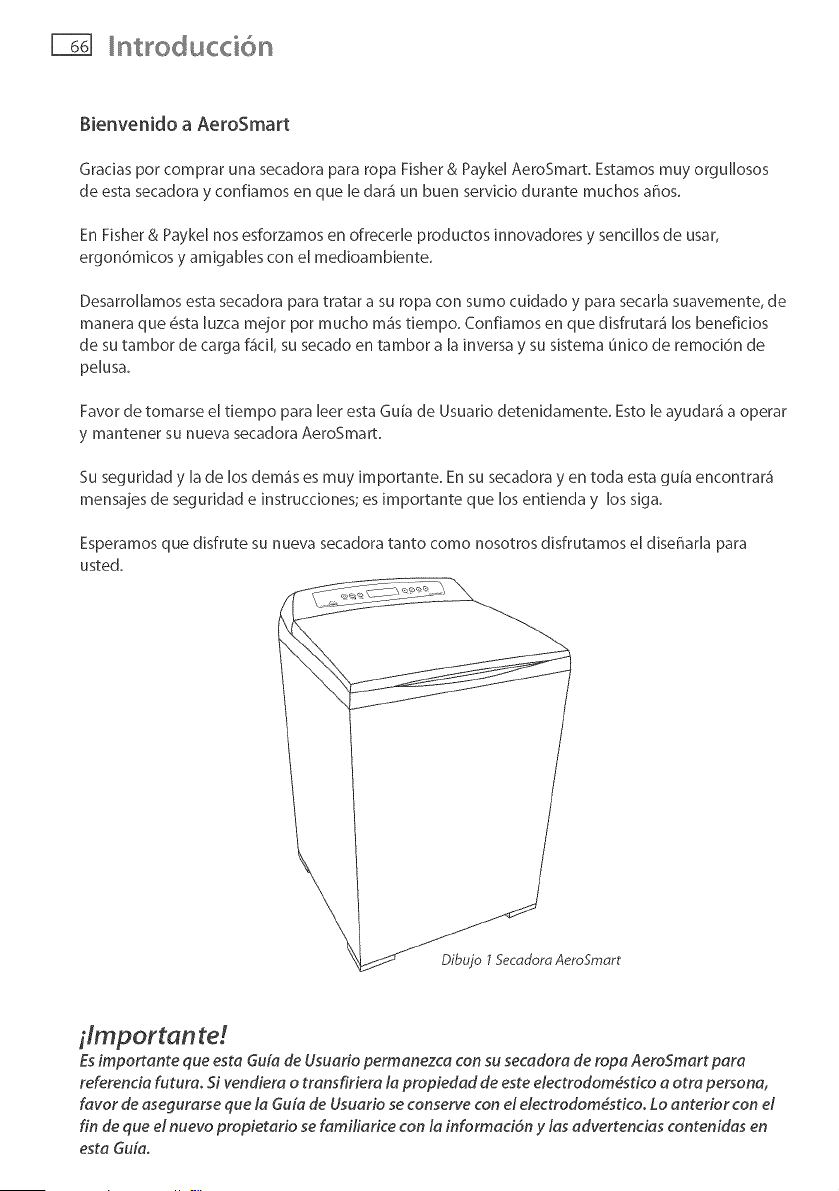
Bienvenido a AeroSmart
Gradas pot comprar una secadora para ropa Fisher& Payke[AeroSmart. Estamosmuy orgullosos
de esta secadora y confiamos en que [edar_i un buen servido durante muchos aflos.
En Fisher& Paykel nos esforzamosen ofrecerle productos innovadores y sendllos de usar,
ergon6micos y amigables con el medioambiente.
Desarro[[amosesta secadora paratratar a su ropa con sumo cuidado y para secar[asuavemente, de
manera que @sta[uzcamejor pot mucho ragstiempo. Confiamos en que d[sfrutara"los benefidos
de sutambor de carga f_c[[,su secado en tambor a [a inversa y su sistema un[co de remod6n de
pe[usa.
Favorde tomarse el tJempo para leer esta GuJade Usuar[odetenJdamente. Esto[e ayudar_ a operar
y mantener su nueva secadora AeroSmart.
Su seguridad y la de los dema's es muy importante. En su secadora yen toda esta gula encontrar_
mensajes de seguridad e instrucciones; es importante que los entienda y los siga.
Esperamos que disfrute su nueva secadora tanto como nosotros disfrutamos el diseffar[a para
usted.
Dibujo 1 5ecadora AeroSmarr
ilmportan re!
Es importante que esta Guia de Usuario permanezca con su secadora de ropa AeroSmart para
referenda futura° Si vendiera o transfiriera la propiedad de este electrodom_stico a otra persona,
favor de asegurarse que la Gu[a de Usuario se conserve con el electrodom_stico. Lo anterior con el
fin de que el nuevo propietario se familiarice con la informaci(m y las advertencias contenidas en
esta Gu[ao
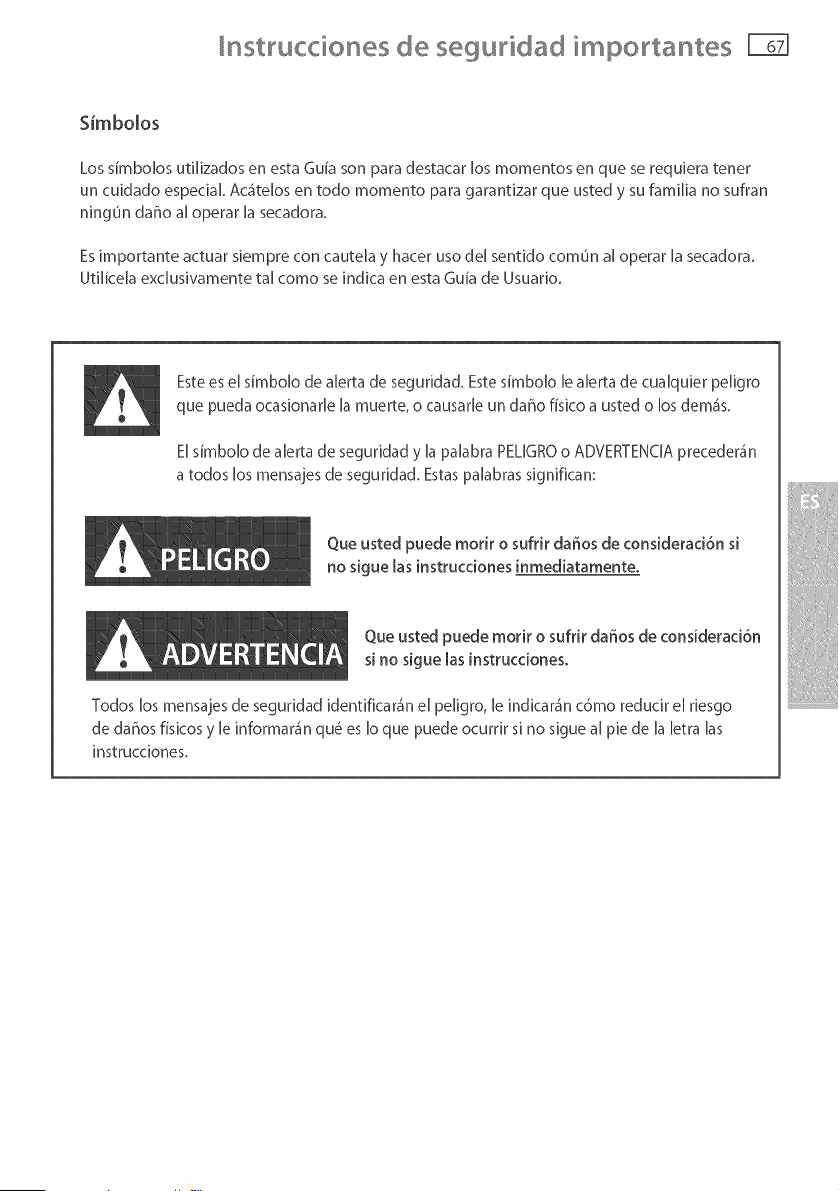
nstrucciones de seguddad impo tantes
Simbolos
Los simboJosutiJJzadosen esta GuJason para destacar los momentos en que se requJeratenet
un cuidado espedaL Ac4te[os en todo momento para garantizar que usted y su famJ[Jano sufran
nJngundaffo a[ operar [a secadora.
Esimportante actuar sJemprecon cautela y hacer uso de[ sentido comun a[ operar [a secadora.
Util[ce[a exc[usivamente ta[ como se [nd[ca en esta Gu[ade Usuar[o.
Este es el simbo[o de alerta de seguddad, Este simbo[o [e alerta de cualquier peligro
que pueda ocasionaHe [a muerte, o causaHe un daf_o fMco a usted o los demos,
Elsimbolo de alertade seguddad y la palabra PELIGROo ADVERTENCIApreceder4n
a todos los mensajesde seguddad. Estaspalabras significan:
Que usted puede motif o sufrir dar_osde considerad6n si
no sigue [as instrucdones inmediatamente.
Que usted puede motif o sufrir dar_osde considerad6n
si no sigue [as instrucciones.
Todos los mensajes de seguddad identificar_n e[ pe[igro, [e indicar_n c6mo redudr e[ desgo
de daF_osfMcos y neinformar_n qu6 es noque puede ocurdr si no sigue al pie de la letra las
instrucciones.

nstrucciones de seguddad impo tantes
I
PeHgro de descarga eJ_ctrica
Siga las medidas de seguddad indicadas en la present÷ Guia del
Usuarioo
El no hacerb puede causar_÷ _amuert÷ o producir una descarga
e_ct_icao
Precaudones importantes de segufidad
Lea todaslas instrucdones cuidadosamenteantes de utifizar estasecadora.
Utificeet dectrodomdstico para los finescon que ruedisehado,tat como seindica en la du/a dd
Usuario.
Para minimizar elriesgo de descargaddctrica, desconectela secadoradd tomacorriente o desconecte
la secadorades@elpanel de distribucidn domdstico (quitando et fusible o desconectandoel
interruptor de circuito)antes de cuatquier intento de darle mantenimiento o fimpieza.
La instafaddn deberdreatizarla un contratista cafificado o con licencia,plomero o tdcnicoen
gas cafificado o con ficenciaemitida por el estado,provincia o regidn en don@ seinstale este
dectrodomdstico.
Estasecadora deberdinstafarsey colocarseadecuadamente,de acuerdo con el lnstructivo de
lnstalaci@, antesde utifizarla.
Estasecadora deberdaterrizarsea tierra adecuadamentecumpfiendo con toclosloscddigosy
regfamentosvigentes.Para rodsinformaddn, consutte elfnstructivo de fnstataddn.
No instafeo cotoqueta secadoraen un lugar expuestoaf agua o a ta intemperie.
Con_ctdaa un circuito de corriented_ctrica de resistenda conocida,adecuadamenteprotegido y de la
dimensidn apropiada para evitar una sobrecargaddctrica.
No repare o reemplaceninguna de laspartes dd dectrodomdstico o intente darle servicioaf menos
que seindique expresamenteen el instructivo de reparacidn publicado y queusted entienda. Deberd,
ademds, tenet lashabitidades necesariaspara Itevar a cabo ta reparacidn.
AI desconectarel electrodomdstico,/ale el enchufeen lugar det cableo el empatmedet mismo para
evitar queef cable,etempatmeo elmismo enchufesedahen.
AsegOresede queef cableseubique de taf manera queno puedapisarse,que no sea un obstdculo con
el cuaf pueda tropezarse,que pueda tensarseo en sudefecto que pueda daharse.
Nojuegue con tos contro/eso con ta traba de la tapa.
Nota: el presionar e/ botdn POWER[encendido], NO garantiza que ete/ectrodom_stico estd
desconectado del fluido efdctrico,adn cuando las lutes est@ apagadas.
No opereet dectrodom_stico si estdaveriado, si no funciona bien,si estd parciatmentedesensamblado
o si tienepartesrotas o fattantes,incfuyendo un cord@ o enchufedahados.
Estasecadora deberdconectarsedirectamentea un tomacorriente aprobadoy fijo. Nodebe conectarse
a una extensl6n.

nstrucciones de segu idad impo tantes
Peligro de Inc@ndio
S÷qu÷Onicam÷nt÷ t÷las qu÷ hayan sido lavadas con aguao
No utiiic÷ caior para s÷car articulos qu÷ contengan espuma de caucho
o material÷s de caucho de textura similaro S÷que ÷n ÷i ciclo S÷c_ Air÷°
Una s÷cadora de ropa produce p÷iusa combustibl÷ la cual d÷ber4
÷xpulsars÷ a_ ÷xt÷rior_ T÷nga cuidado de que no se acumu[÷ p÷lusa ÷n
los air÷d÷dor÷s de la ab÷rtura de ÷xtracci6n y ÷l &rea circundant÷o
No utiiic@ suavizant÷s de teia o productos Data ÷liminar la ÷st_tica, a
m÷nos qu÷ [o r÷comi÷nd÷ ÷l fabricant÷ de[ suavizante o d÷l productoo
E[ no s@guir @stas instruccion÷s pu÷d÷ dar como r÷suJtado [a mu÷rt@ o
da_os persona_÷so
Para reducir el riesgo de incendio en una secadora de tambor, deber_ observar
lo siguiente:
No meta prendas en una secadora de tambor que hayan sJdo lavadas, remojadas o a los que se le
hayan ap[icado quita manchas a base de [[quidos inflamab[es o s6[idos. Esto constituye un pe[igro
[atente de incendio o exp[osi6n. Las sustancias a[tamente inf[amab[es uti[izadas en ambientes
dom@sticos incluyen acetona, alcohol desnaturalizado, gasolina, queroseno, algunas marcas de
quita manchas y so[ventes para lavado en seco, trementina, ceras, removedores de cera, aceite
vegetal, aceite de pescado, aceite para masajes y aceite para cocinar.
No de]e articu[os o prendas que tengan aceite, api[ados o amontonados. Esto puede evitar que
e[ ca[or escape y pot [o tanto, provocar un incendio. Los artlcu[os con aceite pueden encenderse
espontgneamente, especia[mente cuando son expuestos a fuentes de ca[or, como pot e]emp[o,
una secadora de ropa de tambor. Los artlcu[os se ca[ientan causando una reacci6n de oxidaci6n
en el aceite. Esta oxidaci6n crea ca[or. Si el calor no puede escapar, las prendas pueden calentarse
Io sufidentemente como para producir un incendio.
No uti[ice ca[or para secar artlculos que contengan caucho, espuma de caucho, p[a'stico o
materia[es similares (como sostenes aco[chados, tapetes de baho, tapetes, baberos, panta[ones de
beb@, bo[sas de p[4stico, almohadas, etc.) ya que estos materia[es pueden derretlrse o quemarse.
A[gunos materia[es de caucho a[ ca[entarse, pueden incendiarse en de:_erminadas circunstancias
pot combusti6n espont_nea. Seque Onicamente en el cic[o SEC. AIRE.
A[ menos que as[ 1o recomiende especffJcamente el fabrJcante, no utJ[ice suavizantes de tela o
productos sJmJ[ares en una secadora de tambor.
No aJmacene o utJ[ice gasoJina u otros gases inflamabJes y [[quJdos cerca de este o cua[quJer otto
eJectrodom_stJco.
Mantenga e[ a'rea cJrcundante y pot debajo del electrodom_stJco [ibre de cuaJquJer acumuJacJ6n
de materiaJes combustibles, tales como peJusa, papel, trapos, productos quimicos, etc.
No aJmacene n[ngun articu[o que pudJera quemarse o derretJrse (como mater[des de pape[,
pJgstJcos o contenedores de pJa'stJco,etc.) cerca de [a secadora.
Vacie [a canastJJ[a para peJusa antes de que _sta [[egue a [a parte superior de [a seccJ6n
transparente (norma[mente una vez a [a semana).
nstrucciones de segu idad impo tantes
La secadora deber_ tener extracci6n hacia el exterior. Siga cuidadosamente la informaci6n sobre
la ventilaci6n en el Instructivo de Instalaci6n.
Mantenga el piso alrededor de la secadora limpio y seco para red ucir el riesgo de resbalones.
Si su secadora est_ en marcha y desea descargar o agregar ropa, presione START/PAUSE (inicio/
pausa) y espere hasta que la m_quina haya destrabado la tapa. No la fuerce para abrir.
No meta la mano a la secadora si el tambor est_ en movimiento.
Supervise de cerca a los ni_os si 6stos utilizan la secadora o si se encuentran cerca de ella cuando
est6 en march& No permita que los niF]os jueguen ni dentro, ni con la secadora o con cualquier
otro electrodom6stico que haya desechado.
Nunca se monte o se pare sobre la secadora, sobre la tapa o el tambor.
La ropa interior que contenga refuerzos de metal no deber_ meterse directamente dentro de la
secadora. La secadora puede daflarse si los refuerzos de metal se sueltan durante el proceso de
secado.
El interior del electrodom6stico y el d ucto de extracci6n deber_n limpiarse peri6dicamente, acci6n
que debera" realizar personal de servicio calificado.
Antes de que saque de servicio o deseche el electrodom6stico, quitele la tapa y la puerta del
tambor del compartimiento de secado.
GUARDE ESTE tNSTRUCTtVO
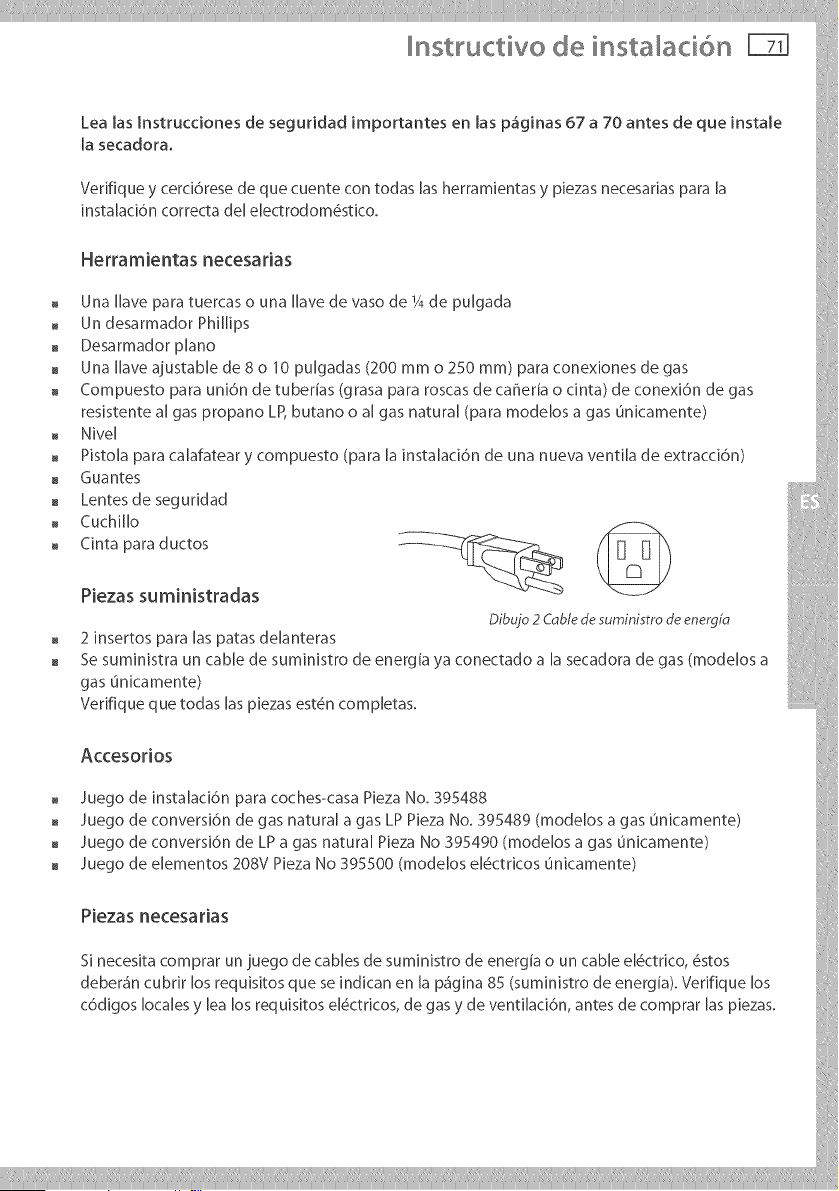
nstructivo de insta aci6n FTT1
Lea [as [nstrucdones de seguridad importantes en [as p_g[nas 67 a 70 antes de que instale
[a secadora.
VerJfiquey cerd6rese de que cuente con todas [asherramJentasy pJezasnecesarJaspara [a
insta[ad6n correcta de[ e[ectrodom6stico.
Herramientas necesarias
Una [lave para tuercas o una Have de vaso de h de pulgada
Un desarmador Phillips
Desarmador piano
Una [lave ajustable de 8 o 10 pu[gadas (200 mm o 250 ram) para conexiones de gas
Compuesto para uni6n de tuber[as (grasa para roscas de caffena o dnta) de conexi6n de gas
resistente a[ gas propano LP, butano o a[ gas natural (para modelos a gas Onkamente)
Nive[
Pisto[a para ca[afatear y compuesto (para [a insta[aci6n de una nueva venti[a de extracci6n)
Guantes
Lentes de seguridad
Cuchillo
Gnta para ductos
Piezas suministradas
@
Dibujo 2 Cable de suministro de energ@
2 insertos para [as patas delanteras
Se suministra un cable de suministro de energ[a ya conectado a [a secadora de gas (modelos a
gas Onkamente)
Verifique que todas [as piezas est@l comp[etas.
Accesorios
Juego de instalaci6n para coches-casa Pleza No. 395488
Juego de conversi6n de gas natural a gas LP Pieza No. 395489 (modelos a gas 0nicamente)
Juego de conversi6n de LP a gas natural Pieza No 395490 (mode[os a gas unlcamente)
Juego de elementos 208V Pieza No 395500 (mode[os e[#ctricos unicamente)
Piezas necesarias
S[ necesita comprar un juego de cables de suministro de energia o un cable el6ctrico, _stos
debera'n cubrir los requisitos que se indican en [a pa'gina 85 (suministro de energia). Verifique los
c6digos locales y lea los req uisitos el#ctricos, de gas y de venti[aci6n, antes de comprar [as piezas.
nstructivo de insta aci6n
Para el instalador
La instaJaci6n correcta de [a secadora es responsabiJidad suya.
AsegOrese de Jeer [as siguientes instrucciones detenidamente, antes de iniciar [a instaJaci6n de [a
secadora. Este instructivo [o deber_Sconservar e[ dueflo de [a casa para referencia futura.
Essu responsabilidad:
Tenet en cuenta [os c6digos y [a normatividad vigentes.
Verificar [os requisitos de [os c6digos. AJgunos c6digos [imitan o no permiten [a instaJaci6n de
secadoras de ropa en garajes, c[6sets, coches<asa o dormitorios. P6ngase en contacto con su
inspector de construcci6n [oca[.
Tener muy en cuenta este instructivo de instaJaci6n.
Dejar espacios suficientes para instaJaciones [ado a [ado (remitase a [a p_igina 73).
Asegurarse de que cuente con todos los artkuJos necesarios para una insta[aci6n correcta.
[nstaJar [a secadora adecuadamente.
Contactar a un insta[ador ca[ificado para garantizar que [a instaJaci6n eJ6ctrica y de gas cumpJa con
todos los c6digos naciona[es y locales, asi como con los regJamentos vigentes. (Vea p_igina 68).
Requisitos de ubicad6n
Pe[igro de exp[osi6n
Mantenga bs materia[es inflamab[es y los vapores como gasoHna [ejos
de _a secadorao
Co[oque _a secadora a[ menos 18 pu[gadas (460 ram) pot encima de[
piso si _a insta_a en una cocherao
E_no hacedo ad puede ocasionar_e _a mueR÷, provocar una exp_osi6n,
incendio o quemaduraso
La secadora deber_i insta[arse o co[ocarse en un _Sreaque no est# expuesta a[ agua o [a intemperie.
Esextremadamente importante que Jasecadora est# instalada in un Jugar bien ventilado. Esta
secadora deber_i contar con extracci6n hacia el exterior. No instale la secadora en ninguna
habitaci6n o cl6set que no permitan el libre flujo o la reposici6n de aire fresco.
EJgrea Jibre de cuaJquier abertura para Jaintroducci6n de aire exterior no deber_i ser menor aJ
dome de[ _irea de sa[ida de venti[aci6n de [a secadora.
Antes de instaJar la secadora, asegurese que exista la altura sufidente para poder abrir Jatapa
Jibremente. Deje el espacio suficiente detra's de Jasecadora para Jaextracci6n. La toma de aire se
encuentra en la parte posterior de Jasecadora. Asegurese de que haya suficiente espacio para el
flujo de aire en cada Jado de la secadora.
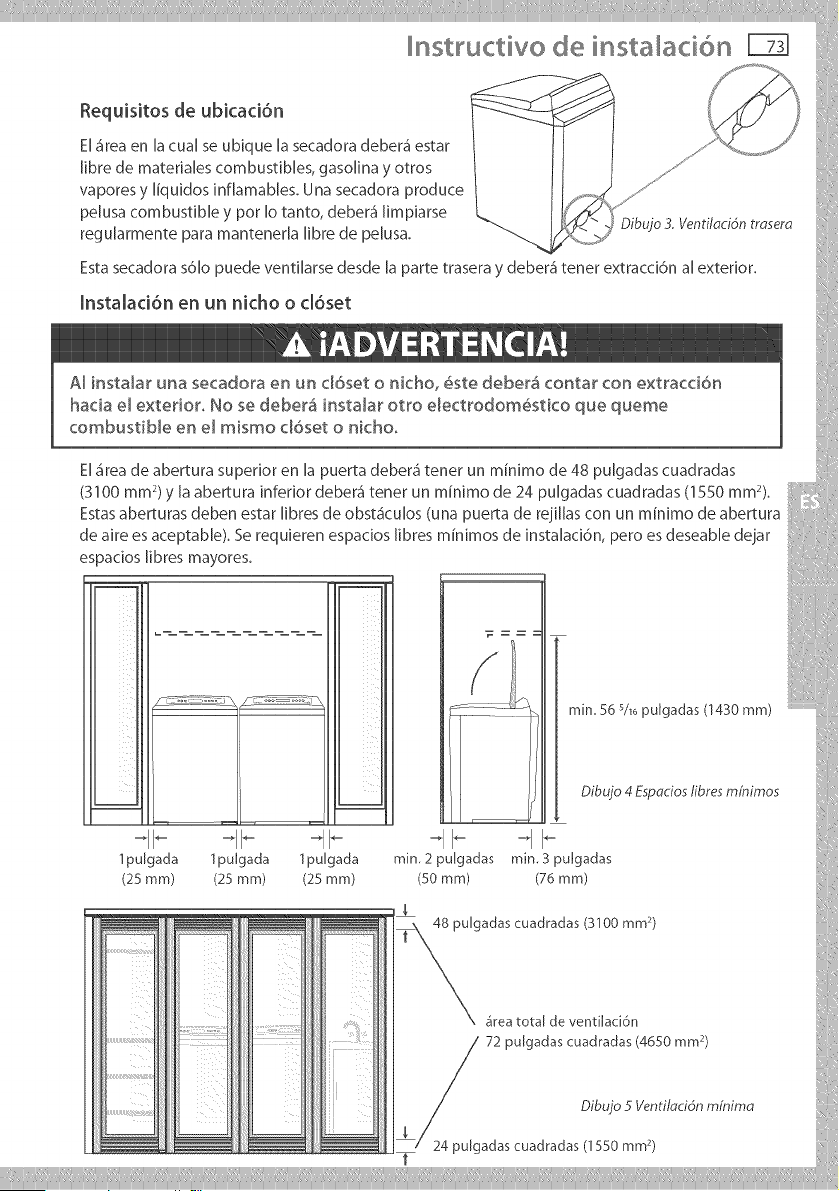
nstructivo de insta aci6n [ZB
Requisitos de ubicaci6n I__
Dibu]o3.Ventitocidntmsera
Estasecadora s6[o puede ventJ[arsedesde [a pare traseray deber_ tenet extraccJ6n a[exterior.
E[a'reaen [acua[ se ubJque[a secadora debera"estar
[ibre de materia[es combustibJes,gaso[ina y otros
vapores y [[quidos [nflamab[es. Una secadora produce
pe[usacombustibJe y por [o tanto, debera"[impiarse
reguJarmente para mantenerJa [ibre de peJusa.
lnstalaci6n en un nicho o cl6set
A[ instaiar una secadora ÷nun d6set o nicho, 4ste deber& contar con @xtracci6n
hacia el exterioro No s÷ deber_ insta_ar otto dectrodom4stico qu@ queme
combustiM÷ @n@_mismo d6set o nichoo
E[_rea de abertura superior en [a puerta deber4 tenet un minimo de 48 pulgadas cuadradas
(3100 mm2)y [a abentura inferior deberg tenet un minimo de 24 pulgadas cuadradas (1550 ram2).
Estasaberturas deben estar [ibres de obst4culos (una puerta de rejillas con un minimo de abertura
de aire esaceptable). Se requieren espacios [ibres minimos de insta[aci6n, pero es deseable dejar
espados libres mayores.
iii_ i
iid
i ii_il
411.... IP
1puJgada 1pulgada 1puJgada
(25 ram) (25 mm) (25 ram)
min, 56 S/l_ pulgadas (1430 mm)
Dibujo 4 Espocios fibres m,"nimos
min. 2 pulgadas min. 3 pulgadas
(50 mm) (76 mm)
48 puJgadascuadradas (3100 mm2)
_qreatota[ de ventiJaci6n
///72 pulgadas cuadradas (4650 mm 2)
// Dibu]o 5 Ventilocidn m,"nimd
l,
/
/ 24 pulgadas cuadradas (1550 mm 2)
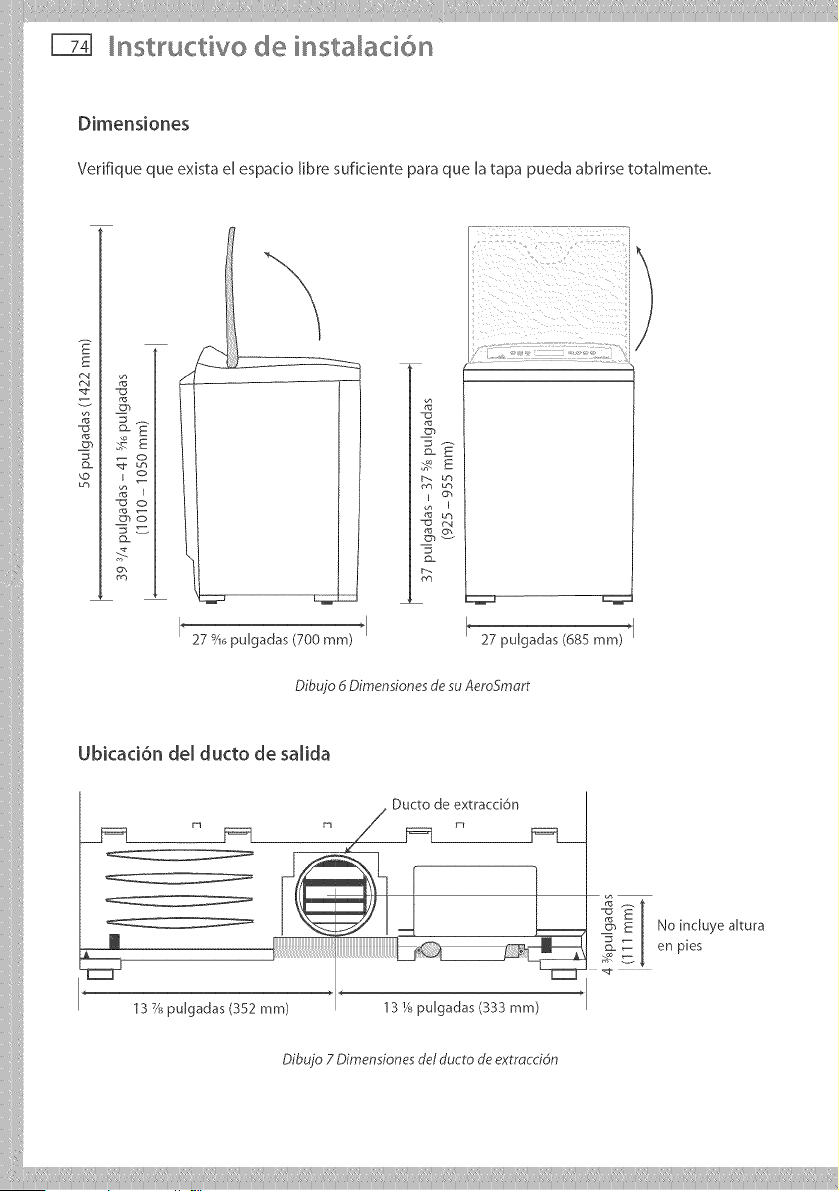
_nstructivo de insta_aci6n
Dimensiones
Verifique que exista el espac[o [ibre suficiente para que [a tapa pueda abrirsetota[mente.
27 9_6purgadas (700 ram)
-777_
\
I* 27 pulgadas (685 mm)"_1
Dibujo 6 Dimensiones de su AeroSmort
UbicadSn de[ ducto de salida
rq
m
13 Xspulgadas (352 mm)
. Ducto de extracci6n
13 i/a purgadas (333 ram)
c_ 8 | Noinduyeartura
l
_ en pies
Dibujo 7 Dimensiones de/ducto de extraccidn
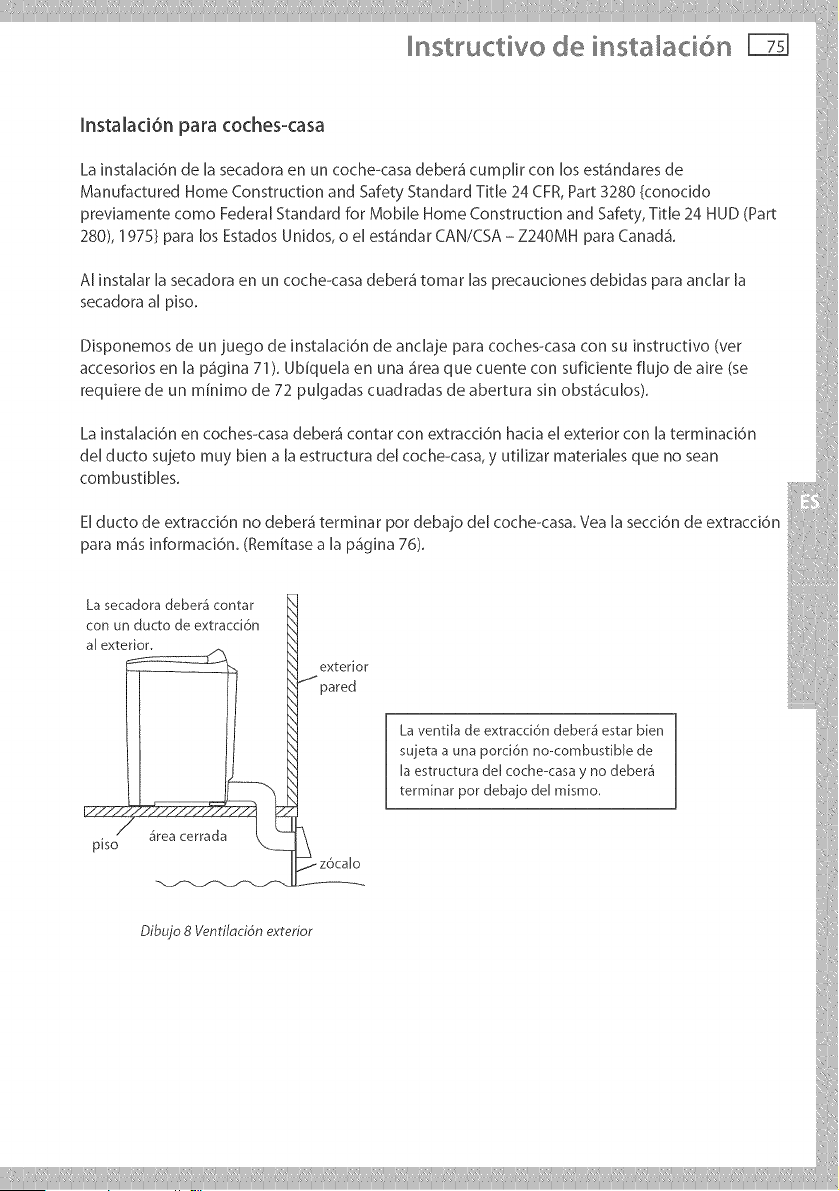
nstructivo de insta aci6n
hstalad6n para coches-casa
La instalaci6n de [a secadora en un coche<asa deber_i cumplir con los esta'ndares de
Manufactured Home Construction and Safety Standard Title 24 CFR, Part 3280 {conocido
previamente como Federal Standard for Mobile Home Construction and Safety, Title 24 HUD (Part
280), 1975} para los Estados Unidos, o el est_indar CAN/CSA - Z240MH para Canad_i.
A[ insta[ar [a secadora en un coche<asa deber_i tomar [as precauciones debidas para anc[ar [a
secadora a[ piso.
Disponemos de un juego de instalaci6n de anclaje para coches<asa con su instructivo (ver
accesorios en la p_igina 71). Ubiquela en una _irea que cuente con suficiente fiujo de aire (se
requiere de un minimo de 72 puJgadas cuadradas de abertura sin obst_icuJos).
La instaJad6n en coches<asa debera" contar con extracd6n hada el exterior con [a terminad6n
de[ ducto sujeto muy bien a [a estructura de[ coche-casa, y uti[izar mater[des que no sean
combustibles.
El ducto de extracci6n no debera" terminar pot debajo del coche<asa. Vea la secci6n de extracci6n
para m_is informaci6n. (Remitase a la p_igina 76).
La secadora deber_S contar
con un ducto de extracci6n
al exte__
piso &rea cerrada
exterior
t_pare d
_z6calo
La ventiJa de extracci6n deber4 estar bien
sujeta a una porci6n no-combustible de
Jaestructura deJ coche-casa y no deber_
terminar por debajo del mismo,
Dibujo 8 Venti/ocidn exterior
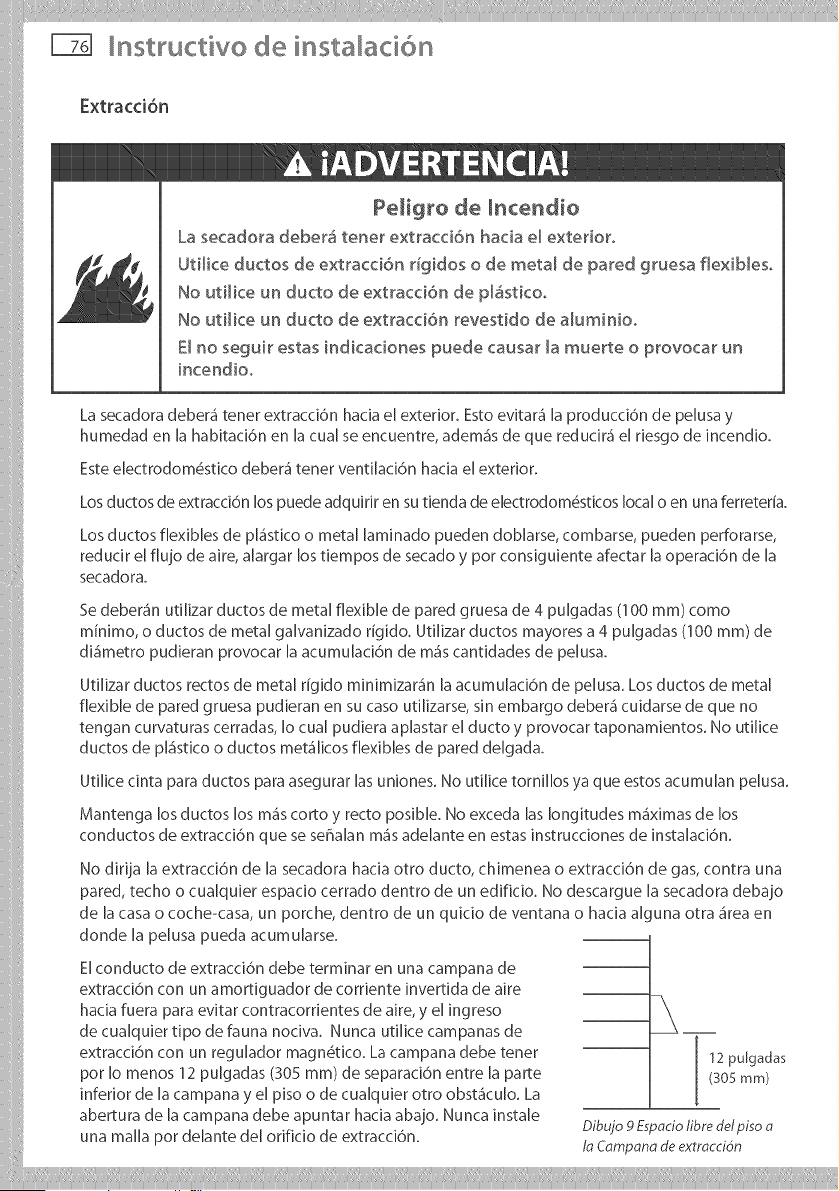
nstructivo de insta aci6n
Extracd6n
Pe[igro de [ncendio
La secadora deber& tenet extracci6n hacia e_ exterior_
Uti_ice ductos de extracci6n rigidos o de metal de pared gruesa flexib[eso
No utilice un ducto de extracci6n de p[&sticoo
No utHice un ducto de extracci6n revestido de aluminio.
El no seguir estas indicaciones puede causar _a mueRe o provocar un
incendioo
La secadora deber_i tener extracd6n hada el exterior. Esto evitarg [a producd6n de pelusa y
humedad en [a habitaci6n en [a cua[ se encuentre, adem_is de que red ucir_i e[ riesgo de incend[o.
Este eJectrodom6stico deber_i tener ventilaci6n hada el exterior.
Los ductos de extracd6n los puede adquirir en su tienda de eJectrodom6sticos local o en una ferreteria.
Los ductos flexibles de pl_istico o metal laminado pueden doblarse, combarse, pueden perforarse,
reducir el flujo de aire, alargar los tiempos de secado y pot consiguiente afectar la operaci6n de la
secadora.
Se deber_in utilizar ductos de metal flexible de pared gruesa de 4 pulgadas (1 O0 ram) como
minimo, o ductos de metal galvanizado rigido. Utilizar ductos mayores a 4 pulgadas (100 mm) de
di_imetro pudieran provocar la acumulaci6n de m_is cantidades de pelusa.
UtiJizar ductos rectos de metal figido minimizara'n la acumuJaci6n de pelusa. Los ductos de metal
flexible de pared gruesa pudieran en su caso utilizarse, sin embargo deber_ cuidarse de que no
tengan curvaturas cerradas, Jocud pudiera aplastar el ducto y provocar taponamientos. No utilice
ductos de pl_istico o ductos met_ilicos flexibles de pared delgada.
Uti[ice cinta para ductos para asegurar [as un[ones. No uti[ice torni[[os ya que estos acumuJan pelusa.
Mantenga los ductos los mgs corto y recto posJbJe. No exceda [as longitudes m_iximas de los
conductos de extracd6n que se seFlalan m_is adelante en estas instrucciones de instalaci6n.
No dirija B extracci6n de la secadora hacia otro ducto, chimenea o extracd6n de gas, contra una
pared, techo o cudquier espacio cerrado dentro de un edificio. No descargue la secadora debajo
de la casa o coche-casa, un porche, dentro de un quicio de ventana o hacia alguna otra _irea en
donde la pelusa pueda acumuJarse.
El conducto de extracci6n debe terminar en una campana de
extracci6n con un amortiguador de corriente invertida de aire
hacia fuera para evitar contracorrientes de aire, y eJingreso
de cuaJquJer tJpo de fauna nocJva. Nunca utilJce campanas de
extraccJ6n con un regulador magn6tico. La campana debe tenet 12 pulgadas
pot [o menos 12 puJgadas (305 mm) de separad6n entre [a parte (305 ram)
inferior de [a campana y e[ piso o de cuaJquier otro obsta'cu[o. La
abertura de [a campana debe apuntar hacia abajo. Nunca [nstaJe
Dibujo 9 Espociolibre delpiso
una malla por delante de[ orificio de extracci6n. In Compond de exrmccid,n
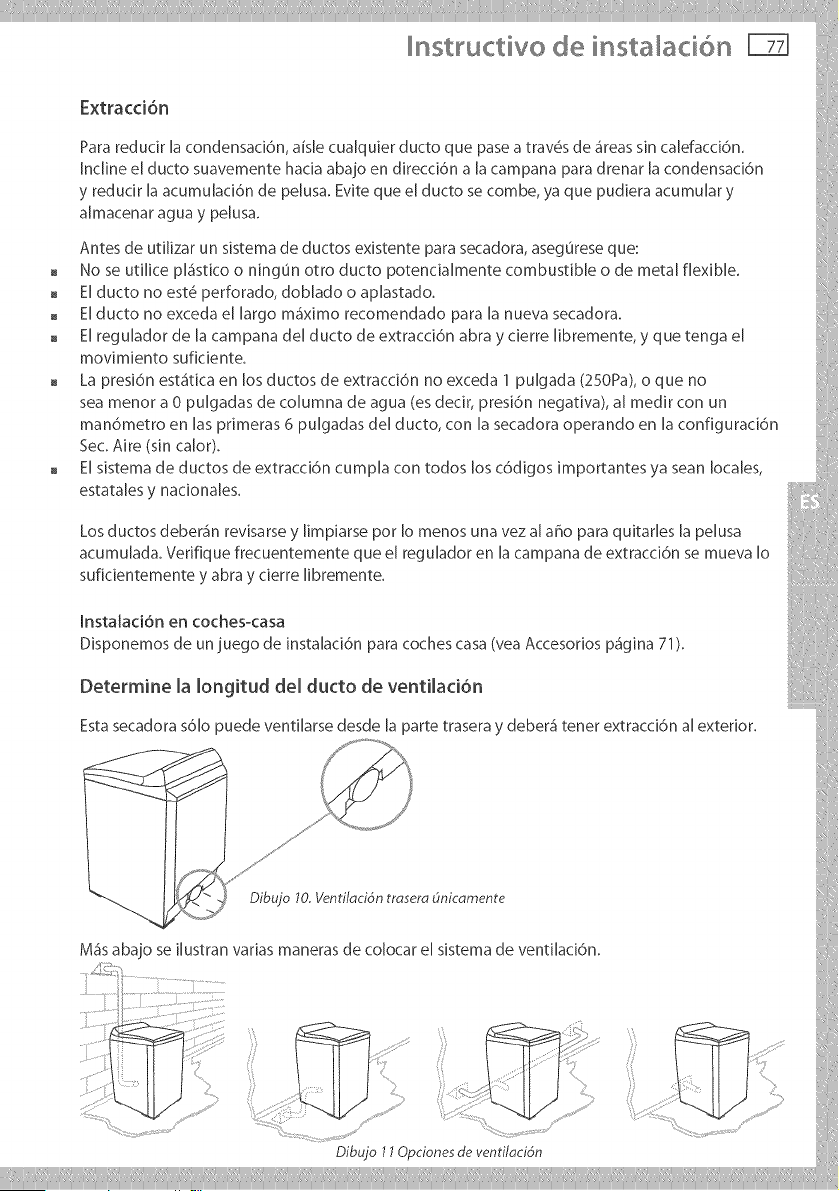
man6metro en las primeras 6 pulgadas del ducto, con la secadora operando en la configuraci6n
Sec. Aire (sin calor).
El sistema de ductos de extracci6n cumpla con todos los c6digos importantes ya sean locales,
estatdes y nacionales.
Los ductos deber_in revisarsey Nmpiarsepor 1omenos una vez a[ aflo para quitarles [a pelusa
acumulada. Verifique frecuentemente que el regulador en [a campana de extracci6n se mueva 1o
suficientemente y abra y cierre Nbremente.
Instalad6n en cochesocasa
Disponemos de un juego de instalaci6n para coches casa (vea Accesorios p_igina 71).
Determine [a [ongitud de[ ducto de ventilad6n
Esta secadora s61o puede venti[arse desde [a parte trasera y deber_i tenet extracd6n a[ exterior.
Dibujo 10.Ventitacidn trasero (lnicamente
M_is abajo se i[ustran varias maneras de co[ocar el sistema de venti[aci6n.
i
Dibuio 770pciones de ventitdcidn
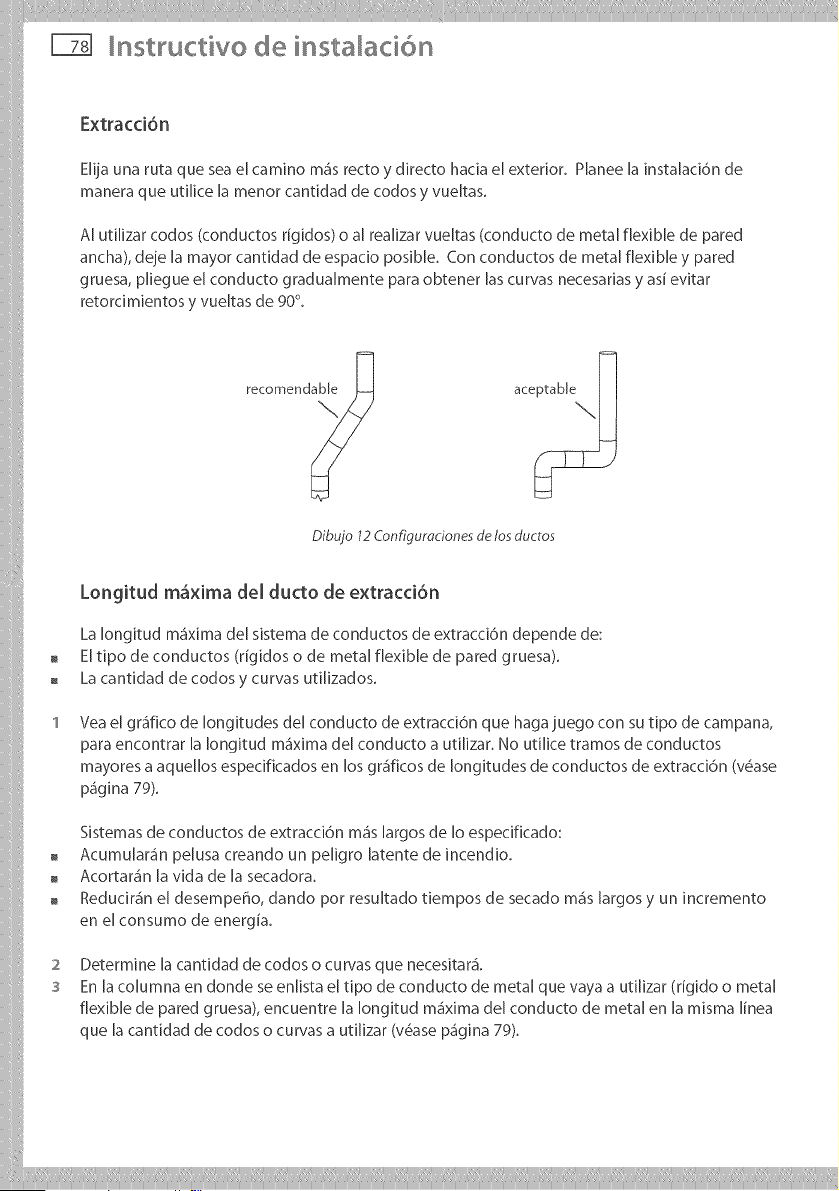
Instructive de instalaci6n
Extracd6n
Elija una ruta que sea el camino re<is recto y directo hada el exterior. Planee la instalad6n de
manera que utilice la menor cantidad de codos y vueltas.
AI utilizar codos (conductos rigidos) o al realizar vueltas (conducto de metal flexible de pared
ancha), de]e la mayor cantidad de espacio posible. Con conductos de metal flexible y pared
gruesa, pliegue el conducto gradualmente para obtener [as curvas necesarias y asi evitar
retorcimientos y vueltas de 90°.
recomend_
Dibujo 12 Configuraciones de los ductos
Longitud mSxima deJ ducto de extracci6n
La Iongitud ma'xima de[ sistema de conductos de extracd6n depende de:
El tJpo de conductos (rigidos o de metal flexible de pared gruesa).
La cantJdad de codos y curvas utJlizados.
Vea el grgfico de longitudes del conducto de extraccJ6n que haga juego con su tipo de campana,
para encontrar la Iongitud m<ixima del conducto a utilizar. No utilice tramos de conductos
mayores a aquellos especJficados en los gr<ificos de longitudes de conductos de extraccJ6n (v6ase
p<igina 79).
@
@
@
Sistemas de conductos de extracd6n m<is largos de [o especificado:
Acumu[ara'n pe[usa creando un pe[igro [atente de incend[o.
Acortara'n [a vida de [a secadora.
Redudr_n el desempeffo, dando por resultado dempos de secado m_s largos y un incremento
en el consumo de energia.
2
3
Determine [a cantidad de codos o curvas que necesitar<i.
En [a coJumna en donde se enJista e[ tipo de conducto de metal que vaya a utiJizar (rJgido o meta[
f[exibJe de pared gruesa), encuentre [a [ongJtud ma'xJma de[ conducto de meta[ en [a mJsma [[nea
que [a cantidad de codos o curvas a utiJizar (v6ase pggJna 79).
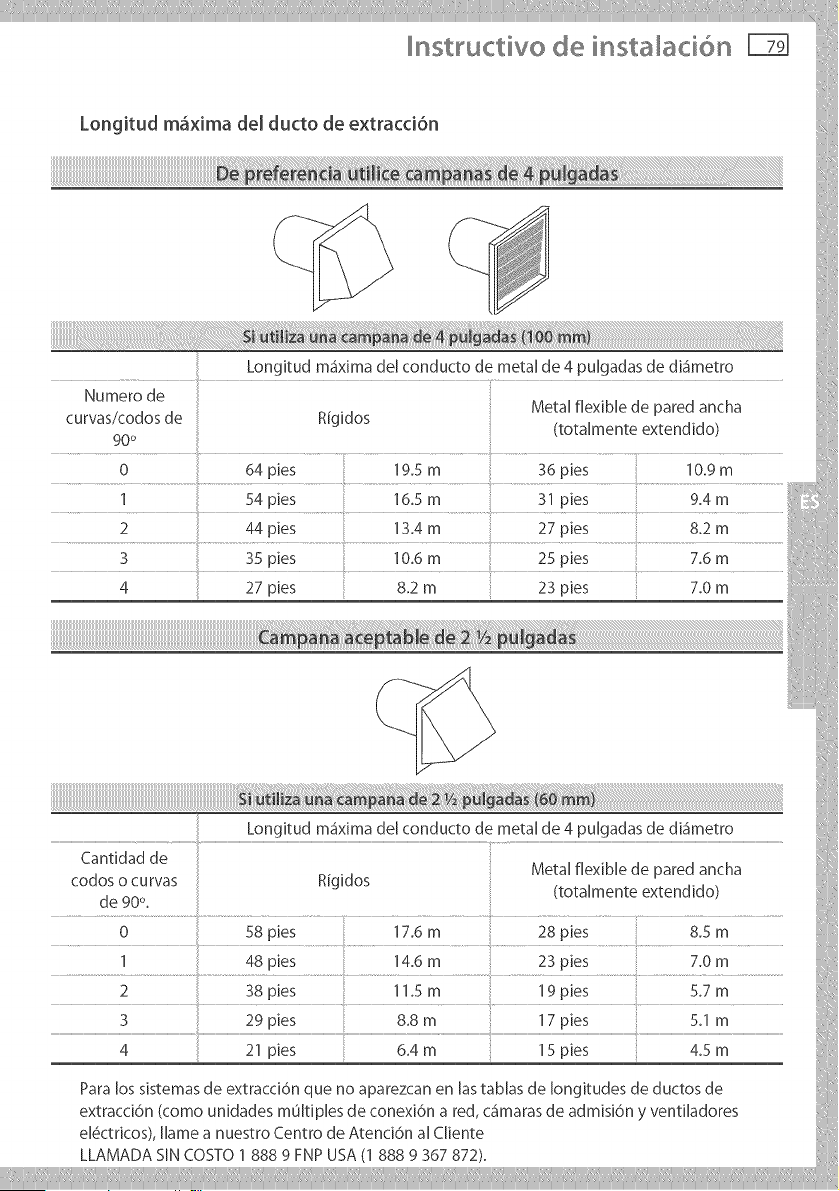
nstructivo de instalaci6n [[B
Longitud m&xima de[ ducto de extracci6n
Longitud m_fixima del conducto de metal de 4 pulgadas de dkimetro
Numero de Metal flexible de pared ancha
curvas/codos de RJgidos (totalmente extendido)
90 °
31 pies 9,4 m
2 38 pies 11,5 m 19 pies 5,7 m
3 29 pies :: 8.8 m :: 17 pies :: 5.1 m
4 21 pies :: 6.4 m :: 15 pies :: 4.5 m
Para los sistemas de extracd6n que no aparezcan en [as tabJas de longitudes de ductos de
extracd6n (como unidades multiples de conexi6n a red, cgmaras de admisi6n y ventHadores
el_ctricos), Ilame a nuestro Centro de Atenci6n a[ Cliente
LLAMADA SIN COSTO 1 888 9 FNP USA (1 888 9 367 872).
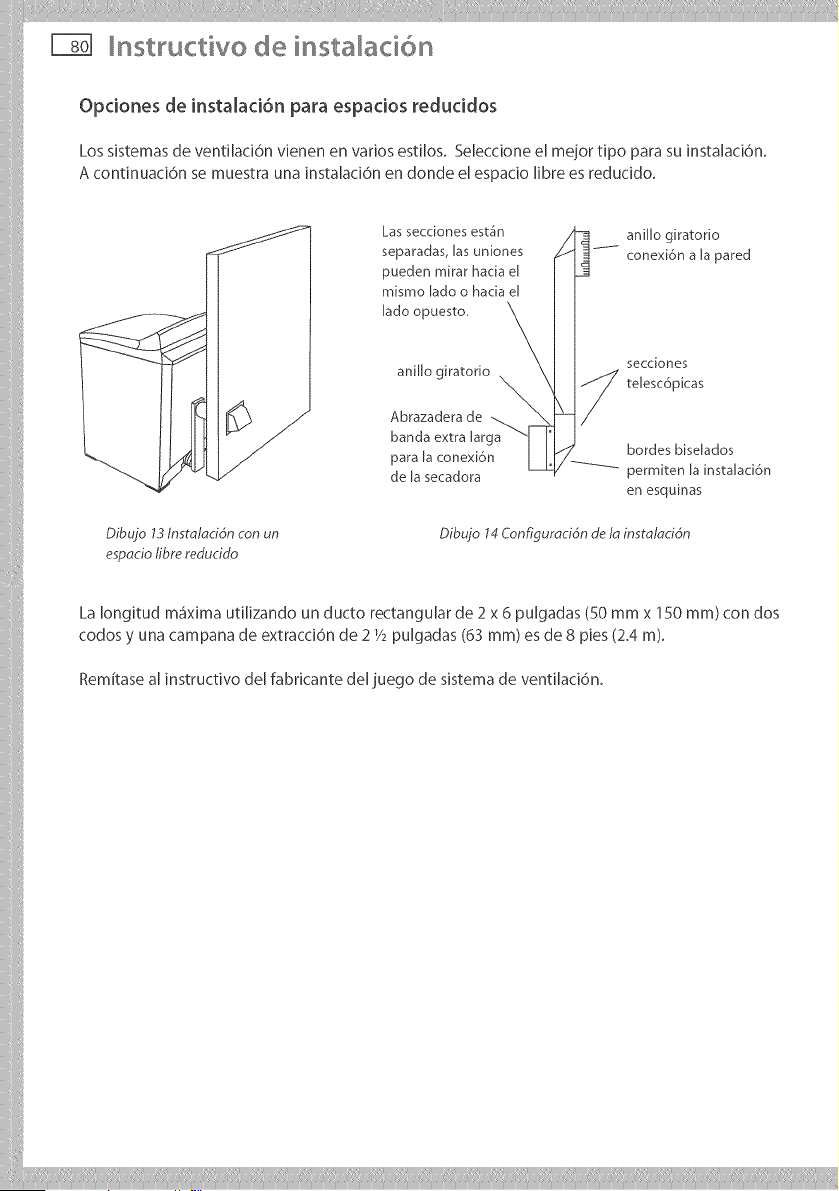
nstructivo de insta aci6n
Opdones de instalad6n para espacios reducidos
Los sistemasde ventilaci6n vienen en varios estilos. Seleccioneel mejor tipo para su insta[aci6n.
A continuaci6n se muestra una insta[aci6n en donde el espac[o [ibre es reducido.
Las secciones est_n
separadas, [as uniones
pueden mirar hacia e[
mismo [ado o hacia e[
[ado opuesto,
aniJJo giratodo _,
Abrazadera de
banda extra Iarga
para [a conexi6n
de [a secadora
Dibujo 13 lnstdlocidn con un
espocio libre reduddo
aniJJogiratorio
conexi6n a Japared
secciones
_ terescdpicas
bordes biselados
........ permiten [a instaJaci6n
en esquinas
Dibujo 14 Configuroeidn de ld instotoeidn
La [ongitud m_ixJma uti[izando un ducto rectanguJar de 2 x 6 puJgadas (50 mm x 150 mm) con dos
codos y una campana de extraccJ6n de 21/2 puJgadas (63 ram) es de 8 pies (2.4 m).
Remitase a[ instructivo de[ fabricante de[ juego de sistema de venti[ad6n.
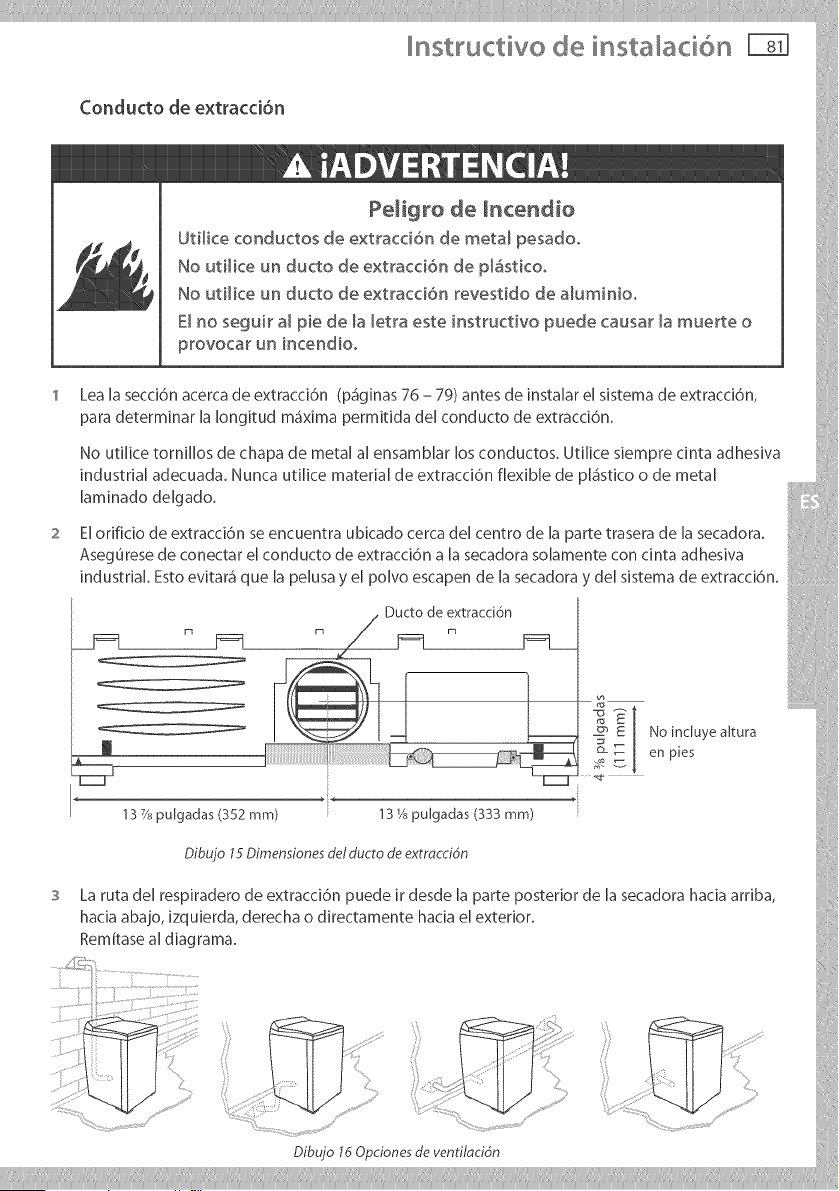
paradeterminar[a[ongitudm_ximapermitidadelconductodeextracci6n.
Noutil[cetornil[osdechapademetala[ensamblarlosconductos.Utilices[emprecintaadhesiva
industrialadecuada.Nuncaut[hcematerialdeextracd6nflex[Medep[_isticoodemetal
[am[nadode[gado.
Elor[fidodeextracc[6nseencuentraub[cadocercade[centrode[apartetraserade[asecadora.
Aseg0resedeconectarelconductodeextracd6na[asecadoraso[amentecondntaadhes[va
industrialEstoev[tar_ique[apelusayelpolvoescapende[asecadora',de[s[stemadeextracd6n................................................
N
p_q p_q
13 7/_puJgadas (352 ram) 13 _ pulgadas (333 mm)
No inc[uye affura
en pies
Dibujo 15 Dimensiones det ducto de extrocci6n
La ruta de[ resp[radero de extracci6n puede Jr desde [a parte posterior de [a secadora hacia arr[ba,
hada abajo, izquierda, derecha o directamente hacia e[ exterior.
Remitase a[ diagrama.
Dibujo I60pciones de yen tilacidn
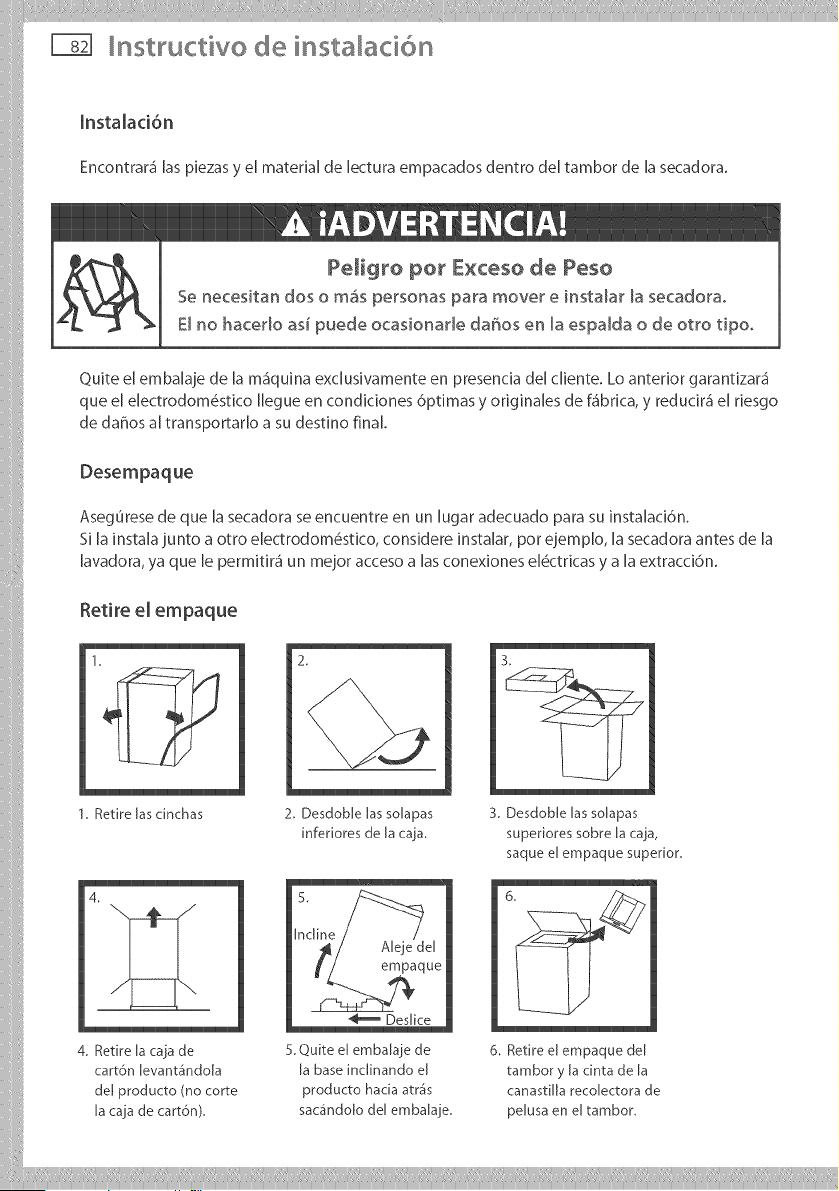
nstructivo de insta aci6n
[nstalad6n
Encontrar_i[aspJezasy e[ material de [ectura empacados dentro de[ tambor de [a secadora.
PeHgro pot Exceso de Peso
Se necesitan dos o m_s personas para mover e insta_ar _a secadorao
E_no hacedo asi puede ocasionade da_os en _a espaMa o de otto tipoo
Quite el embalaje de la m_iquina exclusivamente en presenda del cliente. Lo anterior garantizara"
que el electrodom#stico Ilegue en condidones 6ptimas y origlnales de f_ibrica, y redudr_i el riesgo
de daffos al transportarlo a su destino final
Asegurese de que [a secadora se encuentre en un lugar adecuado para su instalaci6n.
Si la instala junto a otro electrodom#stico, considere instalar, pot ejemplo, la secadora antes de la
lavadora, ya que le permitir_i un mejor acceso a las conexiones el#ctricas y a la extracci6n.
Retire el empaque
1,
1, Retire Jas einchas
4. Retire la caja de
cart6n levant_indola
de[ producto (no corte
[a caja de cart6n).
2.
2. Desdoble las solapas
inferiores de Ja caja,
A[eje de[
empaque
Deslice
5, Quite el embalaje de
[a base inc[inando e[
producto hacia atr_s
sac_ndolo de[ embalaje,
3
3. Desdoble las solapas
superiores sobre ia caja,
saque e[ empaque superior,
6, Retire el empaque de[
tamboryla dnta de [a
canastilla recolectora de
pelusa en el tambor.
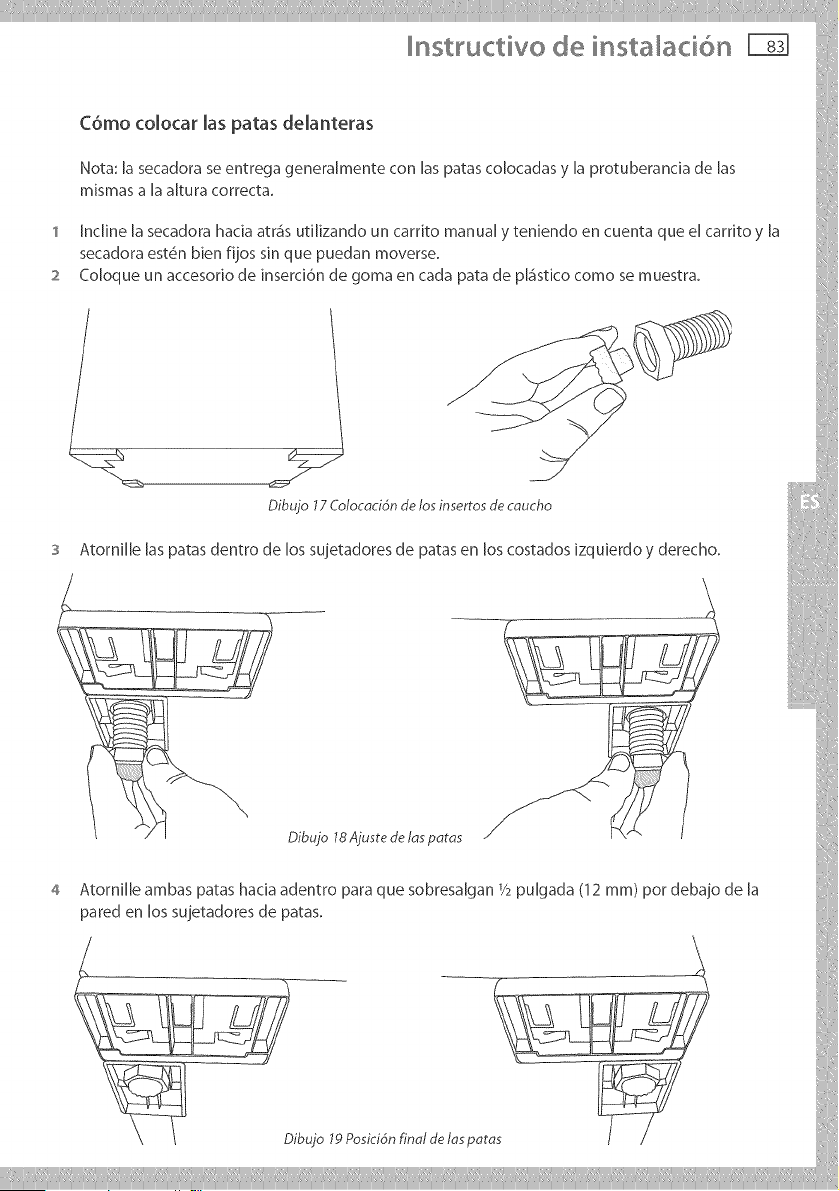
nstructivo de insta aci6n
C6mo colocar las patas delanteras
Nota: la secadora se entrega generalmente con las patas coJocadas y la protuberancia de las
mismas a la altura correcta.
1 Incline la secadora hacia atra's utiJizando un carrito manual y teniendo en cuenta que el carrito y la
secadora est6n bien fijos sin que puedan moverse.
2 CoJoque un accesorio de inserci6n de goma en cada pata de pJ_stico como se muestra.
Dibujo 17 Coloc_cidnde los inserrosde caucho
3
Atornille las patas dentro de los sujetadores de patas en los costados izquierdo y derecho.
Dibujo 18Ajusre de lasparas
4 AtornJlle ambas patas hacJa adentro para que sobresdgan Y2pulgada (12 mm) pot debajo de la
pared en los sujetadores de patas.
Pos/c,on_in_/d
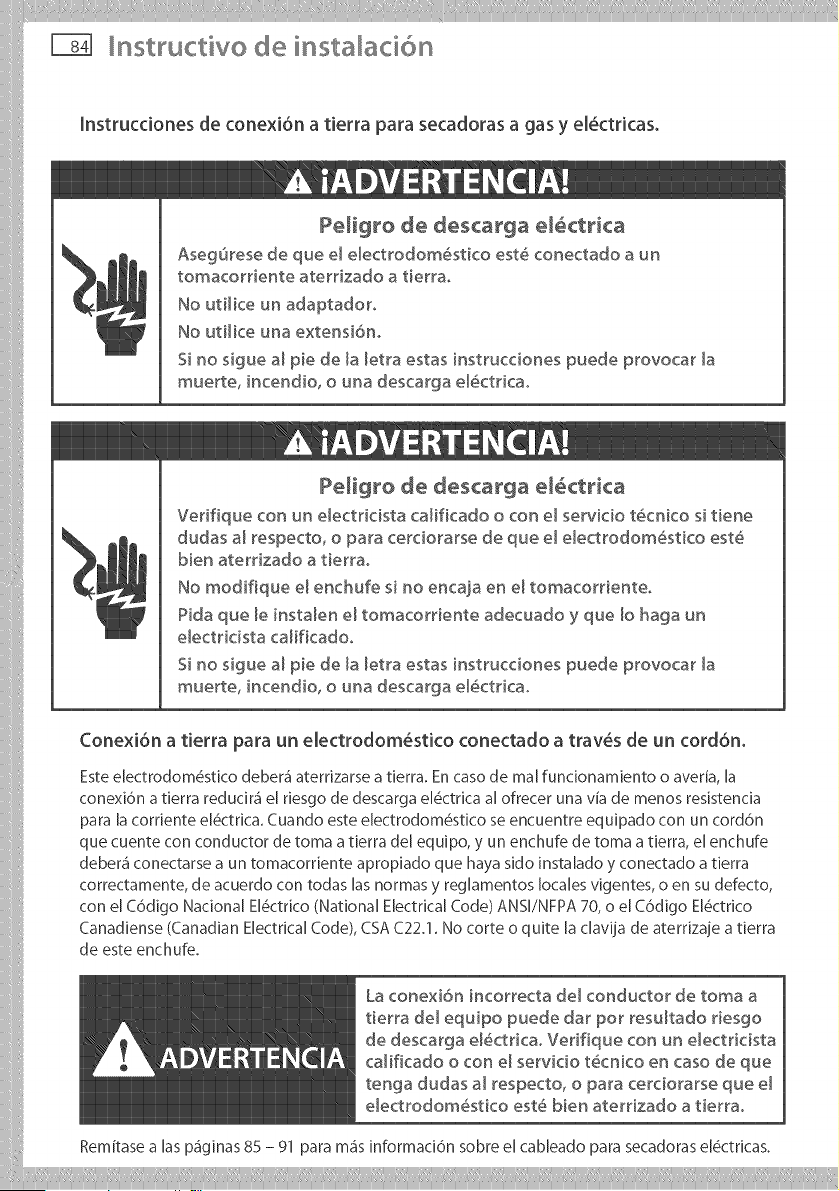
nstructivo de insta aci6n
lnstrucdones de conexi6n a tierra para secadoras a gas y el_ctricas.
PeHgro de descarga el_ctrica
AsegSres÷ de que e_ e[ectrodom6sti¢o est_ conectado a un
tomacorriente aterdzado a tierrao
No utilice un adaptadoro
No utHice una extensi6n.
Si no sigue a_ pie de [a [etra estas instrucciones puede provocar [a
mueR÷, incendio, o una descarga e_ctricao
Peligro de descarga e_ctrica
Verifique con un electricista ca_ificado o con el servicio t_cnico si tiene
dudas a_respecto, o para cerciorarse de que e_ e_ectrodom_stico est_
bien aterdzado a tierrao
No modifique e_enchuf÷ si no encaja en e_tomacorrient÷o
Pida que _e insta_en e_tomacordente adecuado y que _o haga un
e_ectricista ca_ificadoo
Si no sigue a_ pie de _a_etra estas instrucciones puede provocar _a
mueR÷, incendio, o una descarga e_ctricao
Conexi6n a tierra para un electrodom_stico conectado a trav_s de un cord6n.
Este electrodom6stico deber_i aterrizarse a tierra. En caso de mal funcionamiento o averia, la
conexi6n a tierra reducir_i el riesgo de descarga el6ctrica al ofrecer una via de menos resistencia
para la corriente el6ctrica. Cuando este electrodom6stico se encuentre equipado con un cord6n
que cuente con conductor de toma a tierra del equipo, y un enchufe de toma a tierra, el enchufe
debera" conectarse a un tomacorriente apropiado que haya sido instalado y conectado a tierra
correctamente, de acuerdo con todas las normas y reglamentos locales vigentes, o en su defecto,
con el C6digo Nacional El@ctrico (National Electrical Code) ANSI/NFPA 70, o el C6digo El@ctrico
Canadiense (Canadian Electrical Code), CSA C22.1. No corte o quite la clavija de aterrizaje a tierra
de este enchufe.
La conexi6n incorrecta de_ conductor de toma a
tierra de_ equipo pued÷ dar pot resu_tado ries9o
de descarga e_ctrica. Verifique con un e_ectricista
ca_ificado o con el servicio t_cnico ÷n caso de que
tenga dudas a_ respecto, o para cerciorarse que e_
e_ectrodom_stico est_ bien aterrizado a tierrao
Rem[tase a [as pa'ginas 85 - 91 para mas informaci6n sobre el cableado para secadoras el6ctricas.
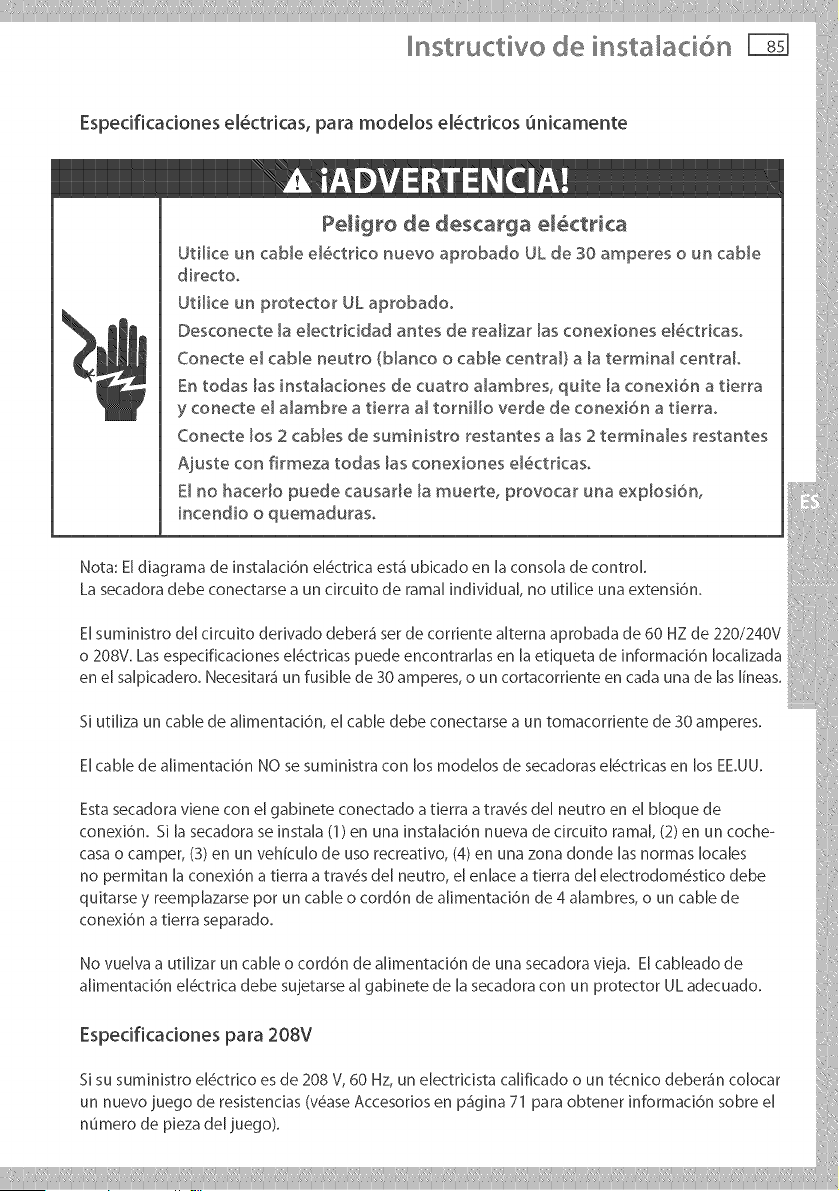
Lasecadoradebeconectarseaundrcuitoderamalindividual,noutiliceunaextensi6n.
Elsumin[strode[drcuitoder[vadodebera"setdecorr[entealternaaprobadade60HZde220/240V
o208V.Lasespecificadonese[_ctHcaspuedeencontrar[asen[aetiquetade[nformad6n[ocaHzada
enelsa[picadero.Necesitar_unfusiblede30amperes,ouncortacorr[enteencadaunade[as[[neas.
Siutilizauncabledealimentaci6n,elcabledebeconectarseauntomacorrientede30amperes.
Elcabledea[[mentad6nNOsesum[nistraconlosmodelosdesecadorasel_ctr[casenlosEE.UU.
Estasecadoravieneconelgabineteconectadoatierraatrav#sde[neutroenelbloquede
conexi6n.S[[asecadoraseinsta[a(1)enunainsta[aci6nnuevadecircuitorama[,(2)enuncoche-
casaocamper,(3)enunvehicu[odeusorecreativo,(4)enunazonadonde[asnormaslocales
nopermitan[aconexi6natierraatrav#sde[neutro,elenlaceatierradelelectrodom#sticodebe
quitarseyreemp[azarseporuncableocord6ndea[imentaci6nde4a[ambres,ouncablede
conexi6natierraseparado.
Novuelvaautilizaruncableocord6ndealimentaci6ndeunasecadoravieja.Elcableadode
a[imentaci6ne[#ctricadebesujetarsea[gabinetede[asecadoraconunprotectorULadecuado.
Especificaciones para 208V
S[ su sumJnJstro eJ@ctrJcoes de 208 V, 60 Hz, un eJectridsta ca[ificado o un t@cnico deber_n co[ocar
un nuevo juego de resistencJas (v#ase AccesorJos en pggJna 71 para obtener informacJ6n sobre e[
numero de pieza de[ juego).
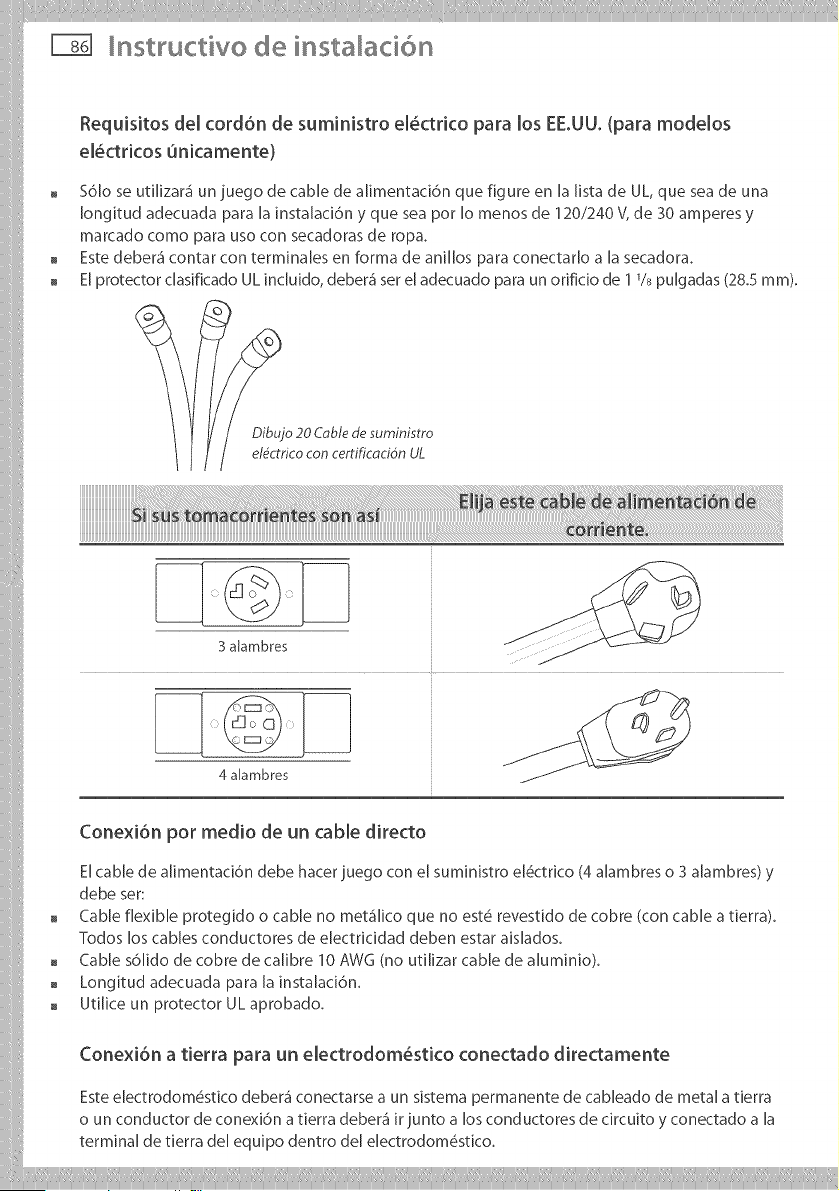
nstructivo de insta aci6n
Requisitos de[ cord6n de suministro el_ctrico para los EE.UUo(para modelos
el_ctricos unicamente)
561o se utilizara" un juego de cable de alimentaci6n que figure en la lista de UL, que sea de una
Iongitud adecuada para la instalaci6n y que sea pot Io menos de 120/240 V, de 30 amperes y
marcado como para uso con secadoras de ropa.
Este deber_i contar con terminales en forma de anillos para conectarlo a la secadora.
El protector clasificado UL incluido, deber_i ser el adecuado para un orificio de 1 1/s pulgadas (28.5 ram).
3 alambres
4 aBmbres
Conexi6n por medio de un cable directo
El cable de alimentaci6n debe hacer juego con el suministro el6ctrico (4 alambres o 3 alambres) y
debe set:
Cable flexible protegido o cable no meta'lico que no est6 revestido de cobre (con cable a tierra).
Todos los cables conductores de electricidad deben estar aislados.
Cable s61ido de cobre de calibre 10 AWG (no utilizar cable de aluminio).
Longitud adecuada para la instalaci6n.
Utilice un protector UL aprobado.
Conexi6n a tierra para un electrodom_stico conectado directamente
Este electrodom6stico debera" conectarse a un sistema permanente de cableado de metal a derra
o un conductor de conexi6n a tierra debera" ir junto a los conductores de circuito y conectado a la
terminal de derra del equipo dentro del electrodom_sdco.

Instructive de instalaci6n Fbq
Conexiones El_ctricas (modelos el_ctricos unicamente)
Lea primero las especificaciones el_ctricas y las instrucdones de conexi6n a tierra en las
p4ginas 84- 85.
Los modelos el_ctricos de la secadora se fabrican para un sistema de conexi6n de 3 alambres. El
marco de la secadora se conecta a tierra por medio de un enlace al conductor neutral en el bloque
de conexi6n de la secadora. Si las normas locales no permiten la conexi6n a tierra a trav_s ctel
neutro, el enlace a tierra ctel bloque de conexi6n ctebe retirarse y se deber<i utiNzar un cable a
tierra por separado.
El enlace a tierra en la secadora debe retirarse para todas las instalaciones de 4 alambres,
incluyendo una construcci6n nueva, remodelaci6n o coches<asa.
Estas [nstrucdones de conexi6n eJ#ctrica [e dJr_in c6mo insta[ar [a secadora en [as siguientes
drcunstancias:
Conexi6n de 3 a[ambres cuando [as normas locales permiten [a conexi6n a tierra a trav#s de[
neutro.
Conexi6n de 3 a[ambres rags conector a tierra pot separado cuando [as normas locales no
permiten [a conexi6n a tierra a trav#s de[ neutro.
Conexi6n de 4 aJambres
Cada una de [as conexiones enJistadas arr[ba puede reaJizarse con un cable de a[imentaci6n
aprobado, o pot med[o de un cabJeado dJrecto. Cada instrucd6n de conexJ6n identJfica el Cable
de ANmentacJ6n apropiado y cubre los requerimientos para el cabJeado dJrecto.
Para conexiones de 3 alambres pot medio de cables de aNmentadbn
Un cable de a[imentad6n de 3 a[ambres debe contar con tres a[ambres de cobre de 10 AWG y
debe hacer juego con un tomacorriente de 3 a[ambres de tipo NMEA Tipo 10-30R.
Para conexiones de 3 alambres pot medio de cableado directo
3 a[ambres con a[ambre
a tierra: alambre sin Desprenda 4 V4pulgadas de [a cubierta
aislamiento corto. A[ambre exterior de[ final de[ cable Desprenda
1pulgada de
no utilizado Secadora el ais[amiento en [a O[tima pulgada. Si
Protector de a[ambres sin
conectada a tierra pot utiNza un cane de 3 ahmbres, corte el
3 als[amlento
-_ pulgadas medio de neutro o aislamiento del alambre parejo con la
aprobado pozUL conexi6n a tierra separada. I<_-_.j protecci6n exterior.
a caja de desco_ '/ _i_._j_-_-_ }_Aia_T,bre NEUTRAL P
\ (blanco o central) I_
._ [ [ extremos
Moldee los
3 alambres c :-:---_ [ [ deI cable bajo Ia
4 34 ul adas forma de un garflo
0,3 alambres c_bre I< 4 34 P_gadas _I U '
10, con aJambre a
tierra (Romex)
Dibujo 21 Cobleodo de los conexiones de 3 olombres

nstructivo de insta aci6n
Conexiones El_ctricas (modelos el_ctricos unicamente)
Para conexiones de 4 alambres por medio de cables de aiimentad6n
Un came de aiimentaci6n de 4 aiambres debe contar con cuatro aiambres de cobre de 10 AWG
y debe hacer juego con un tomacorriente de 4 a[ambres de tipo NMEA Tipo 10-30R. E[ cuarto
a[ambre (conductor a tierra) debe estar identificado por una cubierta verde, y e[ a[ambre neutro
debe estar identificado por una cubierta bianca.
Para conexiones de 4 a[ambres pot medio de cab[eado directo
Protector de
4 ¼ puigadas
34pulgadas _< 1pulgada _ej
aprobado por UL | a[ambressinj
| [ais[amiento I
desc_'@}_ j j.-------_mbre NEUTRAL
(bJanco.o centraD
3 aBmbres calibre 10 con _ ........... _--_ ......
aBmbre a tierra (Romex) alambre a t_erra .... -,
sin revestimiento
Desprenda 4 h puigadas de la cubierta
exterior de[ fina[ de[ came. Desprenda e[
aMambnto en la O[tima puJgada
_ oJdee [os extremos
det cane bajo [a
forma de un garfio.
Dibujo 22 Cobleodo de los conexiones de 4 olombres
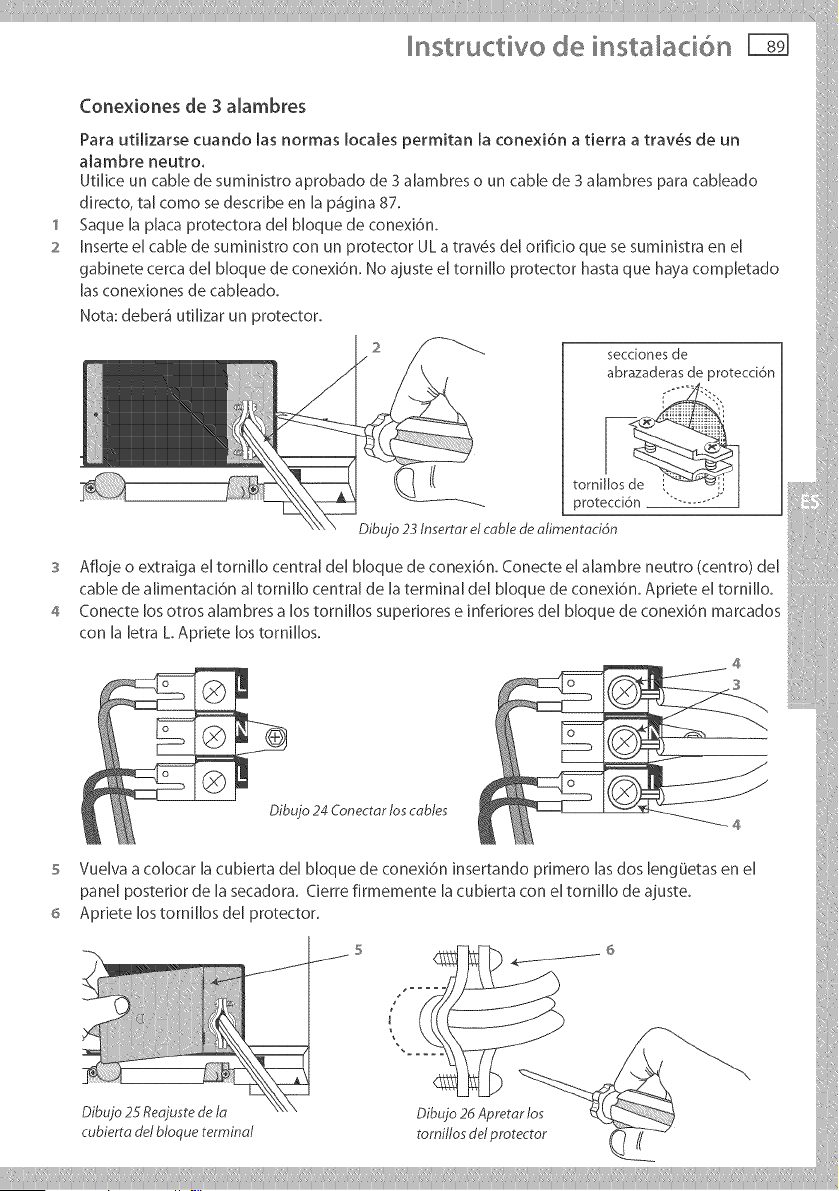
nstructivo de insta aci6n
1
2
Conexiones de 3 a[ambres
Para ut[[[zarse cuando [as normas locales permitan [a conexibn a t[erra a trav_s de un
a[ambre neutro.
Ut[[ice un cane de sum[n[stro aprobado de 3 a[ambreso un cane de 3 a[ambres para cab[eado
d[recto, ta[ como sedescnbe en [a p_ig[na87.
Saque[a p[aca protectora de[ b[oque de conex[6n.
[nserte e[ cane de sum[n[stro con un protector ULa trav6s de[ or[fido que se sum[n[stra en e[
gab[nete cerca de[ b[oque de conex[6n. No ajuste e[ torn[[[o protector hasta que haya comp[etado
[asconex[ones de cab[eado.
Nota: deberg utilizar un protector.
secciones de
abrazaderas de protecci6n
tornii[os de
protecci6n
Dibujo 23 lnsertar el cable de atimentaci4n
S Afloje o extraiga el torni[[o central de[ bloque de conexi6n. Conecte el alambre neutro (centro) del
cable de a[imentaci6n a[ torni[[o central de [a terminal de[ b[oque de conexi6n. Apriete e[ torni[[o.
4 Conecte los otros a[ambres a los torni[[os superiores e infer[ores de[ b[oque de conexi6n marcados
con [a [etra L. Apriete los torni[[os.
Dibujo 24 Conectar los cables
5 Vuelva a co[ocar [a cubierta del bloque de conexi6n insertando primero [as dos [engOetas en el
pane[ posterior de [a secadora. Cierre firmemente [a cubierta con e[ torni[[o de ajuste.
6 Apriete [ostorni[[os de[ protector.
Dibujo 25 Reajustede la Dibujo 26 Apretar los
cubierta del bloque terminal tornillos det protector
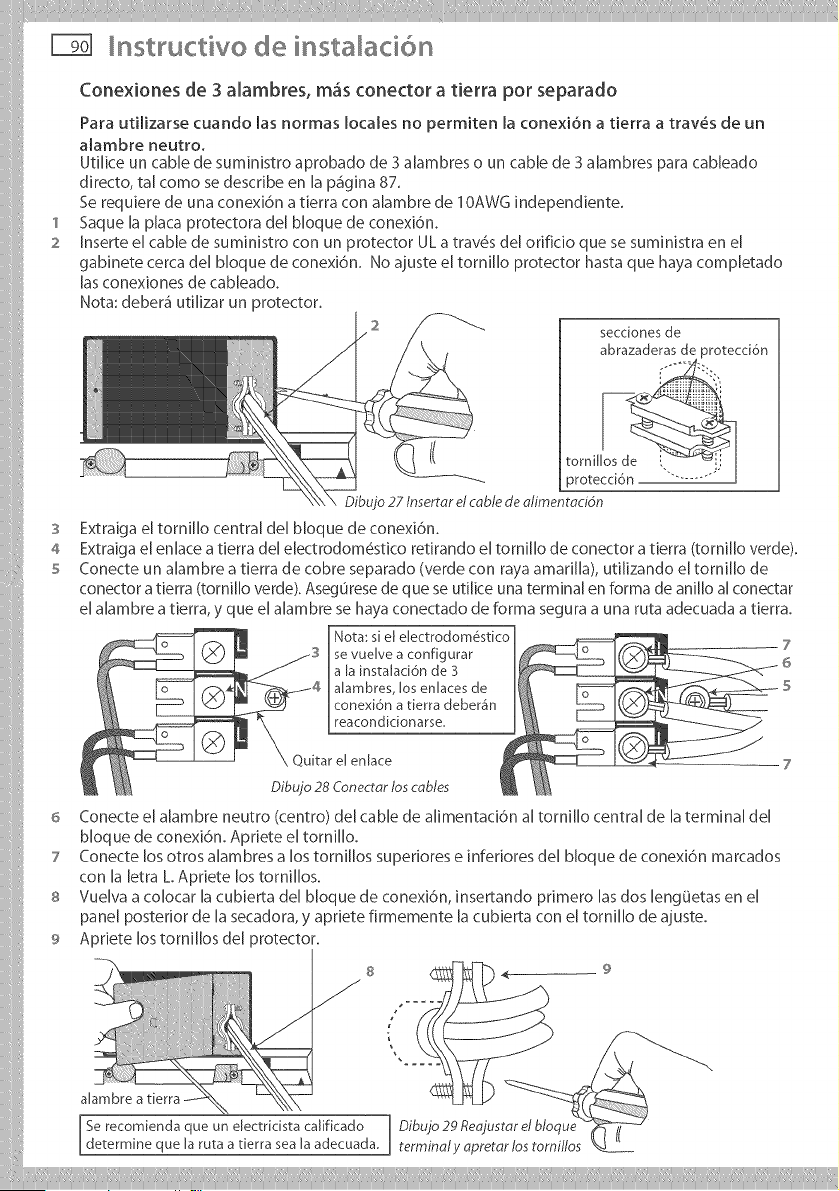
'I
2
3
4
5
nstructivo de insta aci6n
Conexiones de 3 alambres, m_s conector a tierra pot separado
Para utilizarse cuando [as normas locales no permiten [a conexi6n a tierra a trav6s de un
alambre neutro.
Utilice un cable de suministro aprobado de 3 a[ambres o un cable de 3 a[ambres para cableado
directo, ta[ como se describe en [a pa'gina 87.
Se requiere de una conexi6n a tierra con alambre de IOAWG independiente.
Saque [a placa protectora de[ bloque de conexi6n.
[nserte el cable de suministro con un protector UL a trav6s del orific[o que se suministra en el
gabinete cerca de[ bloque de conexi6n. No ajuste el torn[[[o protector hasta que haya completado
[as conexiones de cableado.
Nota: deber_i uti[izar un protector.
secciones de
abrazaderas de protecci6n
( tornilbs
protecci6n
Dibujo 27 lnserrar d cable de alimentacidn
Extraiga el torni[[o central de[ b[oque de conexi6n.
Extraiga el en[ace a tierra de[ e[ectrodom6stico retirando el tomi[[o de conector a tierra (torni[[o verde).
Conecte un a[ambre a derra de cobre separado (verde con raya amafi[[a), ud[izando el torn[[[o de
conector a derra (torni[[o verde). AsegOrese de que se uti[ice una terminal en forma de ani[[o a[ conectar
el a[ambre a tierra, y que el a[ambre se haya conectado de forma segura a una ruta adecuada a tierra.
Nora: si el electrodom6stico 7
sevuelve a configurar
a [a instalaci6n de 3
alambres, los en[acesde 5
conexi6n a tierra deber_n
reacondicionarse.
Quitar el enJace 7
Dibujo 28 Conectarlos cables
6 Conecte el alambre neutro (centro) del cable de alimentaci6n a[ tornil[o central de [a terminal del
bloq ue de conexi6n. Apfiete el tornil[o.
7 Conecte los otros alambres a los tornillos superiores e inferiores de[ bloque de conexi6n marcados
con la letra L. Apriete los tornillos.
s Vuelva a colocar la cubierta del bloque de conexi6n, insertando primero las dos lengOetas en el
panel posterior de la secadora, y apriete firmemente la cubierta con el tornillo de ajuste.
9 Apriete Iostornillos de[ protector.
alambre a
Serecomienda que un electricista caJificado [ Dibujo29Reaiustarelbloque {(
determine que la ruta a tierra seala adecuada, termina/y aprerarlos romi/los
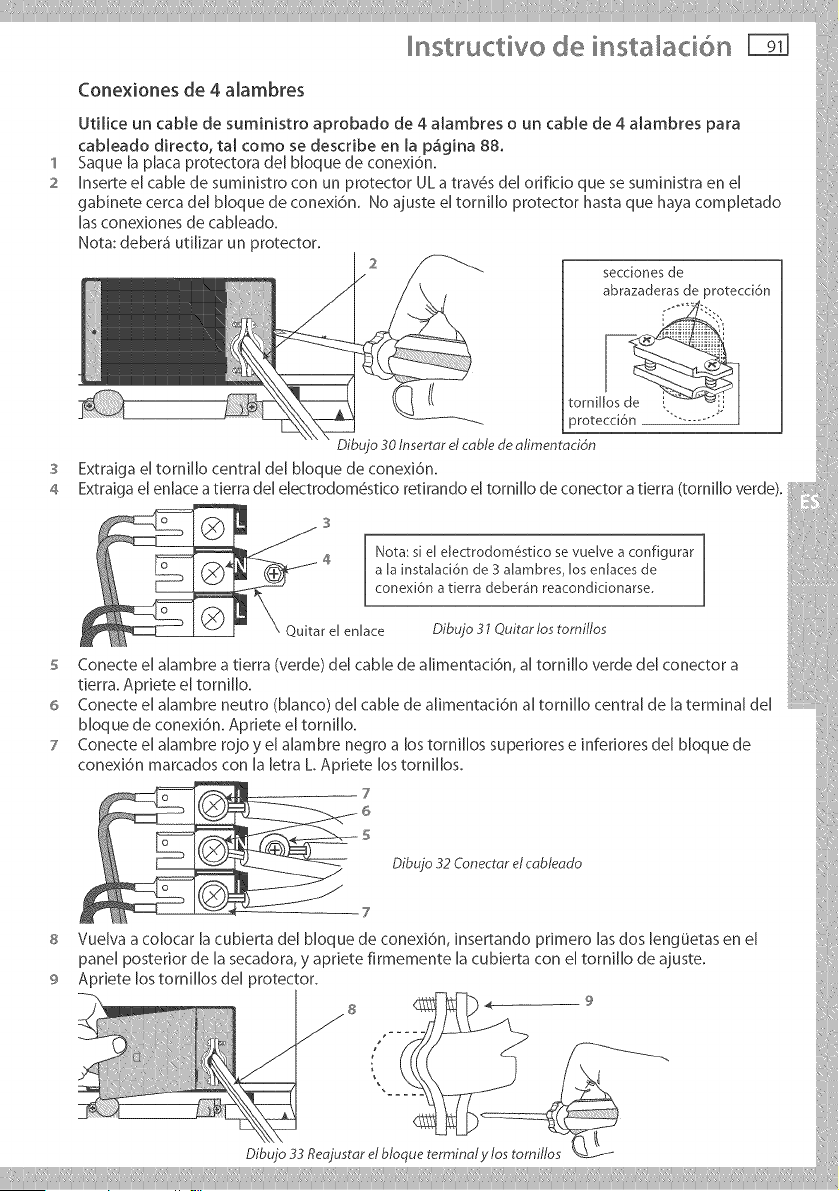
I
2
S
4
nstructivo de insta aci6n I-Fil
Conexiones de 4 a[ambres
Uti[ice un came de suministro aprobado de 4 a[ambres o un cane de 4 a[ambres para
cab[eado directo, ta[ como se describe en [a p4g[na 88.
Saque [a p[aca protectora de[ b[oque de conexJ6n_
[nserte el cable de sum[nistro con un protector UL a tray, s del or[fido que se sum[nistra en el
gabJnete cerca de[ b[oque de conexJ6n. No ajuste el tornJ[[o protector hasta que haya compJetado
[as conexJones de cabJeado.
Nota: deber_ utJ[izar un protector.
secciones de
abrazaderas de protecci6n
I( tomiUo_
protecci6n "_......... ]
Dibujo 30 lnserrar el cablede afimentaci4n
Extraiga e[ torniJJo central deJ bbque de conexi6n.
Extraiga eJenJace a tierra deJ eJectrodom6stJco retJrando eJtornJl[o de conectora tJerra (tornJl[o verde),
S
4
Nota: si el eJectrodom6stico se vueJve a configurar
a la instalaci6n de 3 alambres, los enJaces de
conexi6n a tierra deber_n reacondicionarse
Quitar e[ enJace Dibujo 31 Ouitar los tomitlos
5 Conecte el alambre a tlerra (verde) del cable de alimentaci6n, a[ tornil[o verde del conector a
tierra. Apriete el tornll[o.
6 Conecte el alambre neutro (blanco) de[ cable de a[imentaci6n a[ torni[[o central de [a terminal de[
bloq ue de conexi6n. Apriete el tornil[o.
7 Conecte el alambre rojo y el alambre negro a los tornl[[os superiores e inferiores de[ bloque de
conexi6n marcados con [a [etra L. Apriete los tornillos.
7
6
Dibujo 32 Conecraretcabteado
8
9
7
Vuelva a colocar [a cubierta del bloque de conexi6n, insertando primero [as dos lengi]etas en el
panel posterior de [a secadora, y apriete firmemente [a cubJerta con el torni[[o de ajuste.
Apriete los tornJJlos de[ protector.
<_ 9
J
l
i >
Dibuio 33 Reojustar elbloque terminal
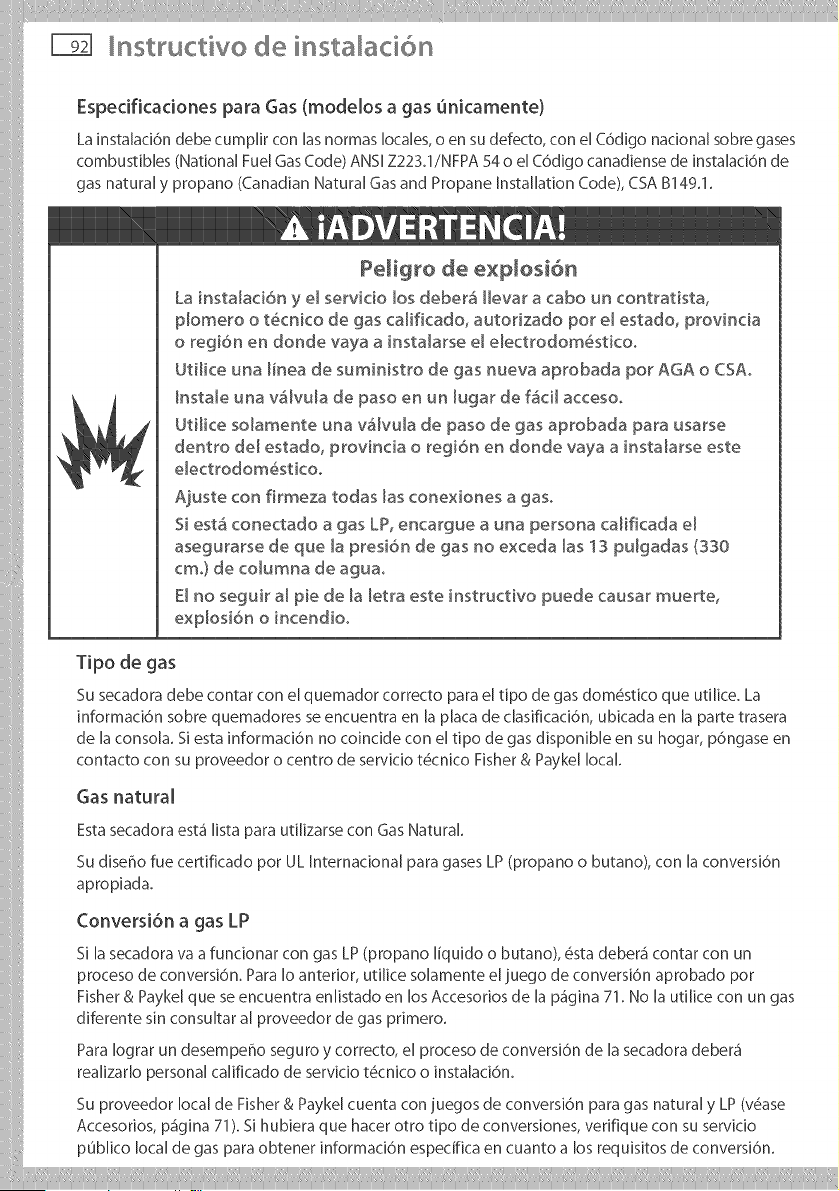
nstructivo de insta aci6n
Espedficadones para Gas (modelos a gas unicamente)
La ]nsta[ac[6ndebe cump[ir con [asnormas locales,o en sudefecto, con e[ C6d[go national sobre gases
combustibles (National FuelGasCode) ANSiZ223J/NFPA 54o e[ C6d[go canad[ensede [nsta[ac[6nde
gas natural y propano (Canad[anNatural Gasand Propane Instal[at[on Code), CSAB149J.
!IE
Pemigro de exp_osi6n
La instalaci6n y e[ servicio _os debera Hevar a ¢abo un ¢ontratista,
p[ome_o o t6cni¢o de gas calificado, autorizado pot el estado, provincia
o regibn en donde vaya a insta[arse e[ e_ectrodom6sticoo
UtHice una Hnea de suministro de gas nueva aprobada pot AGA o CSAo
hsta_e una v_vu_a de paso en un _ugar de f_cil accesoo
UtHice so[amente una v&[vu_a de paso de gas aprobada para usarse
dentro del estado, provincia o regi6n en donde vaya a insta[arse este
e[ectrodom6stico.
Ajuste con firmeza todas _as conexiones a gas.
Si est_ conectado a gas LP, encargue a una persona ca_ificada e_
asegurarse de que _a presi6n de gas no exceda _as 13 pu_gadas (330
cmo) de co_umna de agua.
E_ no seguir a_ pie de _a _etra este instructivo puede ¢ausar muerte,
expbsi6n o incendioo
Tipo de gas
Su secadora debe contar con e[ quemador correcto para e[ tipo de gas dom6stico que uti[ice. La
informaci6n sobre quemadores se encuentra en [a p[aca de c[asificaci6n, ubicada en [a parte trasera
de [a conso[a. S[ esta informaci6n no coincide con e[ tipo de gas disponib[e en su hogar, p6ngase en
contacto con su proveedor o centro de servic[o t6cnico Fisher & Payke[ local
Gas natural
Esta secadora esta" [ista para utilizarse con Gas Natural.
Su d]seffo fue cerqficado pot UL [nternac]ona[ para gases LP (propano o butano), con la convers[6n
apropiada.
Conversi6n a gas LP
si [asecadora va afundonar con gas LP(propano [[quido o butano), 6sta debera"contar con un
proceso de conversi6n. Para Io anterior, utilice solamente el juego de conversi6n aprobado por
Fisher& Paykel que seencuentra enlistado en losAccesoriosde la p_igina71.No la utilice con un gas
diferente sin consultar a[ proveedor de gas primero.
Para [ograr un desempeffo seguro y correcto, el proceso de conversi6n de [a secadora deber_i
rea[izar[o personal ca[ificado de servic[o t6cnico o insta[aci6n.
Su proveedor local de Fisher & Payke[ cuenta con juegos de conversi6n para gas natural y LP (v6ase
Accesorios, p_igina 71). Si hubiera que hacer otro tipo de conversiones, verifique con su sewicio
publico local de gas para obtener informaci6n especifica en cuanto a los requisitos de conversi6n.
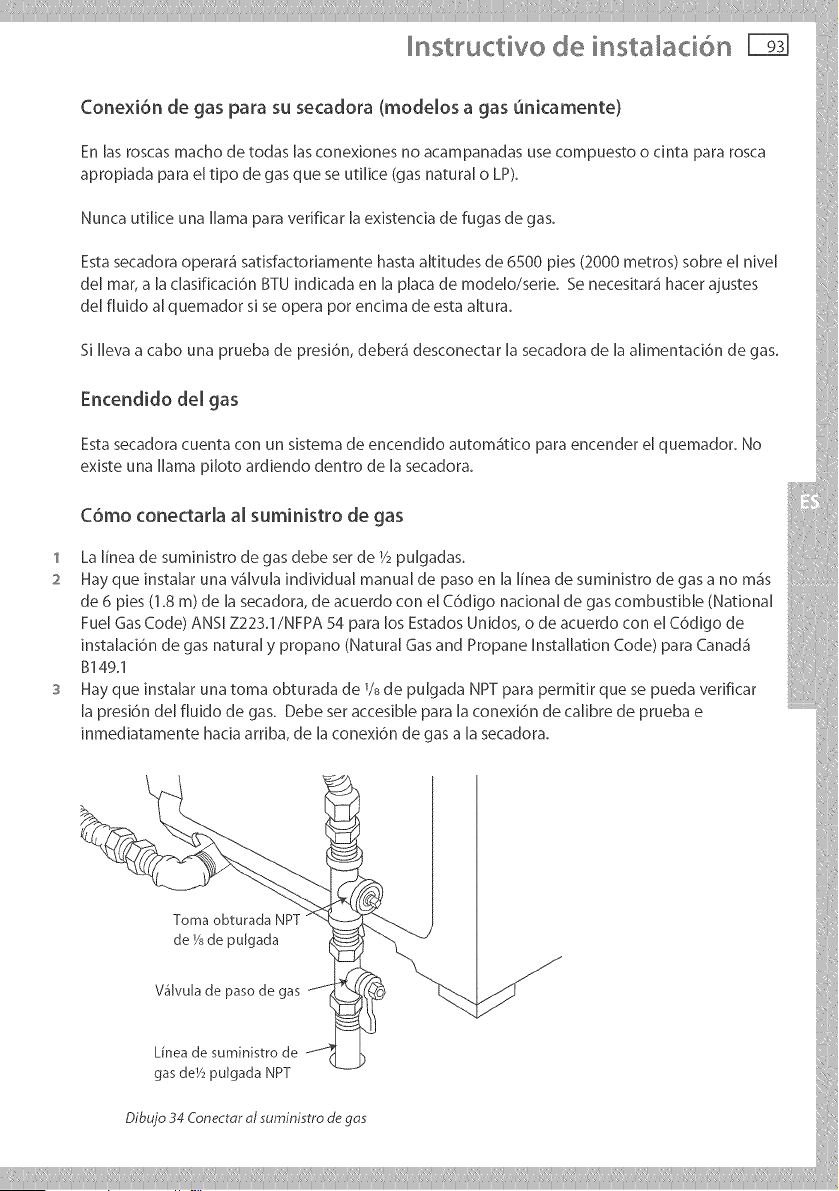
nstructivo de insta acidn
Conexidn de gas para su secadora (modelos a gas unicamente)
En las roscas macho de todas las conexiones no acampanadas use compuesto o cinta para rosca
apropiada para el tipo de gas que se utMce (gas natural o LP).
Nunca utMce una llama para verMcar la existencia de fugas de gas.
Esta secadora operar_ satisfactoriamente hasta altitudes de 6500 pies (2000 metros) sobre el nivel
del mar, a la clasificaci6n BTU indicada en la placa de modelo/serie. Se necesitar_ hacer ajustes
del fluido al quemador si se opera pot encima de esta akura.
Si Ileva a cabo una prueba de _resi6n, deber_ desconectar la secadora de la alimentaci6n de gas.
Encendido del gas
Esta secadora cuenta con un sRstema de encendido autom_tico para encender el quemador. No
existe una llama piloto ardiendo dentro de la secadora.
Cdmo conectarla al suministro de gas
1 La [[nea de suministro de gas debe set de 1/2pulgadas.
2 Hay que insta[ar una wi[vula individual manual de paso en [a [[nea de suministro de gas a no m_is
de 6 pies (1.8 m) de [a secadora, de acuerdo con el C6digo naciona[ de gas combustible (National
Fuel Gas Code) ANSI Z223.1/NFPA 54 para los Estados Unidos, o de acuerdo con el C6digo de
insta[aci6n de gas natural y propano (Natural Gas and Propane Installation Code) para Canada1
B149.1
s Hay que instalar una toma obturada de Ys de pu[gada NPT para permitir que se pueda verificar
[a presi6n de[ fluido de gas. Debe ser accesible para [a conexi6n de calibre de prueba e
inmediatamente hacia arriba, de [a conexi6n de gas a [a secadora.
Toma obturada NPT
de X de pulgada
V_qlvu[a de paso de gas
Linea de suministro de
gas de1/2 pulgada NPT
Dibu]o 34 Conectar al suminisrro de gas
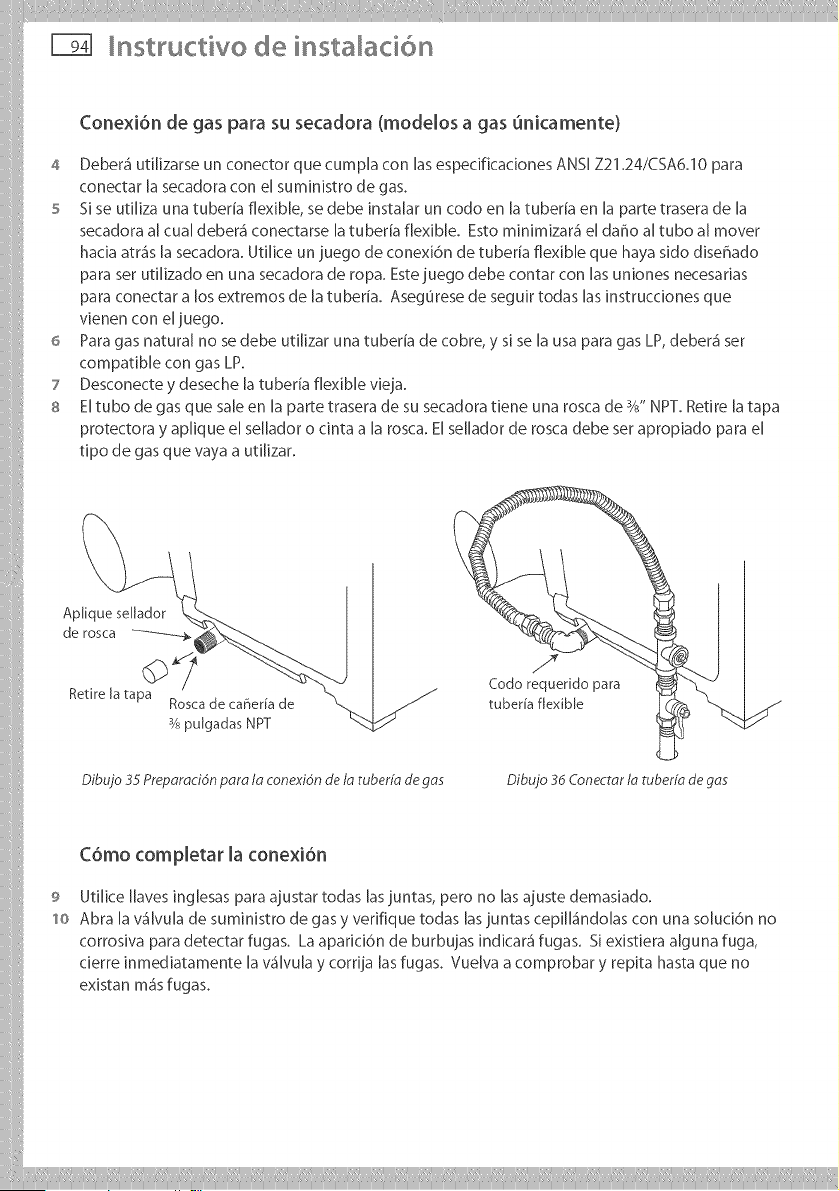
nstructivo de insta aci6n
Conexi6n de gas para su secadora (modelos a gas Onicamente)
4 Debera" utilizarse un conector que cumpJa con las espedficaciones ANSI Z21.24/CSA6.10 para
conectar la secadora con el sumJnJstro de gas.
5 S[ se utJJiza una tuberia flexible, se debe JnstaJar un codo en la tuberia en la parte trasera de Ja
secadora a[ cua[ debera" conectarse la tuberia flexible. Esto minJmJzar_Sel daflo aJtubo a[ mover
hacJa atrgs la secadora. UtiJice un juego de conexJ6n de tuberia flexible que haya sJdo dJseflado
para set utiJizado en una secadora de ropa. Este juego debe contar con las unJones necesarJas
para conectar a los extremos de la tuberia. Asegurese de seguir todas las instruccJones que
vienen con el juego.
6 Para gas natural no se debe utJlizar una tuberia de cobre, y s[ se la usa para gas LP, deber_i ser
compatible con gas LP.
7 Desconecte y deseche Jatuberia flexible vieja.
s Eltubo de gas que sale en la parte trasera de su secadora tJene una rosca de s/s"NPT. Retire la tapa
protectora y aplique el sellador o cJnta a la rosca. El sellador de rosca debe ser apropiado para el
tJpo de gas que vaya a utJJizar.
Retire la ta pa©:i de ca _e"_b_..b..
3_puigadas NPT
/
Codo requerido para
tuberia flexibJe
Dibu]o 35 Preporocidn poro Io con_,xidn de la ruberfo de ges Dibujo 36 Conecrar la tuber@ de gas
C6mo completar Haconexi6n
9 Utilice [laves [nglesas para ajustar todas [asjuntas, pero no [as ajuste demasiado.
'1o Abra [a vg[vu[a de suministro de gas y verifique todas [asjuntas cepi[[_indo[as con una so[uci6n no
corrosiva para detectar fugas. La aparici6n de burbujas indicate1 fugas. Si existiera a[guna fuga,
cierre [nmediatamente [a vg[vu[a y corrija [as fugas. Vue[va a comprobar y repita hasta que no
existan ma's fugas.
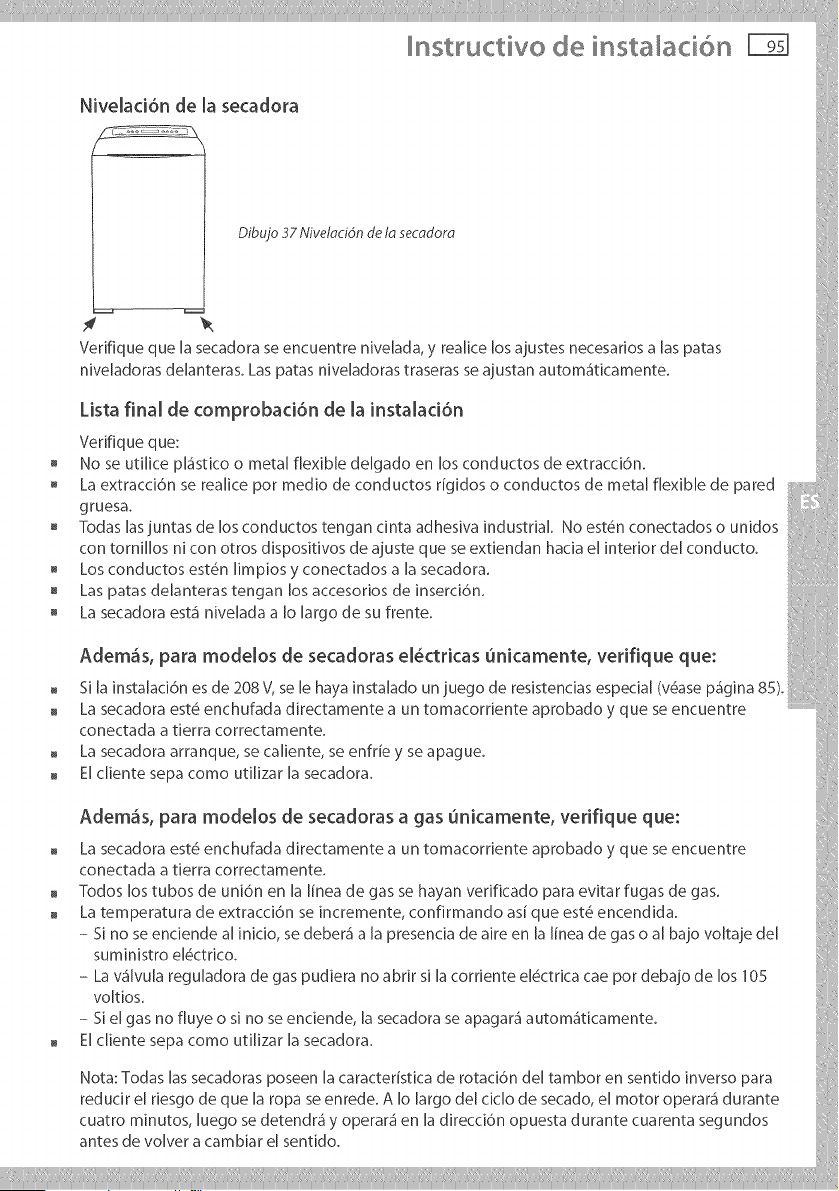
nstructivo de instaBci6n F??l
Nivelad6n de la secadora
Dibu]o 37 Nivdaci@ de ld sec_dor_
Verifique que la secadora se encuentre nivelada, y realice los ajustes necesarios a Bs paras
niveJadoras deJanteras. Las patas niveJadoras traseras se ajustan autom_tJcamente.
Lista final de comprobaci6n de la instalaci6n
Verifiq ue q ue:
No se uti[ke pBstico o metal flexible delgado en los conductos de extracci6n.
La extraccJ6n se reaJice por med[o de conductos r[gJdos o conductos de metal flexible de pared
gruesa.
Todas Bs juntas de los conductos tengan cinta adhesiva industrial. No est#n conectados o unidos
con tornillos ni con otros dispositivos de ajuste que se extiendan hacia el interior del conducto.
Los conductos est#n limpios y conectados a la secadora.
Las patas delanteras tengan los accesonos de inserd6n.
La secadora est_ nivelada a Io largo de su frente.
Adem_s, para modelos de secadoras el@tricas unicamente, verifique que:
S[ [a instaJad6n es de 208 V, se [e haya [nstalado un juego de resistencias especial (v_ase pggJna 85).
La secadora est_ enchufada directamente a un tomacorriente aprobado y que se encuentre
conectada a tierra correctamente.
La secadora arranque, se caJiente, se enfrie y se @ague.
El cliente sepa como uti[izar [a secadora.
Adem_s, para modelos de secadoras a gas unkamente, ve@que que:
La secadora est_ enchufada directamente a un tomacorriente aprobado y que se encuentre
conectada a tierra correctamente.
Todos los tubos de unbn en [a [[nea de gas se hayan verifkado para evJtar fugas de gas.
La temperatura de extracci6n se incremente, confirmando as[ que est_ encendida.
- S[ no se enciende a[ inic[o, se deber_ a [a presencia de aire en [a [[nea de gas o a[ bajo voJtaje de[
suministro el@trico.
- La va'JvuJa reguJadora de gas pudiera no abrir s[ [a corr[ente eJ@trica cae por debajo de los 105
voltios.
- S[el gas no fluye o sJ no se enciende, [a secadora se apagar_ automgticamente.
El cliente sepa como uti[izar [a secadora.
Nota: Todas las secadoras poseen Jacaracteristka de rotaci6n del tambor en sentido inverso para
reducJr el riesgo de que la ropa se enrede. A Io largo del cJclo de secado, el motor operara" durante
cuatro mJnutos, luego se detendra" y operara" en la dJreccJ6n opuesta durante cuarenta segundos
antes de volver a cambiar el sentido.
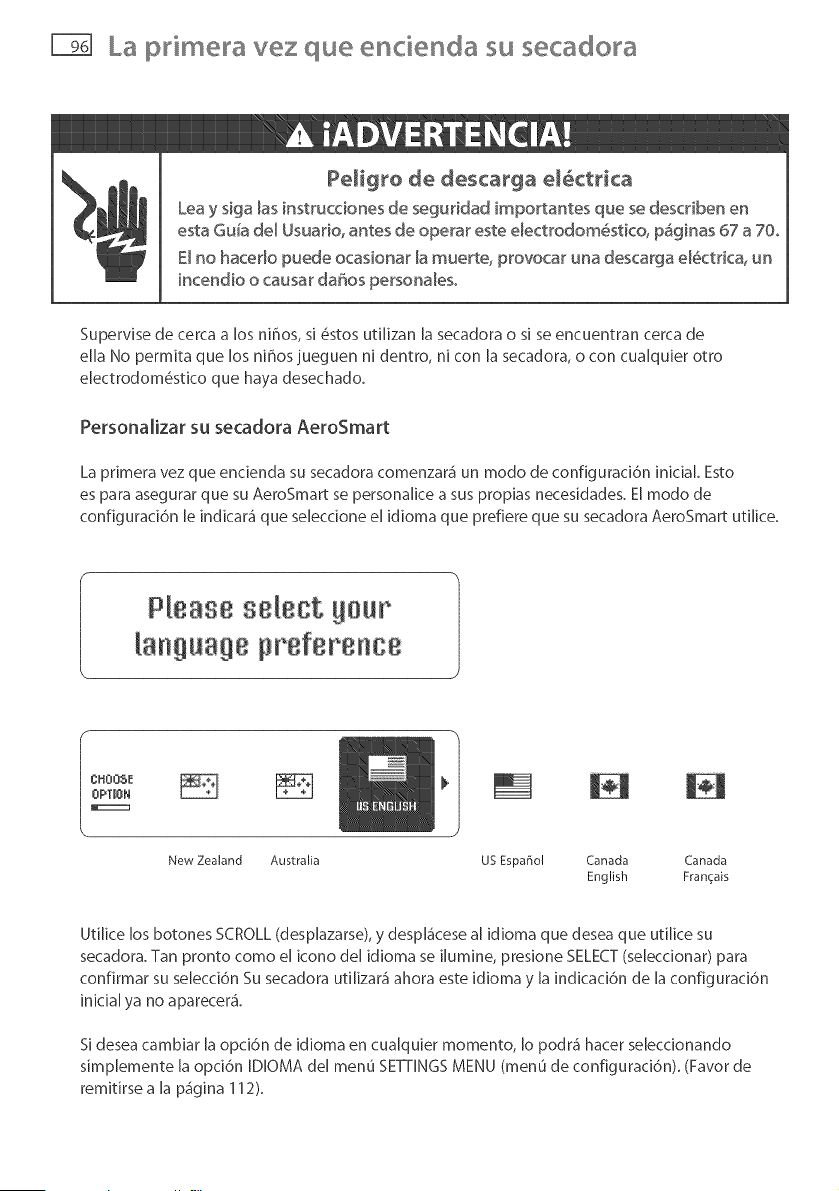
La p_imera vez que encienda su secado_a
I
Pe_igro de descarga e_ctrica
Lea y siga _as instrucciones de seguridad impo_tantes que se describen en
esta Guia de_ Usuar'ie, antes de eperar este e_ectrodem_stico, p_ginas 67 a 70°
E_no hace__o puede ocasiena_ la muerte, p_'eveca_ una desca_ga e_ct_ica, un
incendie o causar da_os persena_eso
Supervise de cerca a los n]_os, s] _stos util]zan la secadora o s] se encuentran cerca de
ella No perm]ta que los n]hos jueguen n] dentro, n] con la secadora, o con cualqu]er otro
electrodom#stico que haya desechado.
Personalizar su secadora AeroSmart
La pr]mera vez que enc]enda su secadora comenzar_ un mode de configurac]6n ]nic]al. Esto
es para asegurar que su AeroSmart se personal]ce a sus prop]as neces]dades. El mode de
configurac]6n le ]nd]car_ que selecc]one el ]d]oma que prefiere que su secadora AeroSmart ut]l]ce.
PJeas8ss/eet !@ur
aJ' uag8 prsfer'snc:8
New Zealand Australia US Espaffol Canada Canada
English Fran(_ais
Utilice los botones SCROLL (desplazarse), y despla'cese a[ ]dioma que desea que util]ce su
secadora. Tan pronto come el ]cone del ]dioma se ][um]ne, pres]one SELECT(seleccionar) para
confirmar su se[ecc]6n Su secadora uti[]zar_ ahora este ]d]oma y [a ]nd]cac]6n de [a configurac]6n
]nicia[ ya no aparecer&
Si desea cambiar la opc]6n de id]oma en cualqu]er memento, Io podra" hacer selecc]onando
s]mplemente la opc]6n IDIOMA del menu SETTINGS MENU (menu de configurac]6n). (Favor de
rem]t]rse a la p_g]na 112).

Ca acter sticas FTfl
Carga [nte[igente
El nuevo disefio ergon6mico de esta secadora imp[ica que uno deba
agacharse menos. Mueva simp[emente [a ropa desde [a [avadora
hasta [a secadora con un minimo de esfuerzo.
Cuidado 6ptimo de [a ropa
El 6ptimo cuidado de [a ropa se [ogra gracias a un ventJlador de
f[ujo de aire aJtamente eficJente y un cuidadoso control de[ caJor.
Su AeroSmart brinda pot un [ado, el calor correcto para articuJos
deJicados y sensJbJes a [a temperatura, secando en forma eficJente pot
e[ otro, cargas norma[es m_is voJumJnosas y de ropa de mezcJi[[a.
Acd6n de[ Tambor en sentido inverso
El tambor rota en sentido inverso reguJarmente, para que sus prendas
se sequen de forma m_is un[forme sin enredarse.
Canastilla de Pelusa
El fi[tro de pe[usa se [imp[a automa't[camente pot raspado durante
el cic[o de secado y [a pe[usa se deposita en [a canast[[[a de pe[usa.
Ya no es necesar[o tocar n[ raspar [a pe[usa. Elf[ujo de aire es rags
eficiente ya que su paso nunca se b[oquea debido un fi[tro tapado.
Todo a [a perfecd6n con [a [avadora Fisher & Payke[
La secadora, combinada con el desempefio de centrifugado superior
y tiempos de cJc[o rgpidos de [a [avadora AquaSmart r_',acortara" el
tJempo total de[ [avado hasta en un terc[o, reducJendo asi el tiempo
que usted dedJca a [avar ropa
Tambor de acero inoxidable
A[ ser de acero inoxidable, este tambor no es s61o m_is higi#nico,
sino tambi#n m_is resistente y m_isf_ic[[ de mantener en buenas
condiciones.
\
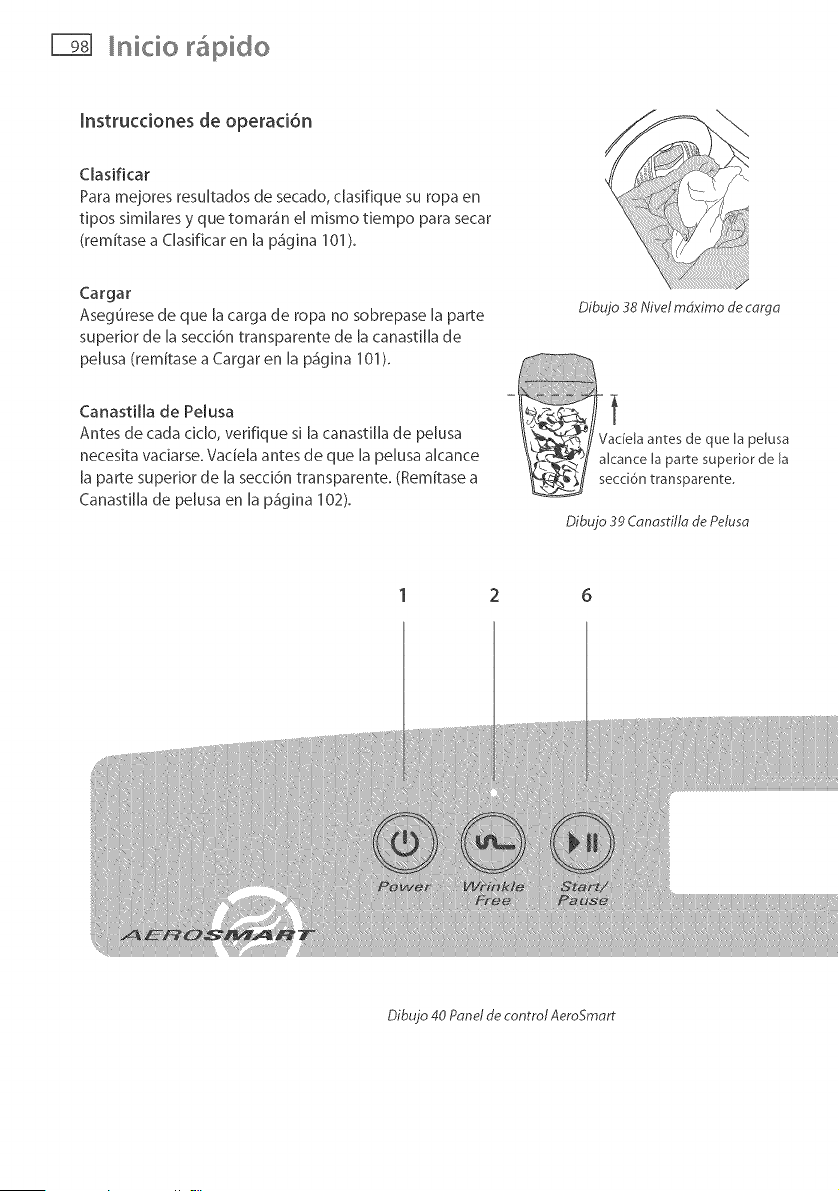
nicio pido
mnstruccionesde operaci6n
Clasificar
Parame]ores resultados de secado, clasifique su ropa en
tipos sJmi[aresy que tomar_in e[ mismo tiempo parasecar
(remitase a C[asificaren la p_iglna 101).
Cargar
AsegOresede que [a carga de ropa no sobrepase [a parte
superior de [asecd6n transparente de [a canastJ[[ade
peJusa(remitase a Cargar en [a p_igina 101).
i! ii!ii!ii!i iiiiiiiiiiiiiii iiiiiiiiii!i i iiii!i i:!
Dibujo 38 Wive/m4ximo de carga
CanastiHa de PeJusa
Antes de cada cic[o, verifique si [a canasti[[a de pelusa
necesita vadarse. VacJe[a antes de que [a pe[usa a[cance
[a parte superior de [a secd6n transparente. (Remitase a
Canasti[[a de pe[usa en [a p_igina 102).
Dibujo 39 Canastitla de Petusa
Dibujo 40 Panel de control AeroSmart
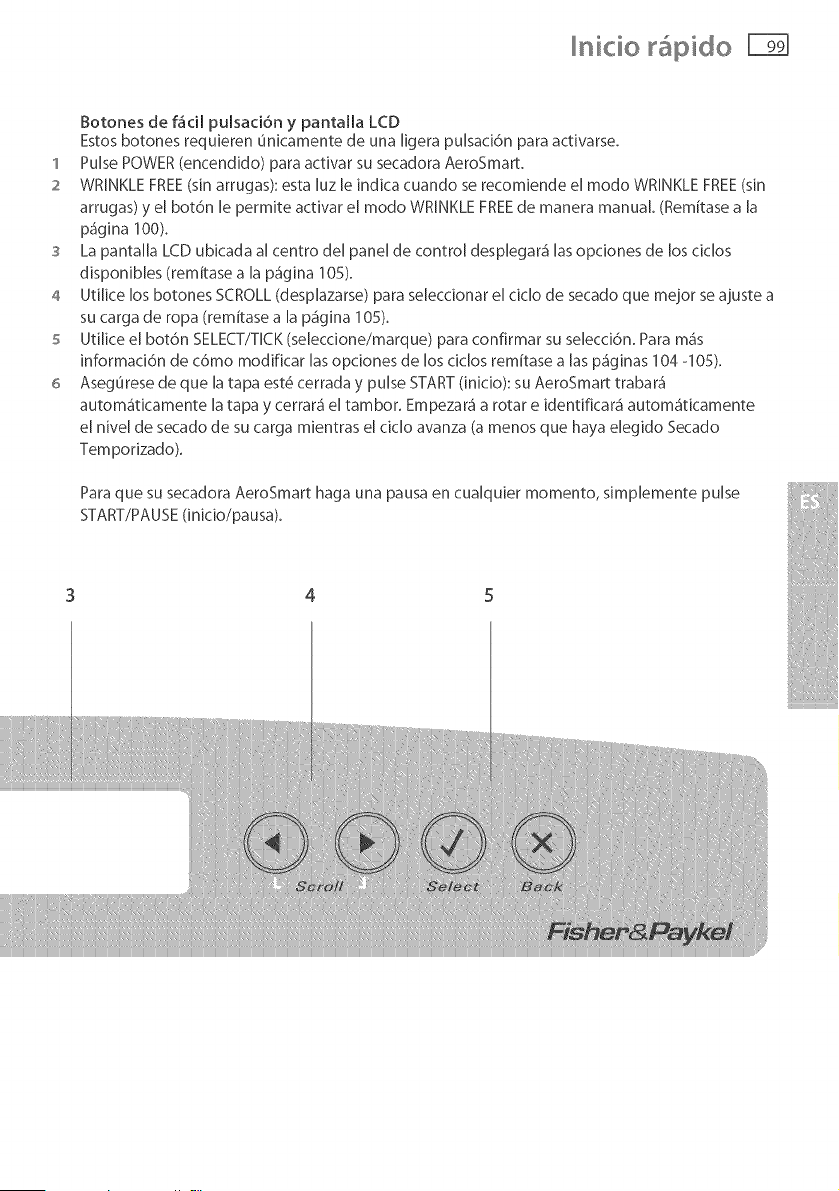
nicio @ido
Botones de f4ci[ puJsaci6n y pantalJa LCD
Estos botones requieren unicamente de una [igera puJsaci6n para activarse.
1 Puke POWER (encendJdo) para activar su secadora AeroSmart.
2 WRINKLE FREE(sin arrugas): esta [uz [e indica cuando se recomiende el modo WRINKLE FREE(sin
arrugas) y el bot6n [e permite activar el modo WRINKLE FREEde manera manual. (Remitase a [a
p_igina 100).
3 La pantalla LCD ubicada al centro del panel de control desplegar_i las opciones de los ciclos
disponibles (remitase a la p_igina 105).
4 Utilice los botones SCROLL (desplazarse) para seleccionar el dclo de secado que mejor se ajuste a
su carga de ropa (remitase a la pa'gina 105).
5 Utilice el bot6n SELECT/TICK (seleccione/marque) para confirmar su selecci6n. Para m_s
informaci6n de c6mo modificar las opciones de los ciclos remitase alas p_iginas 104 -105).
6 AsegOrese de que la tapa est_ cerrada y pulse START (inicio): su AeroSmart trabara"
autom_ticamente la tapa y cerrar_ el tambor. Empezar_i a rotar e identificara" autom_iticamente
el nivel de secado de su carga mientras el ciclo avanza (a menos que haya elegido Secado
Temporizado).
Para que su secadora AeroSmart haga una pausa en cualquier momento, simplemente pulse
START/PAUSE (inicio/pausa).
3 4 5
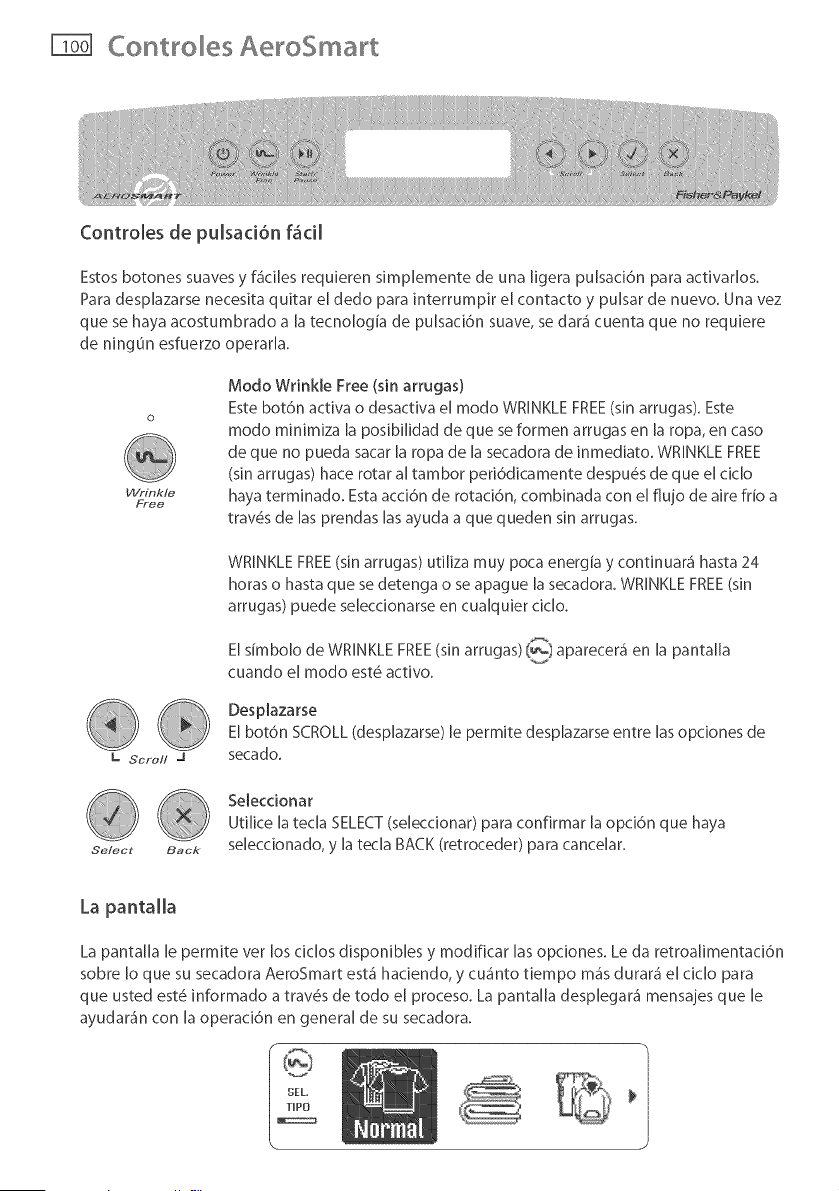
Controles AeroSmart
Controles de pulsaci6n f£cil
Estos botones suavesy fa'cilesrequieren simplemente de una [igera pulsaci6n para activarlos.
Paradesp[azarse necesita quitar el dedo para interrumpir el contacto y pulsar de nuevo. Una vez
que se haya acostumbrado a [a tecno[ogia de pu[saci6n suave, se dar<icuenta que no requiere
de ningOn esfuerzo operarla.
Wrinkle
Free
Modo Wrinkle Free (sin arrugas)
Este bot6n activa o desactiva el modo WRINKLEFREE(sin arrugas). Este
modo minimiza la posibilidad de que seformen arrugas en la ropa,en caso
de que no pueda sacar la ropa de [a secadora de lnmediato. WRINKLEFREE
(sin arrugas) hace rotar altambor peri6dicamente despu@sde que el ciclo
hayaterminado. Estaacd6n de rotad6n, combinada con el flu]o de aire frio a
trav@sde lasprendas lasayuda a que queden sin arrugas.
WRINKLE FREE(sin arrugas) utlliza muy poca energia y continuara" hasta 24
horas o hasta que se detenga o se apague [a secadora. WRINKLE FREE(sin
arrugas) puede seleccionarse en cualquier dclo.
[= Scroll J
El simbolo de WRINKLE FREE(sinarrugas) (_ aparecer<i en la pantalla
cuando el modo est_ activo.
Desplazarse
Elbot6n SCROLL(desplazarse)le permite desplazarseentre lasopdones de
secado.
@ SeleccionarUtilice latecla SELECT(selecdonar) para confirmar la opd6n que haya
Select Back selecdonado, y [atecla BACK(retroceder) para cancelar.
La pantalla
La pantalla le permite ver los dclos disponibles y modificar las opciones. Le da retroalimentad6n
sobre 1o que su secadora AeroSmart esta" hadendo, y cu4nto tiempo re<is durara" el ciclo para
que usted est# informado a trav(_s de todo el proceso. La pantalla desplegar<i mensajes que le
ayudar<in con la operaci6n en general de su secadora.
SEL
TIP8
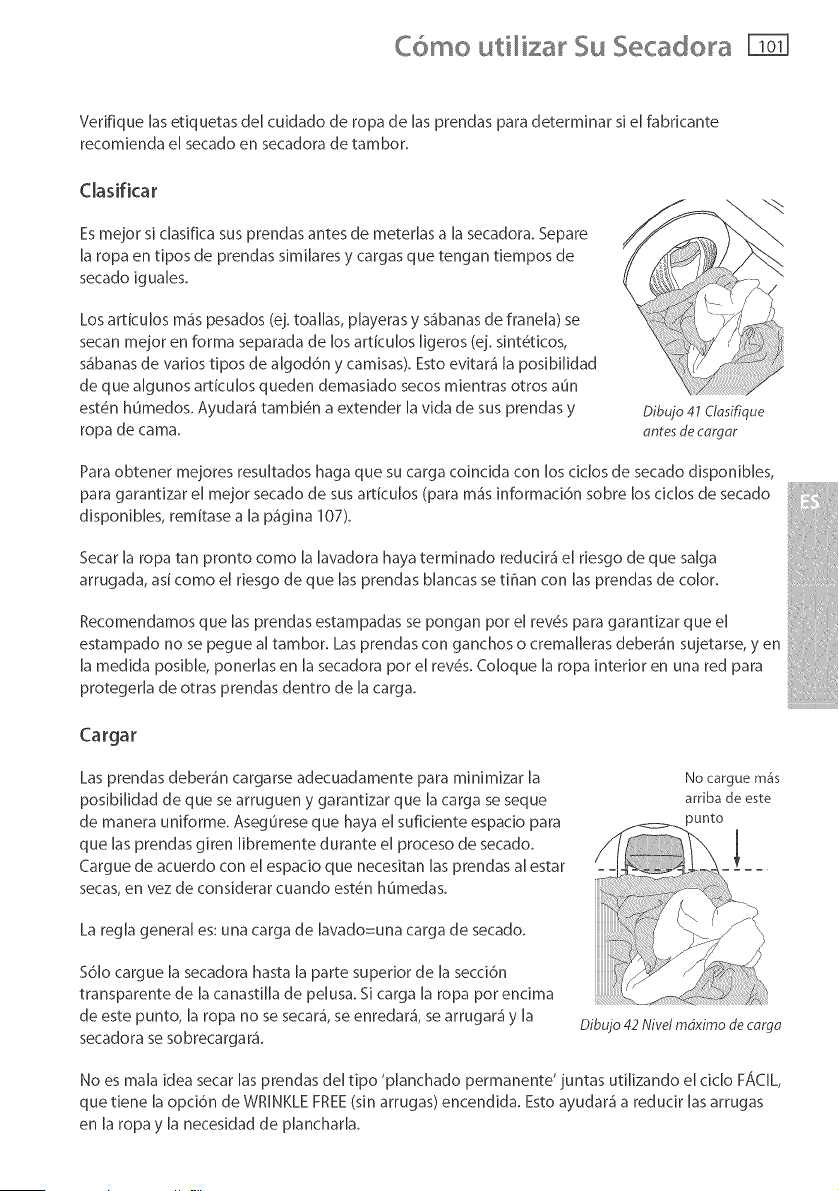
C6mo uti iza $u $ecado a FTOq
VerJfique [as etJquetas de[ cuidado de ropa de [as prendas para determJnar s[ e[ fabncante
recomJenda el secado en secadora de tambor.
C[asificar
Esme]or s[ clasifica sus prendas antes de meter[as a [a secadora. Separe
[a ropa en tipos de prendas simi[ares y cargas que tengan tiempos de
secado igua[es.
Los artkulos mgs pesados (el. toallas, playeras y sgbanas de franela) se
secan me]or en forma separada de los articu[os [igeros (ei. sint6ticos,
sa'banas de varios tipos de a[god6n y camisas). Esto evitarg [a posibi[idad
de que a[gunos articu[os queden demasiado secos mientras otros aun
est6n humedos. Ayudar_ tambi6n a extender [a vida de sus prendas y
ropa de cama.
Dibujo 41 Clasifique
ontes de c_rgar
Para obtener me]ores resultados haga que su carga coindda con los cic[os de secado disponibles,
para garantizar e[ me]or secado de sus articuJos (para m_s informacJ6n sobre los cJc[os de secado
disponJbles, remitase a [a p4gJna 107).
Secar [a ropa tan pronto como [a [avadora haya terminado reducira" el riesgo de que salga
arrugada, asi como e[ riesgo de que [as prendas b[ancas se tiffan con [as prendas de color.
Recomendamos que [as prendas estampadas se pongan pot el rev#s para garantizar que el
estampado no se pegue a[ tambor. Las prendas con ganchos o crema[[eras deber_n sujetarse, y en
[a medida posib[e, poner[as en [a secadora por e[ rev#s. Co[oque [a ropa interior en una red para
proteger[a de otras prendas dentro de [a carga.
Cargar
Las prendas debera'n cargarse adecuadamente para mJnJmJzar [a
posibiHdad de que se arruguen y garantizar que [a carga se seque
de manera uniforme. Asegurese que haya el suficiente espacio para
que [as prendas giren [ibremente durante el proceso de secado.
Cargue de acuerdo con el espacio que necesitan [as prendas a[ estar
secas, en vez de considerar cuando est6n humedas.
No cargue m&s
arriba de este
punto
La regla genera[ es: una carga de [avado=una carga de secado.
$61o cargue [a secadora hasta [a parte superior de [a secci6n
transparente de [a canasti[[a de pe[usa. S[ carga [a ropa por encima
de este punto, [a ropa no se secar_, se enredar_, se arrugar_ y [a
secadora se sobrecargar_.
Dibujo 42 Nivd mSximo de carga
No es mala idea secar [as prendas de[ tipo 'planchado permanente' juntas uti[izando el cJc[o FACIL
que tiene [a opd6n de WRINKLE FREE(sin arrugas) encendida. Esto ayudar_i a redudr [as arrugas
en [a ropa y [a necesidad de plancharla.
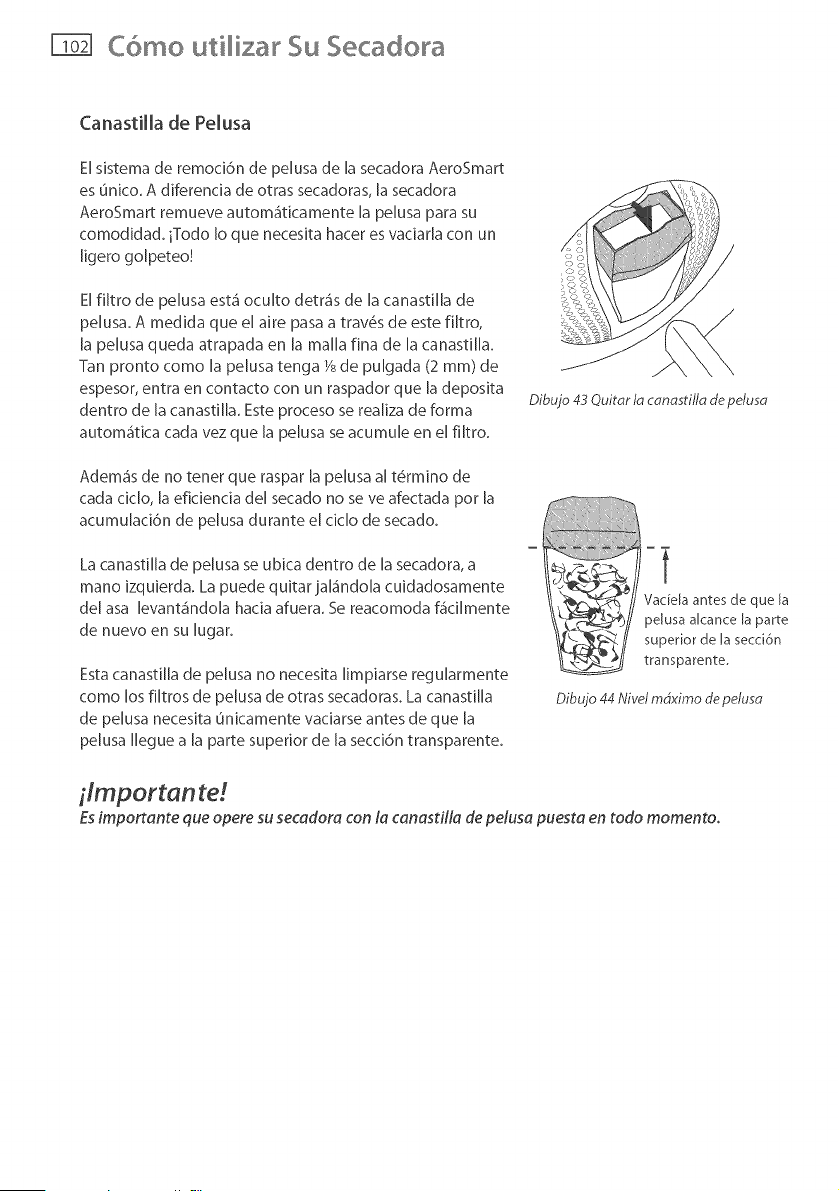
C6mo uti iza Su Secado a
Canastilla de Pelusa
El sistema de remoci6n de peJusa de la secadora AeroSmart
es Onico. A diferencia de otras secadoras, la secadora
AeroSmart remueve automa'ticamente la pelusa para su
comodidad, iTodo Io que necesita hacer es vaciarla con un
[igero golpeteo!
E[ filtro de pe[usa est_ ocuko detr_s de [a canasti[B de
pelusa. A medida que el aire pasa a trav#s de este filtro,
[a pelusa queda atrapada en [a malla fina de la canastilla.
Tan pronto como la pelusa tenga Vsde pu[gada (2 ram) de
espesor, entra en contacto con un raspador que la deposita
dentro de [a canastilla. Este proceso se realiza de forma
autom_tica cada vez que la pelusa se acumule en el fikro.
Dibujo 43 Quitar la canastilla de pelusa
Adem_s de no tener que raspar la pelusa al t(_rmino de
cada ciclo, la eficiencia del secado no se ve afectada pot la
acumulaci6n de pelusa durante el ciclo de secado.
La canastilla de pelusa se ubica dentro de [a secadora, a
mano izquierda. La puede quitar ja[_ndo[a cuidadosamente
de[ asa [evanta'ndo[a hacia afuera. Se reacomoda f_ci[mente
de nuevo en su [ugar.
Esta canastilla de pelusa no necesita Iimpiarse regularmente
como los filtros de pelusa de otras secadoras. La canastilla
de pelusa necesita unicamente vaciarse antes de que la
pelusa Ilegue a [a parte superior de la secci6n transparente.
w
t
Vac[e[aantes de que [a
pe[usa a[cance [a parte
superior de Ia secci6n
transparente
Dibujo 44 Nivel mdximo de pelusa
ilmp or tan re!
Es importente que opere su secedore con la cenestilla de peluse pueste en redo momento.
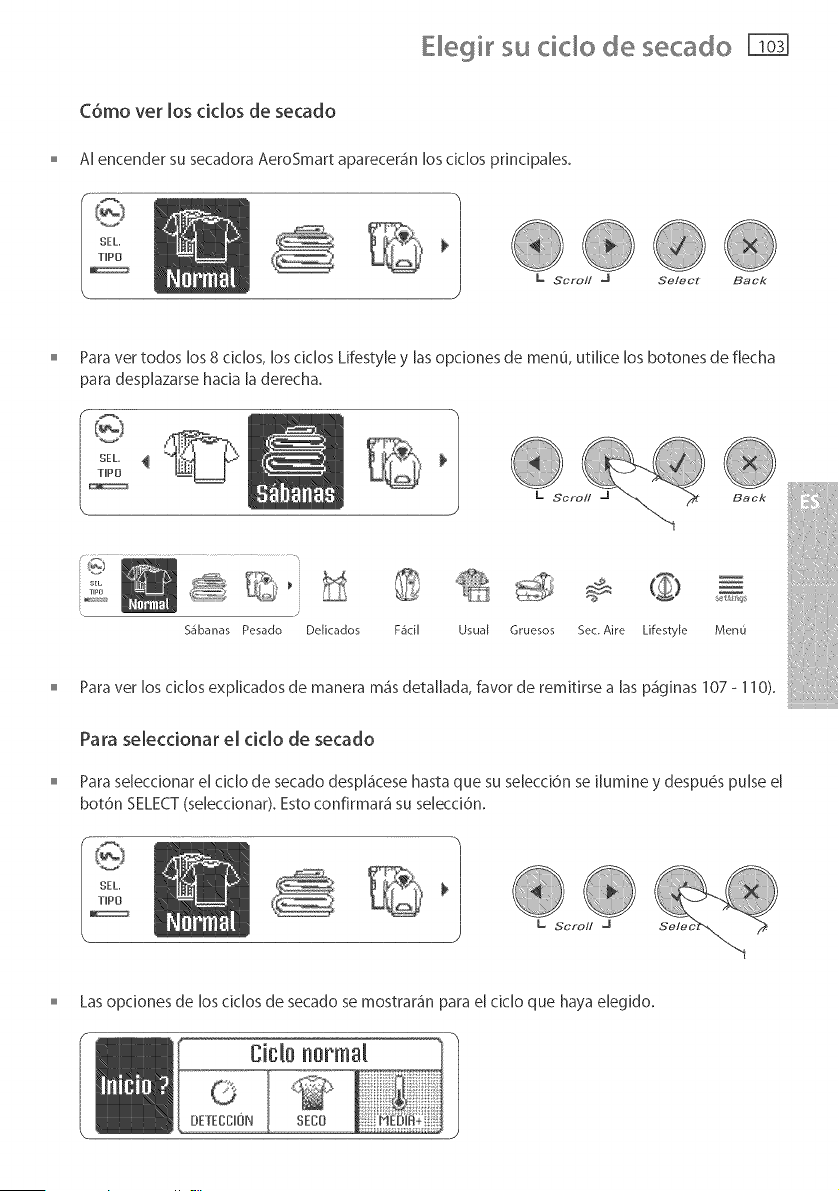
E_egi_su cido de secado
C6mo ver los cidos de secado
AI encender su secadora AeroSmart aparecer_n los cJclos princJpaJes.
'/ ®®@®
L Scroll J Select Back
Para ver todos los 8 cic[os, [os cic[os Lifestyle y [as opcJones de menu, utJHce los botones de flecha
para desplazarse hacia la derecha.
TIPO
Back
i SEL
Tmo
S4banas Pesado De[icados F&cil
UsuaF Gruesos Sec. Aire LifestyFe MenO
Paraver losciclos explicados de manera m_isdetallada, favor de remRirsealas p_iginas107 - 110).
Para seleccionar el cicio de secado
Para seJeccionar e[ cic[o de secado despJgcese hasta que su seJecci6n se [[umJne y despu_s puJse el
bot6n SELECT (seleccionar). Esto confirmar_5 su selecci6n.
o Las opciones de los cic[os de secado se mostrar_in para el cJc[o que haya elegJdo.
Cicm0normal

Modificar _asopciones de_ tide de secado
Despla'cese a la opd6n que desee modificar seleccion_ndola y puBando el bot6n SELECT
(seleccionar).
Cisl0 normal
%08
Despl_cese a la configurad6n apropiada y presione SELECT (selecdonar). Esto iluminar_ su
selecci6n para mostrarle que ya fue seleccionada.
DE[ECCION
BPCION
ftUTOi
MENOS
TEl'qP.i
Em 1 MAs
L Scroll J Back
S Tendr_Sentonces la opd6n de guardar esta opd6n modificada para dclos futuros o utilizarla
simplemente para 6sta en particular. Si selecciona '_}guardar para ciclos futuros?', la m_iquina
guardar_i la opci6n modificada para ese ciclo exclusivamente.
4 Presione SELECT (seleccionar) para elegir.
5 Regresar_i a la pantalla del menu de opciones.
6 Seleccione START (inicio) para empezar con el secado, o presione el bot6n START/PAUSE (inicio/
pausa).
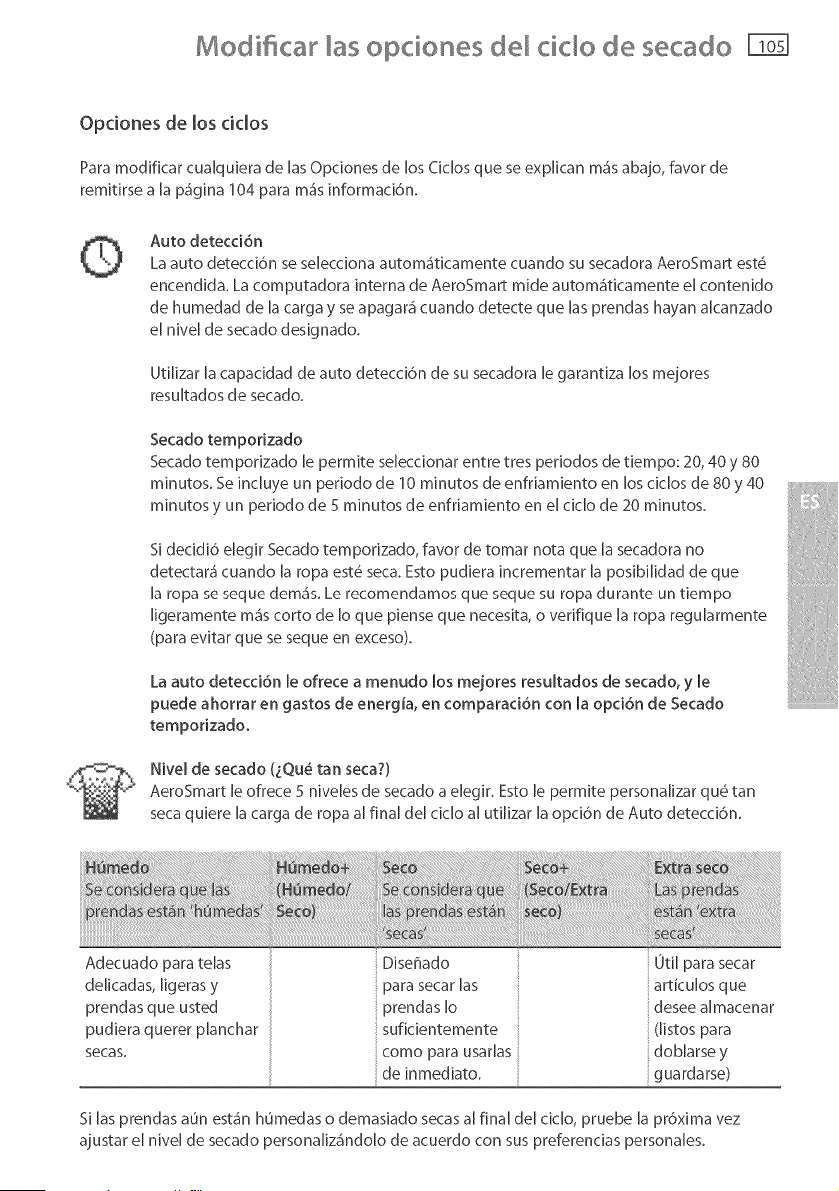
Modi car opciones cido de secado !
Opciones de los ciclos
Para modificar cualquiera de [as Opciones de los Cic[os que se explican m_s abajo, favor de
remitirse a [a p_gina 104 para m_is informaci6n.
Auto detecci6n
La auto detecci6n se selecciona automgticamente cuando su secadora AeroSmart est6
encendida. La computadora interna de AeroSmart mide automa'ticamente el contenido
de humedad de [a carga y se apagar_ cuando detecte que [as prendas hayan a[canzado
el nivel de secado designado.
Utilizar [a capacidad de auto detecci6n de su secadora [e garantiza los mejores
resu[tados de secado.
Secado temporizado
Secado temporizado [e permite seleccionar entre tres periodos de tiempo: 20, 40 y 80
minutos. Se incluye un periodo de 10 minutos de enfriamiento en los cic[os de 80 y 40
minutos y un periodo de 5 minutos de enfriamiento en el cic[o de 20 minutos.
Si decidi6 elegir Secado temporizado, favor de tomar nota que [a secadora no
detectar_ cuando [a ropa est6 seca. Esto pudiera incrementar [a posibi[idad de que
[a ropa se seque dema's. Le recomendamos que seque su ropa durante un tiempo
[igeramente mgs corto de [o que piense que necesita, o verifique [a ropa regularmente
(para evitar que se seque en exceso).
La auto detecci6n [e ofrece a menudo los mejores resu[tados de secado, y [e
puede ahorrar en gastos de energia, en comparad6n con [a opci6n de Secado
temporizado.
Nivel de secado QQu_ tan seca?)
AeroSmart le ofrece 5 niveles de secado a elegir. Esto [e permite personalizar qu6 tan
seca quiere [a carga de ropa al final del ciclo al utilizar [a opci6n de Auto detecci6n.
Adecuado para telas
delicadas, ligeras y para secar las
prendas que usted prendas Io
pudiera querer planchar suficientemente
secas, como para usarlas
de inmediato.
Otil para secar
artlculos que
desee almacenar
(listos para
dob[arse y
guardarse)
Si[as prendas aun esta'nhumedaso demasiado secasa[ final del cic[o, pruebe [a pr6xima vez
ajustar el n[vel de secado personaliz_indo[ode acuerdo con suspreferencias personales.
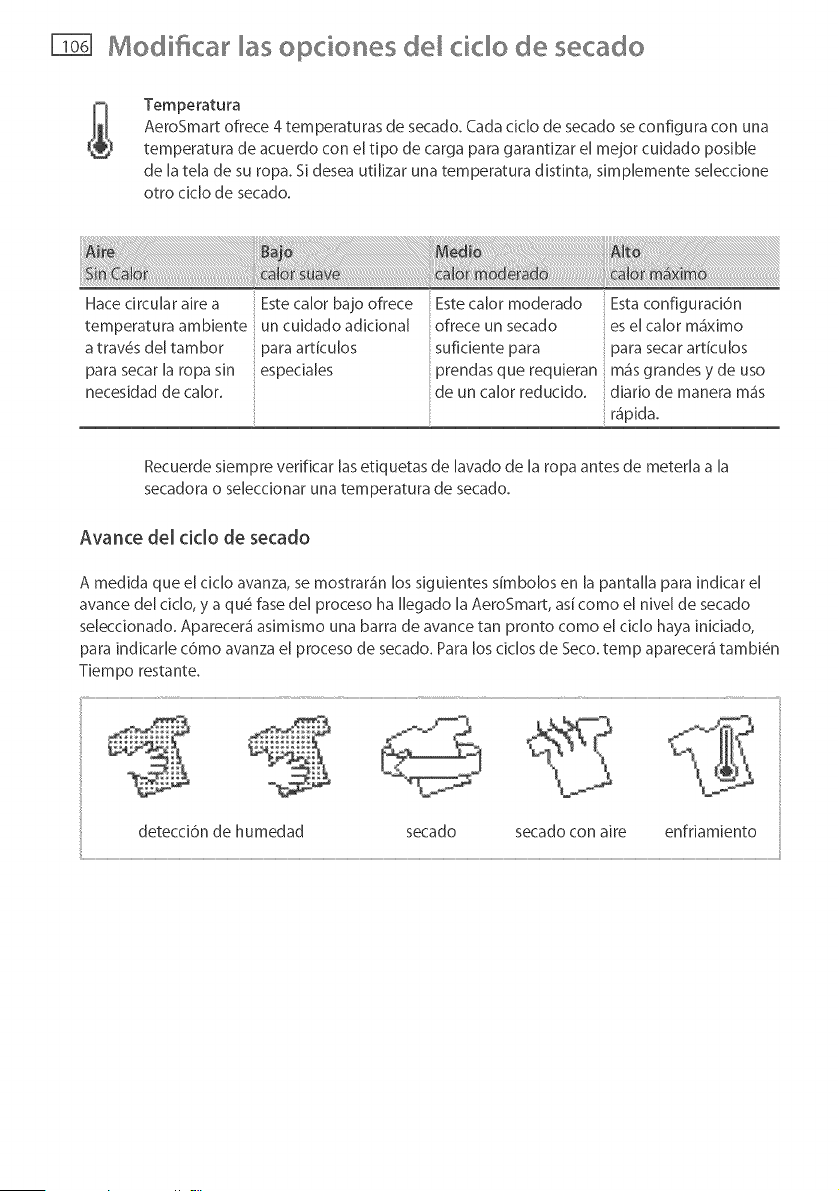
Modificar opciones tide de secado
Temperatura
AeroSmart ofrece 4 temperaturas de secado. Cada cic[o de secado se configura con una
temperatura de acuerdo con el tipo de carga para garantizar el mejor cuidado posible
de [a tela de su ropa. Si desea utilizar una temperatura distinta, simplemente seleccione
otro cic[o de secado.
Hace drcuJar aJre a
temperatura ambiente
a trav#s deJ tambor
para secar [a ropa sin
necesidad de ca[or.
Este ca[or bajo ofrece
un cuidado adicional
para articu[os
Este ca[or moderado Esta configurad6n
ofrece un secado es e[ ca[or m_iximo
suficiente para para secar artku[os
prendas que requieran m_is grandes y de uso
de un ca[or reducido, diar[o de manera m_is
r_pida.
Recuerde siempre verificar [aset[quetas de [avado de [a ropa antes de meter[a a [a
secadora o se[eccionar una temperatura de secado.
Avarice de[ dc[o de secado
A medida que el cic[o avanza, se mostrar_in los siguientes simbolos en [a panta[[a para indicar el
avance de[ cic[o, y a qu_ fase del proceso ha [[egado [a AeroSmart, asicomo el nJve[ de secado
seleccionado. Aparecera" asimismo una barra de avance tan pronto como el cic[o haya iniciado,
para indicar[e c6mo avanza el proceso de secado. Para los cic[os de Seco. temp aparecer_ tambi@n
TJempo restante.
detecci6n de humedad secado secado con aire enfriamiento
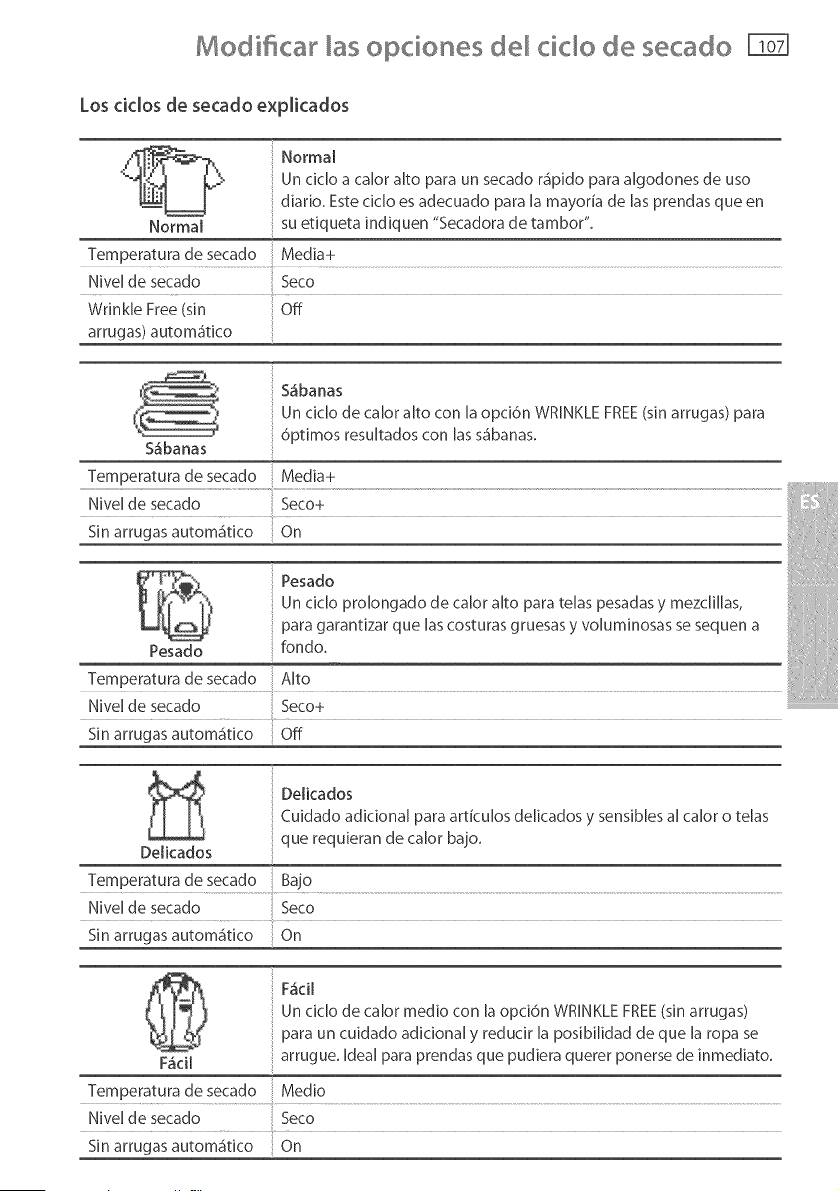
Modi_car _asopciones de_ tide de secado FT6TI
Los dclos de secado explicados
Delicados
Cuidado adiciona[ para articulos delicados y sensib[es a[ ca[or o telas
que requieran de ca[or ba]o.
Delicados
Temperatura de secado Bajo
Nivel de secado Seco
Sin arrugas autom_itico On
F&ci[
Un cic[o de calor med[o con [a opci6n WRINKLE FREE(sin arrugas)
:: para un cuidado adiciona[ y redudr [a posibi[idad de que [a ropa se
: arrugue. Ideal para prendas que pudiera querer ponerse de inmediato.F_cH
Temperatura de secado Med[o
Nivel de secado Seco
Sin arrugas automgtico On
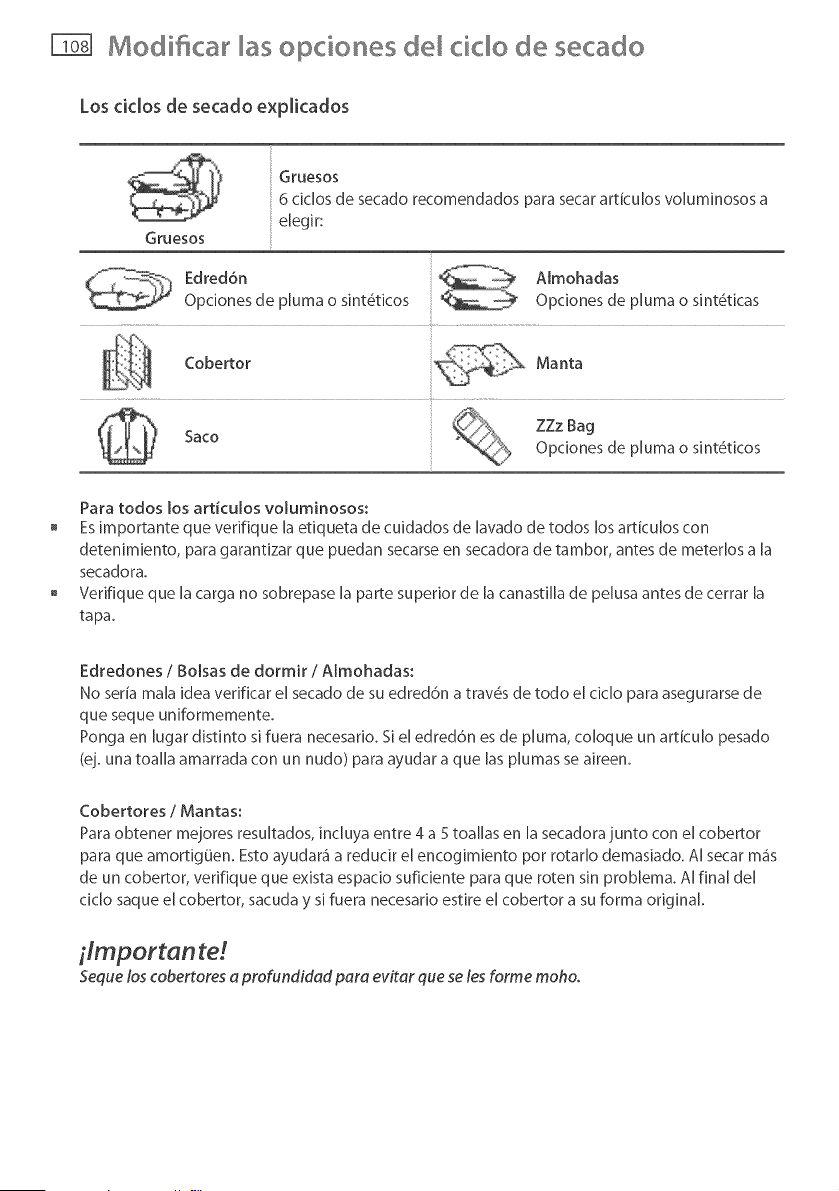
Modi car opciones tide de secado
Los cidos de secado explicados
Gruesos
Gruesos
6 c]clos de secado recomendados para secar artkulos volum]nosos a
elegir:
Edred6n
Opciones de pluma o sint6ticos
AImohadas
Opciones de p[uma o s]nt6ticas
Para todos los articulos voluminosos:
Esimportante que ver]fique la etiqueta de cuidados de lavado de todos los artku[os con
detenimiento, para garantizar que puedan secarse en secadora de tambor, antes de meter[os a [a
secadora.
Ver]flque que Uacarga no sobrepase Uaparte superior de UacanastiHa de pelusa antes de cerrar na
tapa.
E@edones/Bolsas de dormir/Almohadas:
No ser[a mala idea ver]ficar el secado de su edred6n a trav6s de todo el ciclo para asegurarse de
que seque un]formemente.
Ponga en lugar d]stinto s] fuera necesar]o. Si el edred6n es de pluma, coloque un art[culo pesado
(ej. una toa[[a amarrada con un nudo) para ayudar a que las plumas se a]reen.
Cobertores / Mantas:
Para obtener mejores resu[tados, ]ncluya entre 4 a 5 toallas en la secadora junto con el cobertor
para que amort]gOen. Esto ayudar_ a reduc]r el encog]m]ento pot rotarlo demas]ado. AI secar m_s
de un cobertor, ver]fique que ex]sta espac]o sufic]ente para que roten sin problema. AI final del
c]clo saque el cobertor, sacuda y s] fuera necesar]o est]re el cobertor a su forma original
ilmp or tan re!
Seque los cobertores a profundidad para evitar que se /es forme moho.
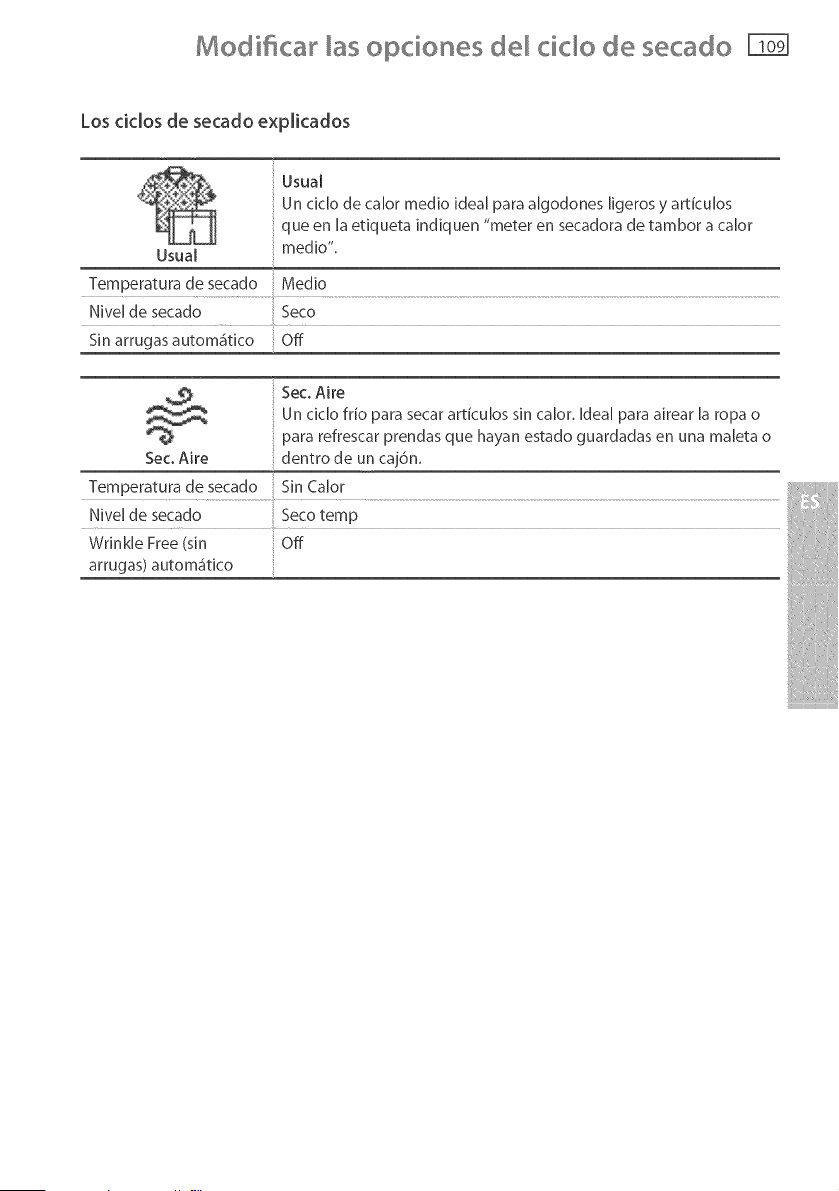
Modi_car _asopciones de_ cido de secado FT61
Los ciclosde secado explicados
UsuaJ
Usual
Un c[c[o de calor med[o [dea[ para algodones [[gerosy articulos
queen [aefiqueta [nd[quen "meter en secadora de tambor a ca[or
medb'.
Temperatura de secado Medb
N[vel de secado Seco
Sin arrugas autom_it[co Off
Sec. Aire
SecoAire
Un c[c[o frio para secar artkulos sin calor, ideal para airear [a ropa o
para refrescar prendas que hayan estado guardadas en una maleta o
dentro de un caj6n.
Temperatura de secado .............Sin Calor ..............................................................................................................................................................................................................................................................................................
N!vel de secado .....Seco temp
Wrinkle Free (sin Off
arrugas) automat[co
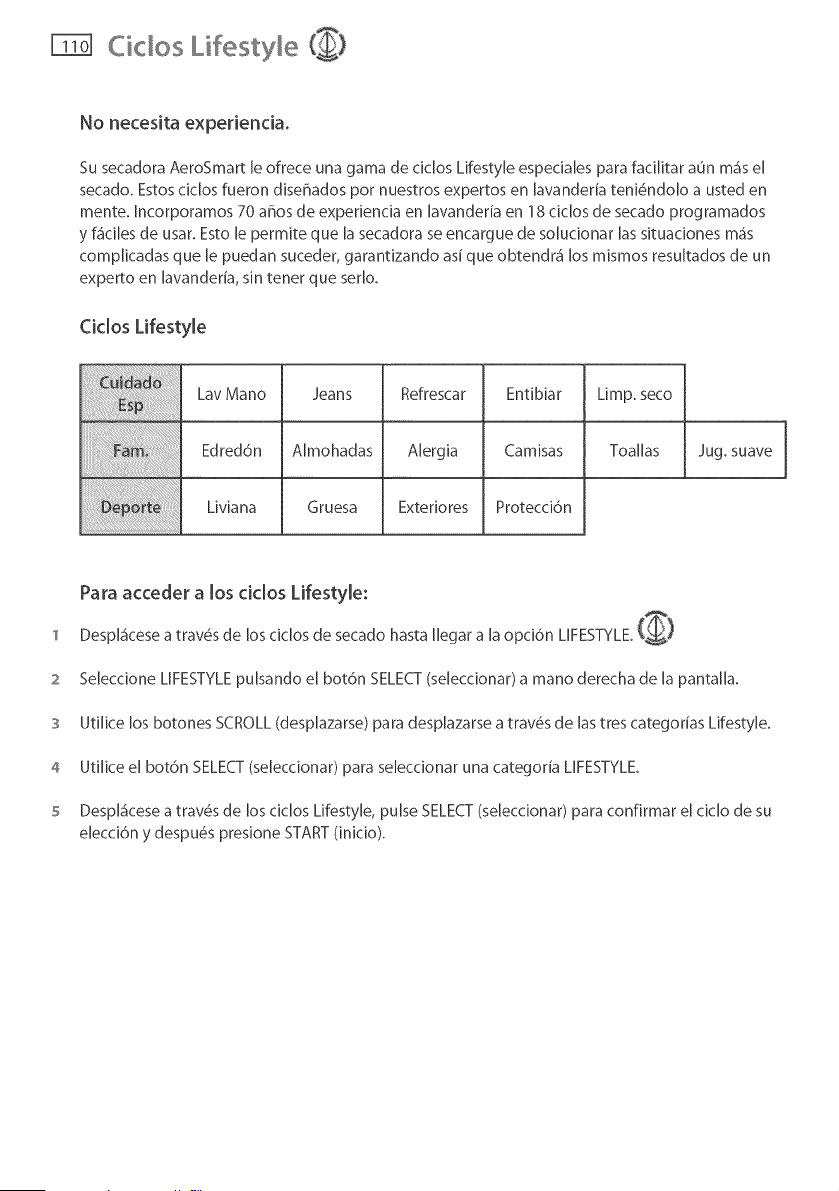
Cidos Lifestyle
No necesita experiencia,
Su secadoraAeroSmart le ofrece una gama de dclos Lifestyle espedales parafacilitar aun m4sel
secado.Estosciclosfueron diseffados por nuestros expertos en lavanderia teni@ldolo a usted en
mente. Incorporamos 70 afros de experiencia en lavanderia en 18 dclos de secado programados
y fa'cilesde usar. Estole permite que la secadorase encargue de soludonar lassituadones ma's
complicadas que le puedan suceder, garantizando asi que obtendr_ los mismos resultados de un
experto en lavanderia, sin tener que ser[o.
Ciclos Lifestyle
[ Lay Mano Jeans Refrescar Entibiar Limp. seco
Edred6n A[mohadas A[ergia Camisas Toallas Jug.suave
Liviana Gruesa Exteriores Protecci6n
Para acceder a los ciclos Lifestyle:
C1 Despl_ceseatrav_s de losdclos de secado hasta Ilegar a la opd6n LIFESTYLE. }
2 Se[ecdone LIFESTYLEpu[sando e[ bot6n SELECT(se[ecdonar) a mano derecha de [a panta[la.
3 Utilice los botones SCROLL(desp[azarse)para desp[azarsea trav_s de lastres categorias Lifestyle.
4 Utilice el bot6n SELECT(selecdonar) para selecdonar una categoria LIFESTYLE.
5 Despla'ceseatrav_s de losdclos Lifestyle, pulse SELECT(selecdonar) para confirmar el dclo de su
elecd6n y despu_s presione START(inicio).
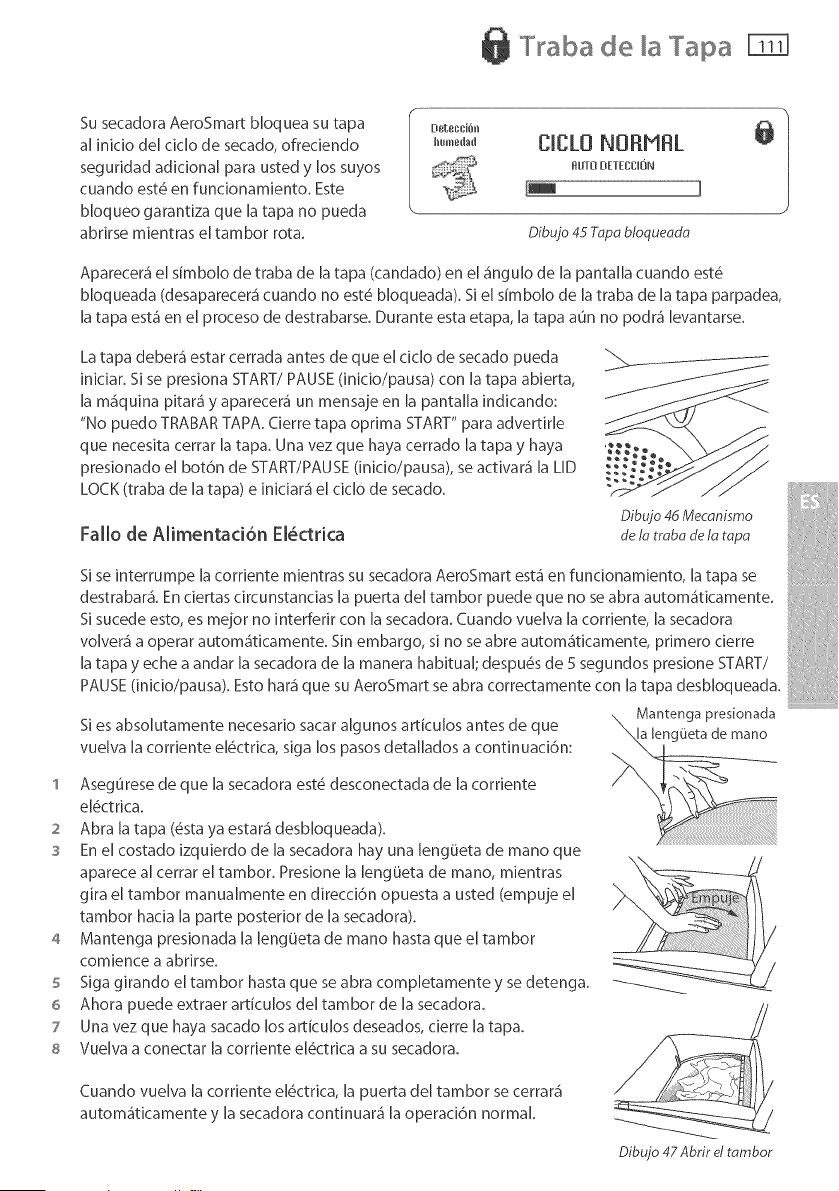
T aba de Tapa
Su secadora AeroSmart bloquea su tapa
al inkio de[ cic[o de secado, ofreciendo
seguridad adicional para usted y los suyos
cuando est# en funcionamiento. Este
bloqueo garantiza que [a tapa no pueda
abrirse mientras el tambor rota.
Dstecci0h_
,°mo_d CmCLONORMRL
flUTODETECCIDN
Dibujo 45 Tapa bloctueada
Aparecera" el sJmbo[o de traba de [a tapa (candado) en el _ngulo de [a pantaJJa cuando est6
bJoqueada (desaparecera" cuando no est6 bJoqueada). S[ e[ simbo[o de [a traba de [a tapa parpadea,
[a tapa est4 en e[ proceso de destrabarse. Durante esta etapa, [a tapa aun no podr_ [evantarse.
La tapa deberg estar cerrada antes de que el cic[o de secado pueda __
inkiar. Si se presiona START/PAUSE (inicio/pausa) con la tapa abierta,
la mgquina pitar_ y aparecer_ un mensaie en la pantalla ]ndicando:
"No puedo TRABAR TAPA. Cierre tapa oprima START" para advertirle
que necesita cerrar la tapa. Una vez que haya cerrado la tapa y haya
presionado el bot6n de START/PAUSE (inicio/pausa), se activar_ la LID .",-'_
LOCK (traba de la tapa) e ]n]cJar5 el cJc[o de secado. _"
Fal[o de Alimentaci6n El_ctrica
Dibu]o 46 Mecanismo
de I_ rraba de la tapa
S[ se ]nterrumpe [a corriente mientras su secadora AeroSmart estg en funcionamiento, la tapa se
destrabar_. En cJertas cJrcunstancJas la puerta de[ tambor puede que no se abra automa'ticamente.
S[ sucede esto, es mejor no ]nterferlr con [a secadora. Cuando vueJva [a corrJente, [a secadora
voJver_ a operar autom_tJcamente. Sin embargo, s] no se abre automgtJcamente, prlmero clerre
[a tapa y eche a andar [a secadora de [a manera habitual; despu6s de 5 segundos preslone START/
PAUSE (]nJclo/pausa). Esto har_ que su AeroSmart se abra correctamente con [a tapa desbJoqueada.
Mantenga presionada
S[ es absoJutamente necesario sacar aJgunos articuJos antes de que a [engOeta de mano
vuelva la corrJente el6ctrJca, siga los pasos detaJJados a continuacJ6n:
1 Asegurese de que la secadora est# desconectada de la corrJente
el#ctrJca.
2 Abra Jatapa (#sta ya estara" desbloqueada).
s En el costado izquJerdo de la secadora hay una lengOeta de mano que
aparece al cerrar el tambor. PresJone la JengiJeta de mano, mJentras
gira el tambor manuaJmente en dJreccJ6n opuesta a usted (empuje el
tambor hacJa Japarte posterior de Jasecadora).
4 Mantenga presJonada JaJengi]eta de mano hasta que el tambor
comJence a abrJrse.
5 Siga girando el tambor hasta que se abra completamente y se detenga.
6 Ahora puede extraer articulos del tambor de la secadora.
7 Una vez que haya sacado los articuJos deseados, cJerre la tapa.
s Vuelva a conectar la corrJente el#ctrJca a su secadora.
Cuando vueJva[acorriente eJ#ctrica,[a puerta del tambor secerrar_
autom_tkamente y [a secadoracontinuarg [a operad6n normal
Dibujo 47 Abrir et rambor
Men@ de configu aci6n
Despu_s de utiJizar su secadora AeroSmart usted deseara" afinar aJgunas opdones para que se
a]usten a sus necesidades individuales. Cualquier opd6n que se modifique en este menO ser_ un
cambio permanente, al menos que selecdone 'Reajuste Pred.'
A partir de este menu usted podra" modificar: Pit. AJarma, BriJJantez PantaJJa, Modo Traba, Aviso,
Consejo y el [dioma. Podrg ver informaci6n de Contacto Servic[o, Resoluci6n Problemas, volver a
pasar [a demostraci6n de [ntroducd6n y volver a configurar [a [avadora a Conf. F_brica.
Para acceder al Menu de Configurad6n.
1 Endenda su secadora AeroSmart. _
2 DespJgcese hacJa [a derecha a trav_s de [os cJc[os de [avado hasta que [[egue a[ MenO. W_
3 PresJone SELECT(seJeccJonar) para entrar a[ menu.
4 DespJa'cese a [a opcJ6n de desee para cambJar y presJone SELECT (seJeccJonar).
5 E[ija su configuracJ6n preferJda y presJone SELECT (se[eccJonar) para confirmar su e[eccJ6n.
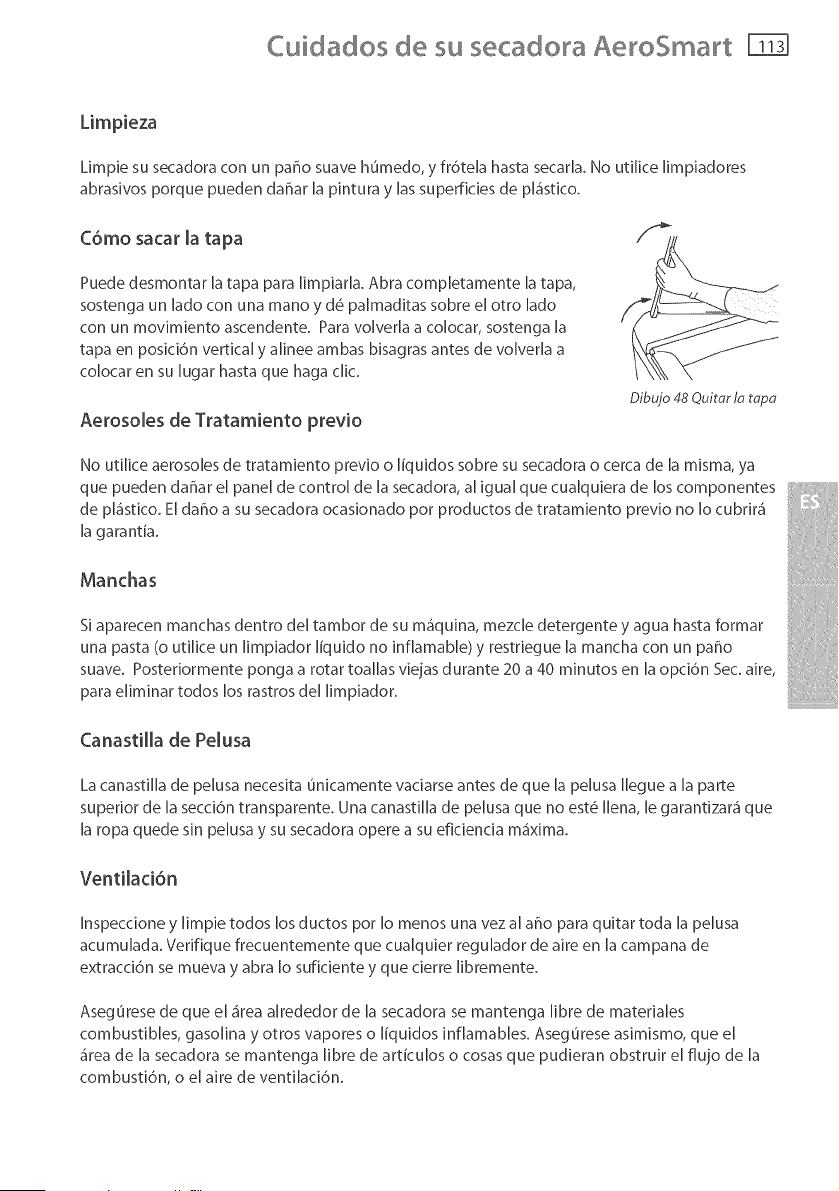
6uidados de su secado a AeroSmart FTT
Limpie su secadora con un patio suave humedo, y fr6tela hasta secarla. No uti[ice [impiadores
abrasivos porque pueden datiar [a pintura y [as superficies de p[_stico.
C6mo sacar la tapa
Puede desmontar [a tapa para [impiar[a. Abra compJetamente [a tapa,
sostenga un [ado con una mano y d6 pa[maditas sobre e[ otto [ado
con un movimiento ascendente. Para voJverJa a co[ocar, sostenga [a
tapa en posici6n vertical y aJinee ambas bisagras antes de voJver[a a
co[ocar en su [ugar hasta que haga cJic.
Aerosoles de Tratamiento previo
Dibujo 48 Ouitar I_ t_p_
No utilice aerosoles de tratamiento previo o [[quidos sobre su secadora o cerca de [a misma, ya
que pueden datiar el panel de control de la secadora, al igual que cualquiera de los componentes
de pla'stico. Eldatio a su secadora ocasionado pot productos de tratamiento previo no 1ocubrir_
[a garantia.
Manchas
Si aparecen manchas dentro del tambor de su mgquina, mezcle detergente y agua hasta formar
una pasta (o utilice un [impiador [[quido no inf[amable) y restriegue [a mancha con un patio
suave. Posteriormente ponga a rotar toa[[as viejas durante 20 a 40 minutos en [a opci6n Sec. aire,
para eliminar todos los rastros de[ [impiador.
Canastilla de Pelusa
La canastilla de pelusa necesita unicamente vadarse antes de que la pelusa Ilegue a la parte
superior de la secd6n transparente. Una canastilla de pelusa que no est6 Ilena, le garantizar_ que
la ropa quede sin pelusa y su secadora opere a su eficienda m_xima.
Ventilaci6n
Inspeccione y limpie todos los ductos pot Io menos una vez al atio para quitar toda la pelusa
acumulada. Verifique frecuentemente que cualquier regulador de aire en la campana de
extracd6n se mueva y abra Io suficiente y que cierre libremente.
Asegurese de que el a'rea alrededor de la secadora se mantenga libre de materiales
combustibles, gasolina y otros vapores o liquidos inflamables. AsegOrese asimismo, que el
_rea de la secadora se mantenga libre de articulos o cosas que pudieran obstruir el flujo de la
combusti6n, o el aire de ventilaci6n.

Antes de se vicio t6cnico
Su secadora AeroSmart es capaz de diagnosticar sus propios desperfectos. Si su secadora
despliega un mensaje en la pantalla y emite una serie musical de pitidos cada 5 segundos, tiene
un problema que usted pudiera ser capaz de solucionar utilizando la lista de comprobaci6n que le
proporcionamos m_s abajo. (Es el mismo sonido que emite su AeroSmart cuando la enchufa a la
corriente).
Si no puede resolver el problema de la siguiente lista de comprobaci6n, Ilame al sen!icio t#cnico.
Gerre la tapa y presione START/PAUSE (inicio/pausa).
Si la tapa todavia est,1 cerrada 4brala y vu6lvala a cerrar, despu6s presione START/
PAUSE (inido/pausa).
Descon6ctela de la corriente el6ctrica (ya sea desenchufando la secadora o
apagando el circuito del cortacorrientes que la alimenta). Espere 10 segundos,
vu6lvala a enchufar y trate de encenderla de nuevo.
La m_iquina es incapaz de cerrar el tambor debido a que la ropa interfiere con el
mecanismo de cerrado. Saque cualquier articulo que interfiera con la puerta del
tambor y s6quelos en la pr6xima carga.
Servido.
Si presiona el bot6n POWER (encendido) una vez, esto detendr_i la emisi6n de pitidos, pero
seguira" desplegando el c6digo de error. Le recomendamos dejar la m_iquina en este modo, ya
que el c6digo de error permitir_i al t6cnico identificar r_ipidamente la causa del problema.
Un pitido Onico cada segundo y °°°
3. Verifique que su ma'quina est6 nivelada (remftase al instructivo de instalaci6n de
las p_Sginas 71 a 95).
4. Saque la carga y vuelva probar.
5. Si la falla reincide, repita pasos 1 y 2.
Si la ma'quina sigue sin funcionar, Ilame a su concesionario o agente de sen!icio autorizado Fisher
& Paykel para que le den sen!icio (remitase a la p_igina 119).
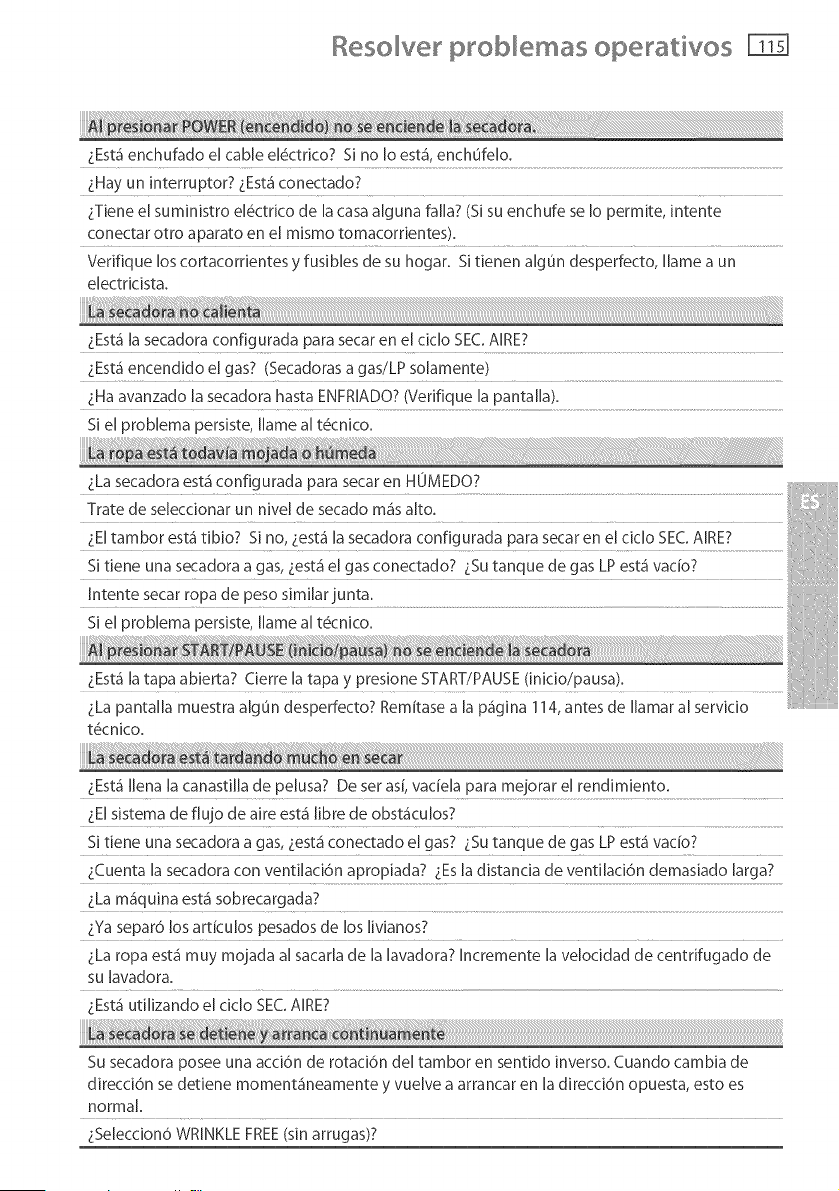
Res© ve p ob emas operatives
i-Est_ enchufado el cable el6ctrico? Si no Io est,, enchufelo.
/_Hayun interruptor? i-Est_ conectado?
_}Tiene el suministro el6ctrico de la casa alguna falla? (S[ su enchufe se Io permite, intente
conectar otto aparato en el mismo tomacorrientes)_
Verifique los cortacorrientes y fusibles de su hogar_ Si tienen algun desperfecto, [lame a un
electridsta.
i-Est,1la secadora configurada para secar en el dclo SEC.AIRE7
i-Estg encendido el gas? (Secadoras a gas/LP so[amente)
/Ha avanzado la secadora hasta ENFRIADO? (Verifique [a panta[[a)_
Si el prob[ema persiste, [lame a[ t6cnico_
i-La secadora estg configurada para secar en HOMEDQ? .................................................................................................................................................................................................
Trate de seleccionar un nivel de secado m_qsalto.
i-El tambor estg dbio? sino, Lestg la secadora configurada pa!a secar en e! c!clo SEC.AIRE?....................................
Si tiene una secadora agas, Lestg e! gas conectado? i-Su tanque de gas LP est_ vado?
lntente secar ropa de peso similar junta.
Si el problema persiste, [lame a[ t6cnico.
i-Estg la tapa abierta? Cierre [a tapa y presione START/PAUSE finido/pausa).
_}Lapantalla muestra algun desperfecto? Remitase a [a p_gina 114, antes de [[amar a[ servido
t6cnico_
i-Estg llena la canastilla de pelusa? De set asi, vadela para me]orar el rendimiento.
i-El sistema de flujo de aire estg libre de obstgculos?
Si tiene una secadora a gas, i-estg conectado el gas? i-Su tanque de gas LP estg vacb?
i-Cuenta [a secadora con ventilaci6n apropiada? i Esla distancia de venti[aci6n demasiado [arga?
i-La m_Squina esta" sobrecargada?
i-Ya separ6 los art£ulos pesados de los livianos?
_}Laropa estg muy mojada a[ sacarla de [a [avadora? [ncremente [a veloddad de centrifugado de
su lavadora.
zEsta"utilizando el cic[o SEC.ARE?
Su secadora posee una acci6n de rotacJ6n de[ tambor en sentido [nverso. Cuando cambia de
dJreccJ6n se detiene moment&neamente y vuelve a arrancar en [a direcd6n opuesta, esto es
normal.
_SeJeccion6 WRINKLE FREE(sin arrugas)?
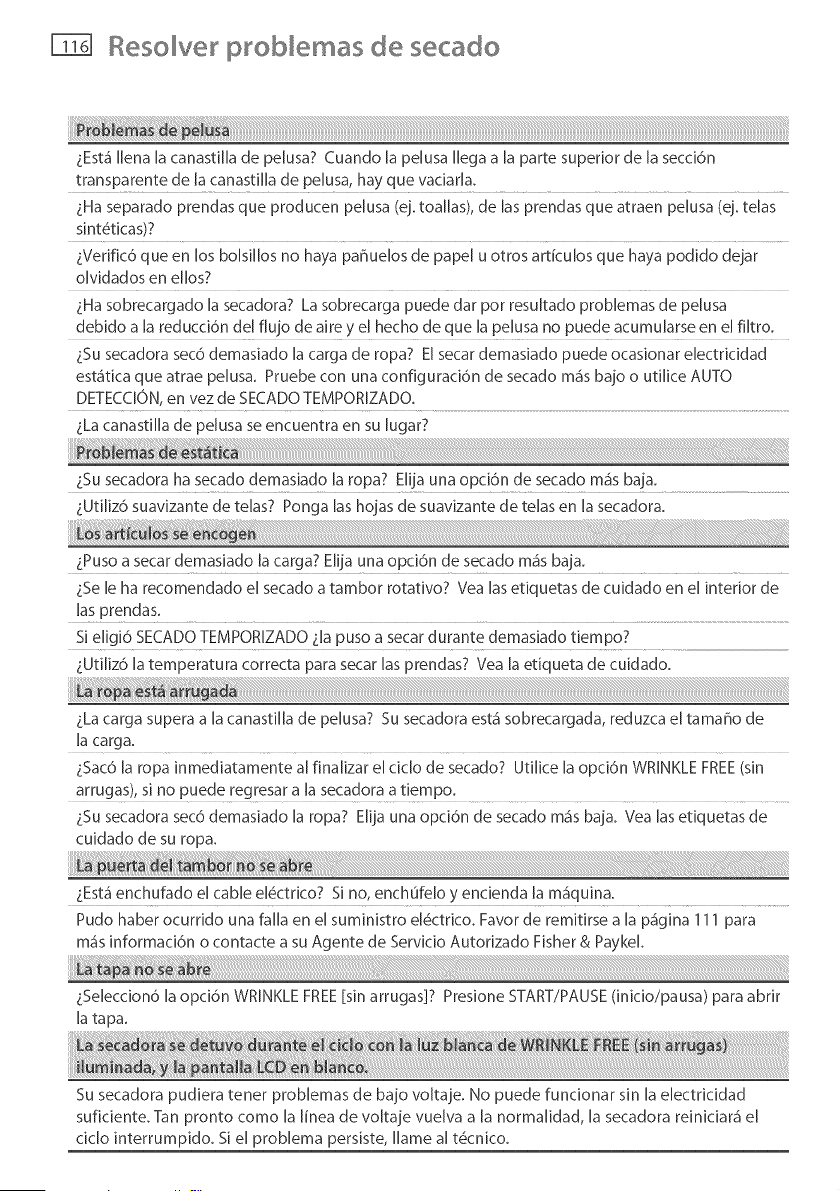
Reserver prob emas de secado
_}Esta"[lena [a canastil[a de pelusa? Cuando [a pelusa [[ega a [a parte superior de [a secci6n
transpa[ent e de la canastilla de pelusa, hay qu e vadar!a. .....................................................
tHa separado prendas que producen pelusa (ej. toallas), de las prendas que atraen pelusa (ej. telas
sint6ticas)?
tVerific6 queen los bolsillos no haya pafiuelos de papel u otros articulos que haya podido dejar
olvidados en e[los?
tHa sobrecargado [a secadora? La sobrecarga puede dar pot resu[tado problemas de pelusa
debido a la reducci6n de[ flujo de aire y el hecho de que la pelusa no puede acumularse en el filtro.
tSu secadora sec6 demasiado [a carga de ropa? El secar demasiado puede ocasionar electrkidad
esta'tica que atrae pelusa. Pruebe con una configurad6n de secado m_is bajo o uti[ice AUTO
DETECCION, en vez de SECADO TEMPORIZADO.
zLa canasti[[a de pe[usa se encuentra en su [ugar?
i Su secadoraha secado demasiado la ropa? EIUauna opd6n de secado m_isbaja,
zUtMz6suavizante de te[as? Ponga [as hojasde suavizantede te[as en [a secadora,
LPuso a secar demasiado la carga? Elija una opci6n de secado m_qsbaja.
tSe [e ha recomendado el secado a tambor rotativo? Vea [as edquetas de cuidado en el interior de
las prendas.
Si eligi6 SECADO TEMPORIZADO i la puso a secar durante demasiado tiempo?
zUtMz6 Jatemperatura correcta para secar [as prendas? Vea [a etiqueta de cuidado.
tLa carga supera a la canastil[a de pelusa? Su secadora est_ sobrecargada, reduzca el tamafio de
la carga.
_}Sac6la ropa inmediatamente a[ finaJizar el dc[o de secado? Utilice [a opci6n WRINKLE FREE(sin
arrugas), si no puede regresar a la secadora a tiempo.
LSu secadora sec6 demasiado [a ropa? E[ija una opci6n de secado m_s baja. Vea [as etiquetas de
cuidado de su ropa,
LEstg enchufado el cable el#ctrico? Si no, enchufelo y endenda la m_iquina.
Pudo haber ocurrido una falla en el suministro el#ctrico. Favor de remitirse a [a pa'gina 111 para
ma's [nformad6n o contacte a su Agente de Servido Autorizado Fisher & Payke[.
LSeleccion6 [a opd6n WRINKLE FREE [sin arrugas]? Presione START/PAUSE ([nido/pausa) para abrir
[a tapa.
Su secadora pudiera tener prob[emas de bajo vo[taje. No puede funcionar sin [a e[ectricidad
suficiente. Tan pronto como [a [[nea de voltaje vuelva a [a norma[idad, [a secadora reiniciar_i el
cic[o interrumpido. S[ el problema persiste, [lame a[ t#cnico.
6arantia imitada FTTTI
Cuando usted adquiere cualquier producto electrodom6stico nuevo Fisher & Payke[ para uso
personal o dom6stico, usted recibe autom_iticamente una garantia [imitada va'[ida pot dos
ahos que cubre partes y mano de obra para reparaciones dentro de los 48 Estados Unidos
continentales, Hawai, Washington D.C. y Canad& En Alaska, [a garantia [imitada es [a misma
excepto que usted debe pagar para enviar e[ producto a[ servic[o t_cnico, o pagar e[ viaje de[
t_cnico de reparaciones a su casa. Los productos, para set uti[izados en Canad& deben ser
adquir[dos a trav6s de[ canal de distribuci6n canadiense para asegurar e[ cump[imiento de
[as normas.
S[ el producto se JnstaJa en un vehicu[o motorJzado, bote o instalaci6n m6viJ similar, usted
recibe la misma garantia limitada por dos ahos, pero debe hacerse cargo, de su propio peculio,
de [Jevar el vehicuJo, bote o instalaci6n m6viJ que contiene el producto a[ servicio t6cnico, o
pagar el viaje de[ t6cnJco de reparaciones hasta el lugar donde se encuentre el producto.
Fisher & Paykel se compromete a:
Reparar sin costo para el dueffo, tanto en materiales como mano de obra, cualquier parte
de[ producto que est@defectuosa, y cuyo numero de serie aparece en el mismo. En Alaska,
usted debe pagar pot el env[o del producto a[ servicio t@cnico, o pagar el viaje de[ t6cnico de
reparaciones a su casa. Si el producto se instala en un vehicu[o motorizado, bote o instalaci6n
m6vi[ similar, usted debe hacerse cargo de [[evar[o a[ servicio t6cnico, de su propio pecu[io, o
pagar e[ viaje de[ t6cnico de reparaciones hasta e[ [ugar donde estg e[ producto. Si no podemos
reparar una parte defectuosa de[ producto despu@s de una cantidad razonable de [ntentos,
podemos reemplazar [a parte o el producto, o podemos devolver[e [a totalidad de[ precio de
compra de[ producto (sin incluir costos de insta[aci6n u otros costos) a nuestra total discreci6n.
Esta garantia es va'lida para el comprador original, as[ como para cualquier dueflo subsecuente
del producto, para productos adquiridos para uso dom6stico normal de una sob familia.
Cualquier servido en los t6rminos de esta garantia limitada 1odeber_i propordonar
Fisher & Payke[ o su Agente de Servicio T_cnico Autorizado, durante el horar[o comercia[ normal
_Cu_nto dura esta garantia limitada?
Nuestra responsabi[idad en los t6rminos de esta garantia [imitada caduca a los DOS ANOS
posteriores a [a fecha de compra de[ producto pot el primer consumidor.
Nuestra responsabiJidad en [os t6rminos de cua[quier garantia impJJcita, incJuyendo [a garantia
implJcita de comerciabi[idad (una garantia no escrita de que el producto es adecuado para uso
normal) tambi6n caduca a[ ANO (o periodo de durad6n m_is largo ta[ como sea requerido pot
[a [ey vigente) a partir de [a fecha de compra del producto por el primer consumidor. Algunos
estados no permiten [imitaciones acerca de cugnto tiempo dura una garantia implJcita, asi que
este [[mite sobre [as garantias implJcitas pudiera no aplicarse a usted.
6arantia imitada
Esta garantia no cubre:
A VBitas del servicio t6cnico que no est_n rehcionadas con defectos en el producto.
Se le cobrara" el costo del servicio t6cnico si no se encuentra que el problema sea un defecto del
producto. Pot ejemplo:
1.Corregir una instalaci6n defectuosa del producto.
2.Ense_larle a utilizar el producto.
3.Cambiar fusibles de la casa, resetear disyuntores de circuitos, corregir el cableado o
plomeria de la casa, o cambiar focos.
4.Corregir fallas ocasionadas pot el usuario.
5.Cambiar la configuraci6n del producto.
6.Modificaciones no autorizadas del producto.
7.Ruido o vibraci6n considerados normales, p. e]., sonidos de desagOe, sonidos de
regeneraci6n y pitidos de aviso del usuario.
8.Correcci6n de dahos ocasionados pot plagas, p. e]., ratas, cucarachas, etc.
B Fallas ocasionadas por factores que no sean:
1.Uso dom6stico normal o
2.Uso de acuerdo con la Guia del Usuario del producto.
C Fallas del producto ocasionadas pot accidente, negligencia, real uso, fuego, inundaciones o pot
causas de fuerza mayor.
D Elcosto de las reparaciones Ilevadas a cabo pot t6cnicos no autorizados, o el costo de corregir
tales reparaciones no autorizadas.
E Gastos de viaje y otros gastos relacionados, cuando se instale el producto en una zona de
acceso limitado o restringido (es decir, vuelos de aviones, tarifas de ferry, areas geogr_ficas
aisladas).
F Mantenimiento normal recomendado seg0n se establece en la Guia del Usuario del producto.
Si tiene un problema de instalaci6n, favor de ponerse en contacto con su proveedor o t6cnico.
Usted es responsable de que existan las conexiones el6ctricas, de escape y otras instalaciones
de conexi6n adecuadas.
No nos hacemos responsables por dahos consecuendales o fortuitos (el costo de reparad6n o
sustituci6n de cualquier otro dano a la propiedad en caso de que el producto est6 defectuoso, o
cualquier otro gasto en que usted haya incurrido en caso de que el producto est6 defectuoso).
Algunos estados no permiten la exclusi6n o limitaci6n de dahos fortuitos o consecuenciales,
pot Io que la limitaci6n o exclusi6n arriba descrita pudiera no ser aplicable en su caso.
6arantia imitada FTT
C6mo obtener servido t6cnico
Pot favor lea su Guia del Usuario. Si tuviera alguna pregunta acerca de c6mo operar el producto,
si necesJta el nombre de su T6cnico local de Servicio T6cnico Autorizado pot Fisher & Paykel,
o sJente que el producto esta" defectuoso y necesita algun servicio en los t6rmJnos de esta
garantia limitada, favor de ponerse en contacto con su concesionario, o II_Smenos sin costo ak
EE.UUo
LLAMADASINCOSTO1.888.9.FNP.USA(1.888o936.7872)
o conta'ctenos a trav6s de nuestro sitio en Internet: www.fisherpaykel.com
Canad4
LLAMADASINCOSTO1.888.9.FNP.USA(1.888.936,7872)
o cont_ictenos a trav6s de nuestro sitio en Internet: www.fisherpaykel.ca
Pudi@amos solicitar[e el presentar una prueba razonable de [a fecha de compra de[ producto,
antes de proporcionar[e el servicio que solicite, en los t6rminos de esta garant[a [imitada.
Uso comerdal
Si usted utiliza el producto en un entorno comerdal (cualquier uso que no sea una vivienda
para una sob familia), nos comprometemos a reparar o reemplazar, sin costo para usted en
cuanto a partes solamente, cuaJquJer parte defectuosa, cuyo numero de serie aparece en el
producto. Nuestra responsabilidad pot estas reparaciones caduca a AL Ai_O, posterior a la fecha
de compra originak
A nuestra total discreci6n pudi6ramos reemplazar la parte o el producto, o pudi6ramos devolverle
la totalidad del predo de compra del producto (sin incluir costos de instalaci6n u otros costos).
Cualquier servicio en los t6rminos de esta garantia limitada Io debera'n propordonar
Fisher & Paykel o su Agente de Servicio T6cnico Autorizado durante el horatio comercial normal.
Ninguna otra garantia
Esta garantia Jimitada constituye el acuerdo total y exclusivo entre usted y Fisher & Paykel
en relaci6n a cualquier defecto en el producto. Ninguno de nuestros empleados (o nuestros
Agentes de Servicio T6cnico Autorizados) est_in autorizados para anexar clausulas o hacer
modificaciones a esta garantia limitada.
Garante: Fisher & Paykel Appliances, Inc.
Si necesita m_is informad6n en reJacJ6n con esta garantia limitada, favor de Ilamarnos al
numero telef6nico descrito ma's arriba, o escribanos a:
Fisher & Paykel Appliances, Inc
5900 SkyBb Road
Huntington Beach
CA 92647
Esta garantia limitada le otorga derechos legales especificos, y usted puede contar tambi6n con
otros derechos que varian de estado a estado.