Loading ...
Loading ...
Loading ...
12
13
QUICK START
quick start
nuwavenow.com
ENGLISHQuick Start
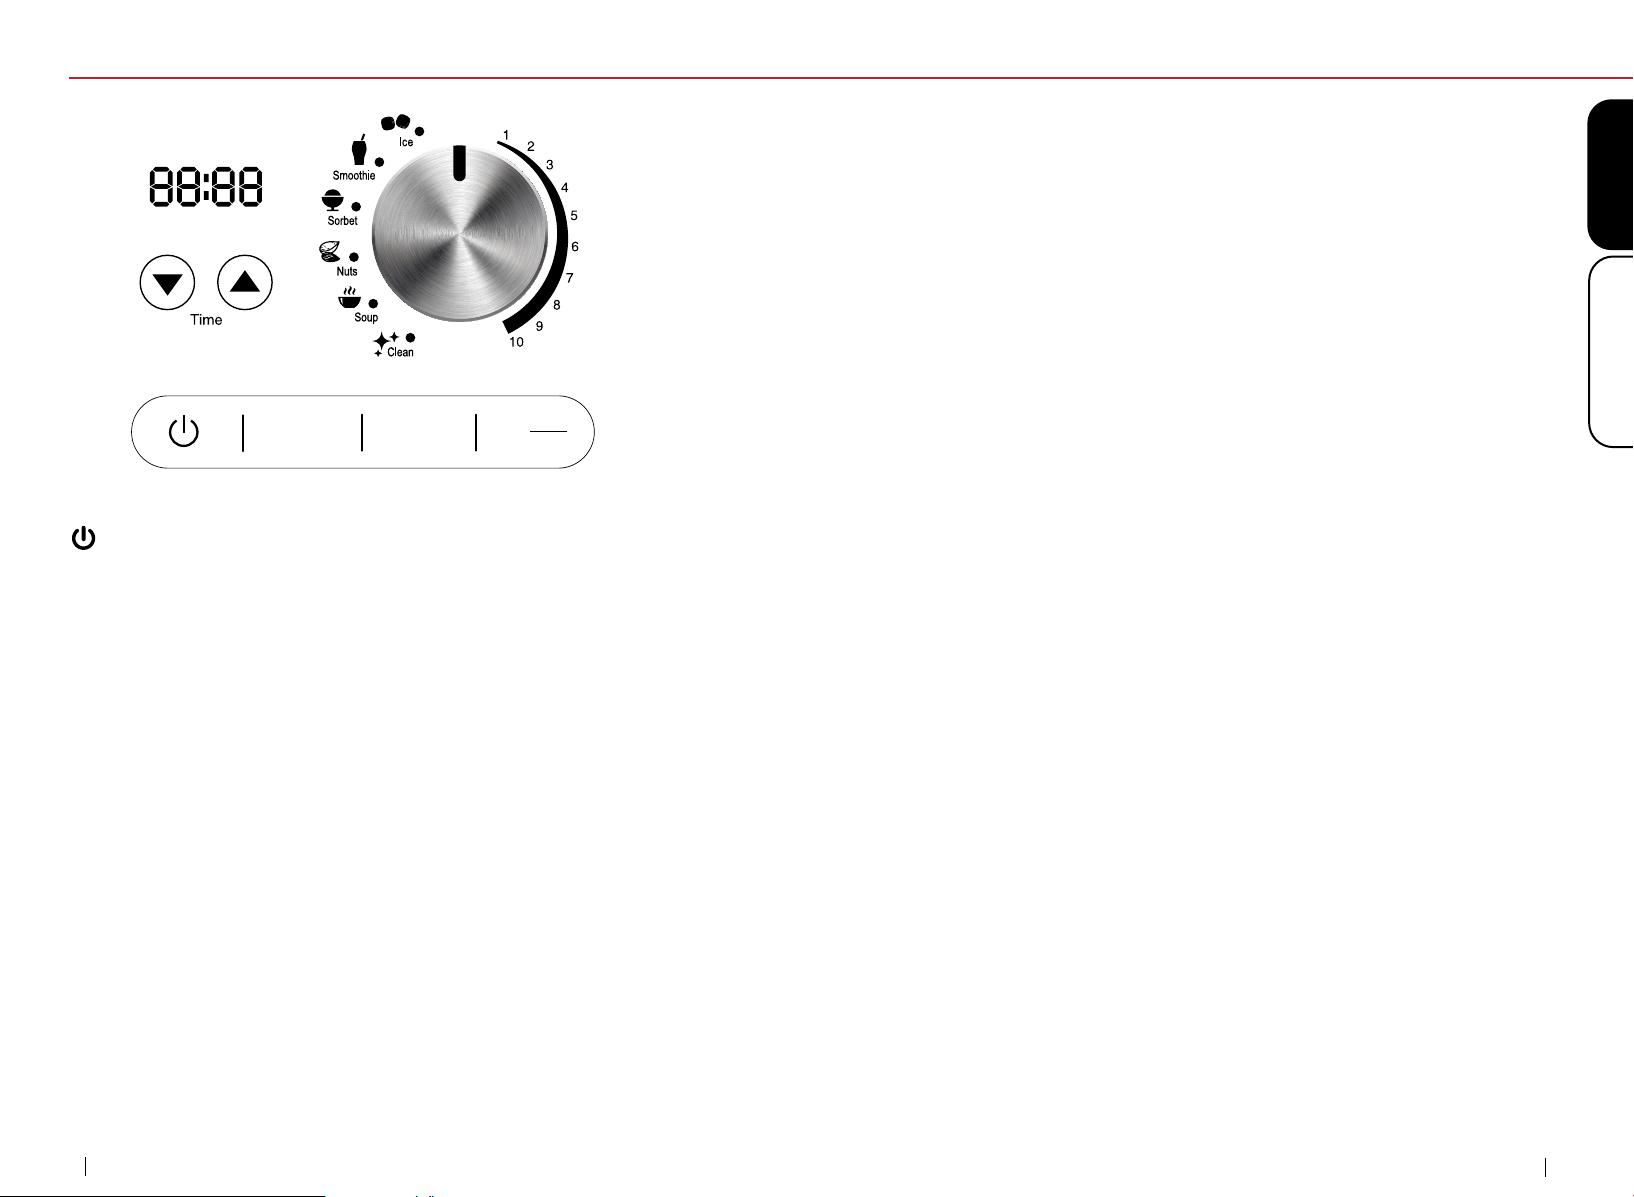
: Turn the red main Power Switch, located on the right side of
the Blender Base, to ON. Press Power once to turn your Innity
Blender
™
Pro Plus on. Press Power again and then press the red
main Base Power Switch to OFF to turn your Infinity Blender
™
Pro
Plus off.
Start/Pause: Press Start/Pause to start and stop blending.
Note: Do not ll the Jar above ¾ capacity (42oz.). Please see
Instructions for more details.
Up and Down Arrows: The arrow buttons adjust the blending time.
• Set your time: The LED display will show the default time
for your selected setting. Times are displayed in minutes and
seconds. Adjustments can be made on all settings. Note:
When blending for a long period of time, liquids may become
hot and steam may escape from the Plunger Cap.
Pulse 1 & Pulse 2: Use either Pulse 1 or Pulse 2 for quick bursts
of high-powered blending. Pulse 2 has a higher RPM than Pulse
1. When using either Pulse 1 or Pulse 2, the LED display will show
the default time that you set and will remain displayed until you
change the setting.
0
Pulse
1
Pulse
2
Start
Pause
Numbered settings: The default time is 3 minutes. For standard
blending you can select from one of the numbered speed settings
between 1 and 10. Adjust to the desired time, then press Start/
Pause to begin blending.
Note: The lowest setting is #1 (5,000 RPM). The highest setting is
#10 (27,000 RPM).
Icon settings: These settings are for specialized blending tasks.
Each icon setting has the default time and RPM built in. Turn the
dial to the desired icon setting and press Start/Pause to begin
blending.
Note: Always start with cold liquids when blending. DO NOT add
hot liquids to the blender.
Cleaning your Innity Blender
™
Pro Plus Jar: Add water and
1-2 drops of liquid dish soap to your Jar, place it on the Base, and
close the Lid. Turn the dial to Clean. 00:15 will be shown on the
LED display. Adjust the time if desired, and then press Start/Pause.
Once nished, remove the Jar, rinse, and dry the Jar thoroughly
before using it again.
Note: For detailed instructions on cleaning refer to “Cleaning and
Maintenance.”
Loading ...
Loading ...
Loading ...