Loading ...
Loading ...
Loading ...
10
11
assembly guide
ASSEMBLY GUIDE
nuwavenow.com
ENGLISHAssembly Guide
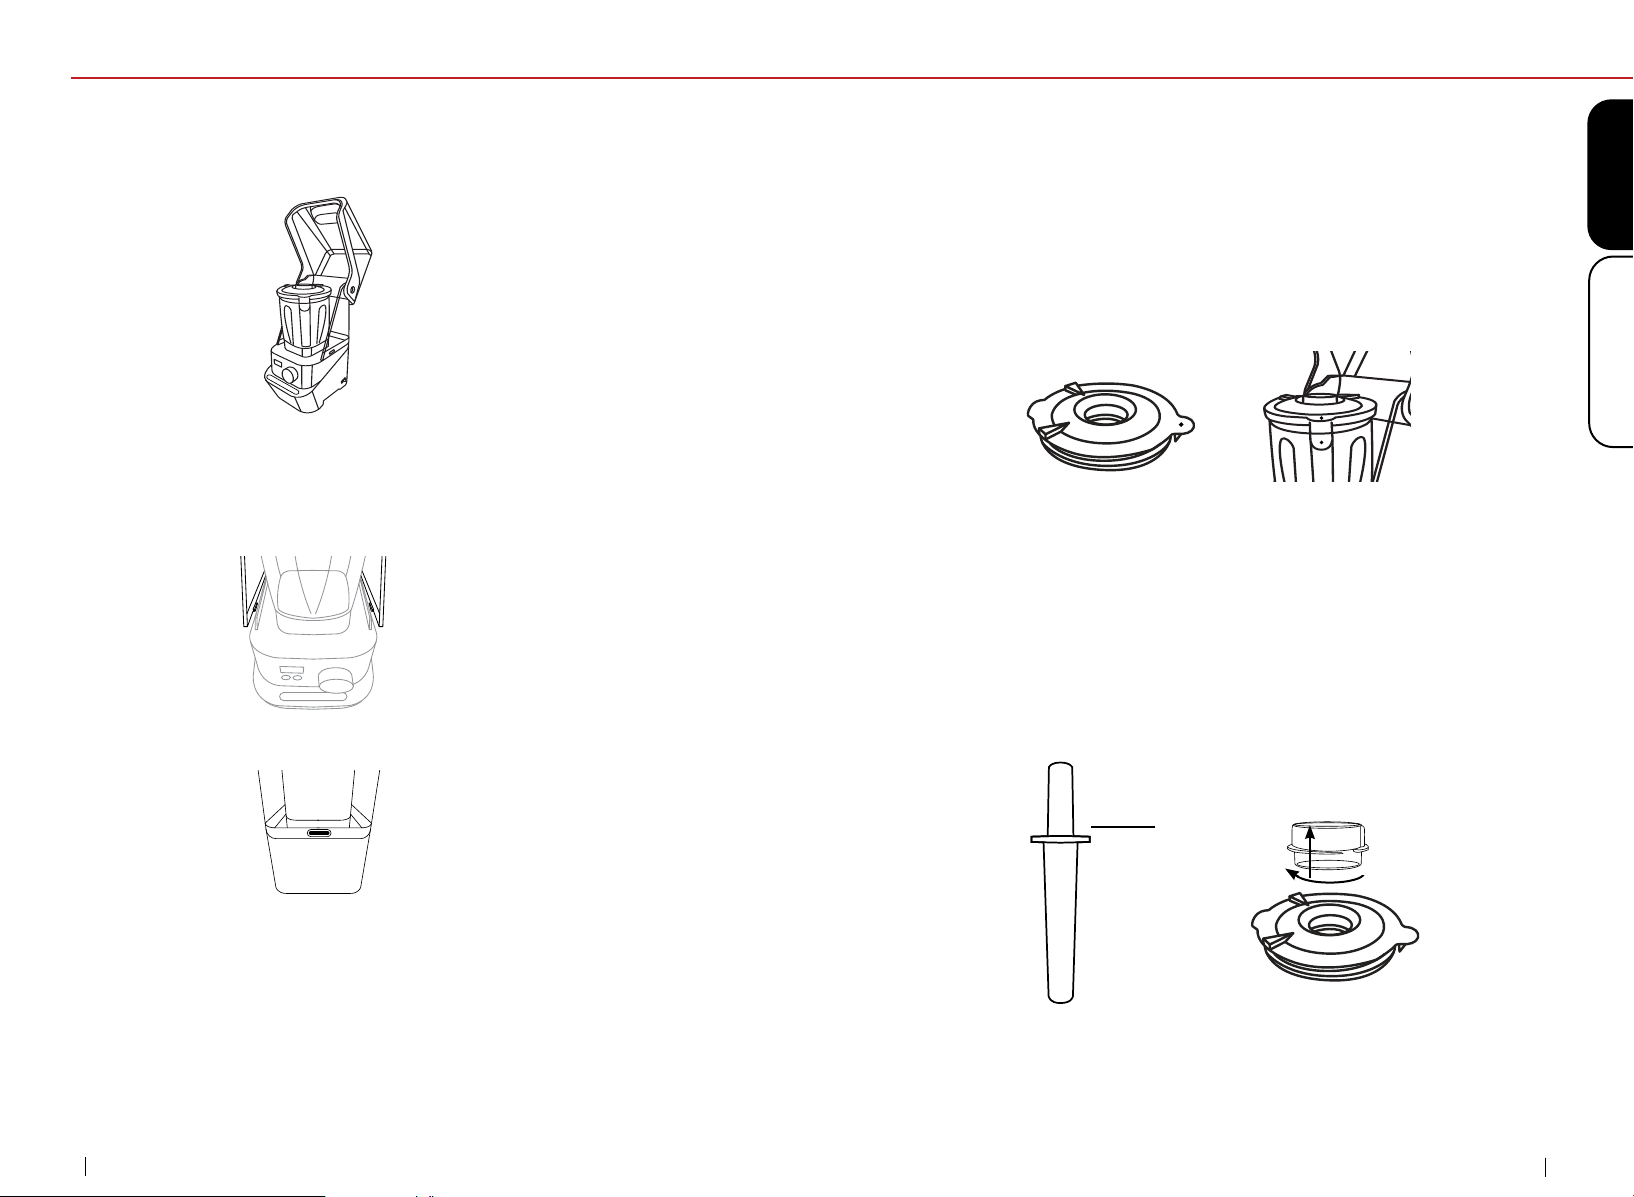
Removing the Quiet Cover
1. Turn the Innity Blender
™
Pro Plus off and unplug it from the
outlet. Lift the Door Cover handle to open the Door Cover.
2. To remove the Back Quiet Cover, apply pressure to two points
(left and right) to disengage the cover from locking tabs on the
motor plate.To avoid damaging the Quiet Cover, apply pressure
to the Back Quiet Cover frame, not the clear plastic material.
3. Disengage the 3rd lock tab located on the back of the Back Quiet
Cover.
4. To reinstall the Quiet Cover, gently spread the sides of the door
and place the door hinge cutouts over the round hinges. Secure
the hinge on the back rst before securing the sides.
Note: Do not disassemble the Quiet Cover unless it is absolutely
necessary to do so for cleaning or maintenance. If any part of the
Quiet Cover arrives broken or is not usable, contact Customer
Service to have the part(s) replaced.
Plunger Lid Assembly
1. Line up the red dot on the Plunger Lid with the handle.
2. Push down on the Plunger Lid until it sits rmly in place.
3. Align the Plunger Cap to the Plunger Lid and twist to secure.
• The Plunger Cap is removed when adding additional
ingredients while blending.
Note: The Plunger Lid Seal Ring and Silicone Pad are removable
for cleaning. Please see Cleaning & Maintenance.
Plunger
Using the Plunger
Remove the Plunger Cap by twisting it to the left to unlock it from
the Plunger Lid before inserting the Plunger.
When you are not using the Plunger, place the Plunger Cap in the
Plunger Lid and twist it to the right to lock it.
Note: The Plunger Lid’s hole is designed to be used with the
Plunger so that the Plunger cannot come in contact with the blades
when moving the ingredients.
Loading ...
Loading ...
Loading ...