OPERATOR'S MANUAL
MANUEL DEL OPERADOR
I " i
CRRFTgHRH °
IIIII I III I
20 in. 24 VOLT
CORDLESS LAWN MOWER
508 mm (20 pulg.) 24 V
PODADORA INALAMBRICA
Model No.
6073290
Ndmero de modeio
6073290
_ WARNING: To reduce the r_skof injury, the user must read and understand the operator's manual
before using this product.
_IL ADVERTENCIA: Pare reducir el riesgo de lesiones, el usuerio debe leer y comprender el manual clef operador
antes de user este producto.
Customer Help Line: 1-888-266-7096
Tel6fonodeatoncibnal consumidor: 1-888-266-7096
Sears Brands Management Corporation, Hoffman Estates, IL 60179 USA
Visit the Craftsman web page: www.craftsman.eom
Visite el sitio web de Craftsman: www,craftsman.com
Save this manual for future reference
Guarde este manual pare futures consulta

ENGLISH
• Warranty. ................................................................. 2
• Introduction .............................................................. 2
• General Safety Rules ............................................... 3
• Specific Safety Rules ........................................... 3-4
• Symbols ................................................................ 5-6
• Features ................................................................... 6
• Assembly. ................................................................. 7
• Operation ............................................................. 8-9
==Maintenance ..................................................... 10-I1
•IlIustrated parts list ........................................... t 2-t 6
ESPA_IOL
• Garant{a ............................ Secci6n de Ingl_s p&g, 2
• tntmducciSn ............................................................ 2
• Reglas de seguridad generales .............................. 3
• Reglas de seguridad especfficas ......................... 4-5
• Simbolos .................. i................................. :........ 6-7
• Caracteristicas ........................................................ 7
• Armado ................................................................ 8-9
• Funcionamiento ................................................. 9-10
• Mantenimiento ................................................. 11-12
• Figure numeras (ilustraciones) ............................. i-iv
CRAFTSMAN _TWO YEAR FULL WARRANTY
FOR TWO YEARS from the date of purchase, this product is warranted against any defects in material or
workmanship. Defective product wiJlbe replaced free of charge.
For warranty coverage details to obtain free replacement, visit the web site: www.craftsmanocom.
This warranty is void if this product is ever used while providing commercial sewices or if rented to another person.
Thiswarrantydoesnotcovertheblade,whichisanexpendablepartthatcanwearoutfrom normalusewithinthe
warrantypedod.
This warranty gives you specific legal rights, and you may also have other rights which vary from state to state.
Sears Brands Management Corporation, Hoffman Estates, IL 60179
GARANTIA COMPLETA DE DOS ANOS CRAFTSMAN _
Este productotiene garantia per cualquier defec_o en material o mano de obra DURANTE DOS AltOS desde la
fecha de compra. Los productos defectuosos se remplazar_n sin cargo.
Para conocer los detalles sebre la cobertura de la garantfa para obtener un remplazo gratuito, visite el silio
web: www.craftsmen.com.
La garantla pierde vatidez s] este preducto se utJlizamientras seprestan servicios comerciales o sise alquilaa otra
persona. Esta gamntfa no cubre ta hoja,que es una parle prescindibleque pueden desgastarse con el uso normal
en el perfodo de garantfa. Esta garantfa ]eotorga derechos Iegales especificos yes posible quetambi_n tenga
derechos que varfan segt3n elestado.
Sears Brands Management Corporation, Hoffman Estates, ]L 60179
This tool has many features for making its use more pleasant and enjoyable. Safety, performance, and
dependability have been given top priority in the design of this product making it easy to maintain and operate.
Esta herramienta ofrece numerosas caracteristicas para hacer m_s agradable y placentero su uso. En el
diseSo de este producto se ha conferido prioridad a Ia seguridad, el desempe_o y la fiabilidad, por Io cual se
facilita su manejo y mantenimiento.
2 -- English
AWARNING! READ AND UNDERSTAND ALL
INSTRUCTIONS. Failure to follow all instructions listed
below and on the machine may result in electdc shock,
fire, and/or serious personal injury.
READ ALL INSTRUCTIONS
,, This cutting machine is capable of amputaf_nghands
and feet and throwing objects. Failure to observe all
safety instnJctions could result in serious injury or death.
= Do not operate power tools in explosive
atmospheres, such as in the presence of flammable
liquids, gases, or dust. Power tools create sparks
which may ignite the dust or fumes.
• Avoid body contact with grounded surfaces such as
pipes, radiators, ranges, and refrigerators. There is an
increased riskof elec_c shock ifyour body is grounded.
m Do not use the lawn mower in damp or Wet
conditions or operate in the rain.
• Keep the area dear ofaII bystanders, children, and pets
while mowing. Stop machine if anyone enters the area,
• Tragic accidents can occur if the operator is not alert
to the presence of children. Children are often attracted
to the machine and the mowing activity. Never assume
that children will remain where you last saw them.
• Keep children out of the mowing area and under the
watchful care of a responsible adult other than the operator.
• Be alert and turn mower off if a child enters the area.
• Never allow children to operate the machine.
• Use extra care when approaching blind corners,
shrubs, trees, or other objects that may block your
view of a child.
= Do not wear loose clothing or jewelry. They can
be Caught in moving parts. Use of rubber gloves and
footwear is recommended when working outdoors.
•, Keep firm footing and balance. DO not overreach.
Overreaching can result in loss of balance.
,, Do not operate the equipment while barefoot or
when weadng sandals or similar lightweight footwear.
Wear protective footwear that will protect your feet and
improve your footing on slippery surfaces.
mDo not leave the mower unattended while running.
• Keep hands and feet away from cutting area. Keep
clear of the discharge opening at all times.
• Operate the lawn mower only in daylight or good
artificial lighL
• Always wear safety glasses with side shields.
Everyday glasses have only impact resistant lenses.
They are NOT safety gtasses. Following this rule
will reduce the risk of eye injury. Use face mask if
operation is dusty.
• V_ar safety glasses or goggles that are marked to
comply with ANSI Z87.1 standard when operating this
product.
• Use the right appliance. DO not uSe the lawn mower
for any job except that for which it is intended.
• Do not force the lawn mower. It will do the job better
and safer at the rate for which itwas designed.
• Stay alert, watch what you are doing and use
common sense when operating the lawn mower.
Do not operate the mower while tired or under the
influence of drugs, alcohol, or medication. A moment
of inattention while operating the lawn mower may
result in serious personal injury.
• Keep machine in good working condition. Keep
blades sharp and guards in place and in working order.
• Check all nuts, bolts, and screws at frequent
intervals for proper tightness to be sure the equipment
is in safe working condition.
- Stop the motor and wait until the blade comes to
a complete stop before cleaning the tawn mower,
removing the grass catcher, or unclogging the
discharge guard.
• When not in use, mower should be stored indoors in
a dry, locked up place--out of the reach of children.
• Do not operate the mower without the entire grass
catcher, discharge guard, rear guard, or other safety
protective devices in place and working.
• Follow manufacturer's instructions for proper
operation and installation of accessories. Only use
accessories approved by the manufacturer.
• Clear the work area before each use. Remove all
objects such as rocks, st(cks, wire, bones, toys, or
other objects which can be thrown by the blade.Stay
beh(nd the handle when the motor isrunning.
• Avoid holes, nY_s,bumps, rocks, or otherhidden objects.
Uneven terraincould cause a slipand fall accident
• Do not mow near drop-offs, ditches, or embankments.
• Mow across the face of slopes, never up and down.
Exercise extreme caution when changing direction on
slopes.
= Plan your mowing pattern to avoid discharge of
material toward roads, sidewalks, bystanders and the
like. Also, avoid discharging matedal against a wall or
obstruction, which may cause the material to ricochet
back toward the operator.
3 -- English
•Donotmowon wet grass or excessively steep slopes.
Poor footing could cause a slip and fall accident. Walk,
never run.
,, If the lawn mower stdkes a foreign object, follow
these steps:
• Stop the lawn mower and release theswC_h con_'otlever.
• Disconnect the power cord.
•Thoroughly inspect the mower for any damage.
• Repair any damage before restarting and continuing
to operate the mower.
= Stop the motor, remove the switch key, and wait until
the blade comes to a complete stop before removing
the grass catcher or unclogging the chute. The cutting
blade continues to rotate for a few seconds affer the
motor is shut off. Never place any part of the body
in the blade area until you are sure the blade has
stopped rotating.
,, If the mower should start to vibrate abnormally,
stop the motor and check immediately for the cause.
V_bration is generally a warning of trouble.
m Service on the product must be performed by
qualified repair personnel only. Service or maintenance
performed by unqualified personnel could result in
injury to the user or damage to the product.
= Use only identical replacement parts when servicing
the product. Use of unauthorized parts may create
a risk of sedous injury to the user, or damage to the
product.
• Do not place battery tools or their batteries near
fire or heat. This will reduce the risk of explosion and
possibly injury.
• Do not open or mutilate battery (ies). Released
electrolyte is corrosive and may cause damage to the
eyes or skin. ]t may be toxic if swallowed,
• If electrolyte contacts the skin, wash it off'immediately
with water.
• ff electrolyte contacts the eyes, flush thoroughly and
immediately with water. Seek medical attention.
SAFETY RULES FOR CHARGER
• Do not abuse the cord. Never use the cord for
carrying, pu(I(ng or unplugging the power tool. Keep
cord away from heat, oil, sharp edges or moving parts.
Damaged or entangled cords increase the risk of
electric shock.
• Use of an attachment not recommended or sold by
the battery charger manufacturer may result in a risk
of fire, electric shock, or injury to persons. Following
this rule wilI reduce the risk of electric shock, fire, or
sedous personal injury.
•=Do not servicemower w_ _witch key orcharger ins_led.
•, Do not use the charger when the ambient temperature
is above 40°C or below 0°C.
• Do not operate charger with a damaged cord or plug,
wh)ch could cause sho_ng and electric shock. Ifdamaged,
have the charger replaced by an authorized serviceman.
• DOnot operate charger if it has received a sharp blow,
been dropped, or otherwise damaged in any way. Take
it to an authorized serviceman for etectdcal check to
determine ifthe charger is in good working order.
• Unplug charger from outlet before attemptthg any
maintenance or cleaningto reduce the riskof eleclric sho_
• Disconnect charger from the power supply when
not in use to prevent damage to the charger during a
power surge.
•. Risk of e)ectric shock, Do not touch uninsu(ated po_on
of output connector or uninsulated battery terminal.
•, Do notexpose charger towet or damp conditions. Water
entering charger will increase the risk of elecbic shock.
• Make sure cord is located so that it will not be
stepped on, tripped over, come in contact with
sharp edges or moving parts or otherw(se subjected
to damage or stress. This will reduce the risk of
accidental falls, which could cause injury,and damage
to the cord, which could resuIt in electric shock.
• Keep cord and charger away from heat to prevent
damage to housing or internal parts.
• Do not let gasoline, oils, petroleum-based products,
etc. come in contact with plastic parts. They contain
chemicals that can damage, weaken, or destroy plasUc.
• An extension cord should not be used unless
absolutely necessary. Use of improper extension
cord could result in a risk of fire and etectdc shock. If
extension cord must be used, make sure:
a, That pins on plug of extension cord are the same
number, size and shape as those of plug on charger.
b. That extension cord is properly wired and in good
electdcaI condition; and
c. That wire size is large enough forAC ampere rating
of charger as specified below:
Cord Length (Feet) 25' 50' 100'
Cord Size (AWG) 16 16 16
NOTE: AWG =American Wre Gauge
• Save these instructions. Refer to them frequently
and use them to instruct others who may use this
product. If you loan someone this tool, loan them
these instructions also.
SAVE THESE INSTRUCTIONS
4 -- English
i,
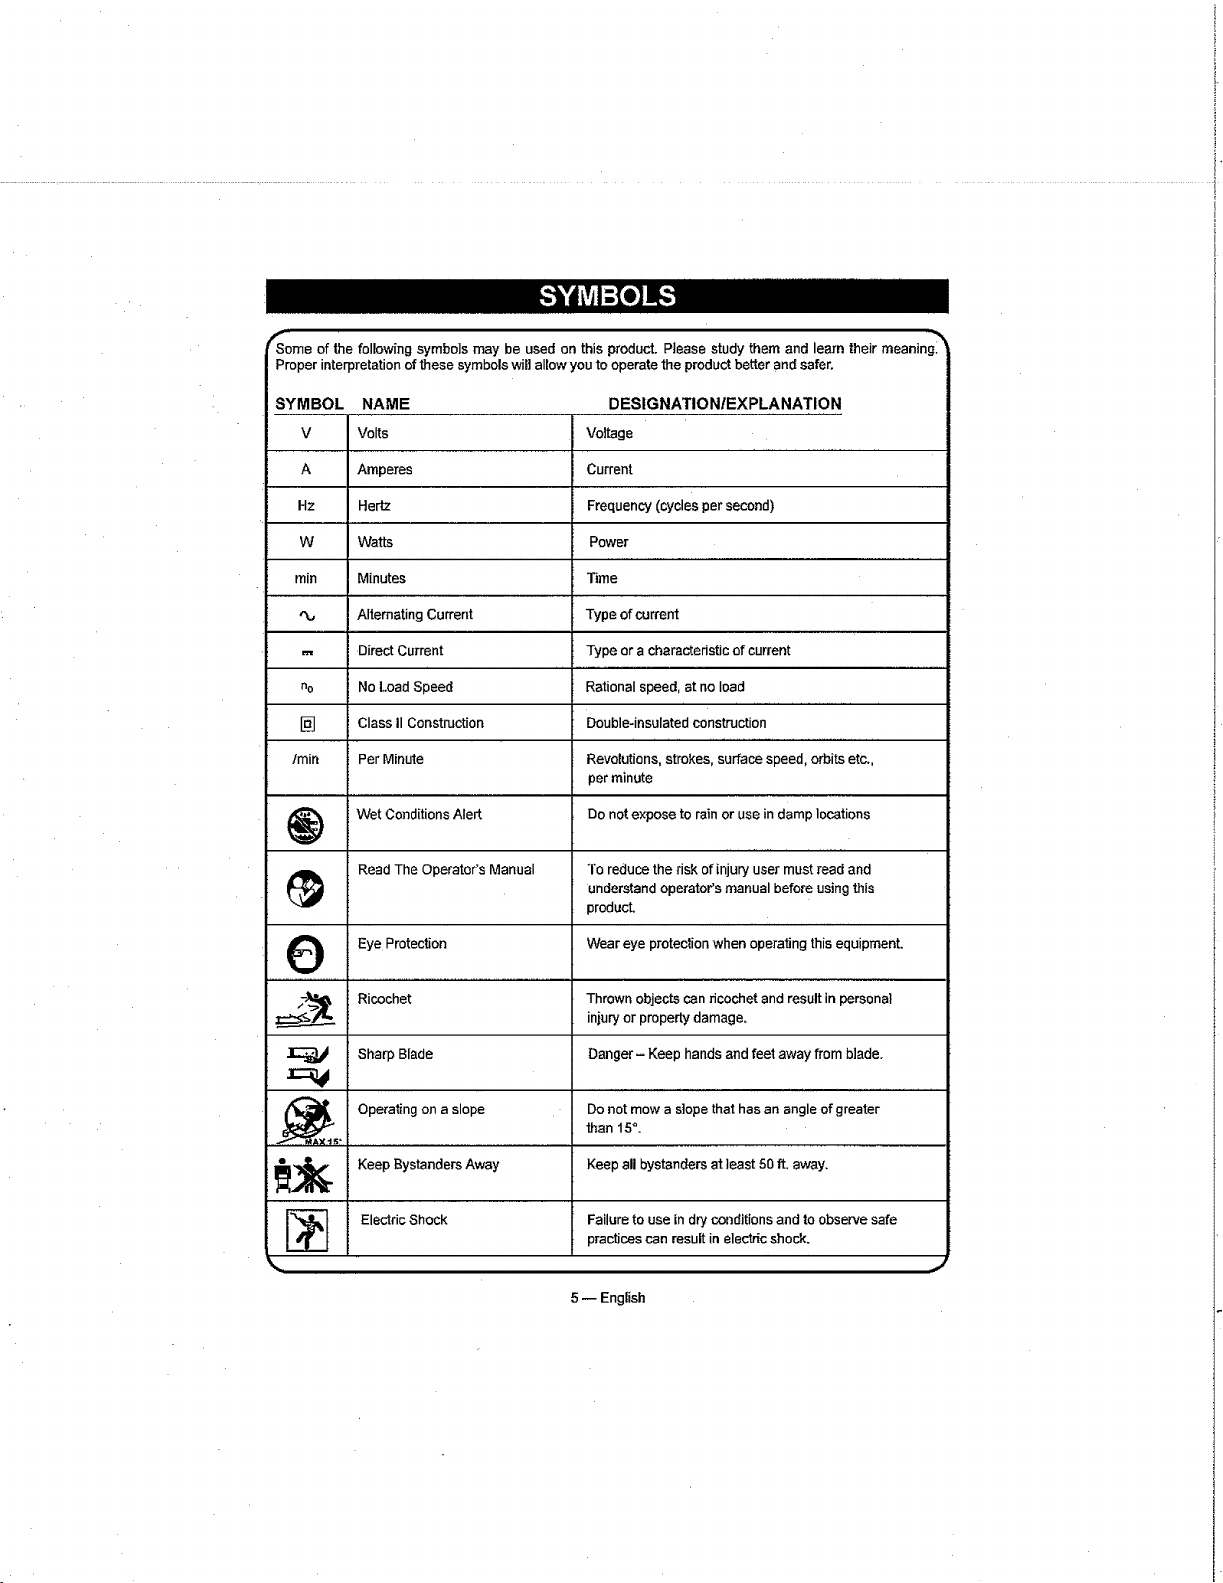
ome of the following symbols may be used on this product. Please study them and learn their meaning,'
roper interpretation of these symbols will allow you to operate the product better and safer.
YMBOL NAME DESIGNATION/EXPLANATION
Volts Voltage
A Amperes Current
Hz Hertz Frequency (cycles per second)
W Watts Power
rain Minutes Time
,_., Alternating Current Type of current
,_, Direct Current Type or a characteristic of current
no No Load Speed Rational speed, at no load
[] Class ii Construction Double-insulated construction
lmin Per Minute Revolutions, strokes, surface speed, orbits etc.,
per minute
Wet Conditions Alert Do not expose to rain or use in damp locations
Read The Operator's Manual To reduce the risk of injury user must read and
understand operator's manual before using this
product.
Eye Protection Wear eye protection when operating this equipment.
..-_ Ricochet Thrown objects can ricochet and result in personal
==_..
injury or property damage.
Sharp Blade Danger - Keep hands and feet away from blade.
._Ax_s Operating on a slope Do not mow a slope that has an angle of greater
than 15°.
t
._ Keep Bystanders Away Keep all bystanders at least 50 ft. away.
Electric Shock Failure to use in dry conditions and to observe safe
practices can result in electric shock.
J
5 -- English
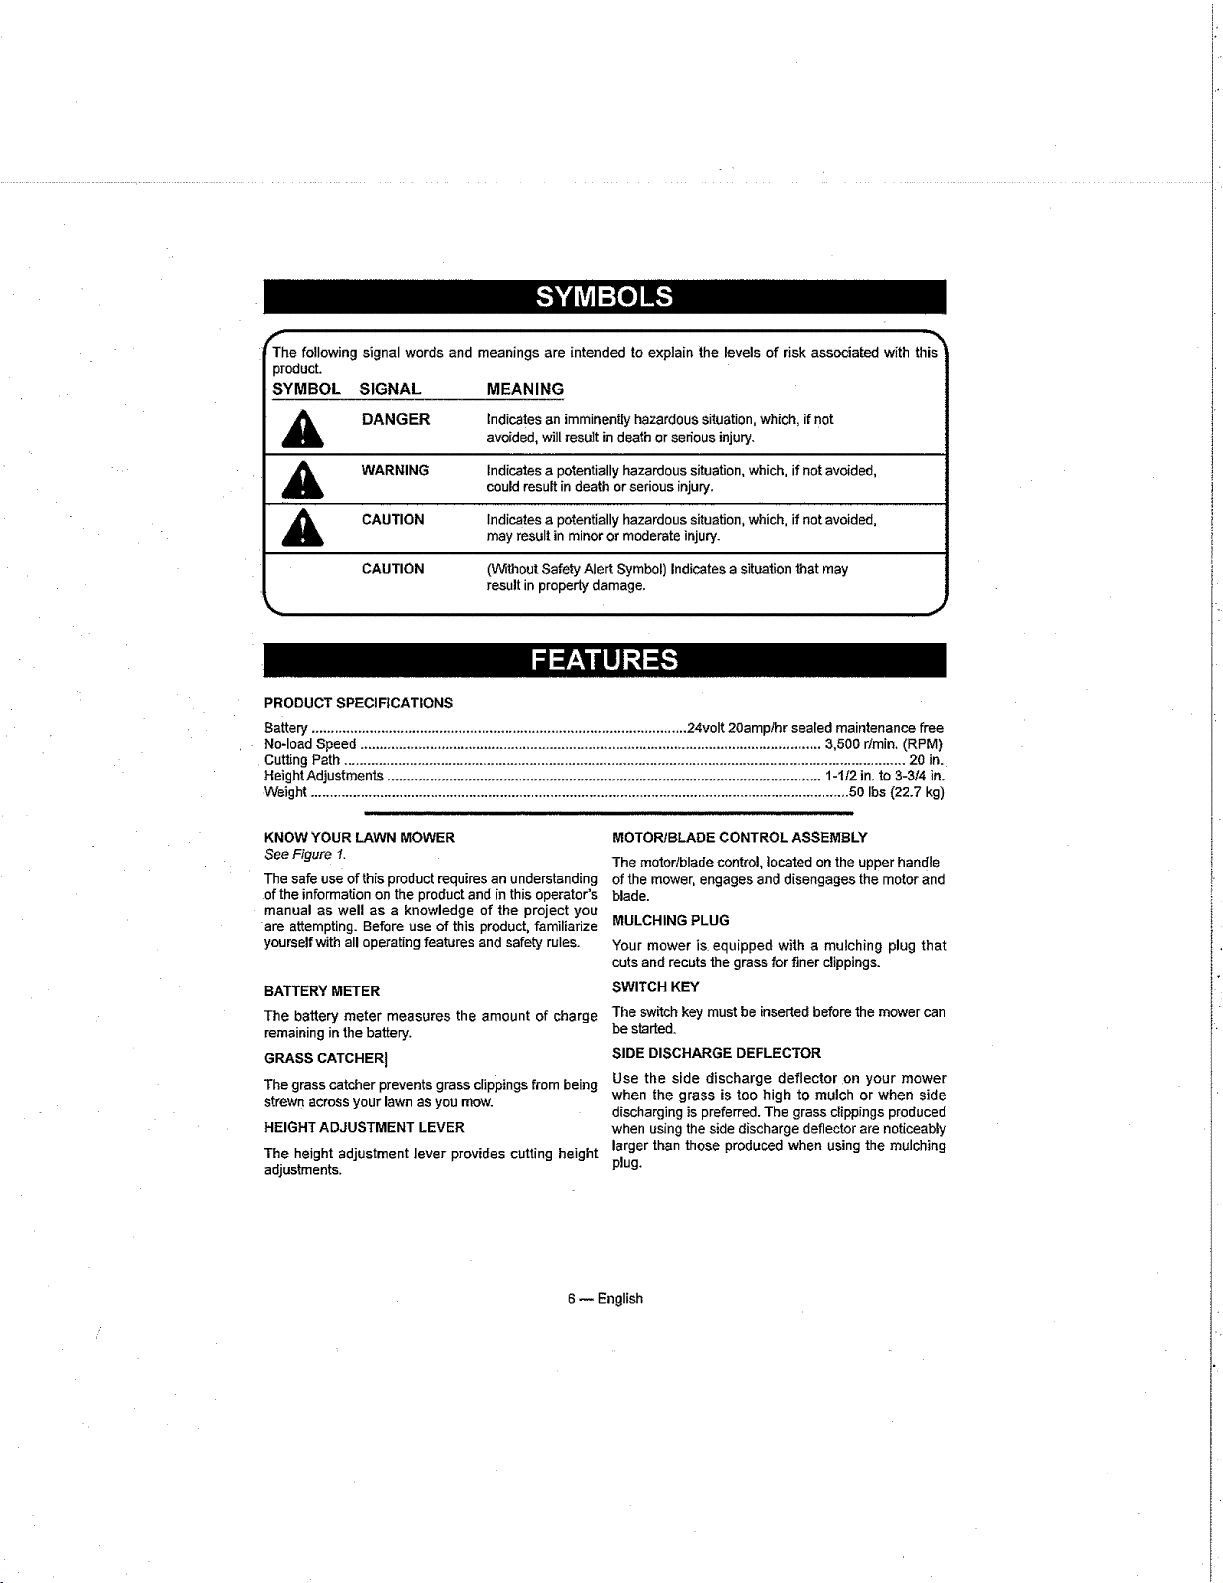
Thefollowingsignal words and meanings are intended to explain the levels of risk associated with this'
product.
SYMBOL SIGNAL MEANING
DANGER
Indicates an imminently hazardous situation, which, if not
avoided, will result in death or serious injury.
WARNING Indicates a potentially hazardous situation, which, if not avoided,
could result in death or serious injury.
CAUTION Indicates a potentially hazardous situation, which, if not avoided,
may result in minor or moderate injurY.
CAUTION (Wlthout Safety Alert Symbol) Indicates a situation that may
result in property damage.
PRODUCT SPECIFICATIONS
Battery" ................................................................................................. 24volt 20amplhr sealed maintenance free
No-load Speed ....................................................................................................................... 3,500 r/min. (RPM)
Curling Path ................................................................................................................................................. 20 in.
Height Adjustments ................................................................................................................ 1-1/2 in. to 3-314 in.
Weight ........................................................................................................................................... 50 Ibs (22.7 kg)
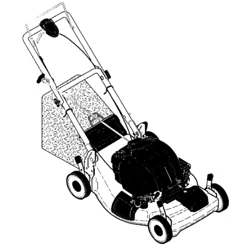
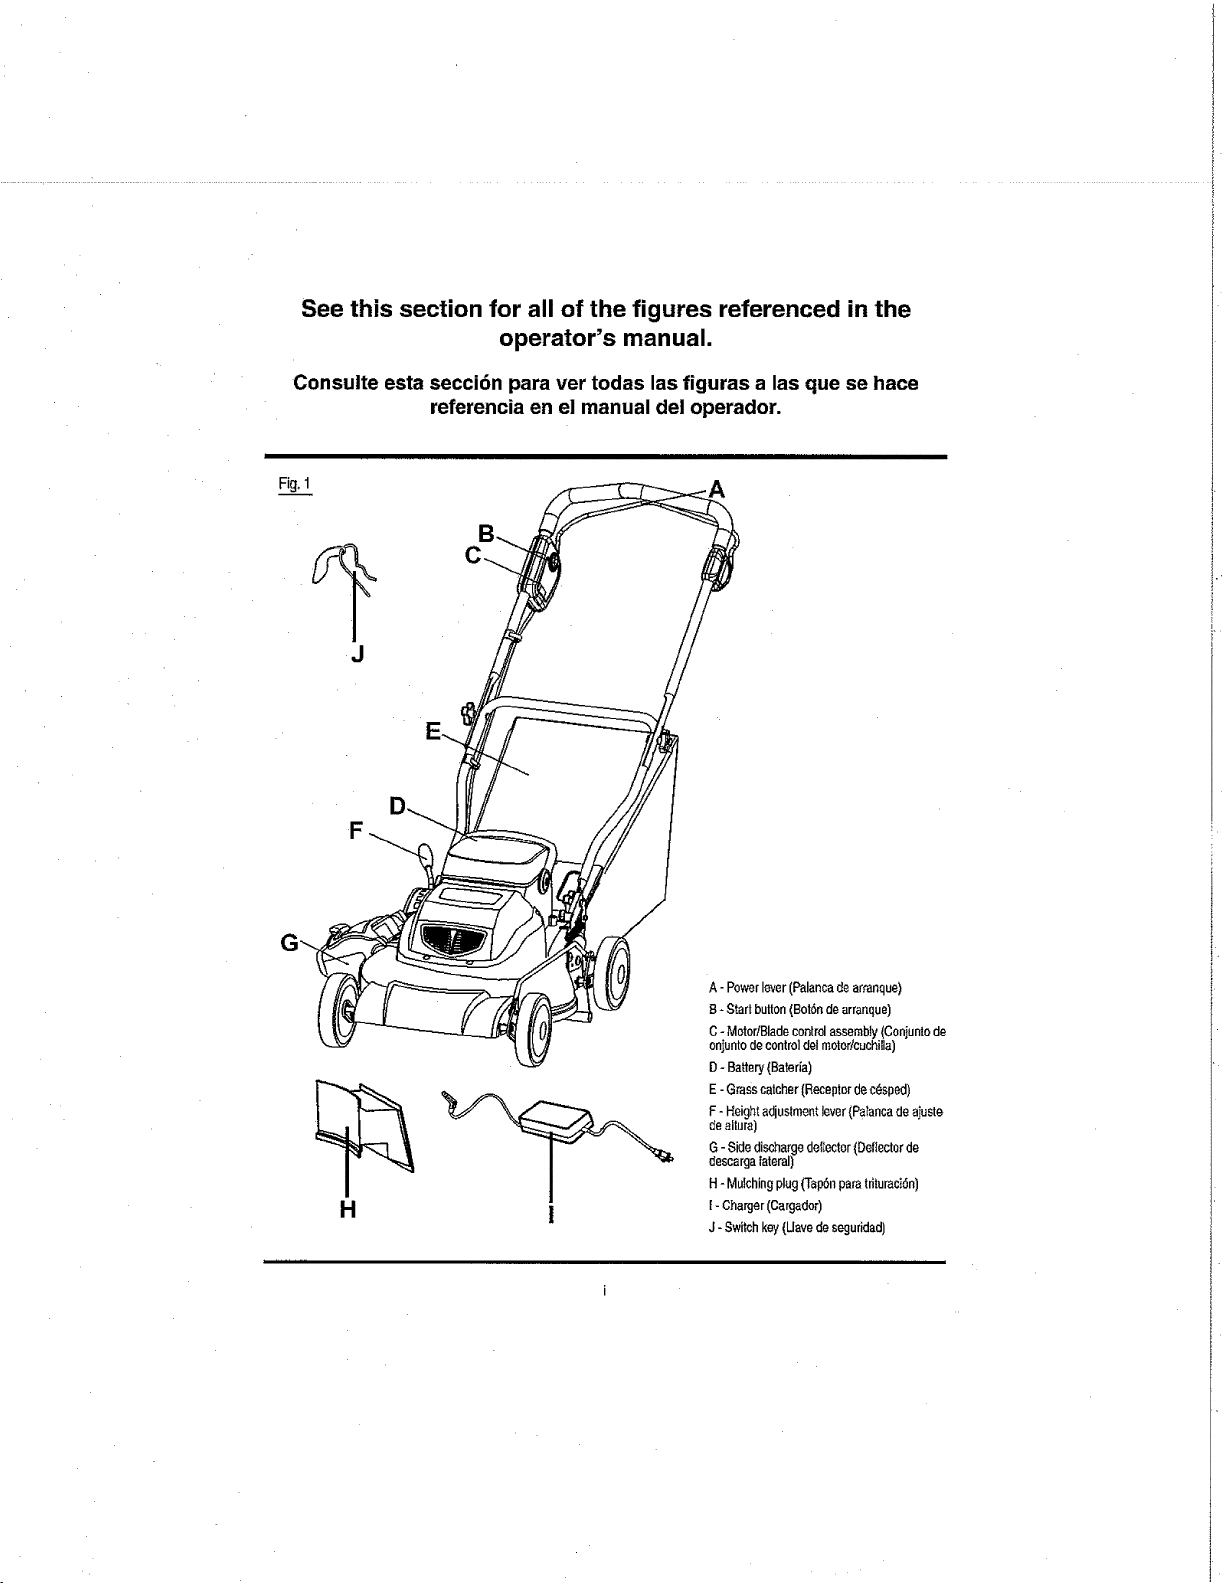
KNOW YOUR LAWN MOWER
See Figure I.
The safe use of this product requires an understanding
of the information on the product and in this operator's
manual as well as a knowledge of the project you
are attempting. Before use of this product, familiarize
yourself with all operating features and safety ruIes.
BATTERY METER
The battery meter measures the amount of charge
remaining in the battery.
GRASS CATCHER !
The grass catcher prevents grass clippings from being
strewn across your lawn as you mow.
HEIGHT ADJUSTMENT LEVER
The height adjustment lever provides cutting height
adjustments.
MOTOR/BLADE CONTROL ASSEMBLY
The motor/blade control, ]ocated on the upper handle
of the mower, engages and disengages the motor and
blade.
MULCHING PLUG
Your mower is equipped with a mulching plug that
cuts and recuta the grass for finer clippings.
SWITCH KEY
The switch key must be inserted before the mower can
be started.
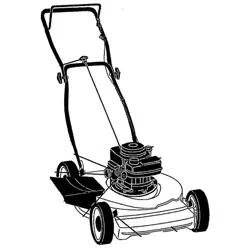
SIDE DISCHARGE DEFLECTOR
Use the side discharge deflector on your mower
when the grass is too high to mulch or when side
discharging is preferred. The grass clippings produced
when using the side discharge deflector are noticeably
larger than those produced when using the mulching
plug.
6 -- English
UNPACKING
This product requires assembly.
i Carefully remove the product and any accessories
from the box. Make sure that all items listed in the
packing list are included.
u Inspect the product carefully to make sure no
breakage or damage occurred during shipping.
,. Do not discard the packing material until you have
carefully inspected and satisfactorily operated the
product.
• If any parts are damaged or missing, please cail
1-888-266-7096 for assistance.
PACKING LIST
Mower
Switch key
Side Discharge Deflector
Mulching Plug
Grass Catcher
Charger
Operator's Manual
P,
rill WARNING! If any parts are damaged or
missing do not operate this product until the parts are
replaced. Failure to heed this waming so could result
in serious personal injury.
d_lb WARNING! Do not attempt to modify this
product or create accessories not recommended
for use with this product. Any such alteration or
modification is misuse and could result in a hazardous
condition leading to possible serious personal injury.
WARNING! Do not insert switch key until
assembly is complete. Failure to comply could result
in accidental starting and possible serious personal
injury.
_IL WARNING! Topreventaccidental starting,
do not make any adjustments or installations with the
switch key inserted.
ASSEMBLING THE HANDLE
See Figure 2.
• Remove any packing material which may be between
the upper and lower handles for shipping purposes.
• Pull up and back on the upper handle to raise the
handle into the operating position. Make certain
the lower handle is seated securely into the handle
mounting bracket.
• Align the holes (3) between the upper handle (1)
and lower (2) handles. Insert the bolts (4) and tighten
them with the wing nuts (5) provided.
• Secure the lower handle to the bracket with the
handle knob (6) in each side.
INSTALLING SIDE DISCHARGE DEFLECTOR
See Figure 3.
• Lift the side discharge door (1).
• Align the grooves on the deflector (2) with the pins
on the underside of the door.
• Lower the deflector (2) until the hooks on the mower
deck are secured inthe openings in the deflector.
,. Release the deflector and door.
INSTALLING THE MULCHING PLUG
See Figure 4,
NOTE: VCnen using the mulching plug, do not install
either the side discharge deflector or the grass
catcher.
• Liftthe rear discharge door (1).
• Grasp the mulching plug (2) by its handle and tilt at
an approximate 15 degree angle.
• Insert the plug into the rear discharge opening.
• Lower the rear discharge door.
INSTALLING THE GRASS CATCHER
See Figure 5.
NOTE: When using the grass catcher, do not install
either the side discharge deflector or the mulching
plug.
[] Liftthe rear discharge door (1).
• Lift the grass catcher by its handle and place under
the rear discharge door so that the hooks (2) on the
grass catcher are seated on the door rod (3).
• Release the rear discharge door, When installed
correctly, the hooks on the grass catcher will extend
through the openings on the rear discharge door.
SETTING BLADE HEIGHT
See Figure 6.
When shipped, the wheels on the mower are set to
a Iowcutting position. Before using the mower for
the first time, adjust the cutting position to the height
best suited for your lawn. The average lawn should
be between 1-1/2 in. to 2 in. during cool months and
between 2 in. and 3-1/4 in. during hot months.
To set the blade height:
• To raise the blade height, grasp the height adjustment
lever and move ittoward the back of the mower.
• To lower the blade height, grasp the height
adjustment lever and move it toward the front of the
mower.
7 -- English
WARNING! Donotallow familiarity with this
type of product to make you careless. Remember that
a careless fraction of a second is sufficient to inflict
serious injury.
_IL WARNING! Always wear safety goggles or
safety glasses with side shields when operating this
product. Failure to do so could result in objects being
thrown into your eyes, resulting in possibie serious
injury,
_ WARNING! Do not use any attachments or
accessories not recommended by the manufacturer of
this product. The use of attachments or accessories
not recommended can result in serious personal
injury.
APPLICATIONS
You may use this product for the purpose listed
below:
mMowing your lawn
BATTERY METER
See Figure 7.
Since the mower battery is shipped in a low charge
condition, the battery must be charged before use.
The battery has 5 LED lights to indicate battery
capacity. These lights will only illuminate when the
mower is running.
If 3 GREEN lights illuminate, the battery is charged
and ready for use. 2 green lights are equal to 50-80%
charge, while I green light isequal to 30-50% charge.
If the AMBER light illuminates, the battery will soon
require charging. It is recommended that the battery
be charged at this point. The battery is at 5-30%
charge when the yellow light illuminates
If the RED light illuminates and/or flashes at any time,
the battery must be charged IMMEDIATELY before
use. There is less than 5% of battery charge when the
red light comes on.
NOTE: When the red light illuminates, you must stop
the mower and charge the battery immediately, or it
will reduce the life of the battery.
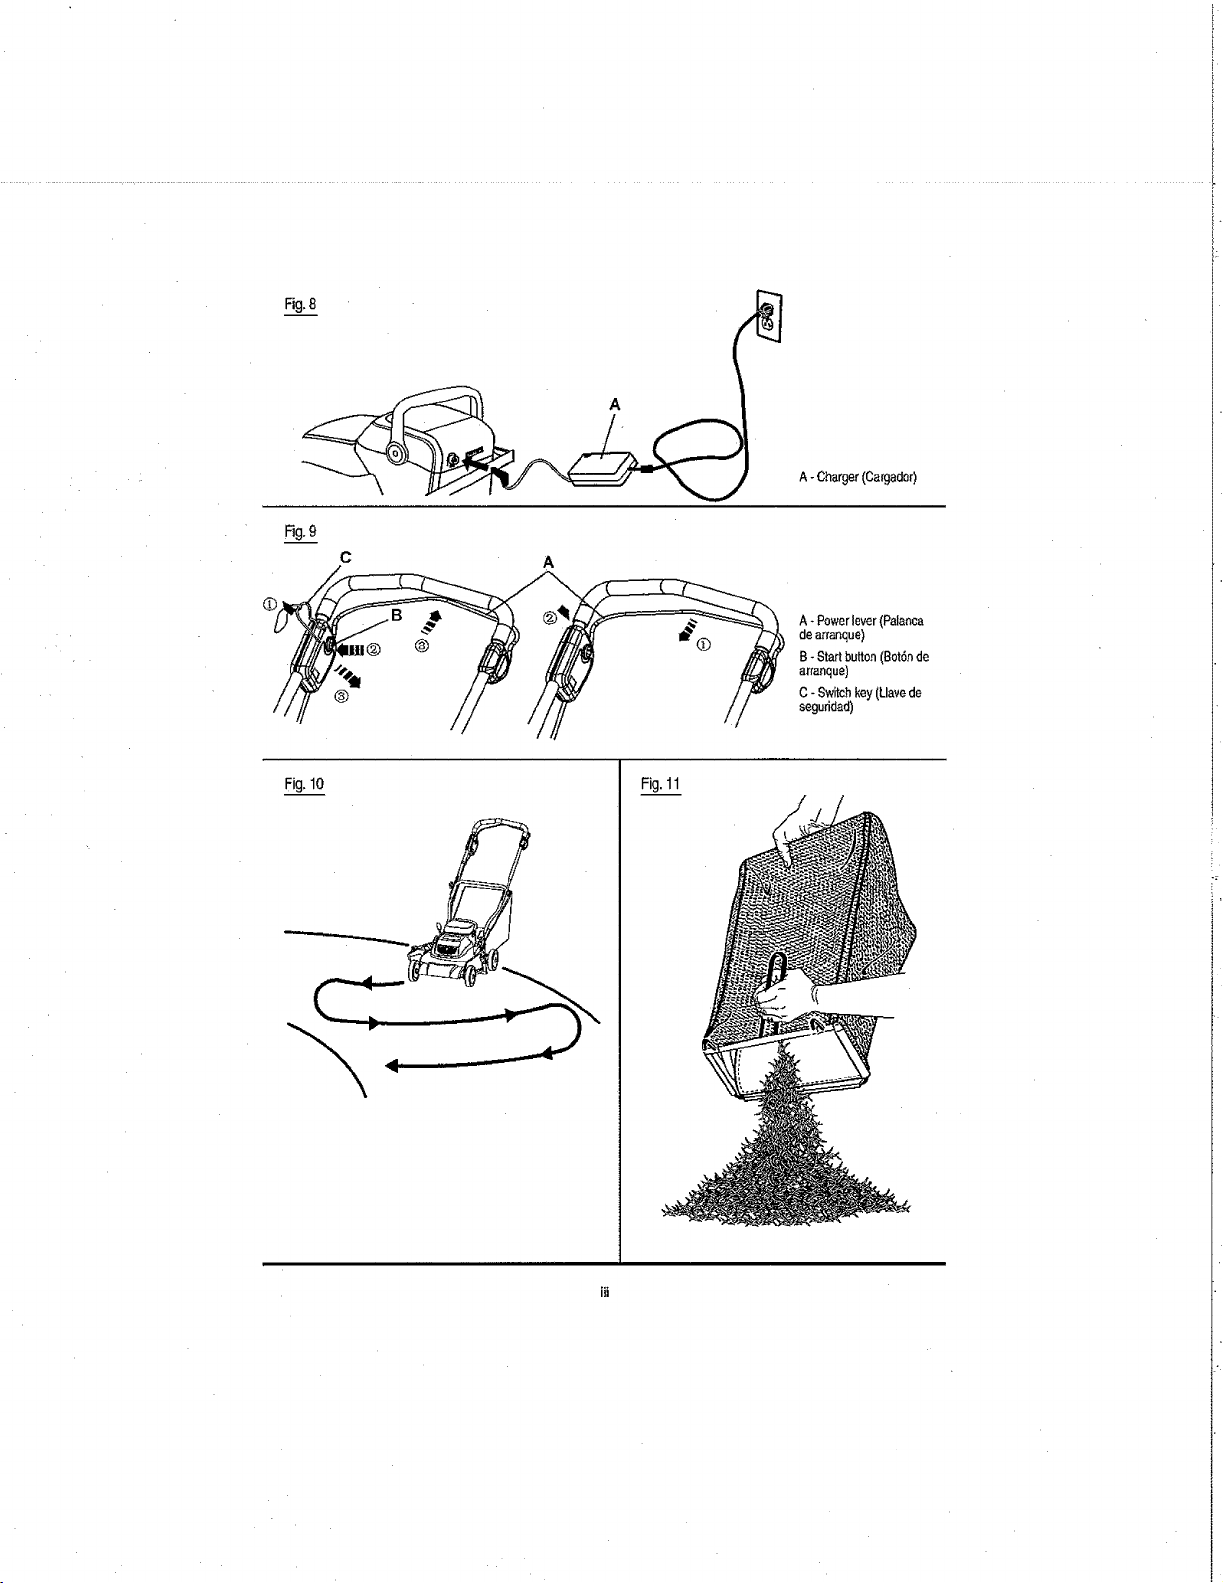
CHARGING THE BATTERY PACK
See Figure 8.
The lawn mower comes with a maintenance free,
sealed 24 volt storage battery.
• Remove the switch key.
• Charge the battery pack only with the charger
provided.
• Allow at least 15 hours of charge time before initial
use of the mower.
,, Make sure the power supply is normal household
voltage, 120 volts, 60 Hz, AC 0nly.
• The battery should be charged in a cool, dry piace.
• To improve battery life, store battery indoors in a
controlled climate. Fully charge battery pack every
two months.
• Since the battery will not develop a memory, it does
not have to be fully discharged before recharging.
• 2 to 3 initial Chargingldischarging cycles may be
required to achieve maximum run time!capacity.
• When fully Charged, the batter,] can be safely stored
in temperatures down to -40°F for a period of up to
two weeks, before requiring charging. Fully charge
battery pack every two months.
• The battery charger should be operated in
temperatures between 23°F and 104°F.
• The battery supplied is sealed, maintenance free
and spill free.
TO CHARGE
See Figure 8.
NOTE: The battery can be charged in or out of the
mowe£
The charger that is supplied with this mower is a
specially designed 2-stage charger.
Step 1: The red light will light up during the recharge
cycle.
Step 2: The green light wilt light up when the battery
is fully charged.
1. Remove the jack cover.
2. Plug the charger connector into the jack on the
battery.
3. Insert the 120 V plug from the charger into the
electrical outlet.
4. The red light on the charger should come on, which
indicates that the charger is working and the battery
is being charged.
The red light will go out and the green light will comb
on when the battery is completely charged (it takes
approximately 15 hours to charge a fully discharged
battery).
5. Battery should be charged after each use
regardless of power level. Battery should always be
stored in a fully charged state. This battery will not
develop a charging memory.
8 -- English
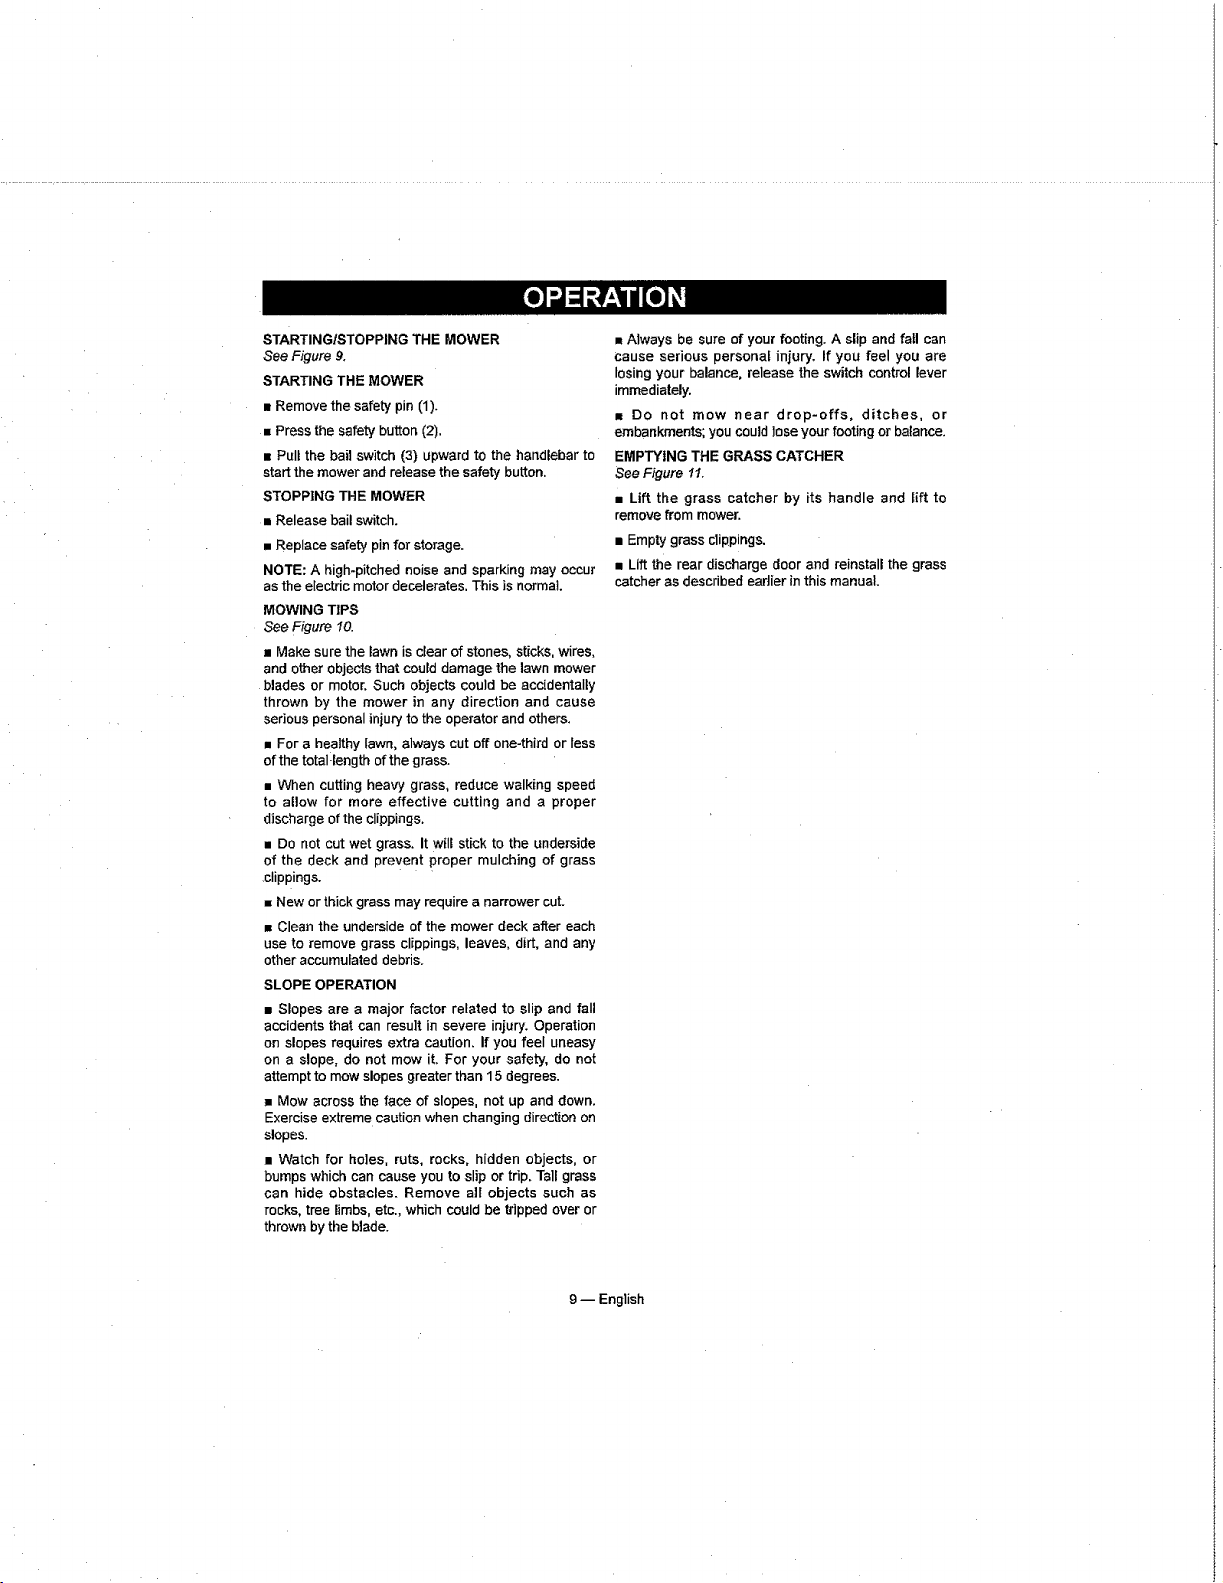
STARTINGISTOPPINGTHEMOWER
See Figure 9.
STARTING THE MOWER
• Remove the safety pin (1).
• Press the safety button (2).
•Pult the bail switch (3) upward to the handlebar to
start the mower and release the safety button.
STOPPING THE MOWER
• Release bail switch.
• Replace safety pin for storage.
NOTE: A high-pitched noise and sparking may occur
as the electric motor decelerates. This is normal.
MOWING TIPS
See Figure 10.
• Make sure the lawn is clear of stones, st_cks, wires,
and other objects that could damage the lawn mower
blades or motor. Such objects could be accidentally
thrown by the mower in any direction and cause
serious personal injury to the operator and others.
• For a healthy lawn, always cut off one-third or Iess
of the total length of the grass.
• When cutting heavy grass, reduce walking speed
to allow for more effective cutting and a proper
discharge of the cuppings.
• Do not cut wet grass. It wilI stick to the underside
of the deck and prevent proper mulching of grass
clippings.
• New or thick grass may require a narrower cut.
• Clean the underside of the mower deck after each
use to remove grass clippings, leaves, dirt, and any
other accumulated debris.
SLOPE OPERATION
• Slopes are a major factor related to slip and fail
accidents that can result in severe injury. Operation
on slopes requires extra caution. If you feeI uneasy
on a slope, do not mow it. For your safety, do not
attempt to mow slopes greater than 15 degrees.
• Mow across the face of slopes, not up and down.
Exercise extreme caution when changing direction on
slopes.
• Watch for holes, ruts, rocks, hidden objects, or
bumps which can cause you to slip or trip. Ta]l grass
can hide obstacles. Remove all objects such as
rocks, tree limbs, etc., which could be tdpped over or
thrown by the blade.
• Always be sure of your footing. A slip and fatl can
cause serious personal injury. If you feel you are
losing your balance, release the switch control lever
immediately.
• DO not mow near drop-offs, ditches, or
embankments; you could lose your footing or balance.
EMPTYING THE GRASS CATCHER
See Figure 11.
• Lift the grass catcher by its handle and Iift to
remove from mower.
• Empty grass clippings.
• Lift the rear discharge door and reinstall the grass
catcher as described eadier in this manual.
9 m English
_I_WARNING] When servicing, use only identical
replacement parts. Use of any other parts may create
a hazard or cause product damage.
_, WARNING! Always wear safety goggles or
safety glasses with side shields during power tool
operation or when blowing dust. If operation is dusty,
also wear a dust mask.
GENERAL MAINTENANCE
Avoid using solvents when cleaning plastic parts.
Most plastics are susceptible to damage from various
types of commercial solvents and may be damaged
by their use. Use clean cloths to remove dirt, dust, oil,
grease, etc.
_I_WARNING! Do not at any time let brake fluids,
gasoline, petroleumbased products, penetrating oi]s,
etc., come in contact with plastic parts. Chemicals
can damage, weaken, or destroy plastic which may
result in serious personal injury.
Periodically check all nuts and baits for proper
tightness to ensure safe operation of the mower.
Remove any buildup of grass and leaves on or
around the motor cover. 'Wipe the mower clean with a
dry cloth occasionally. Do not use water.
LUBRICATION
,_11of the bearings in this product are lubricated with a
sufficient amount of high grade lubricant for the life of
the unit under normal operating conditions. Therefore,
no further bearing lubrication is required.
Atthe beginning and end of each mowing season:
• Lubricate the springs on the rear discharge door
with light oil.
•Lubdcate the height adjustment lever and related
hardware with light oil.
- Remove the wheels and lubricate the surface of the
ax{e bolt and the inner surface of the wheel with light
oil
• Remove the blade and blade hub assembly and
lubricate the motor shaft with light oil or engine oil
See Replacing the Cutting Blade for instructions on
removing the blade.
_t= WARNING! Always protect hands by wearing
heavy gloves sndlor wrapping the cutting edges of the
blade with rags and other material when performing
blade maintenance. Failure to heed this warning so
could result in serious personal injury.
_,WARNING! Before performing any
maintenance, make sure the mower is unplugged
from the power supply and the switch key is removed.
Failure to heed this warning could result in serious
personal injury.
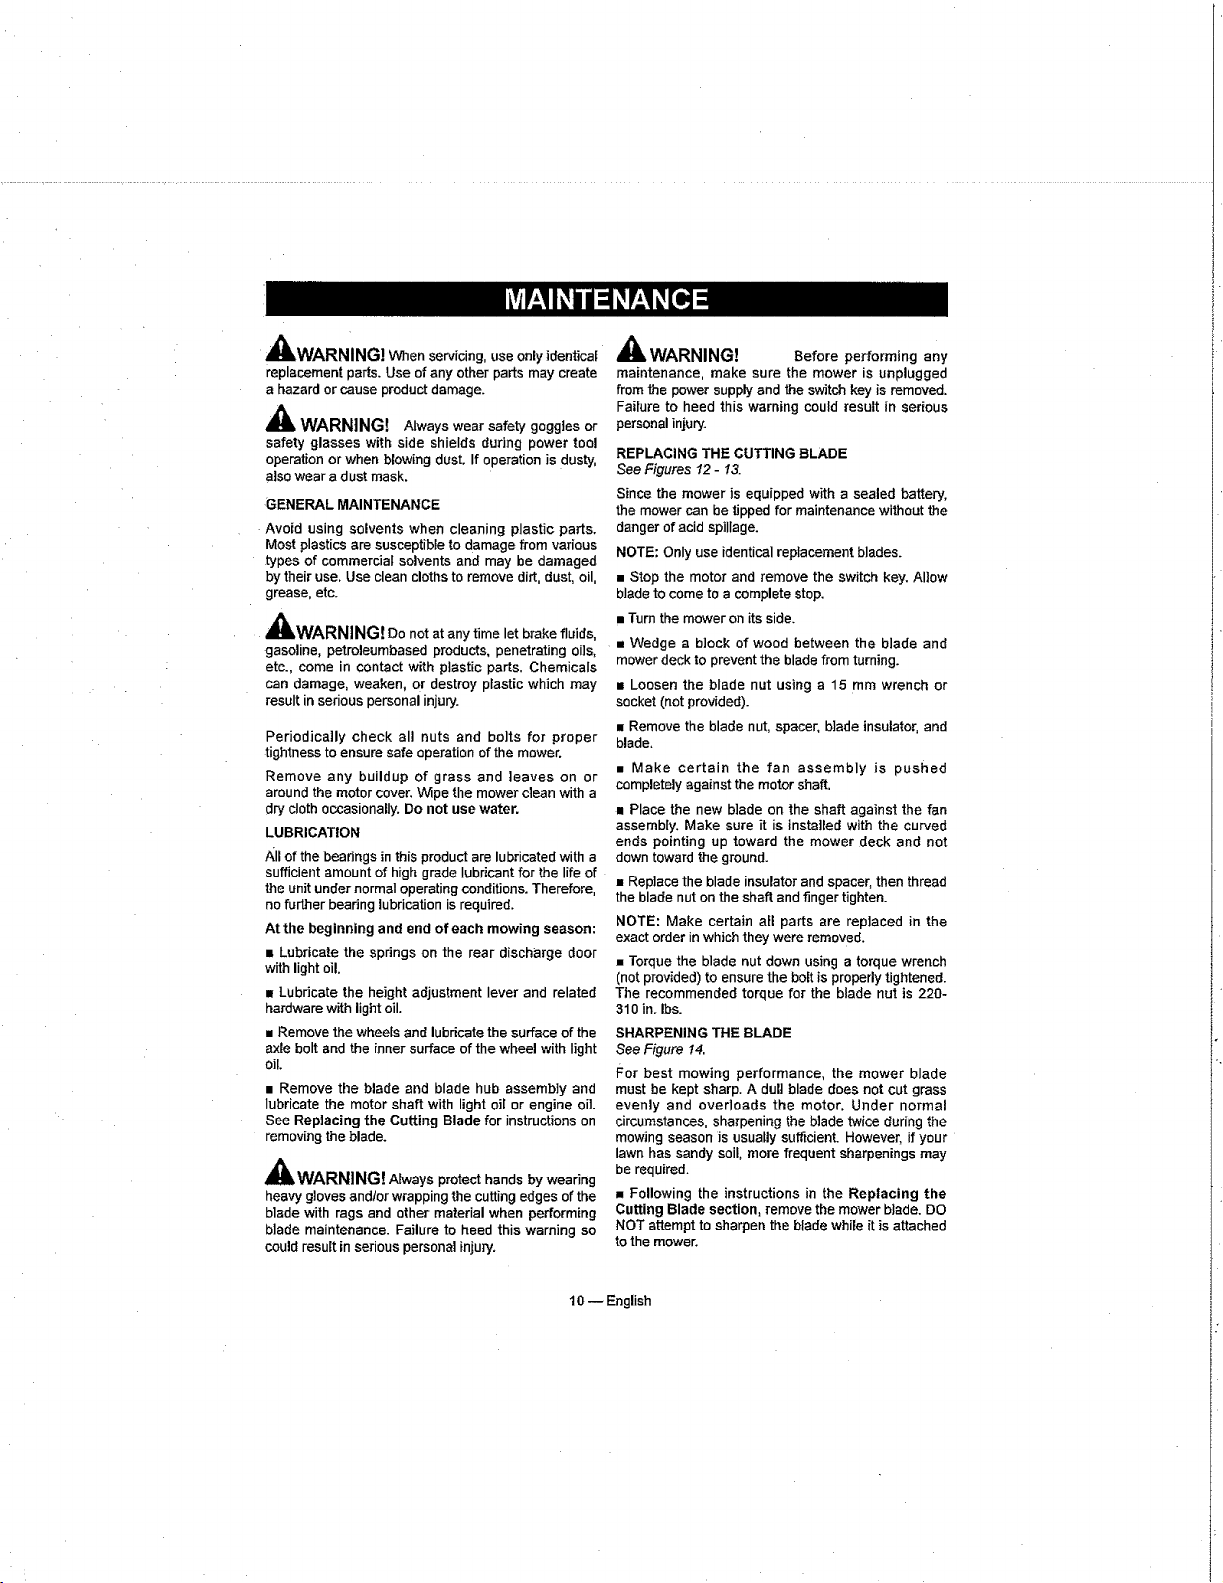
REPLACING THE CUTTING BLADE
See Figures 12 - 13.
Since the mower is equipped with a sealed battery,
the mower can be tipped for maintenance without the
danger of acid spillage.
NOTE: Only use identical replacement blades.
• Stop the motor and remove the switch key. Allow
blade to come to a complete stop.
• Turn the mower on its side.
• Wedge a b]ock of wood between the blade and
mower deck to prevent the blade from turning.
• Loosen the blade nut using a 15 mm wrench or
socket (not provided).
• Remove the blade nut, spacer, blade insulator, and
blade.
• Make certain the fan assembly is pushed
completely against the motor shaft.
• Place the new b)ade on the shaft against the fan
assembly. Make sure it is installed with the curved
ends pointing up toward the mower deck and not
down toward the ground.
• Replace the blade insulator and spacer, then thread
the blade nut on the shaft and finger tighten.
NOTE: Make certain oil parts are replaced in the
exact order in which they were removed.
• Torque the blade nut down using a torque wrench
(not provided) to ensure the bait is properly tightened.
The recommended torque for the blade nut is 220-
310 in. Ibs.
SHARPENING THE BLADE
See Figure 14.
For best mowing performance, the mower blade
must be kept sharp. A duff blade does not cut grass
evenly and overloads the motor. Under normal
circumstances, sharpening the blade twice during the
mowing season is usually sufficienL However, if your
lawn has sandy soil, more frequent sharpenings may
be required.
• Following the instructions in the Replacing the
Cutting Blade section, remove the mower blade. DO
NOT attempt to sharpen the blade while it is attached
to the mower.
t 0 -- English
_ILWARNING! When removing, inspect the
biade carefully. ]f blade is bent or damaged, replace
immediately with a new blade. Failure to replace
a bent or damaged blade could cause an accident
resulting in possible sedous injury.
,, Using a fine-tooth file or stone, sharpen cutting
edges on both ends of the blade, removing equal
amounts of material from both ends.
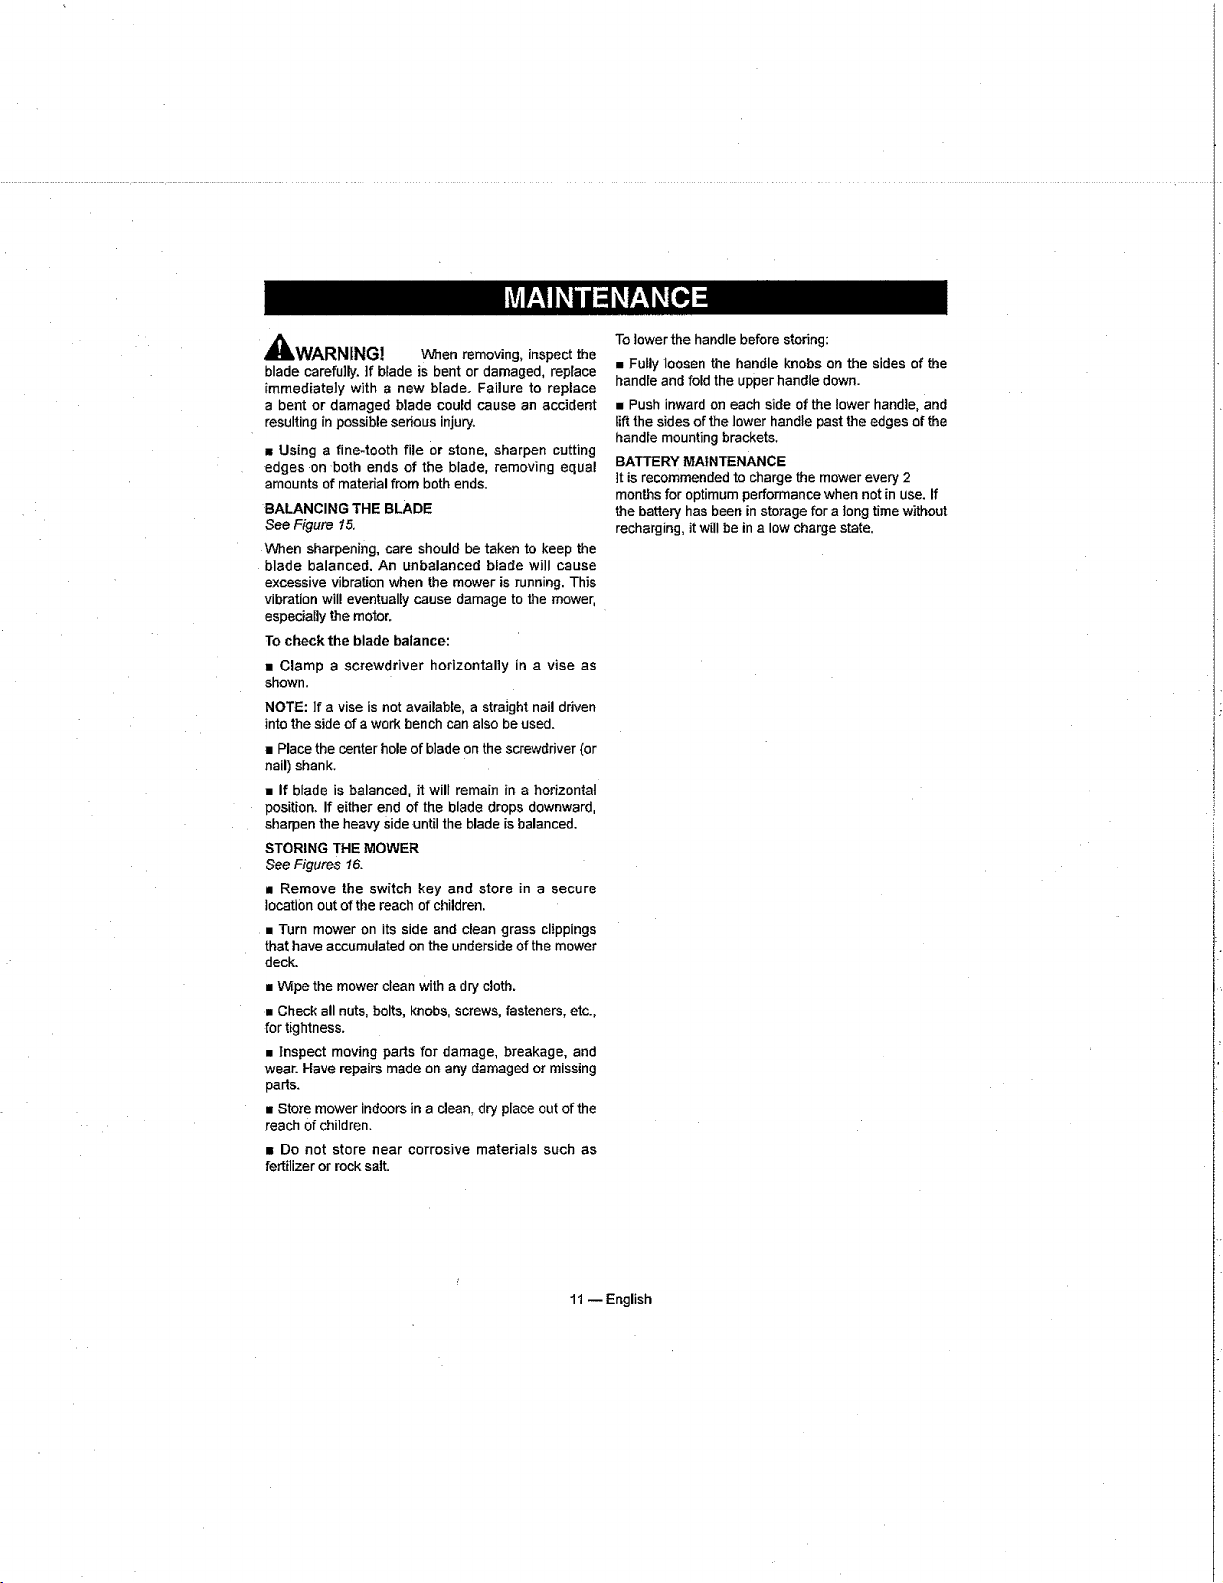
BALANCING THE BLADE
See Figure 15.
When sharpening, care should be taken to keep the
blade balanced. An unbalanced blade will cause
excessive vibration when the mower is running. This
vibration wil! eventually cause damage to the mower,
especia{iy the motor.
TO check the blade balance:
• Clamp a screwdriver horizontally in a vise as
shown.
NOTE: ]f a vise is not available, a straight nail driven
into the side of a work bench can also be used.
mPlace the center hole of blade on the screwdriver (or
nail) shank.
• If blade is balanced, it will remain in a horizontal
position. If either end of the blade drops downward,
sharpen the heavy side until the blade is balanced.
STORING THE MOWER
See Figures I6.
• Remove the switch key and store in a secure
location out of the reach of children.
• Turn mower on its side and clean grass clippings
that have accumulated on the underside of the mower
deck.
,, Wipe the mower clean with a dry cloth.
• Check all nuts, bolts, knobs, screws, fasteners, etc.,
for tightness.
• Inspect moving parts for damage, breakage, and
wear. Have repairs made on any damaged or missing
parts.
• Store mower indoors in a dean, dry place out of the
reach of children.
• Do not store near corrosive materials such as
fertilizer or rock salt.
To lower the handle before storing:
• Fully loosen the handle knobs on the sides of the
handle and fold the upper handle down.
• Push inward on each side of the lower handle, and
lift the sides of the lower handle past the edges of the
handle mounting brackets.
BATTERY MAINTENANCE
]t is recommended to charge the mower every 2
months for optimum performance when not in use. If
the battery has been in storage for a long time without
recharging, it will be in a low charge state.
11 -- English
I-
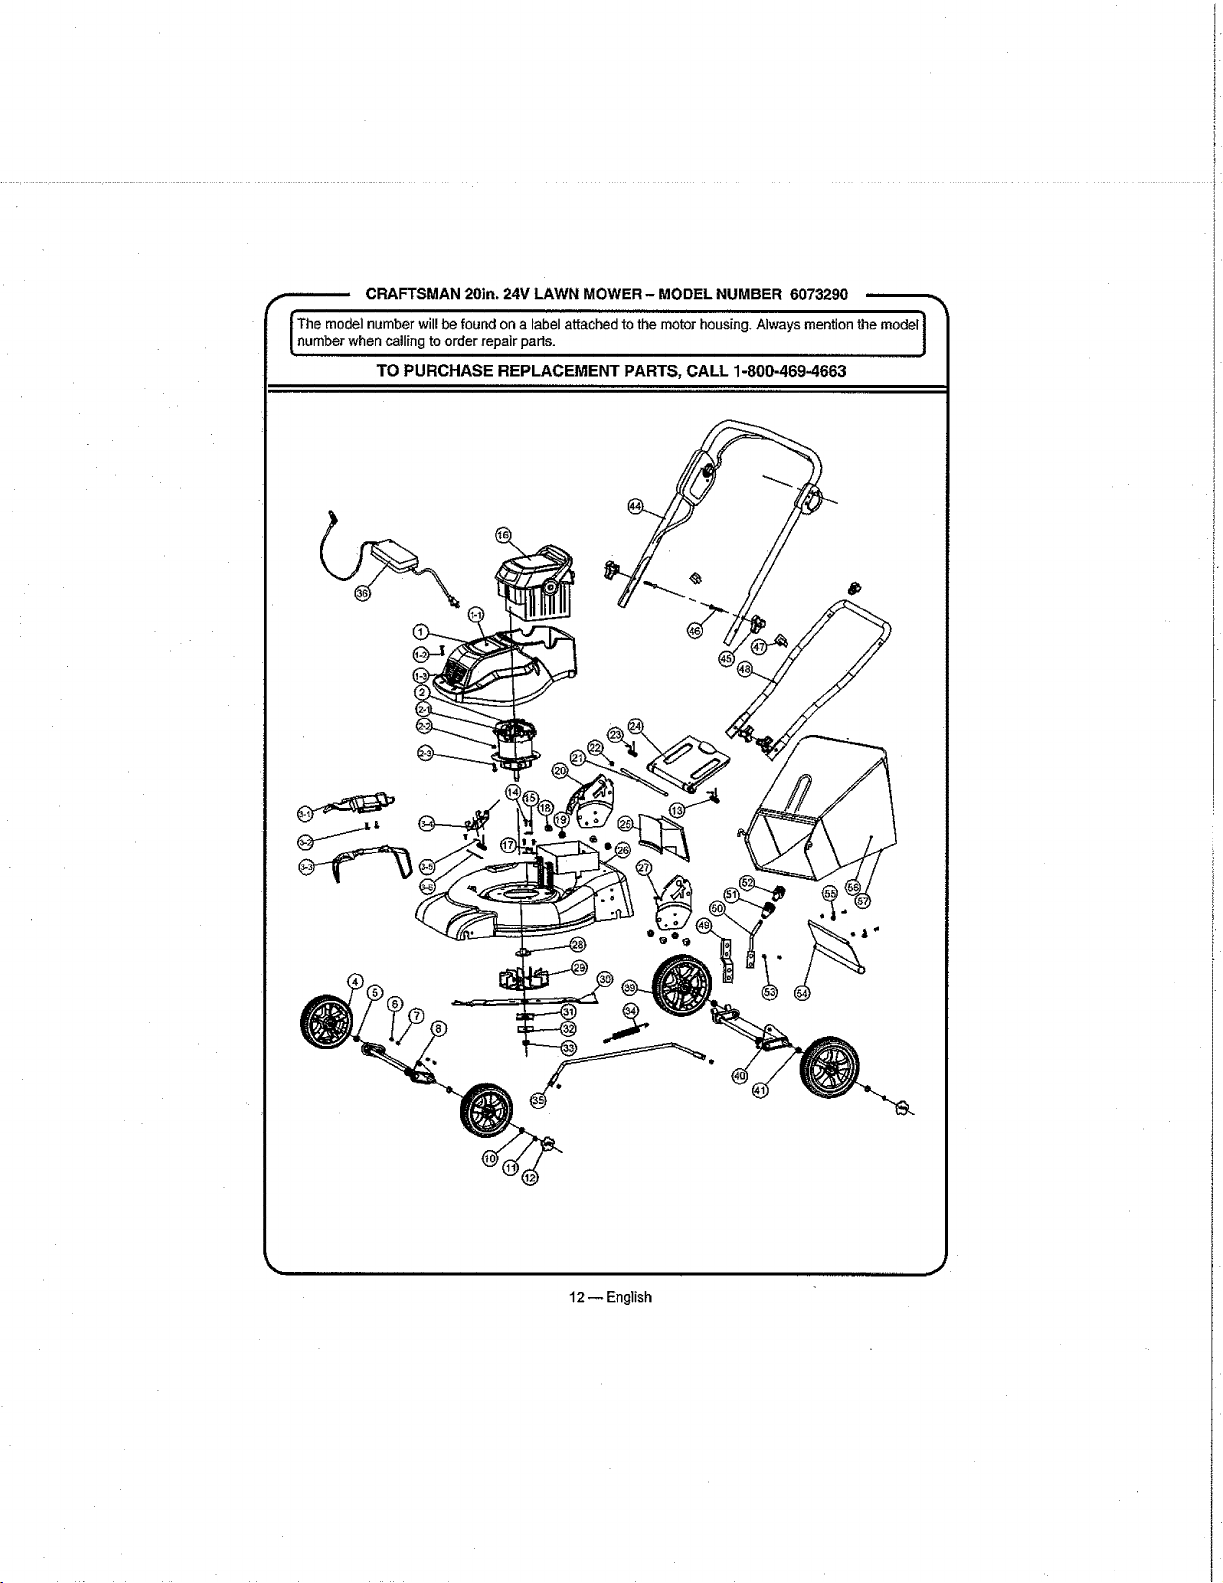
CRAFTSMAN 20in, 24V LAWN MOWER w MODEL NUMBER 6073290 _
The model number will be found on a labeI attached to the motor housing. Always mention the model 1
number when calling to order repair parts.
TO PURCHASE REPLACEMENT PARTS, CALL 1-800-469-4663
12 -- English
i,
i
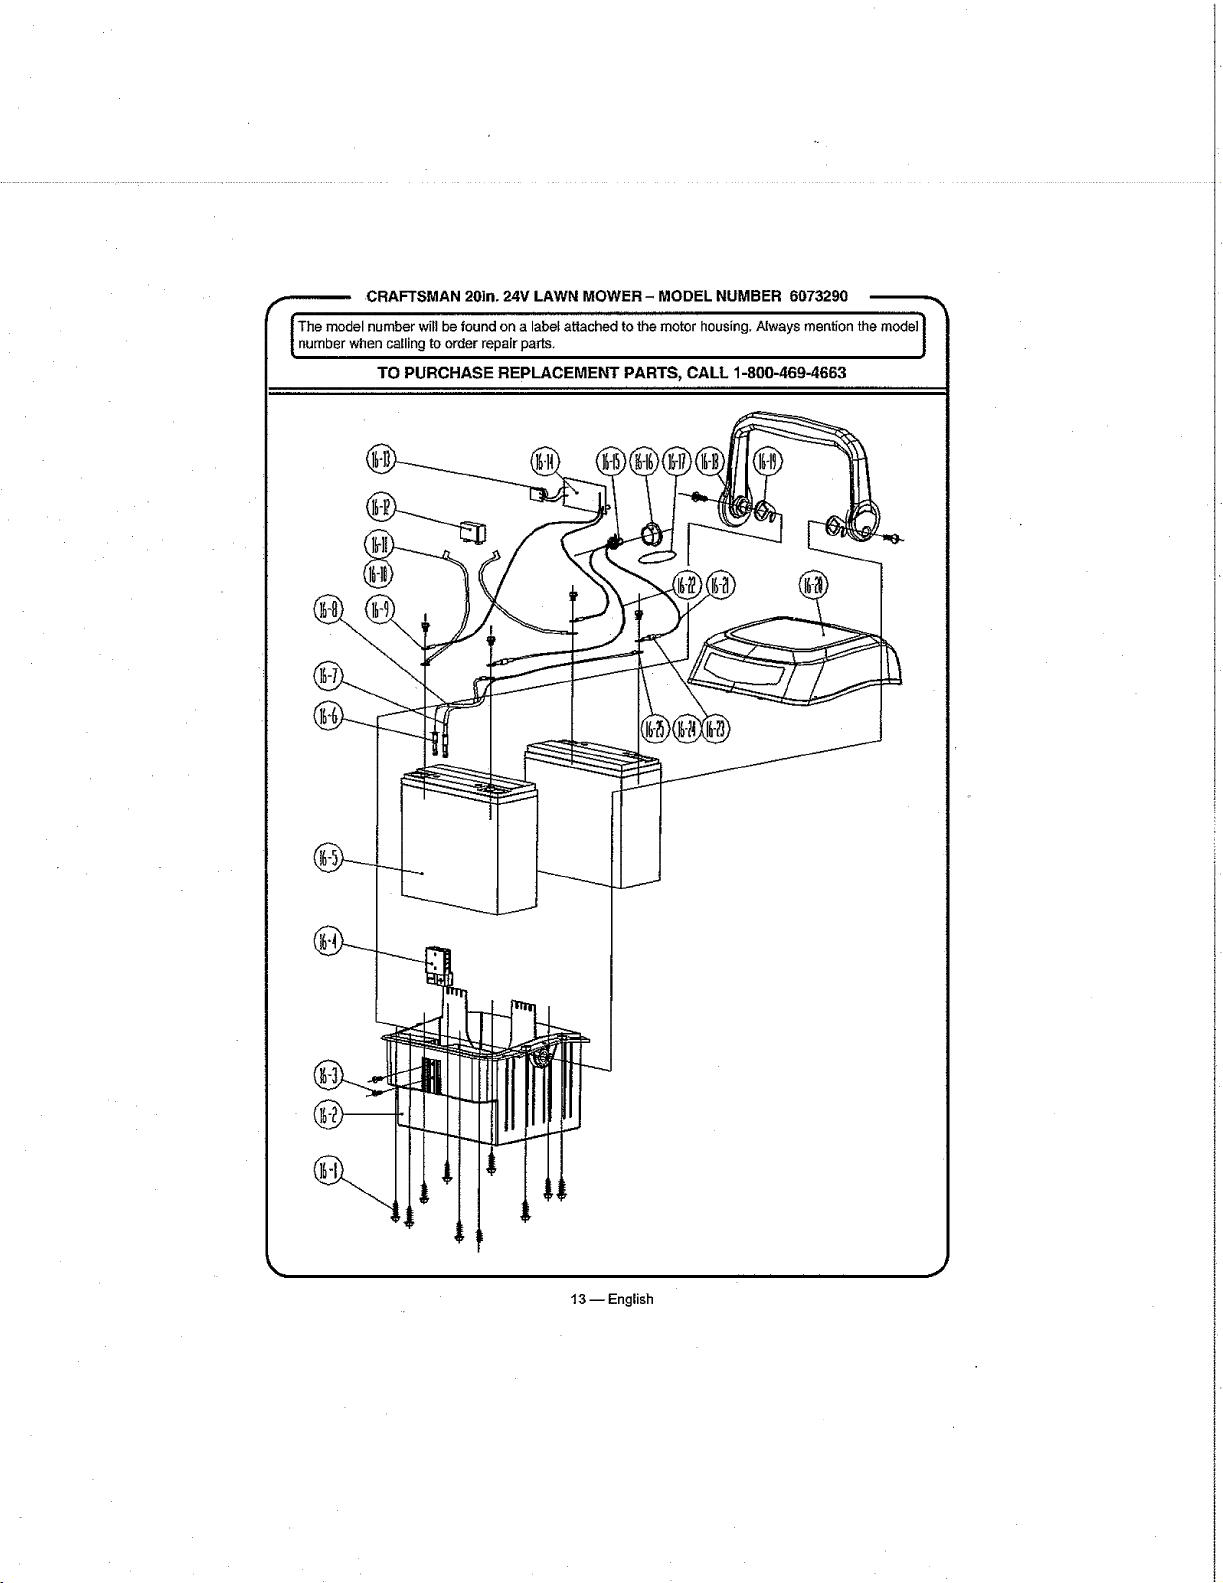
CRAFTSMAN 20in. 24V LAWN MOWER - MODEL NUMBER 6073290 _,_
The model number wit, be found on a labet attached to the motor housing. Nways mention the rood;; I
number when calling to order repair pa_ts.
TO PURCHASE REPLACEMENT PARTS, CALL 1-800-469-4663
..t-4
13 -- English
ii i i i i i
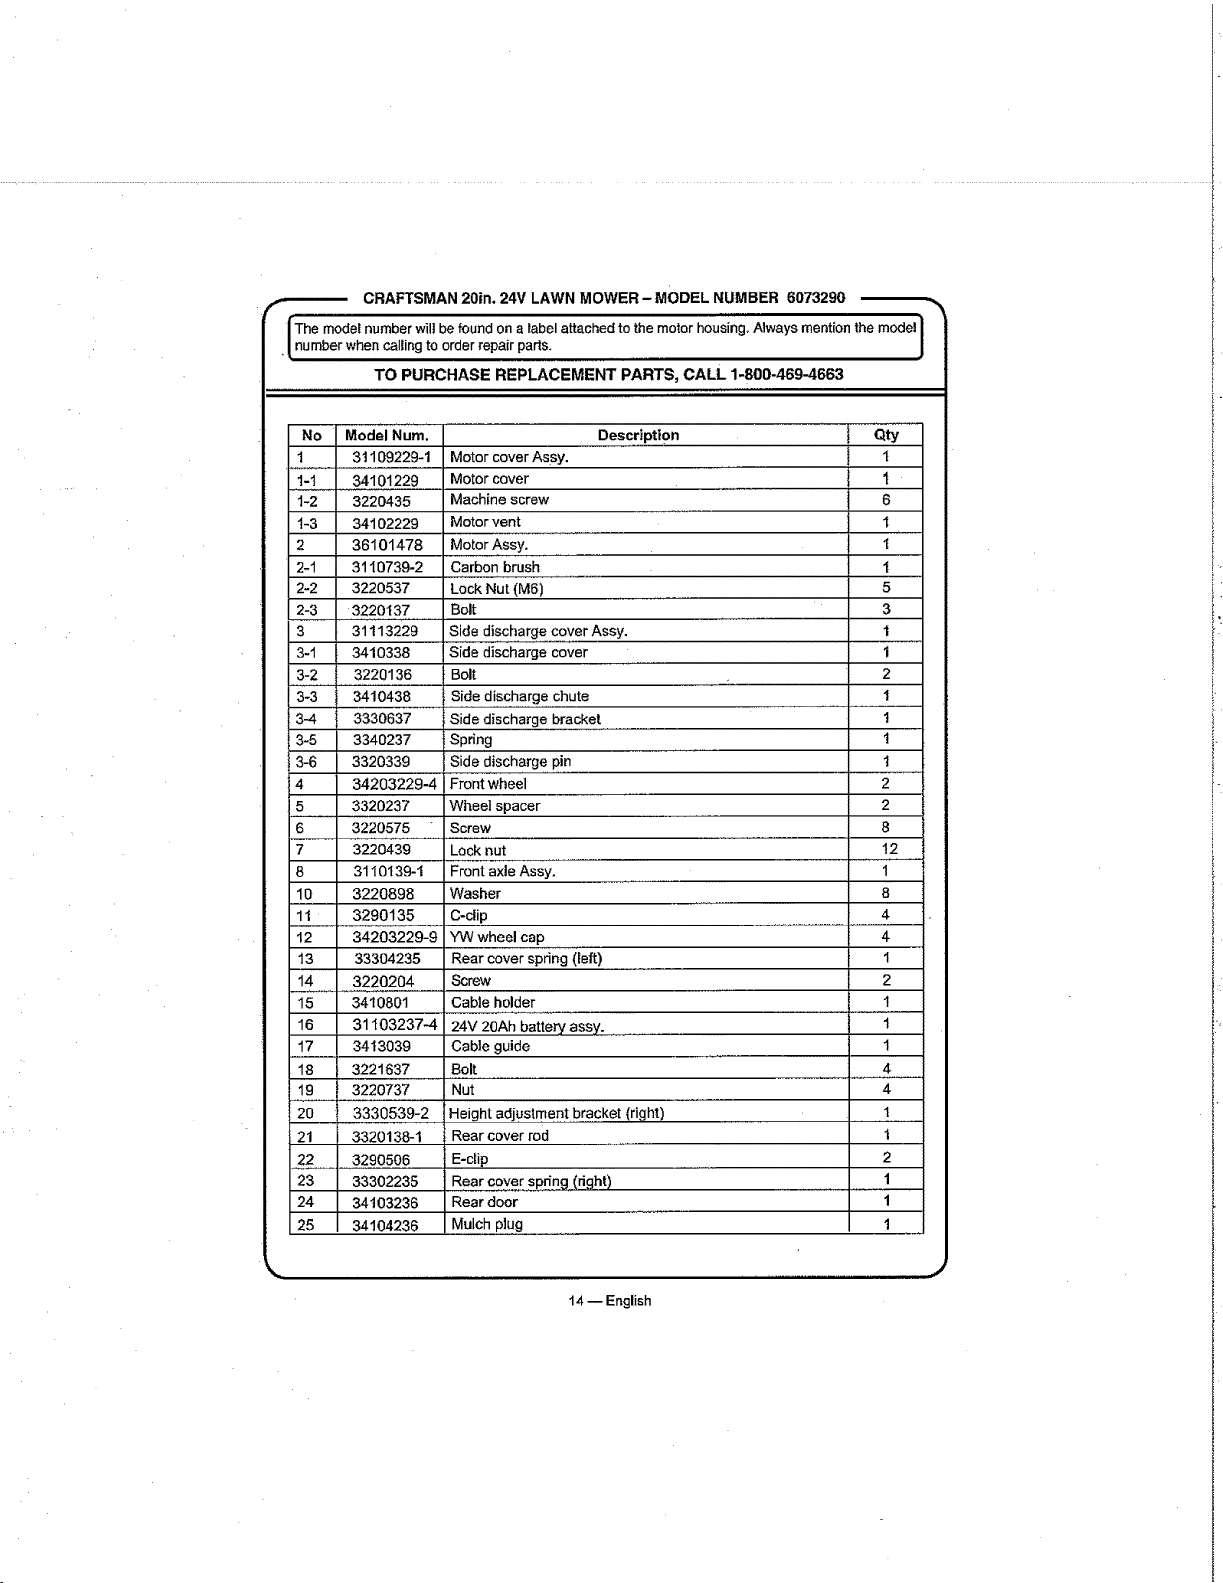
CRAFTSMAN 20in. 24V LAWN MOWER - MODEL NUMBER 6073290 _,
The model number wilt be found on a label attached to the motor housing, Always mention the model i
, [number when calling to order repair parts. J
TO PURCHASE REPLACEMENT PARTS, CALL 1-800-469-4663
No Model Num.
1 31109229-1
1-1 34101229
1-2 3220435
t-3 34102229
2 36101478
2-1 3110739-2
2-2 3220537
2-3 3220137
3 31113229
3-1 3410338
3-2 3220136
3-3 3410438
3-4
3-5
3-6
4
5
6
7
8
10
1t
12
13
14
Description Qty
Motor cover Assy. t
Motor cover 1
Machine screw 6
Motor vent 1
Motor Assy.. ......................... I
Carbon brush I
Lock Nut (M6) 5
Bolt 3
Side discharge.cover Assy, 1
Side discharge cover 1
Bolt ........:..... 2
Side discharge chute 1
I
t
t
2
2
8
12
1
8
4
4
1
2
3330637 Side discharge bracket .......
3340237 Spring
3320339 Side discharge pin
34203229-4 Front wheel
3320237 Wheel spacer
3220575 Screw
3220439 Lock nut
31 I0139-1 Front axle Assy.
3220898 Washer
3290135 C-clip
' 342032;_9-9 YW wheel cap
33304235 Rear cover spdng (left)
3220204 Screw
Cable holder
24V 20Ah barter':/' assy.
Cable guide
Bolt
Nut
Height adjustment bracket (right)
Rear cover rod
E-clip
Rear coyer sp.n.n..g(right)
Rear door
Mulch plLIg
1
1
1
4
4
1
t
2
1
1
1
15 3410801
16 31103237-4
17 3413039
18 3221637
19 3220737
2O 3330539-2
21 3320138-1
22 3290506
23 33302235
24 34103236
25 34104236
14 -- English
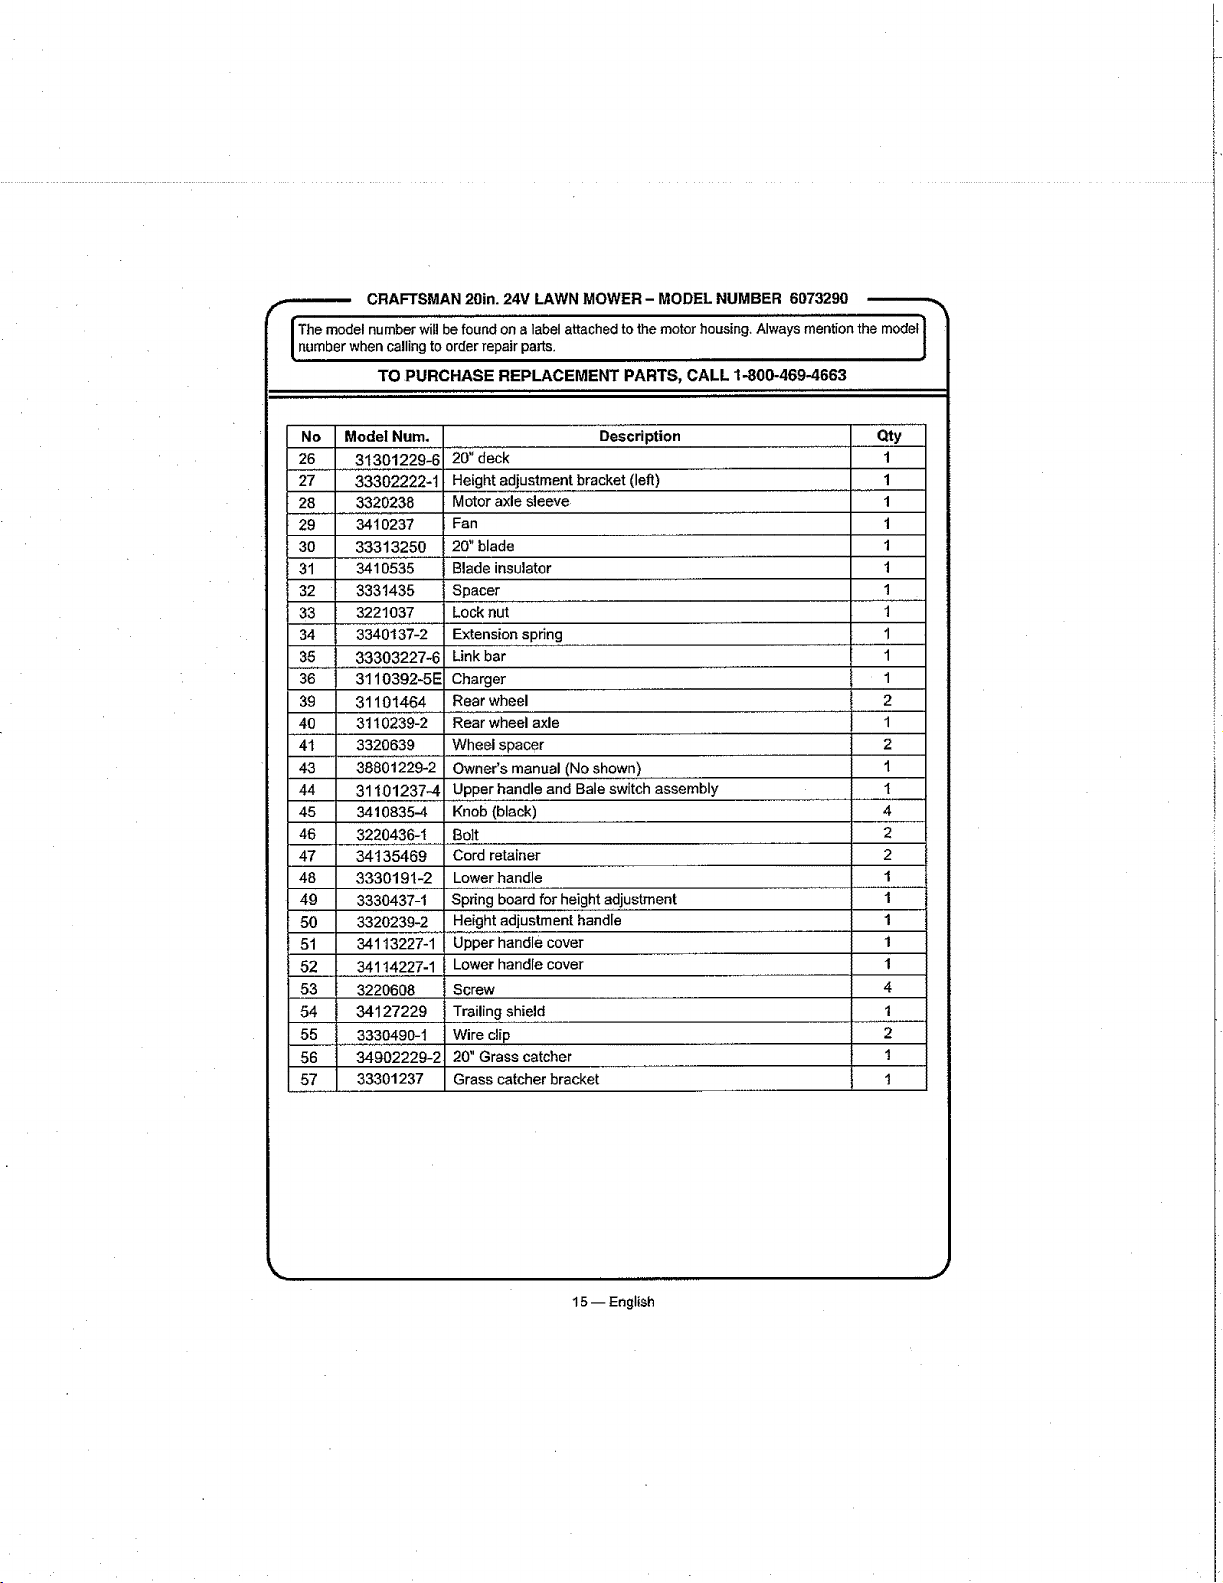
CRAFTSMAN 20in. 24V LAWN MOWER - MODEL NUMBER 6073290 _,_
Themodel numberwillbefound ona labelattachedto themotorhousing. Always mentionthe model}
numberwhen callingto order repair parts,
J
TO PURCHASE REPLACEMENT PARTS, CALL 1-800-469-4663
No Model Num. Description Qty
26 31301229-6 20';'d'eck....................... 1
27 33302222-t Height adjustment bracket (left) .........................1
28 3320238 Motor axle sleeve 1
29..............._10237 Fan .... 1
30 33313250 20" blade 1
31 3410535 Blade insulator 1
32 3331435 Spacer 1
33 3221037 Lock nut 1
34 3340137-2 Extension spring 1
35 33303227-6 Link bar 1
36 3110392-5EE Charger 1
39 31101464 Rear wheel 2
40 3110239-2 Rear wheel axle 1
41 3320639 Wheel spacer 2
43 38801229-2 Owner's manual (Noshown) ........ 1
44 31101237-4 Upper handle and Bale switch assembly I
45 3410835-4 Knolo(black) 4
46 3220436-1 Bolt 2
47 34! 35469 Cord retainer 2
48 3330191-2 Lower handle 1
49 3330437-I Spring board for height adiustrnent 1
50 3320239-2 Height adjustmenthandle 1
51 34113227-1 Upper handle cover 1
52 34114227-1 Lower handle cover 1
53 3220608 Screw 4
54 34127229 Trailing shield 1
55 3330490-1 Wire clip ,. 2
56 34902229-2 20" Grass catcher 1
57 33301237 Grass catcher bracket 1
15 -- EngIish
J
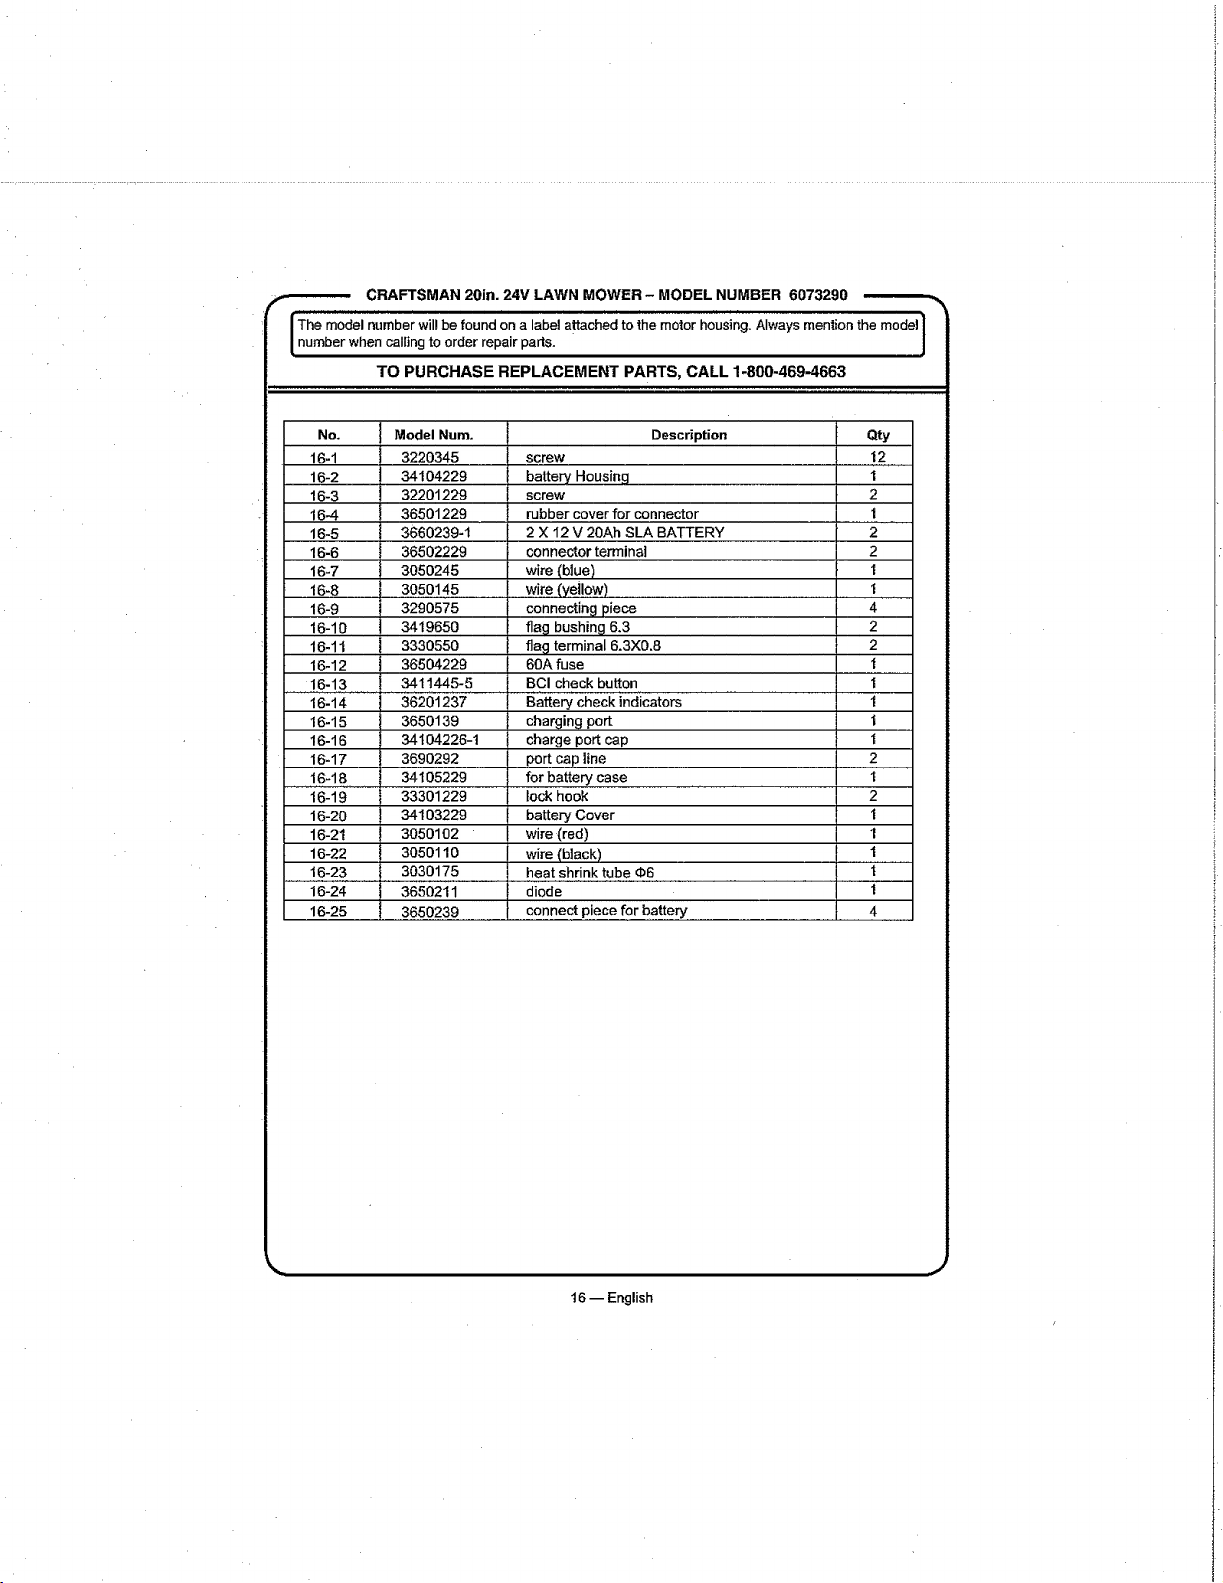
CRAFTSMAN 20in. 24V LAWN MOWER - MODEL NUMBER 6073290
The model number will be found on a label attached to the motor housing. Always mention the model ]
number when calling to order repair parts. ]
TO PURCHASE REPLACEMENT PARTS, CALL 1-800-469-4663
No.
16-1
16-2
16-3
16-4
t6-5
16-6
16-7
16-8
16-9
16-10
t6-11
16-12
Model Num.
3220345
34104229
32201229
36501229
3660239-1
36502229
3050245
3050145
3290575
3419650
3330550
36504229
Description Qty
screw 12
battery Housing 1
screw 2
rubber cover for connector 1
2 X 12 V 20Ah SLA BATTERY 2
connector terminal 2
wire (blue) 1
wire (yel!ow) 1
connecting piece 4
flag bushing 6.3 2
flag terminal 6.3X0.8 2
60A fuse I
...... ,!,6-13 .......... 34t1445- 5 ,, BC I check huron ........... I
16-14 36201237 Battery check indicators
16-15 3650139 charging port
16-16 34t04226-1 charge port cap
16-17 3690292 port cap line
.... 1.6-18.... 34105229 , for battery case
16-19 33301229 lock hook
t6-20 34103229 battery Cover
16-21 3050102 wire (red)
16-22 3050110 wire (black)
t6-23 3030175 heat shrink tube d_6
16-24 3650211 diode
16-25
3650239 connect piecefor battery
1
1
I
2
1
2
1
1
I
t
1
4
16 -- English
,,J
............................................................................ f
See this section for all of the figures referenced in the
operator's manual.
Consulte esta secci6n para ver todas las figuras a las que se hace
referencia en el manual dei operador.
Fig, 1
B
E
D
F
H
A- Powerlever(Palancade arranque)
B- Start button(Bot6odearranque)
C -Motor/Bladecontrolassembly(Conjuntode
oniuntodecontroldelmotor/cuchiIia)
D -Battery(Bateria)
E- Grasscatcher (Receptordec_sped)
F - Heightadjustmentlever(Patancade aiuste
de altura)
G -Sidedischargedellector(Deflectorde
descargarateral)
H -Mulchingplug(Tap6nparatrituraci6n]
l -Charger (Cargador)
5- Switchkey(Uavedeseguridad)
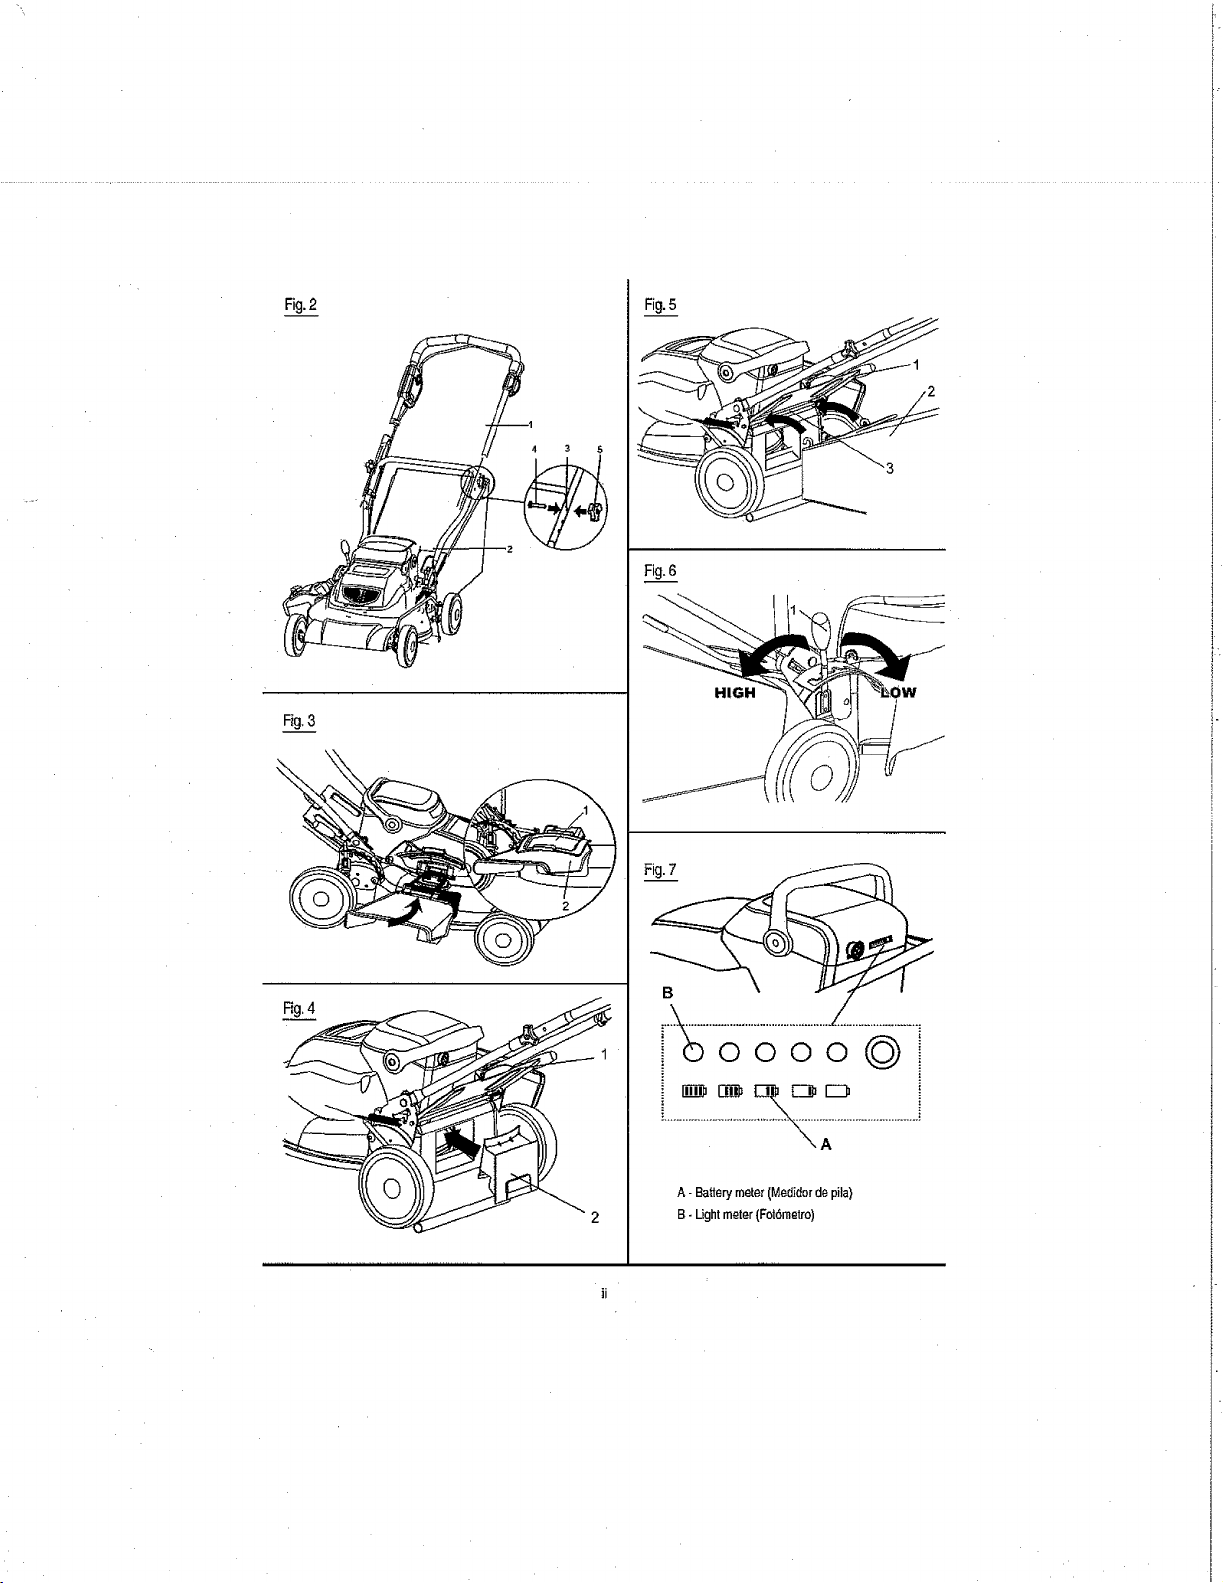
Fig.2
Fig,,3
Fig.5
Fig,6
HIGH
i° __ ° i
A- Baflenj meter(Medidorde pila)
B- Lightmeter(Fol6metro)
ii
.......................................
t
Fig,8
A
A- Charger(Cargador)
Fig.9
C
®
A
A- Powerlever(Palanea
de arranque)
B- Start button(Bot6nde
arranque)
C -Switch key(Llavede
seguddad)
Fig. 10 Fig.11
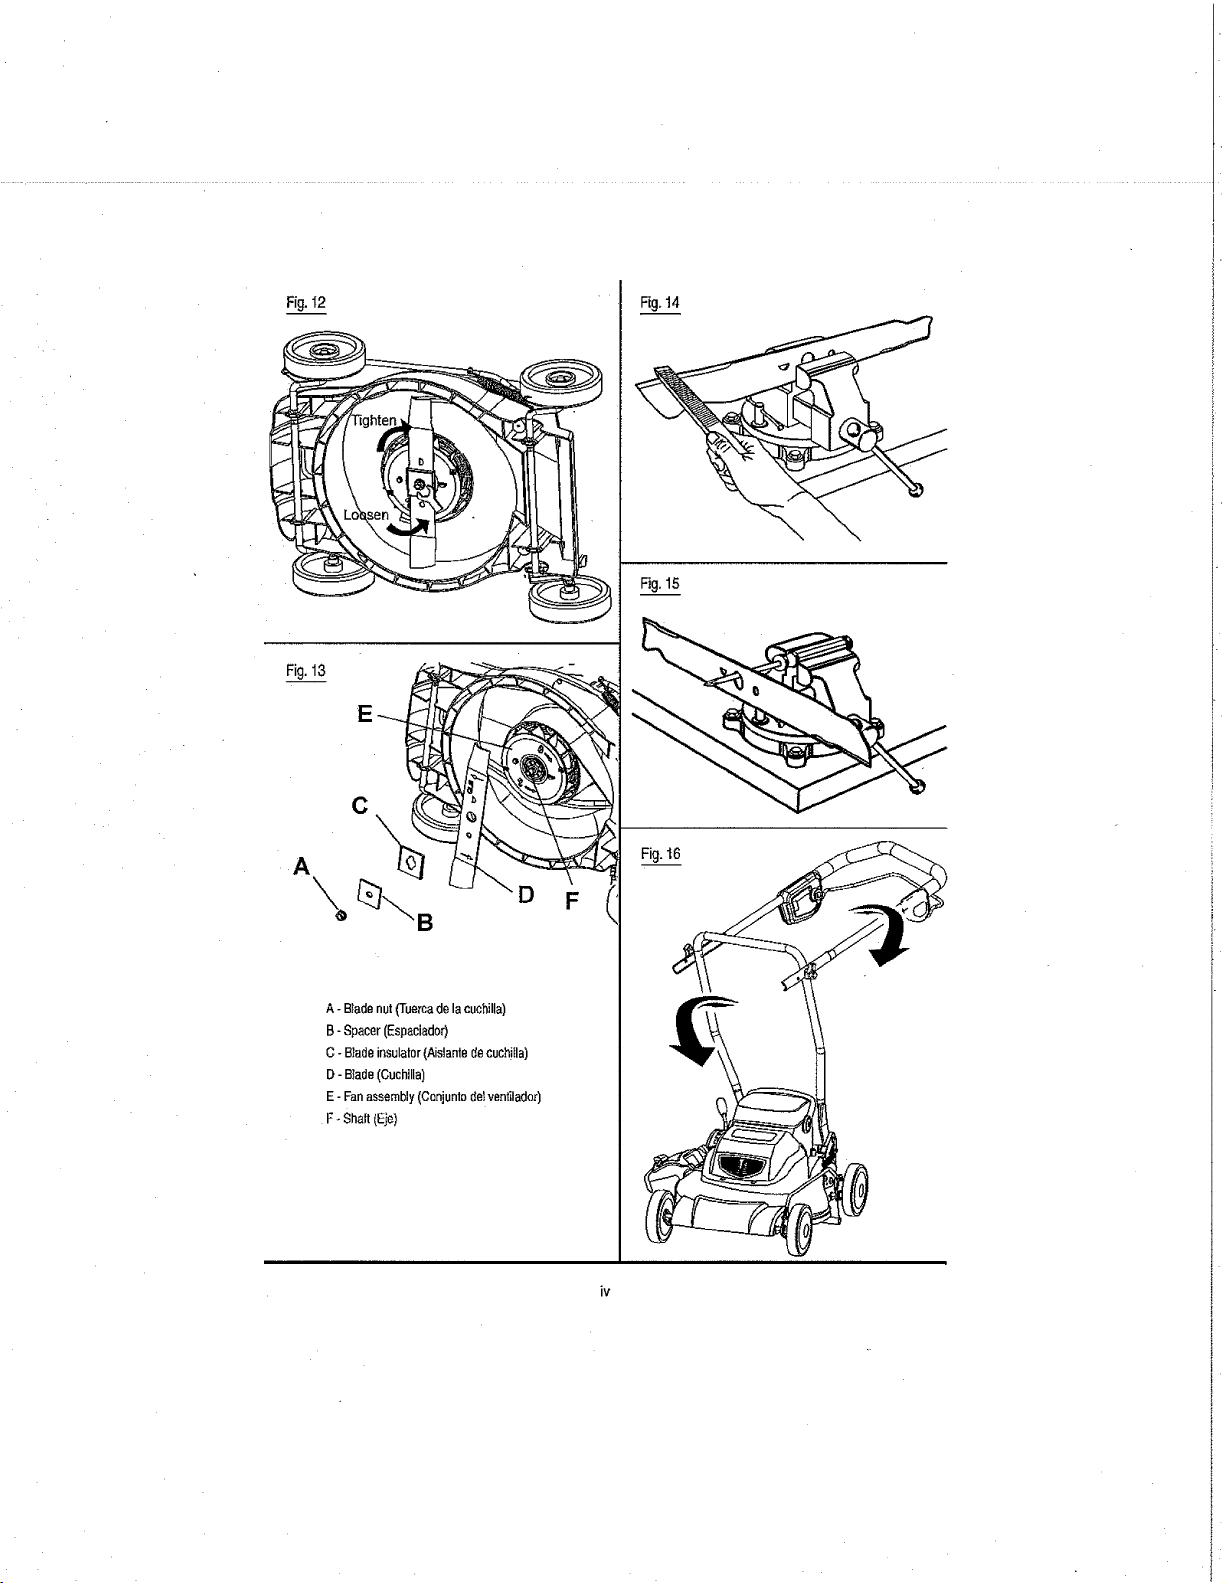
Fig.12
Fig,13
A
\
C
B
A - Bradsnut(Toercade lacuchilla)
B-Spacer(Espaciador)
C - Bladeinsulator(Aislantoctecuch!lla)
D- Btado(Cuchilla)
E- Fanassembly(Conjuntode!ventilador)
F ÷Shaft(Eie)
Fig.14
Fig.15
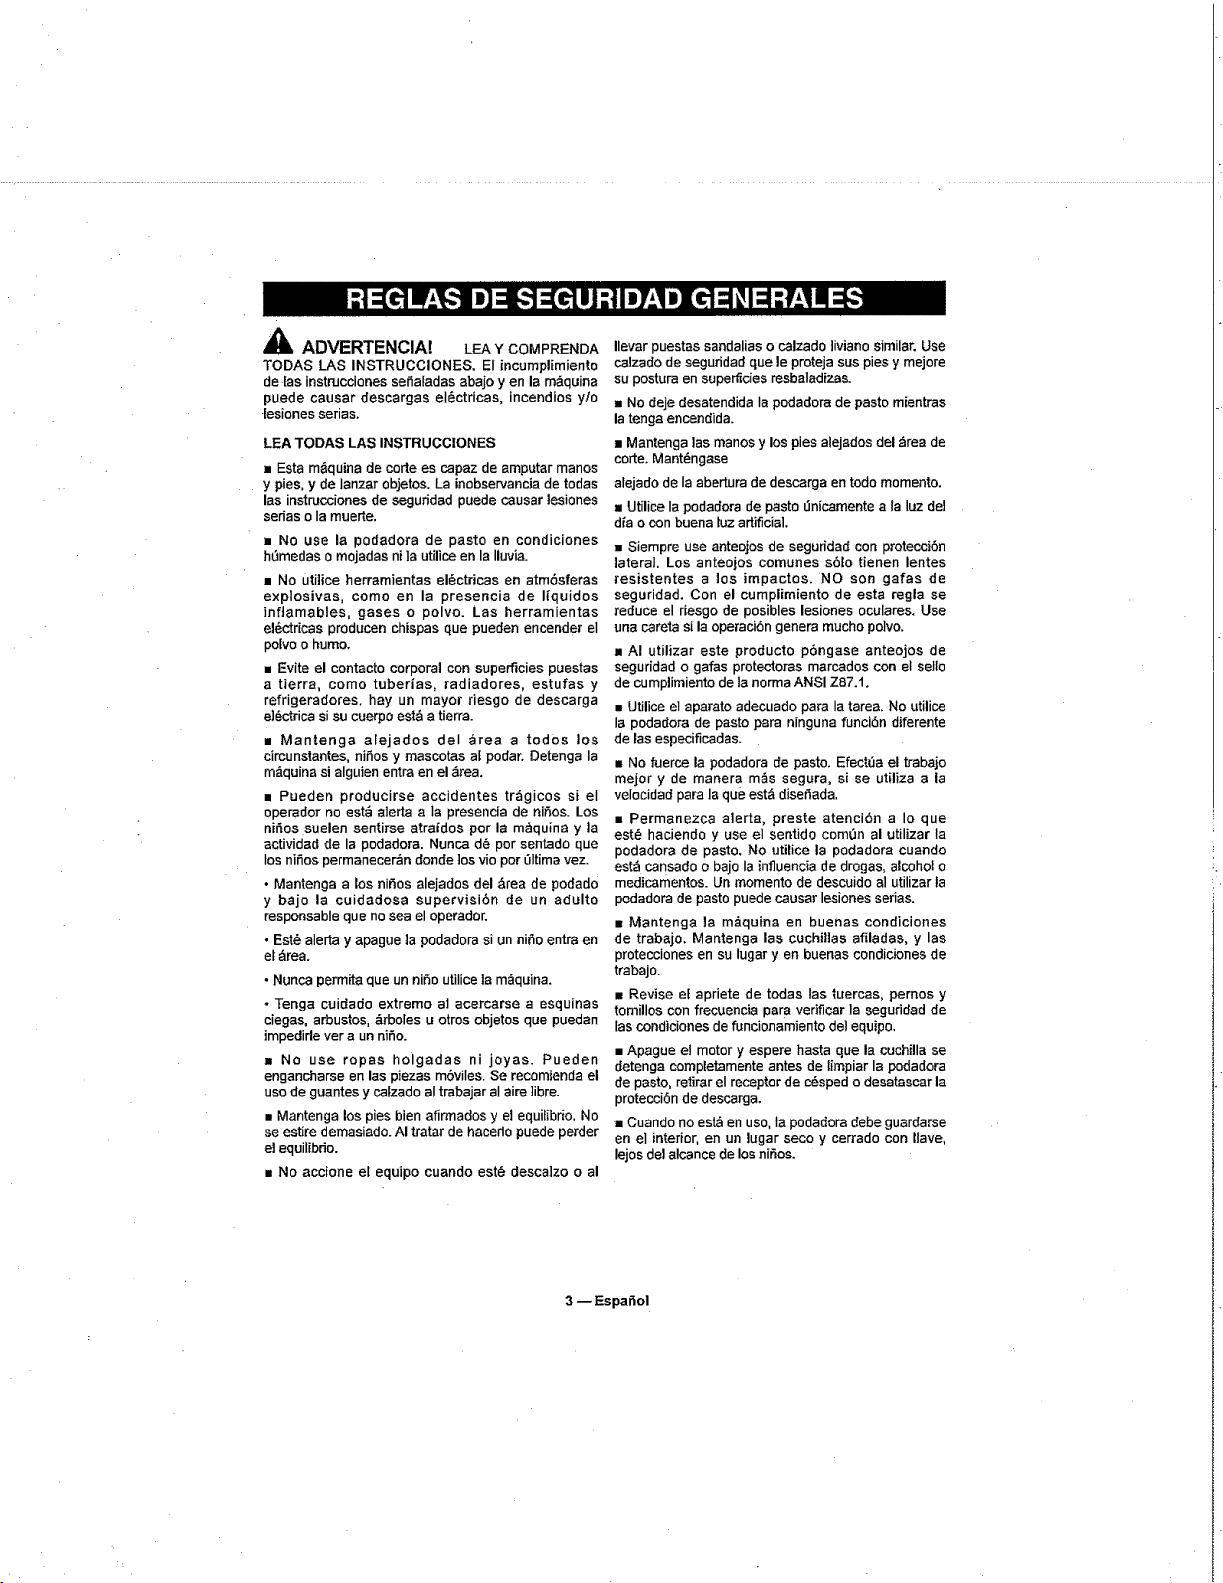
_ ADVERTENCIA! LEAY COMPRENDA
TODAS LAS INSTRUCClONES. El incumplimiento
de las instrucciones seSafadas abajo yen la m&quina
puede causer descargas eI_ctricas, incendios y/o
lesiones serias.
LEA TODAS LAS INSTRUCCIONES
= Esta m&quina de cortees capaz de amputar manos
y pies, y de lanzar objetos. La inobservancJa de todas
lea instrucciones de seguridad pueds causer lesiones
serias o Ia muerte.
a NO use la podadora de pasto en condiciones
h_medas 0 mojadas ni ]a utilice en la Iluvia.
• No uti]ice herramientas el_ctricas en atm6sferas
explosives, como en la presencia de Hquidos
inflamables, gases o polvo. Las herramientas
el_ctricas producen chispas qua pueden encender el
polvo o humo.
• Evite el contacto corporal con superficies puestas
a tierra, como tuberias, radiadores, estufas y
refrigeradores, hay un mayor riesgo de descarga
e]_ctrica si su cuerpo estb a tierra.
• Mantenga alejados deI area a todos los
circunstantes, niSos y mascotas al podar. Detenga la
m&quina si alguien entre en el &tea.
• Pueden producirse accidentes tr_gicos si el
operador no est_ alarta a Ia presencia de niSos. Los
niSos suelen sentirse atraidos por la maquina y ta
actividad de la podadora. Nunca db por sentado qua
los niSos permanecer_n donde ]os vio pot _Itima vez.
• Mantenga a los niSos alejados del _,rea de podad0
y bajo la cuidadosa supervisi6n de un adulto
responsable qua no sea el operador.
• Est_ alerta y apague ta podadora si un niSo antra en
et __rea.
• Nunca perm_a qua un niSo utilice la m_quina.
o Tonga cuidado extremo al acercarse a esquinas
ciegas, arbustos, &rboles u otros objetos qua puedan
impedide ver a un niSo.
• No use ropas hoigadas ni joyas. Pueden
engancharse en Ins piezas m6viles. Se recom]enda el
uso de guantes y catzado aI trabajar aI aire ]ibre.
• Mantenga los pies bien afirmados y el equilibrio. No
se estire demasiado. AI tratar de hacerlo puede perder
el equilibrio.
• No accione el equipo cuando est6 desca]zo o al
Ilevar puestas sandalias o calzado ]iviano similar. Use
calzado de seguridad que le proteja sus pies y majors
su posture en superficies resbaladizas.
,. No deje desatendida Ia podadora de pasto mientras
la tonga encendida.
• Mantenga las manos y los pies alejados del _rea de
corte. Mantengase
alejado de Ia abertura de descarga en todo momento.
• Utilice la podadora de pasta tlnicamente ala luz del
dfa o con buena luz artificial.
• Siempre use anteojos de seguridad con protecci6n
lateral, Los anteojos comunes s61o tienen lentes
resistentes a los impastos. NO son galas de
seguridad. Con el cumplimiento de esta regla se
reduce el riesgo de posibles lesiones oculares. Use
una careta si la operacibn genera mucho poivo.
• AI utilizar este producto p6ngase anteojos de
seguridad o gafas protectoras marcados con el sello
de cumplimiento de la norton ANSI Z87.1.
• Utilice el aparato adecuado pare latarea. No utilice
la podadora de pasto pare ninguna funci6n diferente
de Ins especificadas,
• No fuerce la podadora de pasto, Efect_3ael trabajo
major y de manera m&s segura, s[ se utilize ala
velocidad pare la qua est& diseSada.
• Permanezca alerta> preste atenci6n a Io que
est6 haciendo y use el sentido com0n al utilizar la
podadora de pasto, No utilice la podadora cuando
est_ cansado o bajo la influencia de drogas, alcohol o
medicamentos. Un momento de descuido al utilizar la
podadora de pasto puede causar lesiones serias.
• Mantenga la m_.quina en buenas condiciones
de trabajo. Mantenga Ins cuchil]as afiladas, y las
protecciones en su lugar yen buenas condiciones de
trabajo.
• Revise el apriete de todas las tuercas, pernos y
tomillos con frecuencia pare verificar la seguddad de
fas condiciones de funcionamiento del equipo,
• Apague el motor y espere hasta qua la cochilla se
detenga completamente antes de limpiar la podadora
de pasto, retirar el receptor de c_sperl o desatascar la
protecci6n de descarga.
• Cuando no est_ en uso, Ia podadora debe guardarse
en e] interior, en un lugar seco y cen'ado con Have,
lejos del alcance de los ni_os.
3 _ Espa_ol
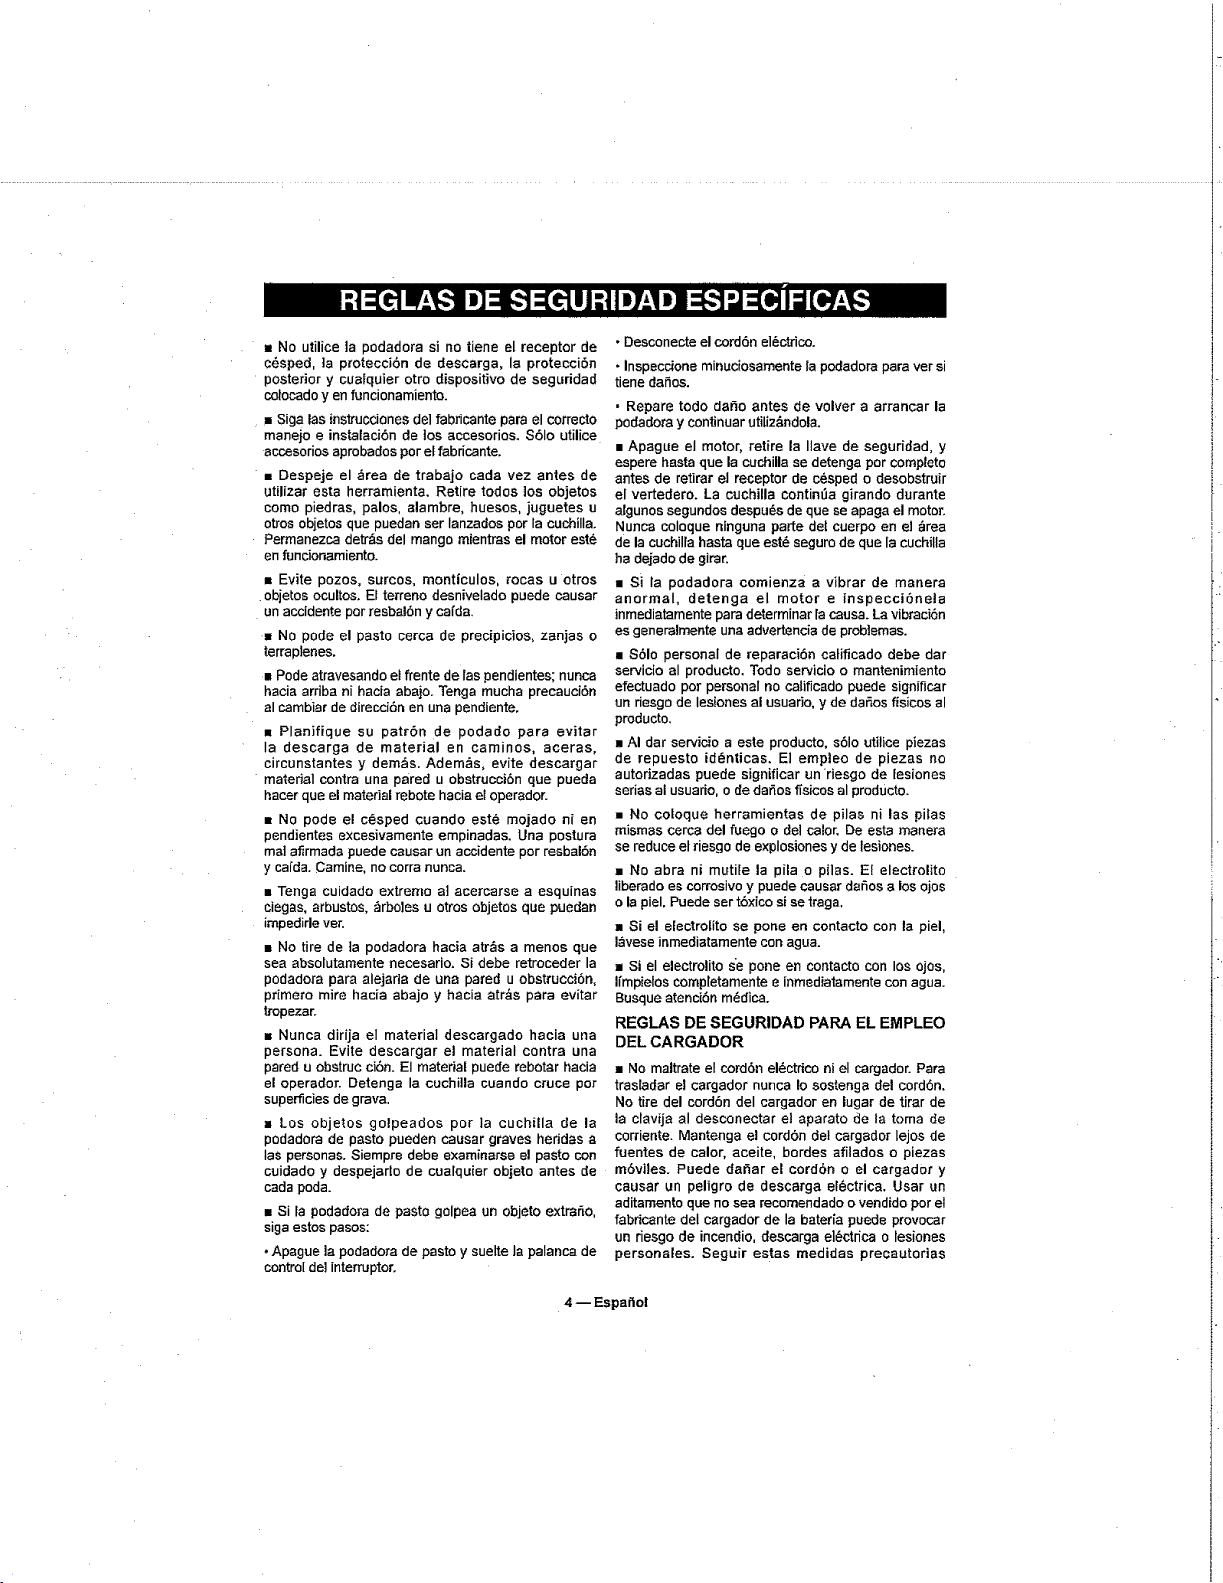
m No utilice ]a podadora si no tiene el receptor de
c_sped, ]a protecciOn de descarga, la protecciOn
posterior y cualquier etro dispositivo de seguridad
colocado yen funcionamiente.
• Siga las instrucciones de] fabricante pare el correcto
manejo e instalacibn de los accesorios. $6Io utilice
accesorios aprobados per el fabdcante.
• Despeje el _rea de trabaje cada vez antes de
utilizar esta herramienta. Retire redes ]as objetos
come piedras, palos, alambre, huesos, juguetes u
otros objetos que puedan ser fanzados per la cuchilIa.
Permanezca detr&s del mango mientras el motor est_
en funcienamiento.
-, Evite pozos, surcos, monticulos, rocas u otros
objetos ocultos. El terrene desnivelado puede causar
un accidente per resbalOn y cafda.
= NO pode el paste cerca de precipicios, zanies o
terraplenes.
m Pode atravesando el frente de las pendientes; nunca
hacia arfiba ni hacia abajOr Tenga mucha precauciOn
al cambiar de direcciOn en una pendiente.
m Planifique su patron de podado para evitar
Ia descarga de material en caminos, aceras,
circunstantes y demos. Adem&s, evite descargar
matedaI contra una pared u obstrucciOn que pueda
hacer que el material rebate hacia el operedor.
• No pode el c_sped cuando est_ mejado ni en
pendJentes excesivamente empinadas. Una postura
ma] afirmada puede causer un accidente per resbalOn
y cafda. Camine, no corra nunca.
• Tenga cuidado extreme a] acercarse a esquinas
ciegas, arbustos, _rbo]es u otros objetas qua puedan
impedide vet.
, No tire de ta podadora hacia atr_s a manes qua
sea absolutamente necesario. Si debe retroceder la
podadora pare alejarla de una pared u obstrucciOn,
primere mire hacia abajo y hacia atr&s pare evitar
lropezar.
m Nunca dirija el material descargado hacia una
persona. Evite descargar el material centre una
pared u obstruc ciOn. El material puede rebater hacia
el operador. Derange la cuchi]la cuando cruce per
superficies de grave.
• Los objetos golpeados per Ia cuchilla de la
podadora de paste pueden causar graves heridas a
Ias personaS. Siernpre debe examinarse el paste con
cuidado y despejarlo de cualquier obieto antes de
cada poda.
• Si la podadora de paste golpea un objeto extrafio,
siga estos pasos:
•Apague la podadora de paste y suelte la palanca de
control del interrupter.
• Desconecte el cordon electrico.
• inspeccione minuc{osamente la podadora para ver si
tiene daOos.
• Repare todo daOo antes de velvet a arrancar la
podadota y continuer utiliz&ndola.
• Apague el motor, retire la Ilave de seguridad, y
espere basra que la cuchilla se detenga per complete
antes de retirar el receptor de c_sped o desobstruir
el vertedero. La cuchilla continua girande durante
algunos segundos despu_s de que seapaga el motor.
Nunca coloque ninguna parte det cuerpo en e] _rea
de la cuchilla haste que esta seguro de que la cuchilla
ha dejado de girar.
• Si la pedadora comienza a vibrar de manera
anormaI, detenga el motor e inspecciOnela
inmediatamente pare determiner ;a causa. La vibraciOn
es generalmente una advertencia de prob]emas.
• S01o personal de reparaci0n catificade debe dar
servicio al producto. Todo servicie o mantenimiento
efectuado per personal no calificado puede significar
un desgo de lesiones al usuado, y de dar_os fisicos al
producto.
• AIdar servicio a este producto, s01o utilice piezas
de repuesto id@nticas. El emp)eo de piezas no
auterizadas puede significar un fiesgo de [esiones
series al usuario, o de dar_os fisicos al producto.
• No coloque herramientas de pilas ni las pilas
mismas cerca del fuego e de] calor. De esta manera
se reduce et riesgo de explosiones y de lesienes.
• No abra ni mutile la pile o piles. El electrolito
liberado es corrosive y puede causar daOos a los ojos
o la piel. Puede ser tbxico si se traga.
• Si el electrolito se pone en contacto con la piel,
I_vese inmediatamente con ague.
• Si el electrolito se pone en contacto con les ojos,
Ifmpielos completamente e inmediatamente con ague.
Busque atenciOn m_dica.
REGLAS DE SEGURIDAD PARA EL EMPLEO
DEL CARGADOR
• Ne maltrate el cord6n el_ctdco ni el cargador. Pare
trasladar el cargador nunca Io sestenga del cordon.
No tire del cordon deI cargador en lugar de tirar de
la clavija al desconectar el aparato de la tome de
corriente. Mantenga el cordon del cargador lejos de
fuentes de calor, aceite, bordes afilades o piezas
m6viles. Puede daOar el cordbn e el cargador y
causer un peligre de descarga elOctrica. Usar un
aditamento qua no sea recomendado o vendido per el
fabdcante deI cargador de la bateria puede provocar
un riesgo de incendio, descarga elOctdca o lesiones
persenales. Seguir estas medidas precautorias
4 -- Espattol
disminuir_ el desgo de descarga e!6ctdca, incendio o
|esiones pesonales.
= No d6 mantenimiento a la podadora con ]a Ilave de
seguddad o el cargador insta_ados.
= No utilice el cargador cuando la temperatura
ambiente sea mayor de 40_C o menor de O°C.
• No utilice el cargador si est& daSado el cord6n o
la clavija, ya que podria causar un corto circuito y
una descarga el_ctdca. Si est_ daSada una pieza,
un t_cnico de servicio autodzado debe reemplazar el
cargador.
• No utilice el cargador si el mismo ha sufddo una
caida, un golpe sdlido o un daSo de cualquier tipo.
Ll_velo a un t_cnico de servicio autodzado para una
revisiSn el_ctrica y as{ determinar si ef cargador est_
en buenas condiciones de funcionamiento.
• Para reducir el riesgo de una descarga el_ctdca,
desconecte el cargador de la toma de cordente antes
de iniciar una tarea de mantenimiento o de limpieza.
• Cuando no est_ en uso el cargador descon_ctelo
deI suministro de voltaje. De esta manera se reduce
el riesgo de una descarga el_ctrica o da_os a[
cargador si artfculos met_licos caen en la abertura.
Esto tambi_n ayuda a evitar daSar eI cargador en el
case de una subida de voltaje.
• Riesgo de descarga el_ctrica. No toque ninguna
parte sin aislar del conector de salida, ni ninguna
terminal de las pilas en tales condiciones.
•, No utilice el cargador a ta intemperie ni Io exponga
a condiciones h0medas o mojadas. La introducci6n
de agua en el cargador aumenta e] riesgo de una
descarga el_ctrica.
• Aseg_rese de que el cordbn el_ctdco est_ ubicado
de tal manera que nadie Io pise o se tropiece con
61, no toque bordes afilados o piezas en movimiento
ni quede sujeto a daSos ni tensiones. De esta
manera se reduce el riesgo de ca_das accidentaies
que pudieran causar Iesiones personates y daSos
al cord6n, Io cua] podr[a ocasionar una descarga
el_ctdca.
• Mantenga el cordSn y el cargador alejados dot calor
para evitar daSar el alojamiento o las partes internas
de la unidad.
= No permita q ue gasolina, aceites, productos a
base de petr61eo, etc., lleguen a tocar las piezas de
pI,_stico. Dichos productos contienen compuestos
quimicos que pueden daSar, debilitar o destruir el
pl_stieo.
• No debe emplearse un cordbn de extensiSn a
menos que sea absolutamente necesario. El empleo
de un cord6n de e×tensiSn inadecuado puede
significar un riesgo de {ncendio o descarga el_ctdca.
Si es necesario utilizar un cord6n de extensi6n,
aseg_rese:
a. De que las patiIlas de la clavija del cord6n de
extensiSn vengan en el mismo n0mero, tama5o y
forma que las de la clavija del cargador.
b. Que el cordSn de e×tensi6n est_ cableado
correctamente yen buenas condiciones e[@ctricas, y
c. Que el tamaSo del alambre sea del tamafio
suficiente para el amperaje de CA nominal del
cargador come se especifica a continuaci6n:
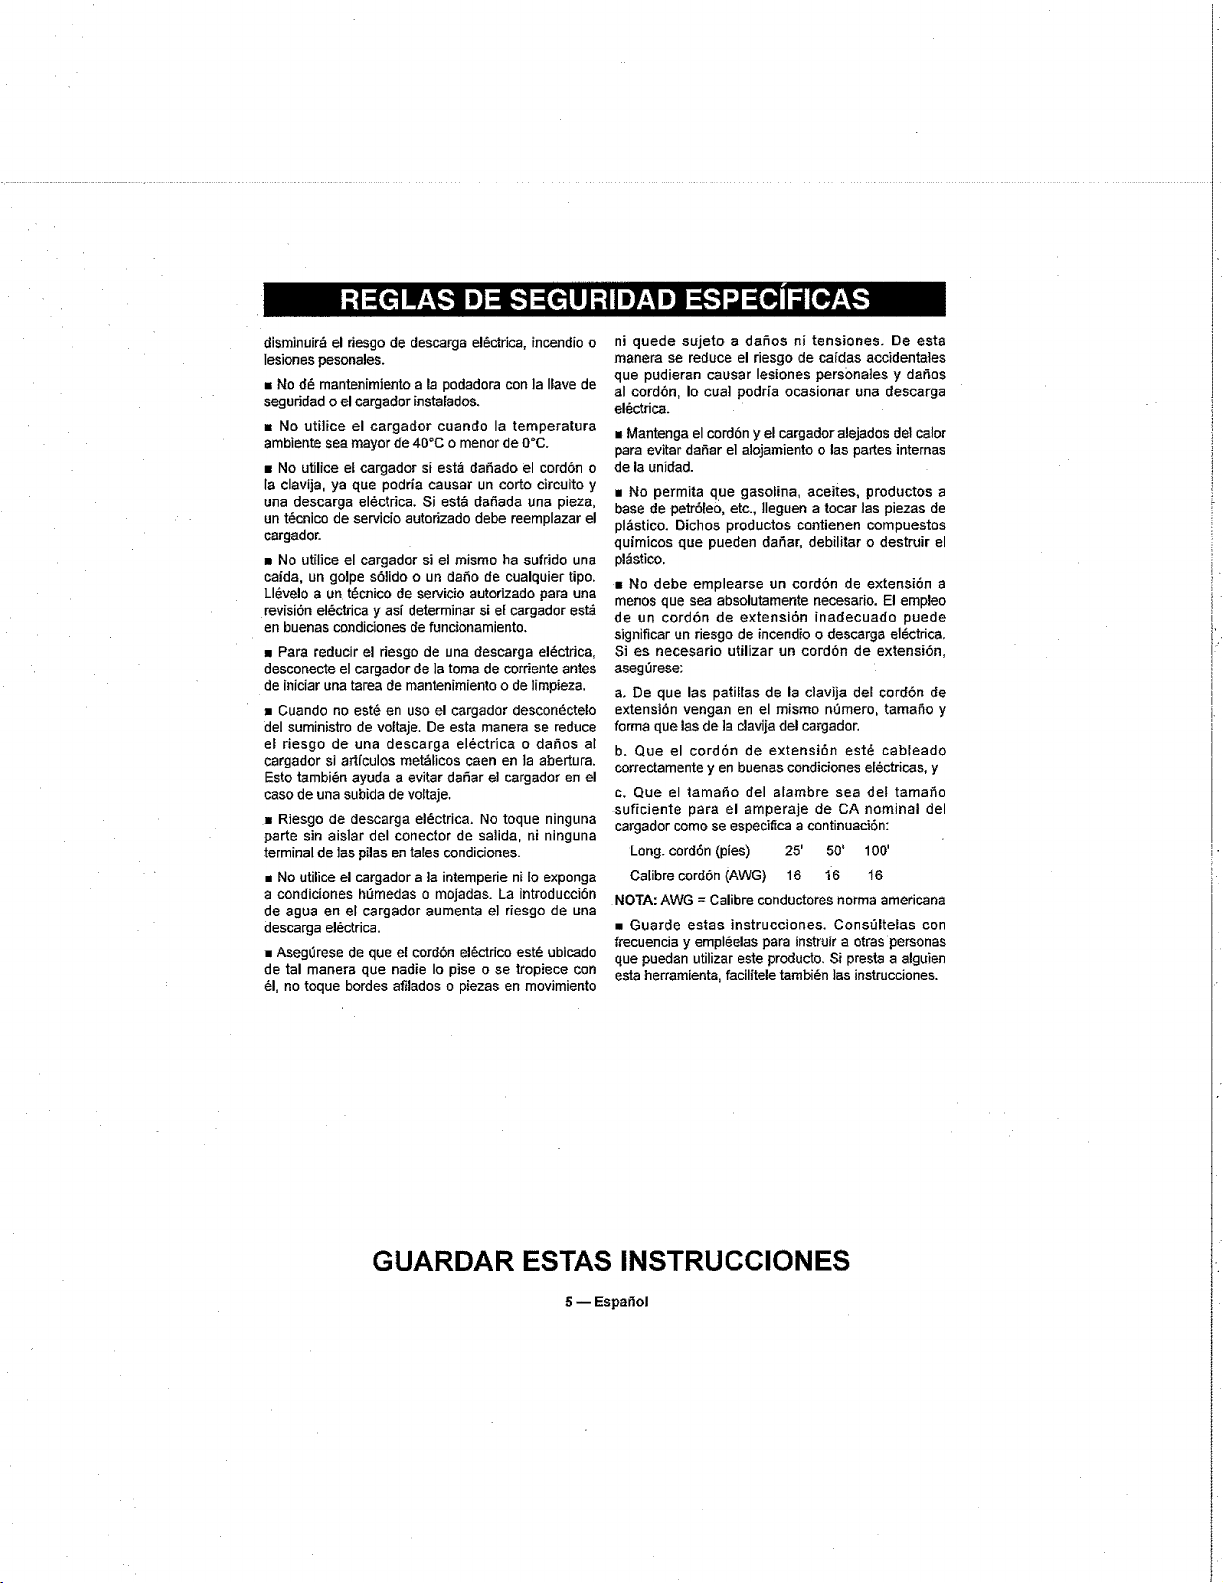
Long. cord6n (pies) 25' 50' 100'
Calibre cord6n (AWG) 16 t6 16
NOTA: AWG = Calibre conductores norma americana
• Guarde estas instrucciones. Const_ltelas con
frecuencia y empI_elas para instruir aotras personas
que puedan utilizar este producto. Si presta a alguien
esta herramienta, facilitele tambi_n las instrucciones.
GUARDAR ESTAS INSTRUCCIONES
5--Espaffol
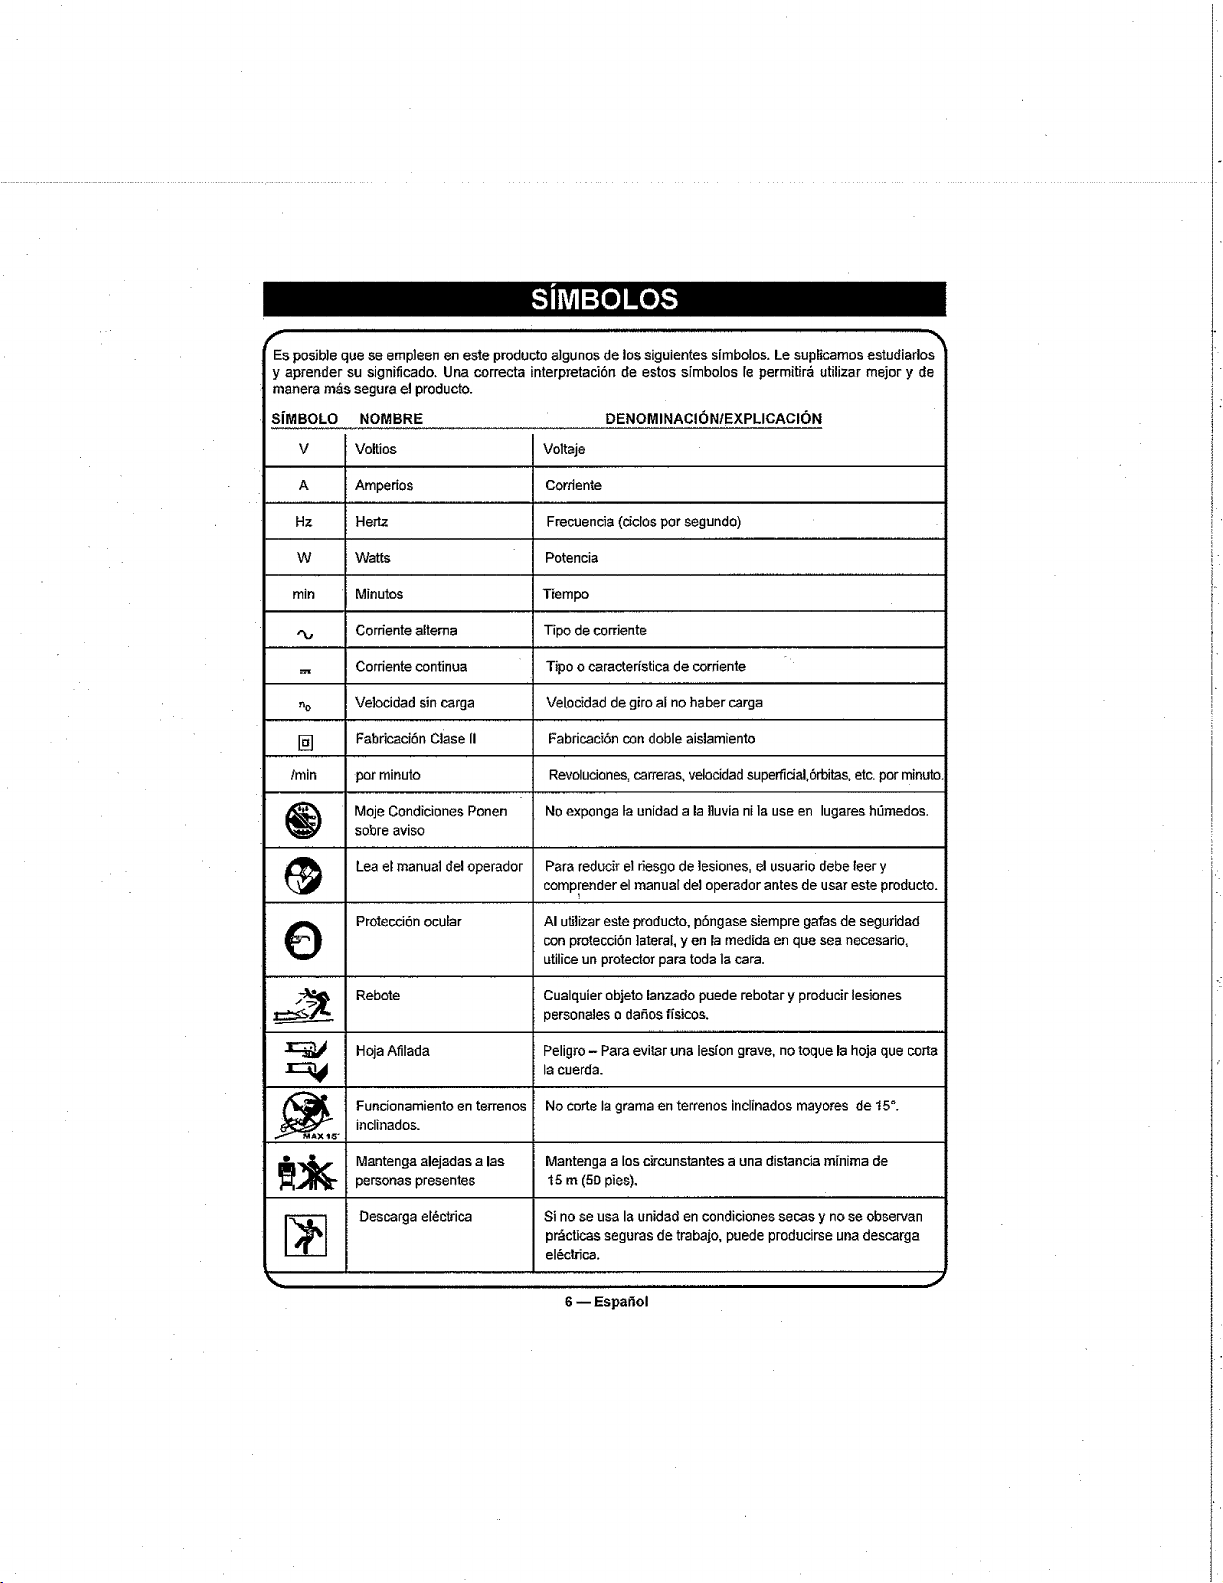
delos siguientes simbolos. Le supEicamos estudiarlosEs posib]e que se empleen en este producto a}gunos
y aprender su significado. Una correcta interpretaci6n de estos s[mbolos le permitir_ utilizar mejor y de
manera m&s segura el producto.
S{MBOLO NOMBRE DENOMINAC!(_ NIEXPLICACI(_ N
Voltios Voltaje
A Ampedos Corriente
Hz Hertz Frecuencia (c[clos por segundo)
W Watts Potencia
rain Minutos Tiempo
"v Corriente altema Tipo de corriente
.,, Corriente continua Tipo o caracter{stica de corriente
no Velocidad sin carga Ve|ocidad de giro al no haber carga
[] Fabdcaci6n C]ase Ii Fabricaci6n con doble aislamiento
/rain pot minuto Revoluciones, carreras, velocidad supenicial,6rbitas, etc. por minuto
Moje Condiciones Ponen No exponga ta unidad a la ]]uvia ni la use en lugares h_medos.
sobre aviso
Lea el manual del operador Para reducir el riesgo de lesiones, el usuario debe leer y
comp[ender el manual del operador antes de usar este producto,
O Protecci6n ocular AI uBizar este producto, p6ngase siempre galas de seguridad
con protecciOn lateral, yen la medida en que sea necesado,
utilice un protector para toda la cara.
Z_ Rebote Cualquier objeto lanzado puede rebotar y producir lesiones
personales o dar3os fisicos,
-_ Hoja Afilada Peligro - Para evi_r una Ies{on grave, no toque la hoja que co_a
la cuerda.
_,_-x_s Funcionamiento en terrenos No corte Ia grama en terrenos inclinados mayores de 15_.
. inclinados.
i_1_#. Mantenga alejadas alas Mantenga a los circunstantes a una distancia mTnima c]e
personas presentes t 5 m (50 pies),
Descarga el_ctrica Si no se usa la unidad en condiciones secas y no se observan
p_cticas seguras de trabajo, puede producirse una descarga
eI_ctrica,
6 m Espanol

f_Las siguientes palabras de seff,alizaci6n y sus s]gnificados tienen el objeto de explicar los niveles de riesgo
retacionados con este producto.
SJMBOLO SENAL SIGNIFICADO
PEUGRO
Indica una situaciSn peligrosa inminente, la cual, si no se evita, causar_
la muerte o lesiones serias.
ADVERTENCIA Indica una situaci0n peligrosa posible, la cuaI, si no se evita, podr_acausar la muerte o lesiones serias.
PRECAUCION Indica una situaci6n potencialmente peligrosa la cual, si no se evita, puede
causar lesiones laves o moderadas.
PRECAUCII_N (Sin el s[mbolo de alerta de seguridad) Indica una situaci6n que puede
producir dafios materia[es.
ESPECIFICACIONES DEL PRODUCTO
Bateria ................................................................................................................................... 24 V, s01ocorr. cont.
Velocidad en vacio .................................................................................................................. 3,500 rlmin. (RPM)
Trayectoda de corte .................................................................................................................................. 20 pulg.
Ajustes de altura ......................................................................... 38,1 mm a 95,25 mm (1-1t2 pulg. a 3-3/4 putg.)
Peso .............................................................................................................................................. 50 Ibs (22.7 kg)
FAMtLIAR{CESE CON SU PODADORA DE PASTO
Vea /a figura 1.
Para usar este producto con la debida seguridad sa
debe comprender la inforrnaci6n indicada en el producto
rnismo y en este manual, y se debe comprender
tambi_n el trabajo qua intenta realizar. Antes de usar
este producto, familiar{case con todas las caracter{sticas
de funcionamiento y normas de seguridad del mismo.
MEDIDOR DE PILA
El medidor de pila mide la cantidad de carga que
queda en la pila.
RECEPTOR DE CESPED
El receptor de c6sped impide que los recortes de
c_sped se dispersen por el pasto mientras Io poda.
PALANCA DE AJUSTE DE ALTURA
La palanca de ajuste de altura brinda ajustes de la
altura de corte.
CON JUNTO DE CONTROL DEL MOTOR/
CUCHILLA
El control del motodcuchilta se ubica en el mango
superior de la podadora y sirve para activar y
desactivar el motor y la cuchil]a.
TAPI_N PARA TRITURACI_)N
Su podadora est_ equipada con un tap6n para
tdturaci6n qua co_a y recorta et c_sped para obtener
recortes robs finos.
LLAVE DE SEGURIDAD
La Have de seguridad debe introducirse antes de
arrancar la podadora.
DEFLECTOR DE DESCARGA LATERAL
Use el deflector de descarga lateral en su podadora
cuando et cesped sea demasiado alto como para
triturarlo o cuando se prefiera una descarga lateral.
Los recortes de c6sped producidos cuando se usa el
deflector de descarga lateral son notoriamente m_s
grandes qua los producidos cuando se usa el tapOn
para trituracibn.
7 _ Espa_ot
DESEMPAQUETADO
Este producto requiere armarse.
• Extraiga cuidadosamente de la caja ta herramienta
y los accesorios. Aseg_rese de que est_n presentes
todos los artfculos enumerados en la lista de
empaquetado.
m Inspeccione cuidadosamente la herramienta pare
asegurarse de que no haya sufrido ninguna rotura o
da_o durante el transporte.
i No deseche el matedal de empaquetado sin haber
Jnspeccionado cuidadosamente [a herramienta y
habeda utilizado satisfactoriamente.
• Si hay piezas daSadas 0 faltantes, le suplicamos
Ilamar a11-888-266-7096, donde le brindaremos
asistencia,
LISTA DE EMPAQUETADO
Podadora
Llave de seguddad
Deflector de descarga lateral
Tap6n pare trituraci6n
Receptor de cesped
Cargador
Manual del operador
_IL ADVERTENCIA{ si hay piezas dafiadas
o fa]tantes, no utilice este producto sin haloer
reemplazado todas las piezas. La inobservanc]a de
esta advertencia podria causer los]ones series.
_ILADVERTENClA! NO intente modificar este
producto ni hacer accesodos no recomendados
para el mismo. Cualquier alteraci6n o modificacibn
constituye rnaltrato y puede causer una condici6n
peligrosa, y como consecuencia posib]es los]ones
serias.
_IL ADVERTENClA! No introduzca Ia ]lave de
seguridad sin haber terminado de armarla. De
Io contrario la unidad puede ponerse en marcha
accidentalmente, con el consiguiente riesgo de
lesiones serias.
_k, ADVERTENClA! Pare evitar que ]a
podadora erranque inadvertidamente, no haga ningen
ajuste ni instalaci6n mientras est6 inse_ada la I]ave
de seguridad.
ENSAMBLADO DE LA MANIJA
Yea ta figure 2r
" Retire el material de embaiaje que probab]emente
est& entre ]as manijas superior e inferior pare fines de
env[o.
• Tire hacia arriba y atr_s la manija superior para
levantar la manija hasta la posiciSn de funcionamiento.
Aseg,3rese de que ]a manija inferior este asentada
flrmemente en el soporte de montaje de la manija.
• Alinee los odflcios (3) entre la manija superior (1)
y la inferior (2). Introduzca los pemos (4) y aj_stelos
con las tuercas rnariposas (5) provistas.
• Asegure la manija inferior a] soporte con la peri}la
de la manija (6) en ambos lados.
INSTALAGION DEL DEFLECTOR DE DESGARGA
LATERAL
Vea la figure 3.
• Levante ia puerta de descarga lateral (1).
• At]nee ]as ranuras del deflector (2) con los
pasadores de la parte inferior de la puerta.
• Baje e_deflector haste que los ganchos del piso de
]a podadora est_n asegurados en las aberturas del
deflector.
• Suelte e! deflector y ta puerta.
]NSTALACI(SN DEL TAPC)N PARA TRITURACI_)N
Vea ta figure 4.
NOTA: A! utilizar el tap6n pare trituraci6n, no se
deben instaiar el deflector de descarga lateral ni el
receptor de c_sped (si Io tiene).
• Levante la puerta de descarga posterior (_).
• Tome el tap6n pare trituraci6n (2) por el mango e
inc][nelo a un z_ngulode aproximadamente 15 grados.
• Introduzca el tap6n en ]a abertura de descarga
posterio.r
• Baje [a pueFta de descarga posterior.
INSTALACIC)N DEL RECEPTOR DE CESPED
Vea la figure 5.
NOTA: AI utffizar el receptor de c_sped, no instale
eJ deflector de descarga lateral ni el tap6n pare
trituraci6n.
• Levante la puerta de descarga posterior (1).
• Levante el receptor de c_sped (2) por su mango y
co]Squelo debajo de ]a puerta de descarga posterior
de modo que los ganchos del receptor de c_sped
queden asentados en la barra de la puerta (3).
• Suelte ]a puerta de descarga posterior. Cuando
est_n correctamente instalados, los ganchos del
receptor de cesped saldr&n por las aberturas de la
puerta de descarga posterior.
AJUSTE DE LA ALTURA DE LA CUCHILLA
Yea la figure 6.
Pare enviarlas, [as ruedas de la podadora se ajustan
8--Espa_ol
en una posiciSn de corte bajo. Antes de user la
podadora per pdmera vez, ajuste la pcsici6n de corte
ala altura m_s adecuada para su pasto. E1 paste
promedic debe tenet una longitud de entre 38,1 mm
(t-112 pulg.) y 50,8 mm (2 pulg.) durante [os meses
fries, y entre 50,8 mm (2 pulg.) y 82,5 mm (3-1t4
pulg.) durante los meses calurosos.
Para ajustar la altura de la cuchilla:
= Pare levantar la altura de la cuchilla, tome la
palanca de ajuste de altura y mu_vala hacia la parte
posterior de la podadora.
= Pare bajar la altura de la cuchilla, tome la palanca
de ajuste de altura y mu_vala hacia la parte delantera
de ia podadora.
_1= ADVERTENClA! No permita que su
familarizaci6n con cste tipo de producto Io vuelva
descuidado. Tenga presente que un descuido de un
instante es suficiente pare causer una lesiSn grave.
ADVERTENClA! Cuando utilice este
producto, p6ngase siempre galas de seguridad
o anteojcs protectores con proteccibn lateral. La
inobservancia de esta advertencia puede causer el
lanzamiento de objetos a los cjcs, y per consecucncia
posibles lesiones series.
_1, ADVERTENCIAI No utilice ningOn
aditamento o accesorio no recomendado per el
fabdcante de este producto. El empleo de aditamentos
o accesorios no recomendados puede causer ]csioncs
sedas.
uses
Esta herram!enta puede emplearse para el fin
sefialado abajo:
•Podar el paste
MEDIDOR DE P1LA
Vea /a figure Z
Come [a pila de la pcdadcra se env{a con carga baja,
se debt cargar la pile antes de usada. La pile tiene 5
luces de diode luminiscente que indic.an Ia capacidad
de la pile. Estas luces s6lo se iluminan cuando la
podadora est& en funcionamiento.
Si se iluminan 3 luces VERDES, la pila est_ cargada
y ]ista pare usarse; 2 ]uces verdes equivalen a una
carga de 50-80%, mientras que 1 luz verde equivale
a una carga de 30-50%.
Si se itumina Ia luz AMBAR, se debcr_ cargar Ia
pila pronto. Se recomienda cargar la pile en este
memento. La pile tiene una carga de 5-30% cuando
se ilumina la luz amarilla.
Si la luz ROJA se ilumina cuando Ia podadora
est& en funcionamiento, se debe cargar la pile
]NMEDIATAMENTE antes de usada. La carga de la
piia es menor a 5% cuando se enciende fa luz roja.
NOTA: Cuandc se ilumina la tuz roja, debe detener
la pcdadora y cargar la pila inmediatamente; de 1o
ccntrario, se reducir_ la vide _til de la pile.
COMe CARGAR EL PAQUETE DE P|LAS
Vea la figura 8.
La podadora tiene una pile sellada de almacencmiento
de 24 voltios fibre de mantenimiento.
• Retire la Ilave de seguddad.
• Cargue la pile s6Io con el cargador suministrado.
• Antes de usar la podadora per primera vez, se
requiere un tiempo m[nimo de carga de I5 hcras.
• Aseg_rese de que el suministro de corriente sea
el voitaje normal de use dom_stico, s61o ccrriente
altcrna de t20 voltios, 60 Hz.
• La pila dcbe cargarse en un lugar fri'o y seco.
•Para aumentar la vide L1tilde Ia pila, a]mac6neta
en el interior en un clima controlado. Recargue
complctamente el paquete de plies cada 2 mcs.
• Debido a que la pila no desarro]lar_ una memoda,
no se debe descargar per complete antes de
recargada.
• Pueden neccsitarse de 2 a 3 ciclcs de cargal
descarga iniciales para obtener el tiempo de
funcionamiento/la capacidad m_×ima.
- Cuandc est_ cargada per ccmpleto, la pila puede
guardarse a una temperature de haste -40°F durante
un pericdo de tics semanas, ccmc m&×imo antes
de necesitar cargarse. Recargue comp[etamente el
paquete de pilescarla 2 rues.
• El cargador de pila debe utilizarse en temperatures
entre 23°F y 104°F.
• La pile suministrada est_ sellada, es de libre
mantenimiento y libre de p6rdidas.
PARA CARGAR LA PILA
Vea la figure 8.
NOTA: La bater{a puede cargarse fuera o dentro de
la podadora.
9_Espa_ol
El cargador que se incluye con esta podadora ea un
cargador de dos etapas especia[mente diseSado.
Paso 1: Se encender_ la luz ro]a durante el ciclo de
recarga.
Paso 2: Se enciende Ia ]uz verde Cuando la baterfa
est_ completamente cargada.
1. Retire la cubierta de la toma+del cargador.
2. Enchufe el conector dei cargador a ta toma en Ia
bateda.
3. Introduzca el enchufe de 120 V de1 cargador en el
tomacorriente,
4. La tuz roja debe enoenderse, Io qua indica que
e] cargador est_ funcionando y Ia bateria se est&
cargando. La tuz roja desaparecer_l y se encendera
fa luz verde cuando la bateria est_ completamente
cargada (la carga de una bateria completamente
descargada tleva unas 15 horas aproximadamente),
5. La bateria debe cargarse despues de cada uso
independientemente del nivet de potencia. La bateria
debe siempre almacenarse completamente cargada.
Esta bateria no desarrollar& una memoria de carga.
STARTINGtSTOPPINGTHE MOWER
Vea /afigura 9.
ARRANQUE DE LA PODADORA
1. Retire el pasador de seguridad ('i).
2. Presione el boron de seguddad (2).
3. Tire el interruptor de agarre (3) hacia el manillar
para arrancar la podadora y suelte el bot6n de
seguridad.
DETENCION DE LA PODADORA
t. Suelte el interruptor de agarre.
2. Cambie el pasador de seguridad para almacenaje.
NOTA: Puede haber un sonido agudo y chispeo
mientras el motor eI_ctrico desacelera. Esto es
normal.
SUGERENCIAS PAPA EL PODADO
Vea ta figura 10.
• Asegt%rese de que el pasto no tenga piedras, palos,
alambres ni otros objetos que puedan dariar las
cuchillas o el motor de la podadora de pasto. Dichos
objetos podrian ser lanzados accidentalmente por la
podadora en cualqu!er direcci6n y provocar Iesiones
sedas aI operador y a otras personas.
i Para tener un paste saludable, siempre corte un
tercio 0 menos de Ia Iongitud total del cesped.
= AI cortar c_sped frondoso, reduzca la velocidad
mientras camina para poder obtener un corte m_s
eficaz y una descarga adecuada de los recortes.
mmNo corte el c_sped cuando est_ mojado. Se pegar_
a la parte inferior del piso e impedir& que se trituren
correctamente los recortes de cesped.
• El c6sped nuevo o grUeso puede requerir un corte
m_s bajo.
• Limpie la parte inferior del piso de la podadora
despu{_s de cada uso para eliminar recortes de
cesped, hojas, suciedad y otros desechos acumu]ados.
MANEJO EN PENDIENTES
• Las pendientes son una de las causas pdncipales
de accidentes por resbalones y ca{das que pueden
provocar lesiones graves. El manejo en pendientes
requiere precaucidm extra. Si se siente {nseguro en
una pendiente, no ]a pode. Para su seguddad, no
intente podar pendientes de m&s de 15 grados,
• Pode atravesando las pendientes; no hacia arriba
ni hacia abajo. Tenga mucha precauci6n al cambiar
de direoci6n en una pendiente.
• Tenga cuidado con los pozos, surcos, piedras,
objetos ocultos o monticulos que puedan provocar
que se resbale o tropiece. El c6sped alto puede
ocultar obst&culos. Retire todos los objetos como
piedras, ramas de _rbo]es, etC., que puedan provocar
tropezones o ser ]anzados por ta cuchilla,
m Siempre asegOrese de su postura, Un resbat_n
y caida puede provocar lesiones serias. Si siente
que est_ perdiendo et equilibrio, sueRe el mango de
control del motor/cuchilta inmediatamente.
• No pode el pasto cerca de precipicios, zanjas o
terraplenes; podrfa perder la firmeza de la postura o
el equilibrio.
EMPTYING THE GRASS CATCHER
Yea !a figura 11.
• Levante el receptor de c_sped pot el mango y
lev_,ntelo para retirarlo de la podadora.
• Vacfe los recorles de c_sped.
• Levante la puerta de descarga posterior y vuelva
a instalar el receptor de c6sped como se explic6
antedormente en este manual,
t0 i Espailol
_I_ADVERTENCIA_I dar servicio a la unidad, s61o
utilice piezas de repuesto id_nticas. El empleo de piezas
diferentes puede causar un peligro o danar el producto.
_1= ADVERTENCIA[ Siempre use galas de
seguddad o anteojos protectores con protecci6n lateraI
aI usar herramientas el_ctricas o al soplar el polvo con
aire cornprimido. Si Ia operacibn genera mucho polvo,
tambi_n pOngase una mascarilla contra el polvo.
MANTENIMIENTO GENERAL
Evite el ernpleo de soIventes al Iimpiar piezas de
pl,_stico. La mayoda de Ios pl_sticos son susceptibles
a diferentes tipos de solventes comerciales y pueden
resultar dar_ados. Utii]ce paSos limpios para eliminar
la sudedad, el polvo, eI aceite, ]a grasa, etc.
_ADVERTENCIA! No permita en ning_n
momento que fluidos para frenos, gasolina, productos
a base de petr6Ieo, aceites penetrantes, etc., lleguen
a tocar las piezas de pl_stico. Las sustancias qL_fmicas
pueden daSar, debilitar o destruir el pl_stico, Io cual a
su vez puede producir lesiones corporales sodas.
Revise pedSdicamente el apriete de redes los pernos
y tuercas para asegurar un manejo seguro de ta
podadora. Elimine e] c_sped y Ias hojas acumuladas
sobre Ia cubierta de] motor o a su alrededor. Limpie
ocasionalmente la podadora con un paso seco. No
utilice agua.
LUBR!CAC}ON
Todos los cojinetes de este producto est&n lubricados
con suficiente cantidad de aceite de alta calidad para
toda la vida _til de la unidad en condiciones normales
de funcionamiento. Per Io tanto, no se necesita
]ubricad6n adicional de los cojinetes.
AI inicio y al final de carla temporada de podado;
• Lubrique los resortes en la puerta de descarga
posterior con aceite de baja viscosidad.
• Lubrique la paIanca de ajuste de altura y las
piezas de ferreteria relacionadas con aceite de baja
viscosidad.
- Retire Ias ruedas y lubrique la superficie del perno
del eje y Ia supe_cie interior de la rueda con aceite
de baja viscosidad.
,. Retire el conjunto de Ia cuchilla y el cube de ta
cuchilla, y lubdque el eje de] motor con aceite de baja
viscosidad o aceite para motor. ConsuIte la secci6n
Reemplazo d e la cuchilla para obtener instrucciones
sobre c6mo retirar la cuchilla.
_ADVERTENCIA! Siempre prot6jase las
manes usando guantes gruesos y/o envolviendo
los bordes de corte de la cuchiila con paSos y otto
material al rea!izar el mantenimiento de la cuchilla.
La inobservancia de esta adverLencia podr{a causar
lesiones serias.
_IbADVERTENCIA!Antes de efectuar Cualquier
tarea de mantenimiento, asegerese de que la
podadora est6 desconectada del suministro de
corriente y que se haya retirado la llave de seguridad.
La inobservancia de esta advertencia podrfa causar
lesiones serias.
REEMPLAZO DE LA CUCHILLA
Vea /as figuras !2 y 13.
NOTA: $61o utilice cuchilJasde repuesto id6nticas.
• Apague el motor y desconecte el suministro de
corriente. Permita que la cuehiHa se detenga per
complete.
• Gire ta podadora sobre su costado.
• !ntroduzca a presi6n un bloque de madera entre la
cuchilla y eI piso de la podadora para evitar que la
cuchilla gire.
i Afloje ]a tuerca de la cuchilla usando una llave
de tuercas o de boca tubuiar de 15 mm (no se
suministra).
• Retire la tuerca de Ia cuchiEla, el espaciador, el
aislante de cuchiga y la cuchilla,
• AsegOrese de que el conjunto del ventiIador este
totalmente empujado contra el eje de] motor.
• Coloque la cuchilla nueva en el eje contra eEconjunto
del ventilador. AsegOrese de que est_ instalada con }os
extremes curves orientados hacia arriba, deride estd
el piso de la podadora, y no hacia abajo, donde est_ e}
suelo.
• Vuelva a colocar el aislante de cuchilla y el
espaciador; luego, enrosque la tuerca de la cuchilla
en eI eje y apri_tela con los dodos.
NOTA: Aseg_rese de volver a colocar todas las
piezas en el erden exacto en que fueron retiradas.
• Apriete la tuerca de la cuchilla usando una Ilave
dinamom_trica (no suministrada) para asegurar que
el perno est_ apretado correctamente. La fuerza de
torsi6n recomendada para la tuerca de la cuchilla es
de 220-310 Ib-pulg.
AFILADO DE LA CUCHILLA
Vea la figura 14.
Para lograr un desempe5o de podado 6ptimo, la
cuchilla de la podadora debe mantenerse afilada. Una
11--Espafiol
cuchilla desafilada no corts el c6sped uniformemente
y sobrecarga el motor, En circunstancias normales,
afilar la cuchi]la dos veees durante la temporada de
podado suele set sufidente. Sin embargo, si su pasto
tiene suelo arenoso, puede ser necesario afilaria con
m&s frecuencia.
• Siguiendo ]as instrucciones de la secci6n Reemplazo
de ]a cuchilla, retire la cuchiila de la podadora.
NO intente afilar ]a cuchilla cuando est_ unida a la
podadora.
• Usando una lima de diente tino o uns piedra, afile
los hordes de corte a ambos extremos de Is euchi]la,
eliminando igua] cantidad de material de ambos
extremos.
_kADVERTENCIA! A] retiraria, inspeccione la
cuchills con cuidado. Si la cuchilla est_ doblada o
daSada, reempl_cela inmediatamente por una nueva.
No reemplazar una cuchilla doblada o daSada puede
causar un accidente, y como consecuencia posibles
Iesiones sedas.
EQUILIBRIO DE LA CUCH1LLA
Vea la figura 15.
AI afilarla, debe tenerse cuidado de mantener el
equilibrio de la cuchilla. Una cuchilfa desequilibrada
causar_ una vibraci6n excesiva cuando Ia podadora
est6 funcionando. Esta vibraci6n finalmente dariar_ la
podadora, especialmente el motor.
Para revisor el equilibdo de ]a cuchilIa:
• Sujete horizontalmente un destarnillador con una
prensa, como se muestra.
NOTA: Si no hay ninguna prensa, un cfavo recto
impulsado en el costado de un banco de trabajo
tambi_n se puede utifizar.
• Coloque el orificio central de la cuchilla en el fuste
de1destomillador (o c]avo).
• Sila cuchil]a est& equilibrada, permanecer_ en
posiei6n horizontal. Si alg_n extremo de Ia cuchilla
se cae, afile el ]ado m&s pesado hasta que la cuchilIa
est6 equilibrada.
GUARDADO DE LA PODADORA
Vea ta figura 16.
• Retire la Ilave de seguridad y guarde en un lugar
fuera del alcance de niffos.
,, Gire ]a podadora sobre su costado y limpie los
recortes de e6sped que se acumulsron en la porte
inferior del piso de la podadora.
• Limpie la podadora con un paso seco.
• Veritique el apriete de todos los pemos, tuercas,
pedlIas, tomil]os, sujetadores, etc_tera.
• Inspeccione las piezas m6viles para vet si hay
daSos, rupturas y desgaste. Haga que reparen todas
Ias piezas dafiadas o faltantes.
m Guarde la podadora en el interior, en Un lugsr limpio
y seco, Iejos del alcance de los niSos.
• No ]a guarde cerca de materiales corrosivos como
fertilizantes o sal gema.
Para bajar el mango antes de guardar la unidad:
,. Afloje las ped]Ias del mango a tos lados del mango y
pliegue el mango superior hacia abaio.
• Presione hacia adentro a coda lado del mango
inferior y levante los lados del mango inferior por
sobre los bordes de los apoyos de montaje del
mango.
MANTENIMIENTO DE LA PILA
Para un rendimiento 6ptJmo, se recornienda cargar
la podadors coda 2 meses si no se usa. Si la pila
ha estado a]macenada durante mucho tiempo sin
recargar, tendr_ una cargo bsja.
t2--Espa_ol

RR