Loading ...
Loading ...
Loading ...
F,,. 11 @
( C_I OF s+,s. ;_ ........ @,,y s ,; o
_f@©/- ss #s
££ ....
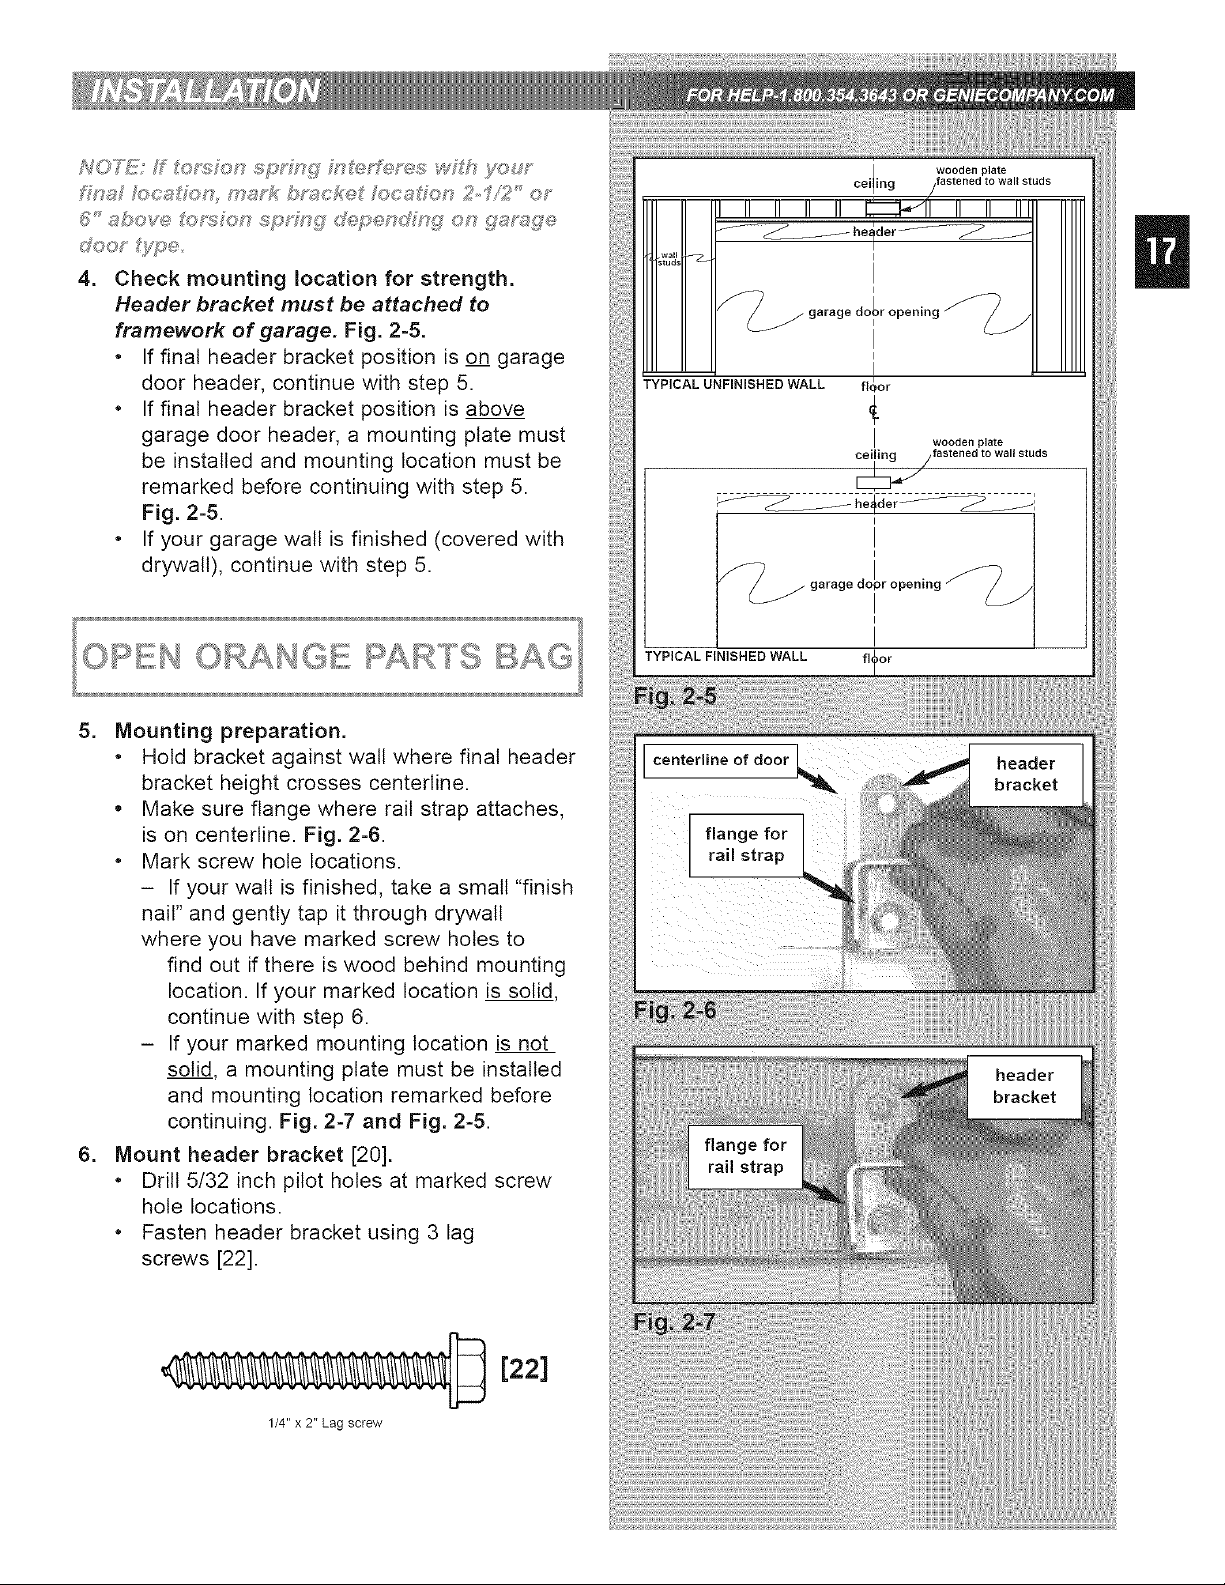
4. Check mounting location for strength.
Header bracket must be attached to
framework of garage. Fig. 2-5.
• If final header bracket position is on garage
door header, continue with step 5.
• If final header bracket position is above
garage door header, a mounting plate must
be installed and mounting location must be
remarked before continuing with step 5.
Fig. 2-5.
• If your garage wall is finished (covered with
drywall), continue with step 5.
TYPICAL FINISHED WALL
5. Mounting preparation.
• Hold bracket against wall where final header
bracket height crosses centerline.
• Make sure flange where rail strap attaches,
is on centerline. Fig. 2-6.
• Mark screw hole locations.
- If your walt is finished, take a small "finish
nail" and gently tap it through drywall
where you have marked screw holes to
find out if there is wood behind mounting
location. If your marked location is solid,
continue with step 6.
- If your marked mounting location is not
solid, a mounting plate must be installed
and mounting location remarked before
continuing. Fig. 2-7 and Fig. 2-5.
6. Mount header bracket [20].
• Drill 5/32 inch pilot holes at marked screw
hole locations.
• Fasten header bracket using 3 lag
screws [22].
1/4" x 2" Lag screw
[22]
flange for
rail strap
Loading ...
Loading ...
Loading ...