Loading ...
Loading ...
Loading ...
TROUBLE SHOOTING CHART
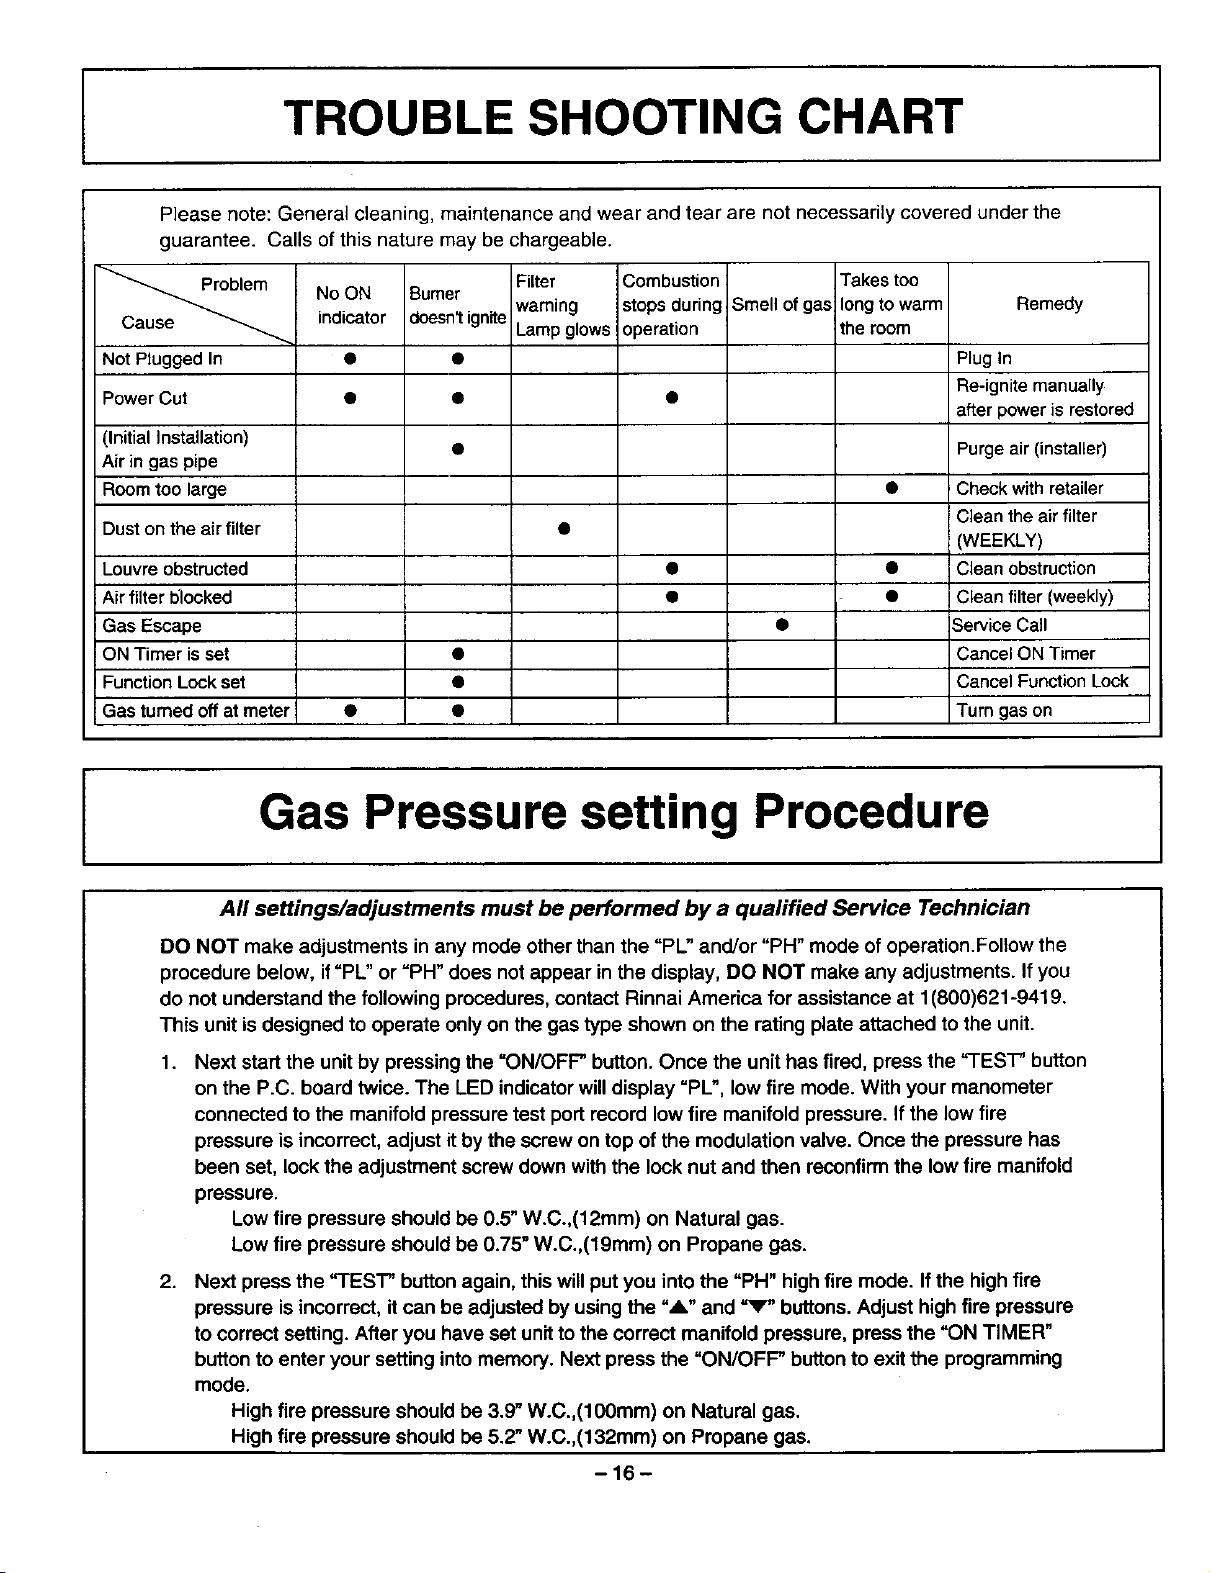
Please note: General cleaning, maintenance and wear and tear are not necessarily covered under the
guarantee. Calls of this nature may be chargeable.
Not Plugged In
No ON
indicator
Bumer
doesn't ignite
e
e
Filter
waming
Lamp glows
Combustion
stops during,
operation
Smell of gas
Takes too
long to warm
the room
Remedy
• Plug In
PowerCut • • Re-ignite manually
after power is restored
(Initial Installation) • Purge air (installer)
Air in gas pipe
Room too large • Checkwith retailer
Cleanthe air filter
Duston the air filter • (WEEKLY)
Louvre obstructed • • Clean obstruction
Air filter tYlocked • • Cleanfilter (weekly)
Gas Escape • ServiceCall
ONTimer is set • CancelON Timer
Function Lock set • CancelFunction Lock
Gas tumed off at meter • • Turn gason
Gas Pressure setting Procedure
All settings/adjustments must be performed by a qualified Service Technician
DO NOT make adjustments in any mode other than the =PL" and/or "PH" mode of operation.Follow the
procedure below, if=PU' or =PH" does not appear in the display, DO NOT make any adjustments. If you
do not understand the following procedures, contact Rinnai America for assistance at 1(800)621-9419.
This unit is designed to operate only on the gas type shown on the rating plate attached to the unit.
1. Next start the unitby pressing the =ON/OFF" button. Once the unit has fired, press the "TEST button
on the P.C. board twice. The LED indicator will display =PL", low fire mode. With your manometer
connected to the manifold pressure test port record low fire manifold pressure. If the low fire
pressure is incorrect, adjust it by the screw on top of the modulation valve. Once the pressure has
been set, lock the adjustment screw down with the lock nut and then reconfirm the low fire manifold
pressure.
Low fire pressure should be 0.5" W.C.,(12mm) on Natural gas.
Low fire pressure should be 0.75" W.C.,(19mm) on Propane gas.
2. Next press the "TEST" button again, this willput you into the "PH" high fire mode. Ifthe high fire
pressure is incorrect, it can be adjusted by using the =A" and =_P' buttons. Adjust high fire pressure
to correct setting. After you have set unitto the correct manifold pressure, press the "ON TIMER"
button to enter your setting into memory. Next press the "ON/OFF' button to exit the programming
mode.
High fire pressure should be 3.9" W.C.,(100mm) on Natural gas.
High fire pressure should be 5.2" W.C.,(132mm) on Propane gas.
-16-
Loading ...
Loading ...
Loading ...