Loading ...
Loading ...
Loading ...
Note
Only use the power connection lead supplied.
u
A longer power connection lead can be ordered from
Customer Service.
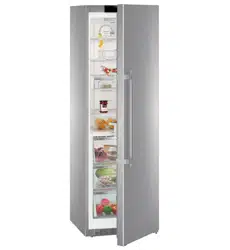
Fig. 24
a b c d G
~ 1800 mm ~ 1400 mm ~ 2100 mm ~ 200 mm Appliance
plugs
Ensure that the following conditions are met:
- The type of current and voltage at the installation site corre-
spond to the information on the model plate (see 1) .
- The socket is earthed according to the regulations and
fused.
- The fuse tripping current is between 10 and 16 A.
- The socket is easily accessible.
- The socket is outside the back of the appliance area in the
specified area
Fig. 24 (a, b, c)
.
u
Check the electrical connection.
u
Insert the appliance plug
Fig. 24 (G)
into the back of the
appliance. Ensure that it clicks into place.
u
Connect the power plug to the power supply.
w
The Liebherr logo appears on the screen.
w
The display switches to the standby symbol.
4.7 Switching on the appliance
Note
If the appliance is in demo mode, DEMO appears on the home-
screen.
u
Disable demo mode (see 7) .
Connect and switch on appliance approx. 2 hours before
loading for the first time.
4.7.1 Switch on appliance
If the standby symbol is displayed over the whole screen:
u
Press the standby symbol.
w
The appliance is switched on. The display switches to the
home screen.
w
The appliance sets itself to the displayed temperature. This
is shown by down arrows.
If the standby symbol is displayed in the fridge compart-
ment and biofresh field:
u
Press the standby symbol.
w
The appliance is switched on.
w
The appliance sets itself to the displayed temperature. This
is shown by down arrows.
If the screen is black:
u
Touch the screen.
w
The standby symbol appears on the whole screen.
u
Press the standby symbol.
w
The appliance is switched on. The display switches to the
home screen.
w
The appliance sets itself to the displayed temperature. This
is shown by down arrows.
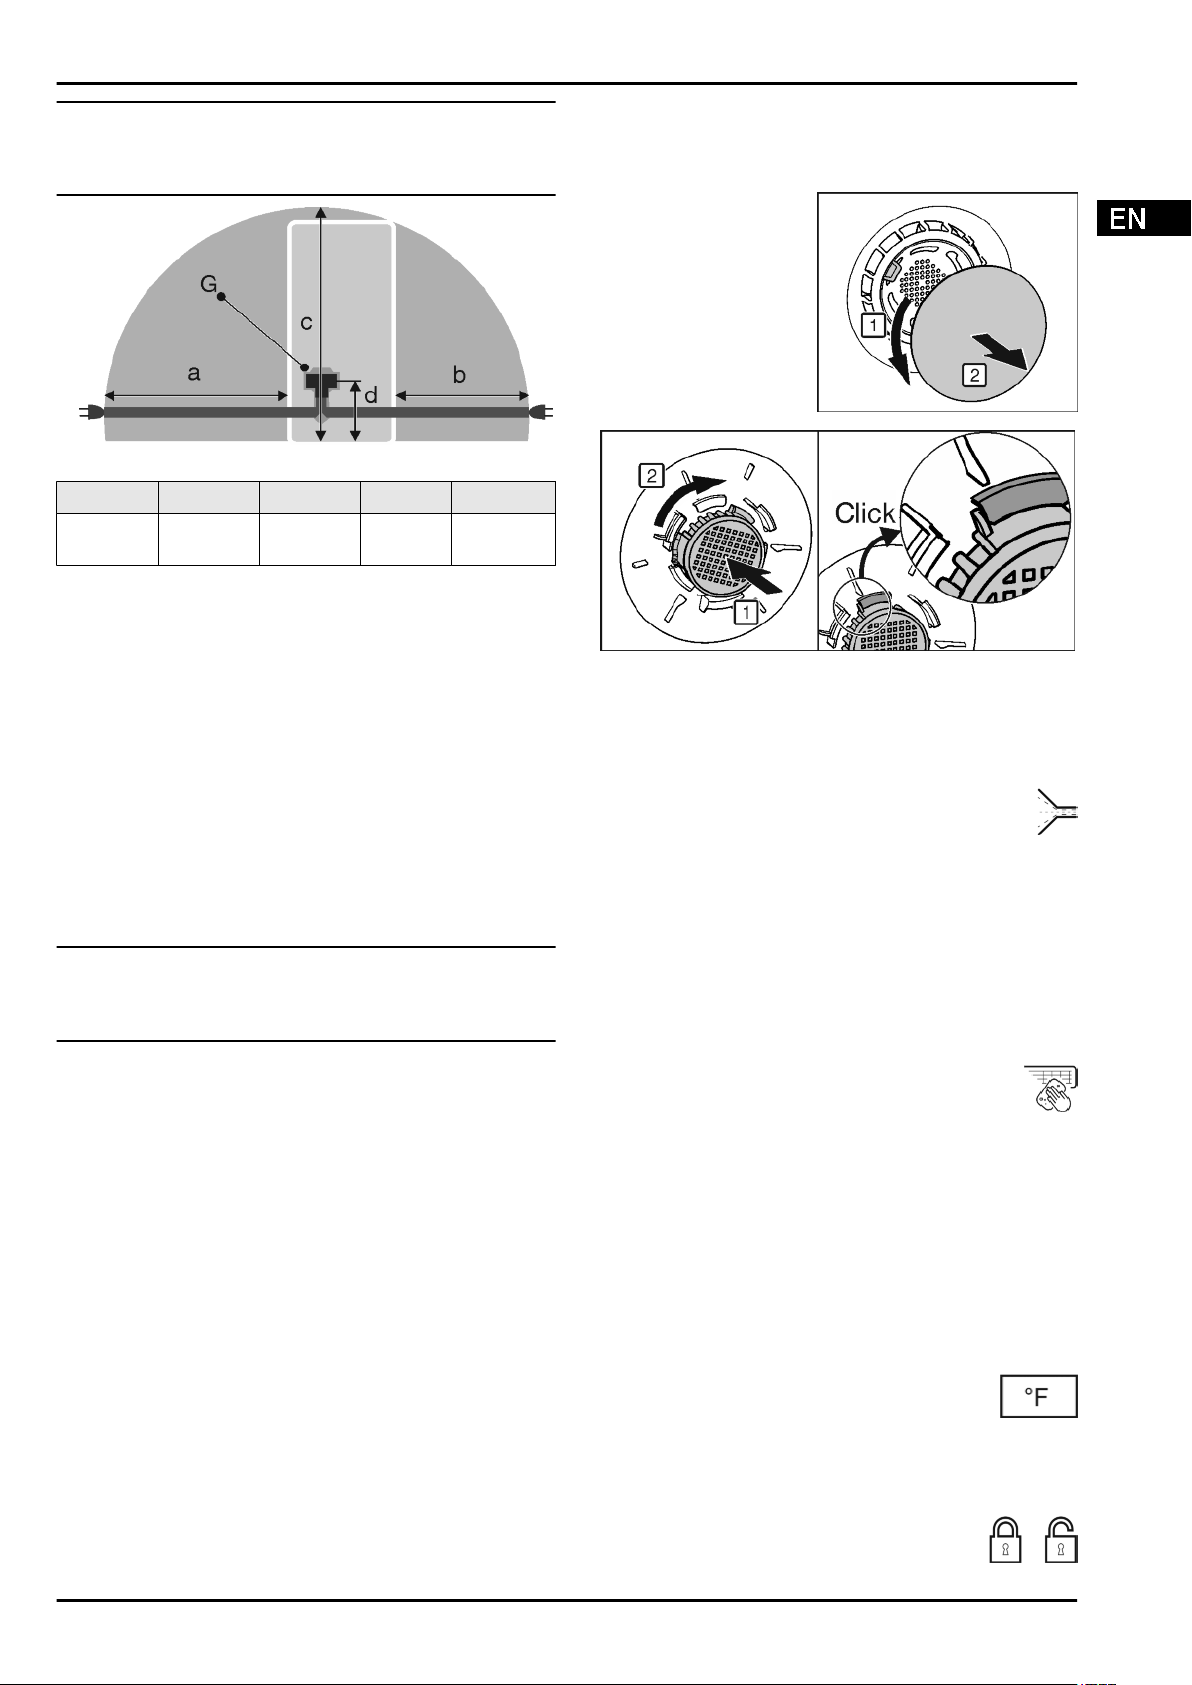
4.8 Inserting the FreshAir filter.
The supplied FreshAir filter can be used for optimum air quality.
The intake is located at the top of the appliance, (see 1)
u
Remove cover.
Fig. 25
u
FreshAir-Insert the filter in the cover and turn it clockwise.
u
Ensure that the filter clicks into place.
u
Replace the cover again.
Setting the timer
u
Press menu.
u
Press the navigation arrows until the FreshAir filter is
displayed.
u
Press the FreshAir filter symbol.
u
Press ON.
w
The timer is set. After the interval has expired a message
prompts you to change the FreshAir filter.
4.9 Setting the clean ventilation grid
timer
The ventilation grid must be cleaned at least once a year for
sufficient ventilation. The timer can be set as a reminder.
u
Press menu.
u
Press the navigation arrows until the ventilation grid
is displayed.
u
Press the ventilation grid symbol.
u
Press ON.
w
The timer is set. After the interval has expired a message
prompts you to clean the ventilation grid.
5 Control
5.1 Changing the temperature unit
The temperature display can be switched from °C to °F.
u
Press menu.
u
Press the navigation arrow until °C is displayed.
u
Press °F.
w
The temperature is displayed in °F.
Switch from °F to °C in the same way.
5.2 Child proofing
The child-proofing function enables you to make
sure that the appliance is not inadvertently
switched off by playing children.
Control
* Depending on model and options 13
Loading ...
Loading ...
Loading ...