Loading ...
Loading ...
Loading ...
12
Installation
Installing the Air Distribution
Box (for FACT12LA-PS/
FACT12LA-BL/FACT12SA-PS/
FACT12SA-BL models only,
same for both ducted and
non-ducted models,
sold separately)
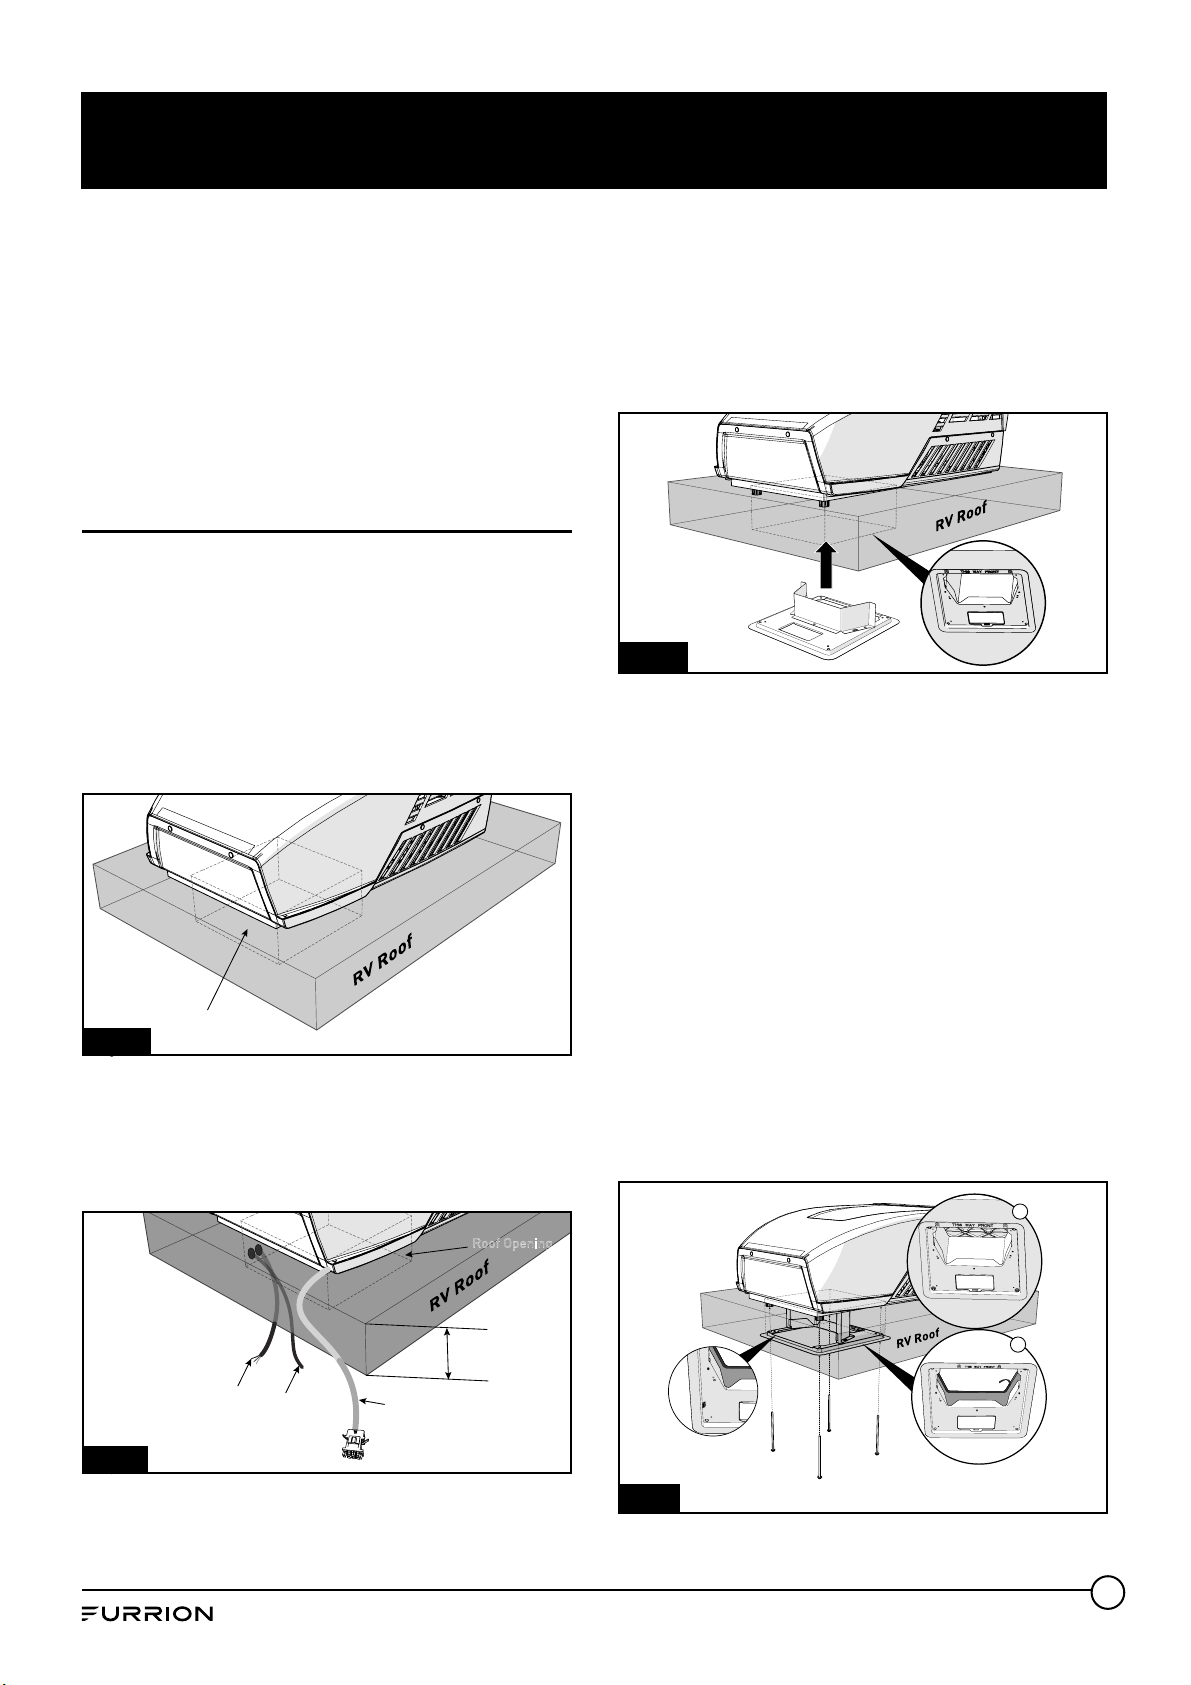
The rooftop unit is fixed on the RV roof
using 4 long bolts through the mounting
frame from the interior of the RV ceiling.
1. Check the gasket alignment of the
rooftop unit inside the RV over the
roof opening and adjust as necessary
by lifting and moving slightly. (Fig. 2)
Roof Opening
Fig. 2
2. Reach up into the return air opening
and pull the rooftop unit electric cord
115VAC power cord and ±12VDC and
thermostat wires. (Fig. 3)
Roof Opening
Rooftop Unit Cable
Ceiling Thickness
115VAC
Power Cord
±12VDC Wires
Fig. 3
3. Install the assembled mounting
frame and the lower duct divider into
the rooftop opening. Make sure the
“THIS WAY FRONT” mark is facing
front (the direction of the vehicle)
while installing. (Fig. 4)
Fig. 4
4. Fix the assembled mounting frame
and lower duct divider into the
rooftop unit using 4 bolts provided.
(Fig. 5-a) Pull to remove the film off
the double sided sticky tape on the
inner side of the lower duct divider.
(Fig. 5-b)
NOTE: If bolts are left loose there
may not be an adequate roof seal or
if over tightened, damage may occur
to the rooftop base or mounting
frame. Evenly tighten the four bolts
to a torque of 40 to 50 inch pounds.
This will compress the roof gasket to
approximately ⁄”.
a
b
Fig. 5
Loading ...
Loading ...
Loading ...