Loading ...
Loading ...
Loading ...
Installation
58
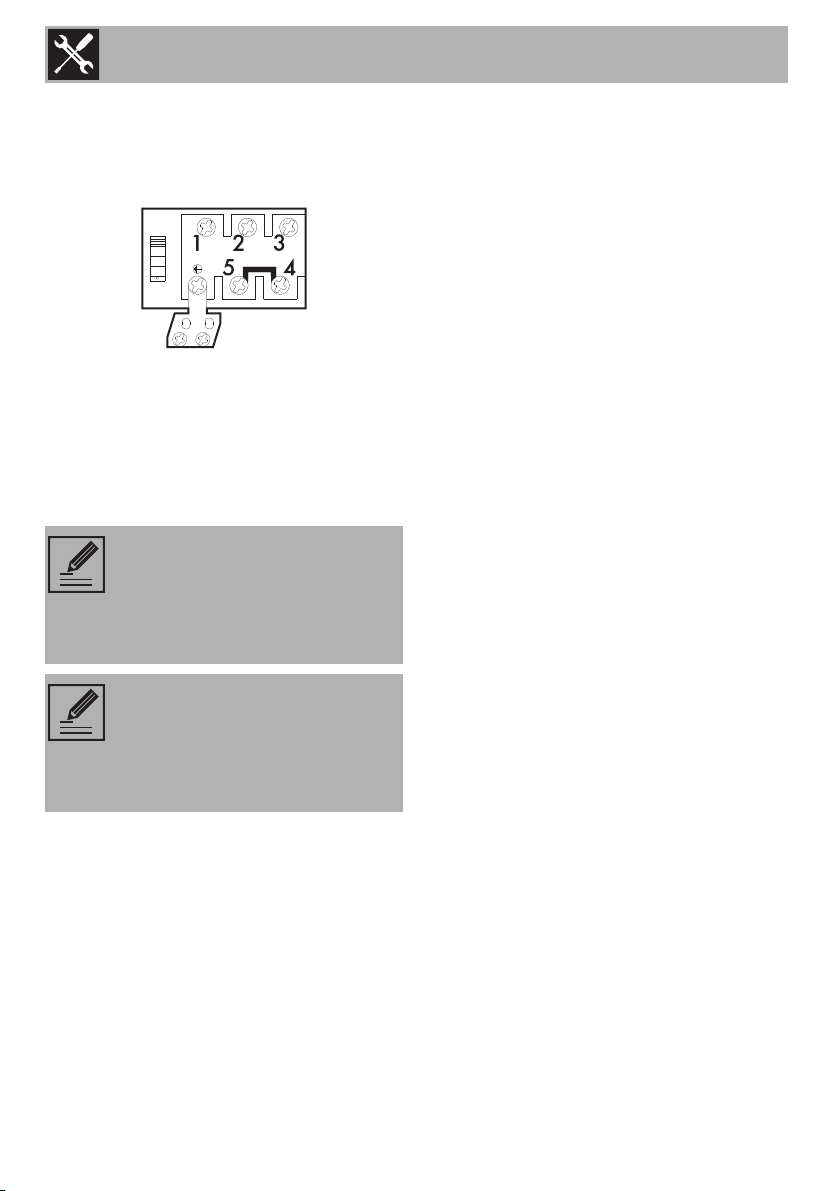
The diagram below illustrates the power
supply terminal from below, with no cables
connected. Terminals 4 and 5 must be
connected at all times.
Connection with plug and socket
Make sure that the plug and socket are of
the same type.
Avoid using adapters and shunts as these
could cause overheating and a risk of
burns.
Fixed connection
Fit the power line with an all-pole circuit
breaker with a contact separation distance
sufficient to provide complete disconnection
in category III overvoltage conditions,
pursuant to installation regulations.
Testing
At the end of installation, carry out a brief
inspection test. If the hob fails to operate,
after checking that you have carried out the
instructions correctly, unplug the appliance
and contact Technical Support.
5.5 Instructions for the installer
• The plug must be accessible after
installation. Do not bend or trap the
power cable.
• The appliance must be installed
according to the installation diagrams.
• If the appliance does not work correctly
after having carried out all the checks,
contact your local Authorised Service
Centre.
• Once the appliance has been installed,
please explain to the user how to use it
correctly.
Run the power cable in the rear
part of the unit. Make sure that it
does not come into contact with
the lower part of the hob or a built-
in oven below it.
Be careful when connecting
additional electrical appliances.
Connection cables must not come
into contact with hot cooking
zones.