Loading ...
Loading ...
Loading ...
en Rails
28
Preparing descaling
ATTENTION!
The length of time for which the descaler is left to work
is based on the recommended, liquid descaler. Other
descalers may damage the appliance.
▶ Only use the liquid descaler recommended by us
for the descaling programme.
If descaling solution comes into contact with the control
panel or other delicate surfaces, it will damage them.
▶ Remove descaling solution immediately with water.
1.
Mix the descaling solution:
‒ 200ml liquid descaler
‒ 400ml water
2.
Open the control panel.
3.
Remove the water tank and pour the descaling solu-
tion into it.
4.
Once the descaling solution has been poured into
the water tank, slide the tank back in.
5.
Close the control panel.
Setting the descaling process
ATTENTION!
If descaling solution comes into contact with the control
panel or other delicate surfaces, it will damage them.
▶ Remove descaling solution immediately with water.
Requirement:The appliance must be prepared for de-
scaling. →Page28
1.
Press
to switch the appliance on.
2.
Press .
3.
Use the or button to set "Descaling" .
4.
Use the button to navigate to the next row.
a The duration will appear on the display. You cannot
change the duration of the descaling process.
5.
Use the
button to navigate to the next row.
6.
Press to start the descaling process.
a The descaling process will start. The duration will
count down on the display.
a Once the descaling process has run through to the
end, an audible signal will sound.
Running the first rinse cycle
1.
Open the control panel and remove the water tank.
2.
Thoroughly rinse the water tank and fill it with fresh
water.
3.
Slide in the water tank and close the control panel.
4.
Press
to start the rinse cycle.
a The rinse cycle will start. The duration will count
down on the display.
a Once the rinse cycle has run through to the end, an
audible signal will sound.
Running the second rinse cycle
1.
Open the control panel and remove the water tank.
2.
Thoroughly rinse the water tank and fill it with fresh
water.
3.
Slide in the water tank and close the control panel.
4.
Press
to start the rinse cycle.
a The rinse cycle will start. The duration will count
down on the display.
a Once the rinse cycle has run through to the end, an
audible signal will sound.
5.
Empty and dry the water tank.
→"Emptying the water tank", Page16
19 Rails
To thoroughly clean the rails and the cooking compart-
ment, or to replace the rails, you can remove the rails.
19.1 Detaching the rails
WARNING‒Risk of burns!
The shelf supports get very hot
▶ Never touch the shelf supports when hot.
▶ Always allow the appliance to cool down.
▶ Keep children at a safe distance.
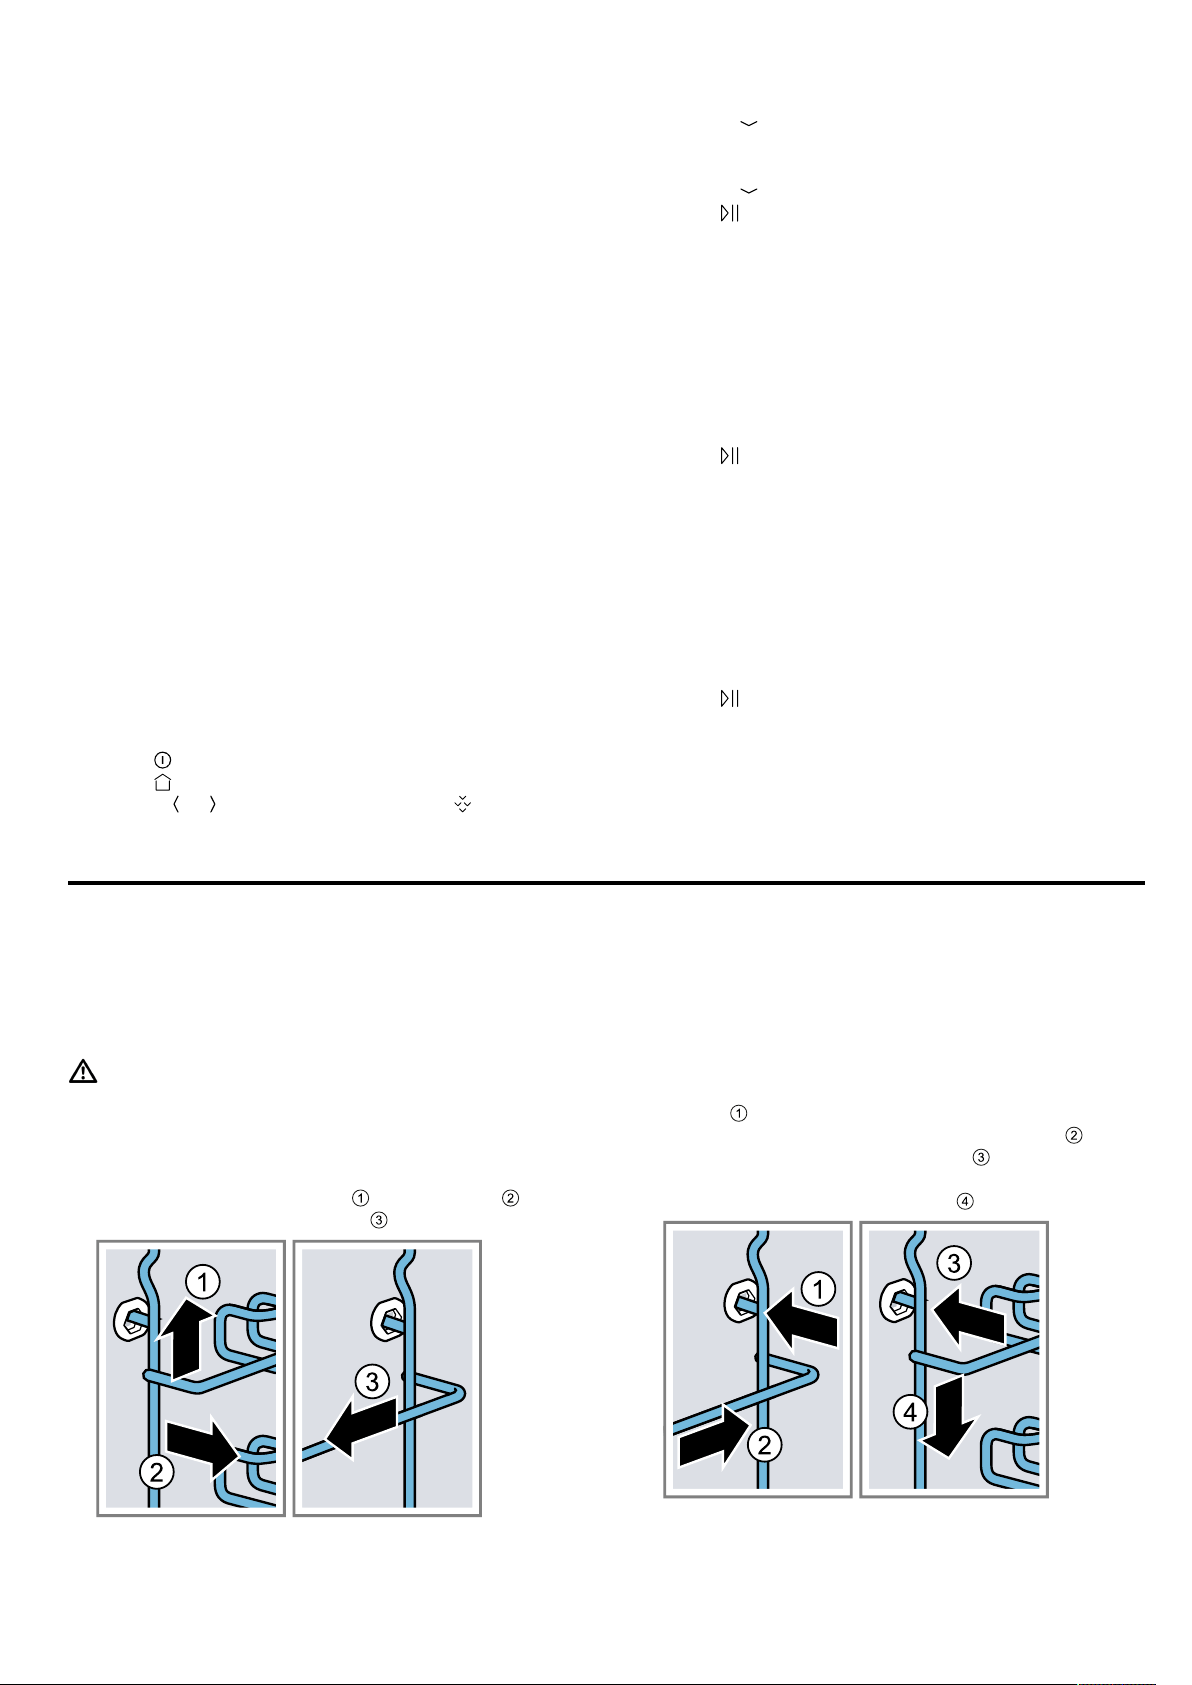
1.
Lift the rail forwards slightly
and detach it .
2.
Pull the whole rail to the front and remove it.
3.
Clean the rail.
→"Cleaning products", Page24
19.2 Attaching the rails
Notes
¡ The rails only fit on the right or left.
¡ For both rails, ensure that the retaining bracket is at
the front.
1.
First, push the rail into the middle of the rear
socket
until the rail rests against the cooking
compartment wall, and then push this back .
2.
Push the rail into the front socket until the rail
also rests against the cooking compartment wall,
and then press this downwards .
Loading ...
Loading ...
Loading ...