Loading ...
Loading ...
Loading ...
54
GENERAL MOUNTING SUGGESTIONS
If unsure please discuss with your local hardware store.
• Ensure the fixing screws are at least suitable for 10Kg each.
• If fitting to a stud wall or ceiling ensure all fixing screws are into timber.
Plasterboard IS NOT suitable by itself.
• If no timber stud/joists are available we would suggest installing a timber
batten to attach to.
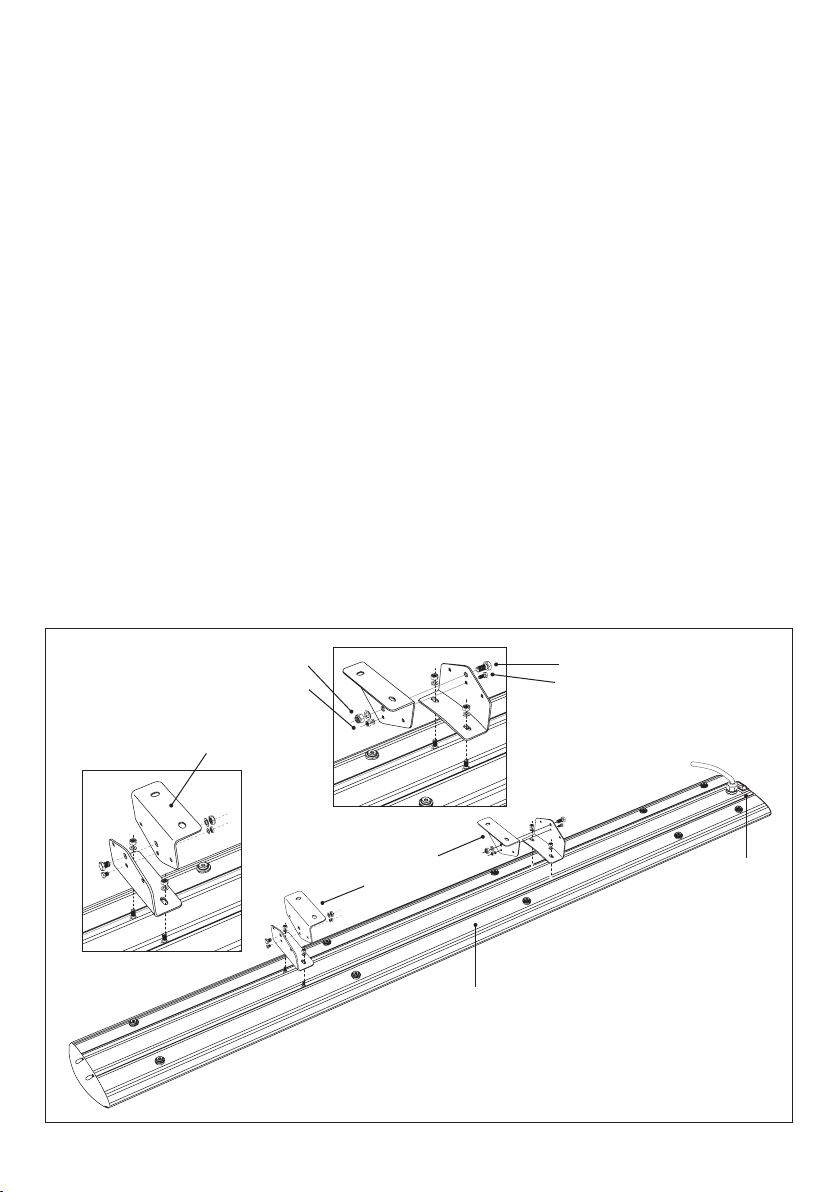
WALL/CEILING BRACKET ASSEMBLY
1. The bottom of the heater body should be 1.8m above the floor, see page 6.
2. Do not position the heater directly above or below a power point or switch.
Do not position heater in front of a power point.
3. Mark and drill 2 mounting holes for bracket (C).
4. Using 2 suitable screws (not supplied) attach the bracket to the wall
or ceiling.
Note: If unsure what screws to use please discuss with your local
hardware store.
5. Using the nuts and bolts join the bracket (C) to the heater bracket (B) and
tighten fully.
6. Heater is now mounted and ready for use. Check the safety distance
between the heater body and flammable surface when wall or corner
mounted (see page 6). Do not mount the heater in the ceiling, always mount
to the ceiling (see page 6).
(C) Ceiling/Wall
Brackets
(C) Ceiling/Wall
Brackets
(A) Heater Body
Heater ON/OFF
Switch
Locking Bolt
Locking Nut and Washer
Head Tilt Bolt
Head Tilt Nut and Washer
NOTE: To adjust bracket position, see bottom page 4
MOUNTING HEATER
Loading ...
Loading ...
Loading ...