Loading ...
Loading ...
Loading ...
TYPES OF CUTTING
I IIIIIIIIIIIIIIII IIIIIII I IIIIIIIIIIIIIIIIIIIIIIIII lJ . II I IIIIIIIIIIIIIII II I IIIIIIIIIWIIIIJ III I
, , ,!
A. BASIC CUTTING TECHNIQUE
1. IMPORTANT POINTS
a, Cut wood only. Do not cut metal, plastics,
masonry,non-woodbuildingmaterials,etc.Donot
useyoursawtopryorshoveawaylimbs,rootsor
otherobjects+
b. Stop the saw if the chain strikes a foreign
object. Inspecttheunitandrepairorreplaceparts
as necesary+
c. Keep the chain out of dirt and sand. Even a
small amountofdirtwillquickly dull a chain and
thus, increasethe possibilityof kickback.
A KICKBACKWARNING
Kickback can occur when the moving chain contacts
an object atthe upperportionofthetipof theguidebar
orwhen the woodcloses inand pinches thesawochain
in the cut. Contact at the upperportion ofthetip ofthe
guide barcan caLU+Sethe chaintod{gintothe object and
stop the chain foPan instant. The result is a lightning
fast, reversereaction whichkicksthe guide bar up and
back toward theoperator, ff the saw chain is pinched
along the top of the guide bar,+the guide bar can be
drivenrapid/ybacktowardthe operator..Eitherofthese
remmtionscan cause loss of saw control which can
result inserious injury.
2. UNDERSTAND REACTIVE FORCES
Pinch-Kickback and Pull-in occur when the chain
is suddenly stopped by being pinched, caught,
or bycontacting aforeignobject in therWOOd.This
results in a reversalof the chain force used tocut
wood and causes the sawto move in the opposite
directionofchainrotation.Eitherreactioncan result
inlossofcontrolandpossibleseriousinjury+
* Pinch-Kickback:
-- occurswhenthechain, ontopofthe bar,issud-
denlystoppedwhen the topof the bar isused
for cutting.
_drives thesawstraightbacktowardtheoperator.
* Pull-in:
-- occurswhenthechainonthe bottomofthebar
is suddenlystopped
--pulls thesawforward.
I t I I, ++'_ _
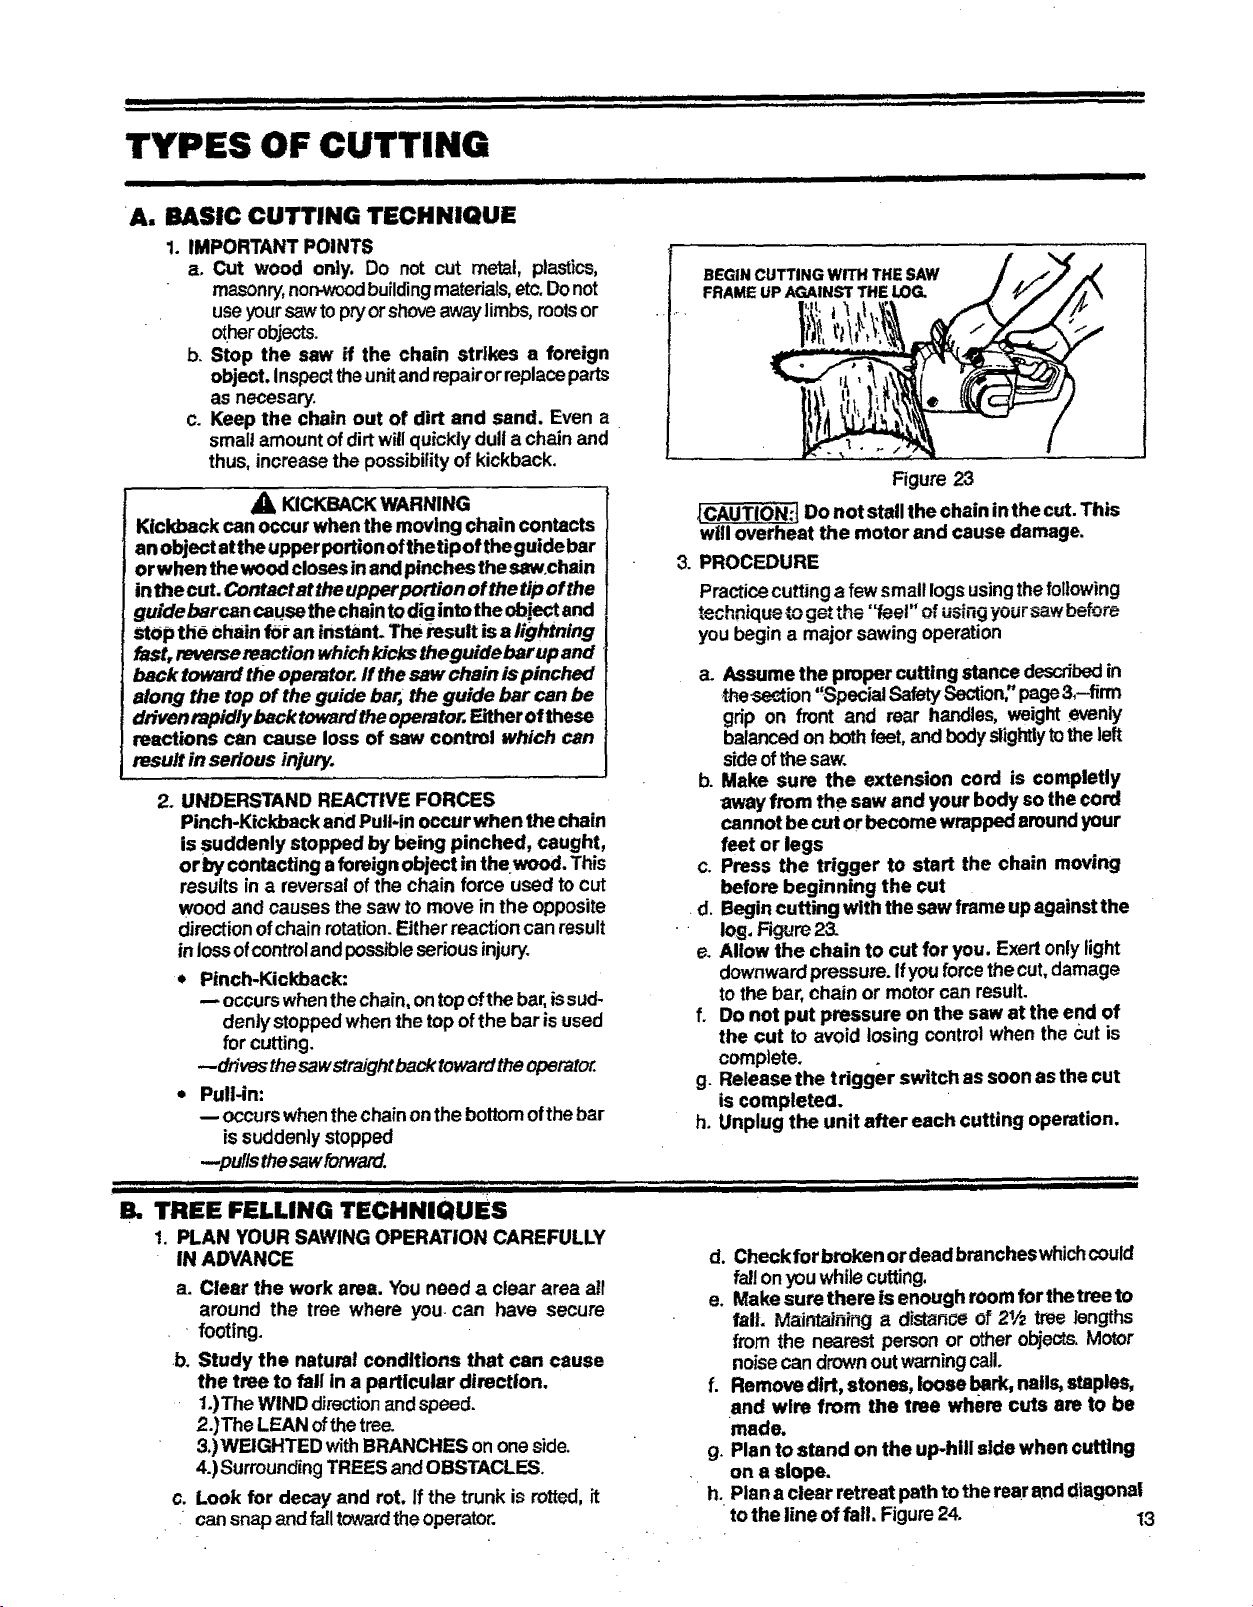
BEGIN CUTTING WITH THE SAW
FRAME UP AGAINST THE LOG.
Figure 23
J_CAUT!0"N:tDo not stall the chain in the cut. This
will overheat the motor and cause damage.
3. PROCEDURE
Practicecutting a few small logs usingthefollowing
f ,.,i-, " _+.+_,..t 4+÷
te,.,,nlque _ _e, ,h_ '_eel" of using yoursaw before
you begin a majorsawing operation
a. Assume the proper cutting stance describedin
.thesect+ion"Special SafetySection"page&-firm
grip on front and rear handles, weight+evenly
balancedonbothfeet,and bodyslightlytotheleft
sideofthesaw.
b+Make sure the extension cord is completly
away from the saw and your body so the cord
cannot becut or become wrapped around your
feet or legs
c+Press the trigger to start the chain moving
before beginning the cut
•d. Begin cutting with the saw frame up againstthe
• log, Fig,jre 23.
e+Allow the chain to cut for you. Exertonlylight
downwardpressure.If youforcethe cut,damage
to the bar, chain or motorcan result+
f. Do not put pressure on the saw at the end of
the cut to avoid losing controlwhen the Cutis
complete.
g. Release the trigger switch as soon as the cut
is complete(].
h. Unplug the unit after each cutting operation.
i • • i
111111111i i
B. TREE FELLING TECHNIQUES
1. PLAN YOUR SAWING OPERATION CAREFULLY
IN ADVANCE
a. Clear the work area. You need a clear area all
around the tree where you+can have secure
footing+
+b+Study the natural conditions that can cause
the tree to fall in a particular direction,
1.)The WIND directionand speed+
2.)The LEAN ofthetree.
&)WEIGHTED withBRANCHES on one side.
4.) SurroundingTREES and OBSTACLES.
c. Look for decay and rot. If the trunk is rotted, it
• cansnap and falltowardtheoperator.
d. Check for broken or dead brancheswhichcould
fallonyouwhilecutting,
e. Make sure there is enough room for thetree to
fall. Maintaining a distance of 21/2tree lengths
from the nearest person or otherobjects.Motor
noisecan drownoutwarningcall.
f. Remove dirt, stones, loose bark, nails, staples,
and wire from the tree where cuts are to be
made.
g. Plan to stand on the up-hill side when cuffing
on a slope.
h. Plan a clear retreat path to the rearand diagonal
tothe line of fall. Figure24. 13
Loading ...
Loading ...
Loading ...