Loading ...
Loading ...
Loading ...
14 15
ELECTRONIC CONTROLSACCESSORIES
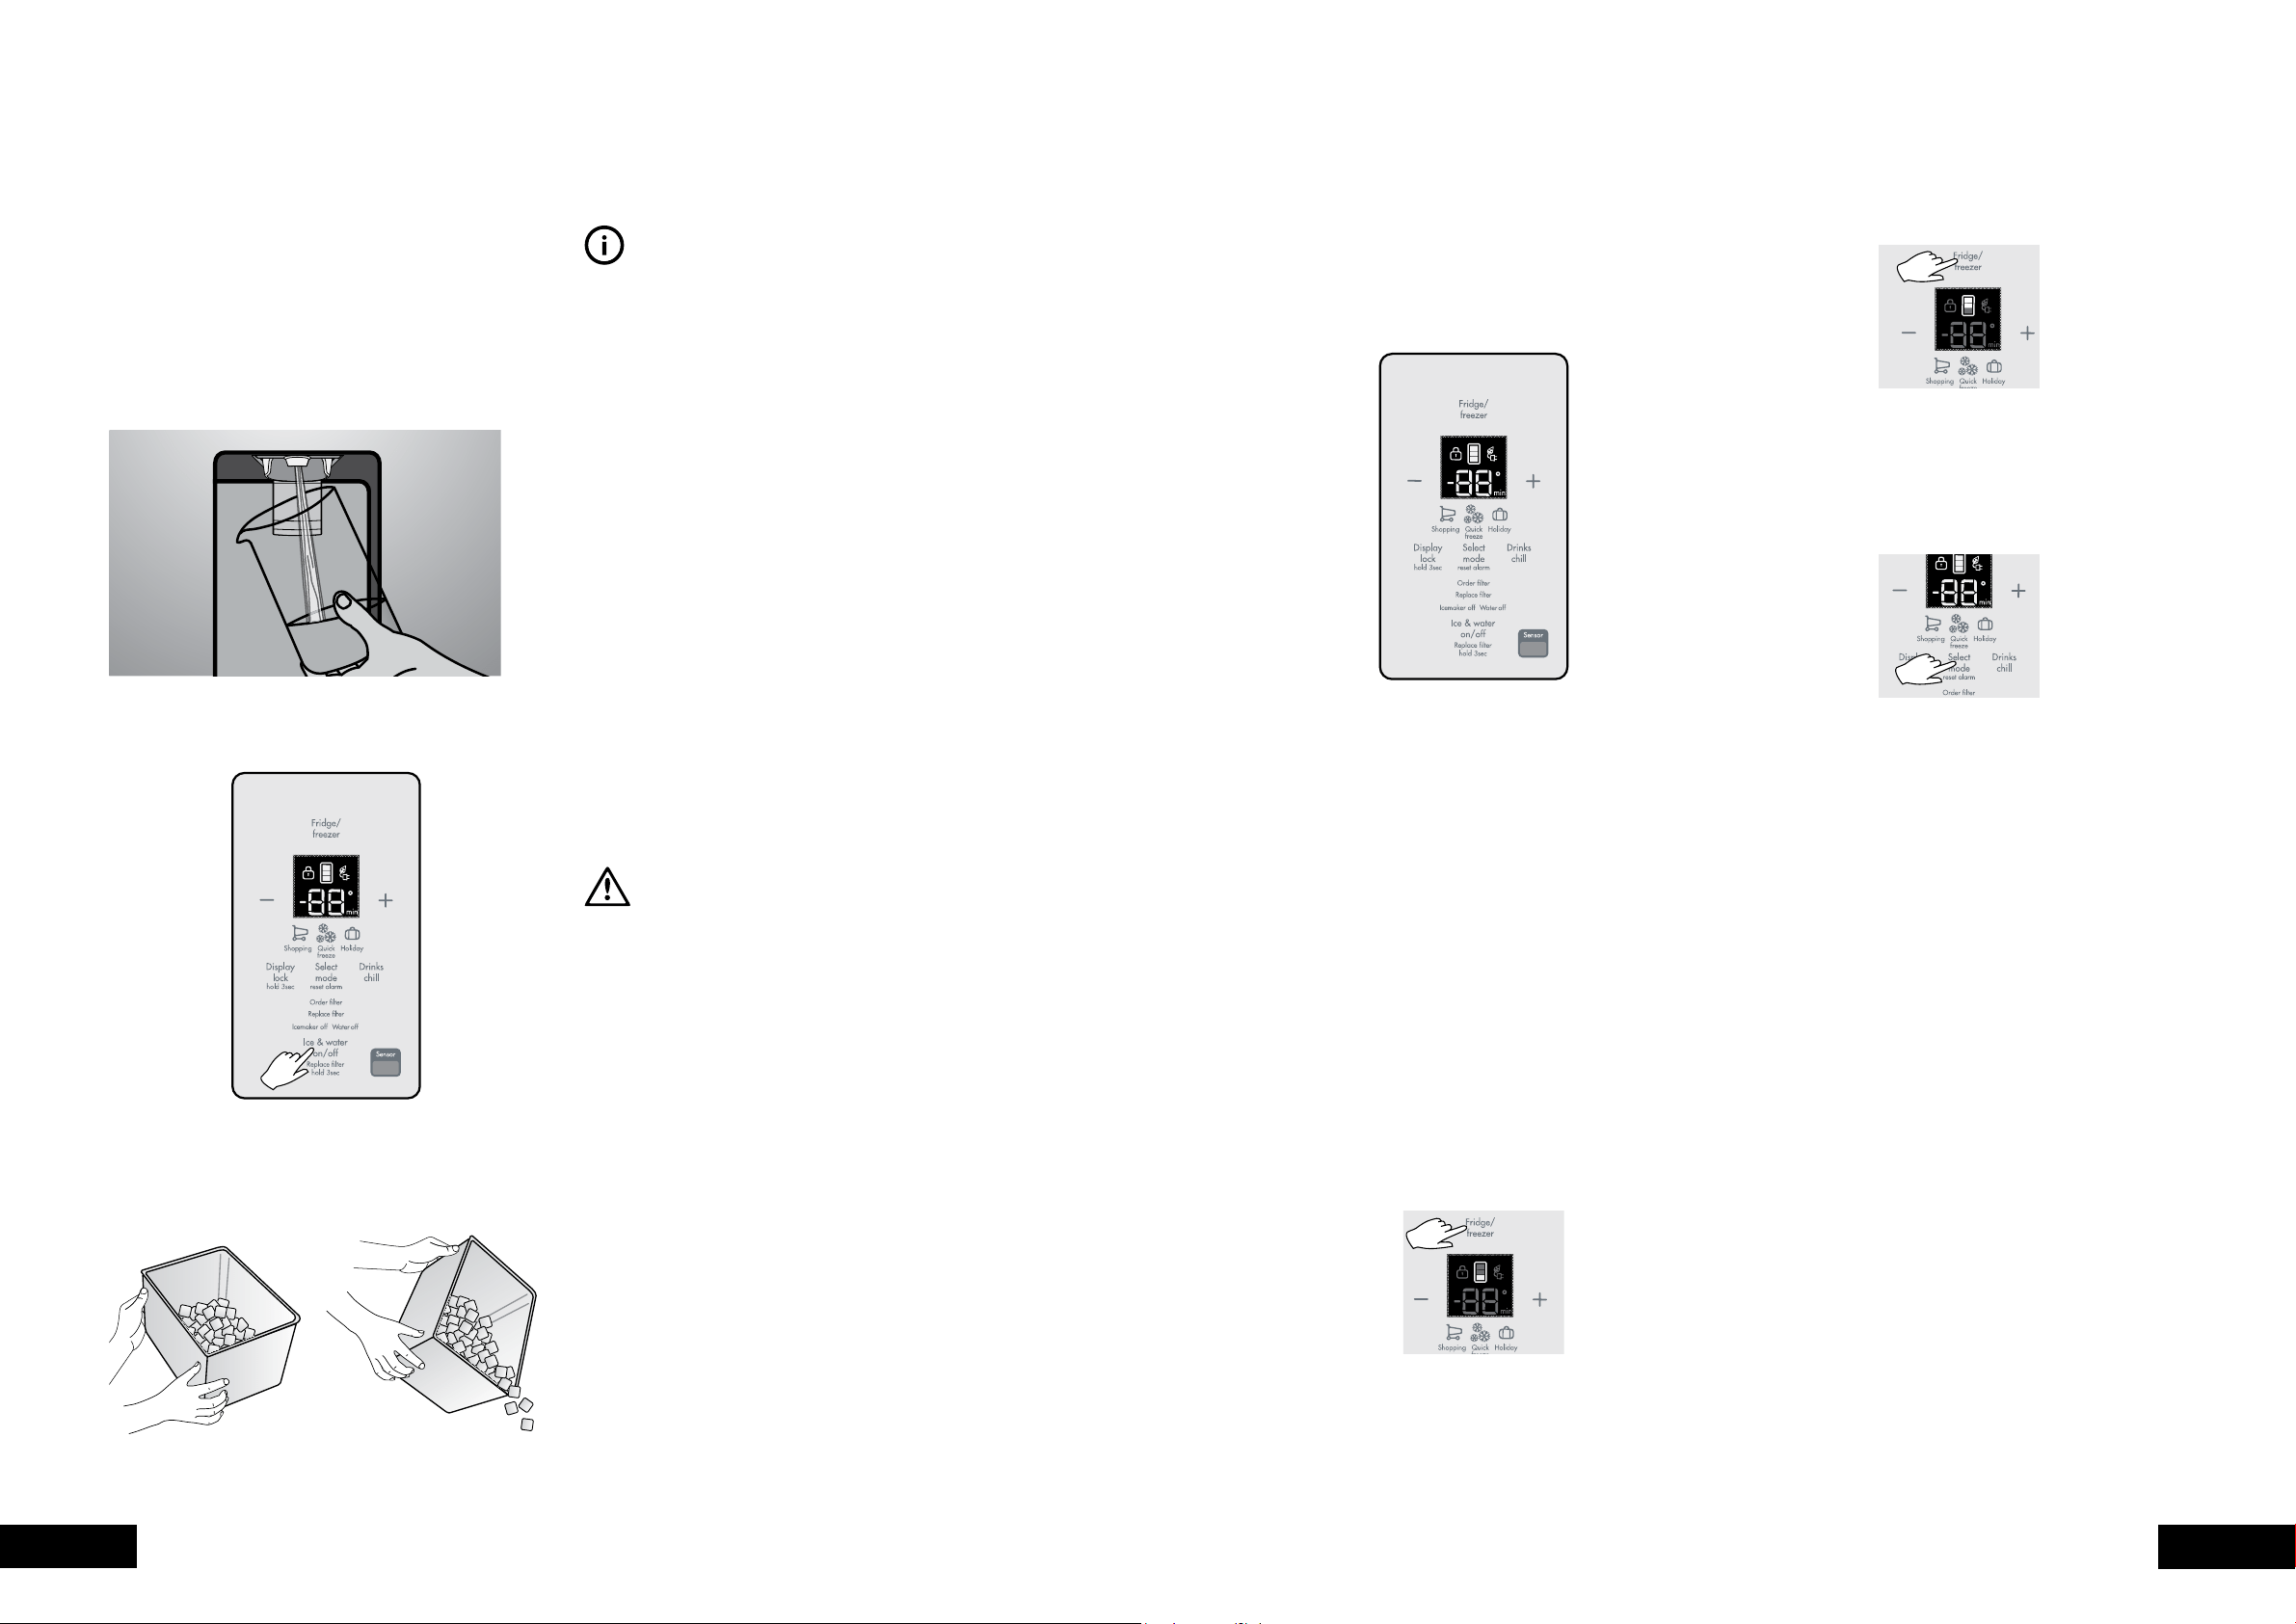
INSTALLING YOUR NEW APPLIANCE USING YOUR ELECTRONIC CONTROLS - ICE & WATER MODELS
Step 15.
Using a large container run the water dispenser to clear
air from lines. This may take a few minutes. Purge and
dispense a minimum of 2 litres of water. Initial water may
be black in colour. This is residual carbon dust from the filter
and is non-toxic. If the water is slow to shut off or
the dispenser is dripping, air may still be in the lines.
Either purge more water through the system to remove
this air or allow some time for the air to be removed over
subsequent dispensing.
Step 16.
Switch ON Ice Maker.
Step 17.
After 24 hours remove ice bin and dispose of first few
batches of ice to ensure that impurities have been flushed
from the system.
The electronic display panel consists of an LCD display with
blue backlighting. When the power is first turned on, the
display, with backlighting, will activate.
If no buttons have been pressed and the fridge door is
closed, the backlighting will turn off after 30 seconds.
Controlling the temperature
We recommend that when you start your refrigerator for
the first time, the temperature for the refrigerator is set to
3°C and the freezer to -18°C. If you want to change the
temperature, follow the instructions below. Make only
small adjustments and wait 24 hours to see if it’s correct.
Checking the softness of ice cream is a good indication
if your freezer is the right temperature, while feeling the
coldness of water kept in the refrigerator is a good way
of checking the temperature of the food compartment.
NOTE: When you set a temperature, you set an average
temperature for the whole refrigerator cabinet. Temperatures
inside each compartment may vary, depending on how
much food you store and where you place it. High or low
room temperature may also affect the actual temperature
inside the refrigerator.
If no button has been pressed for some time there may be a
delay of up to 2 seconds before the display responds, this
is normal and is a part of the display design to reduce the
chance of accidental changes.
Changing the freezer temperature
Press the Fridge/freezer button until the freezer
compartment is illuminated on the refrigerator icon. Use
the ‘–’ and ‘+’ buttons to the left and right of the display to
select a lower or higher temperature in 1°c steps. Once
the maximum of -23°c is reached, the display will return to
-14°c with the next press of the button.
TIPS & INFORMATION
• Ensure that taps are turned off when replacing and
fitting filters. Remember to turn the taps back on when
filter fitting is complete.
•
Always fit filter as per manufacturer’s instructions, paying
special attention to water flow direction.
• If you need to replace water tube, only use approved
water quality piping that meets the pressure
requirements.
• Do not allow the water tubing to become kinked
or trapped under the refrigerator when moving the
refrigerator back into position.
• Make sure your refrigerator is level to avoid uneven ice
cubes.
• After installation, run the water dispenser for a few
minutes to remove carbon dust and to ensure that all air
bubbles have been purged from the tubing. Dripping
may occur if air bubbles remain in the tube.
• Replace filter at suggested intervals to avoid water/ice
reduction and irregularities in taste.
• Remove and clean ice bin once a month, discarding
unused ice cubes. This will ensure fresh, clean ice and
smooth operation of your ice maker.
• Clean and empty the dispenser drip tray regularly to
avoid overflow.
• As the water cut off is not instant, leave glass under
dispenser briefly until water has stopped flowing to
avoid spills.
WARNING
If you have not used the dispenser for some time
discard the first seven or eight cups of water and any ice that
the ice maker produces in the first 24 hours (contaminants
could have settled in the water pipes).
Changing the refrigerator temperature
Press the Fridge/freezer button until the food compartment
is illuminated on the refrigerator icon. Use the ‘–’ and ‘+’
buttons to the left and right of the display to select a lower or
higher temperature in 1°c steps. Once 0°c is reached, the
display will return to 7°c with the next press of the button.
Shopping function
Use the Shopping function when you add a large amount
of food to the fridge compartment. To use this function,
press the Modes button until Shopping is illuminated. The
Shopping function chills the food quickly but does not affect
the temperature in the freezer compartment. The shopping
function will operate for 90 minutes before automatically
returning to normal operation. If you want to turn the
Shopping function off before 90 minutes have passed,
simply press the Modes button again until the Shopping
icon disappears and the refrigerator will return to
normal operation.
Freezer temperature alarm
If the alarm sounds for no apparent reason, check whether
anything is keeping the door open. If the freezer becomes
too warm due to the freezer door being left open or warm
food being placed too close to the temperature sensor, a
buzzer will sound.
If the freezer temperature alarm sounds, press any button to
disable the alarm.
Make sure nothing is holding the freezer door open and
move any warm food away from the temperature sensor. If
the freezer is still too warm after 50 minutes, the alarm will
sound again, indicating that something may be wrong with
the refrigerator.
NOTE: The freezer temperature alarm can be reset for
12 hours by holding the alarm reset button continuously for
10 seconds.
ICE & WATER
Loading ...
Loading ...
Loading ...