Loading ...
Loading ...
Loading ...
20 21
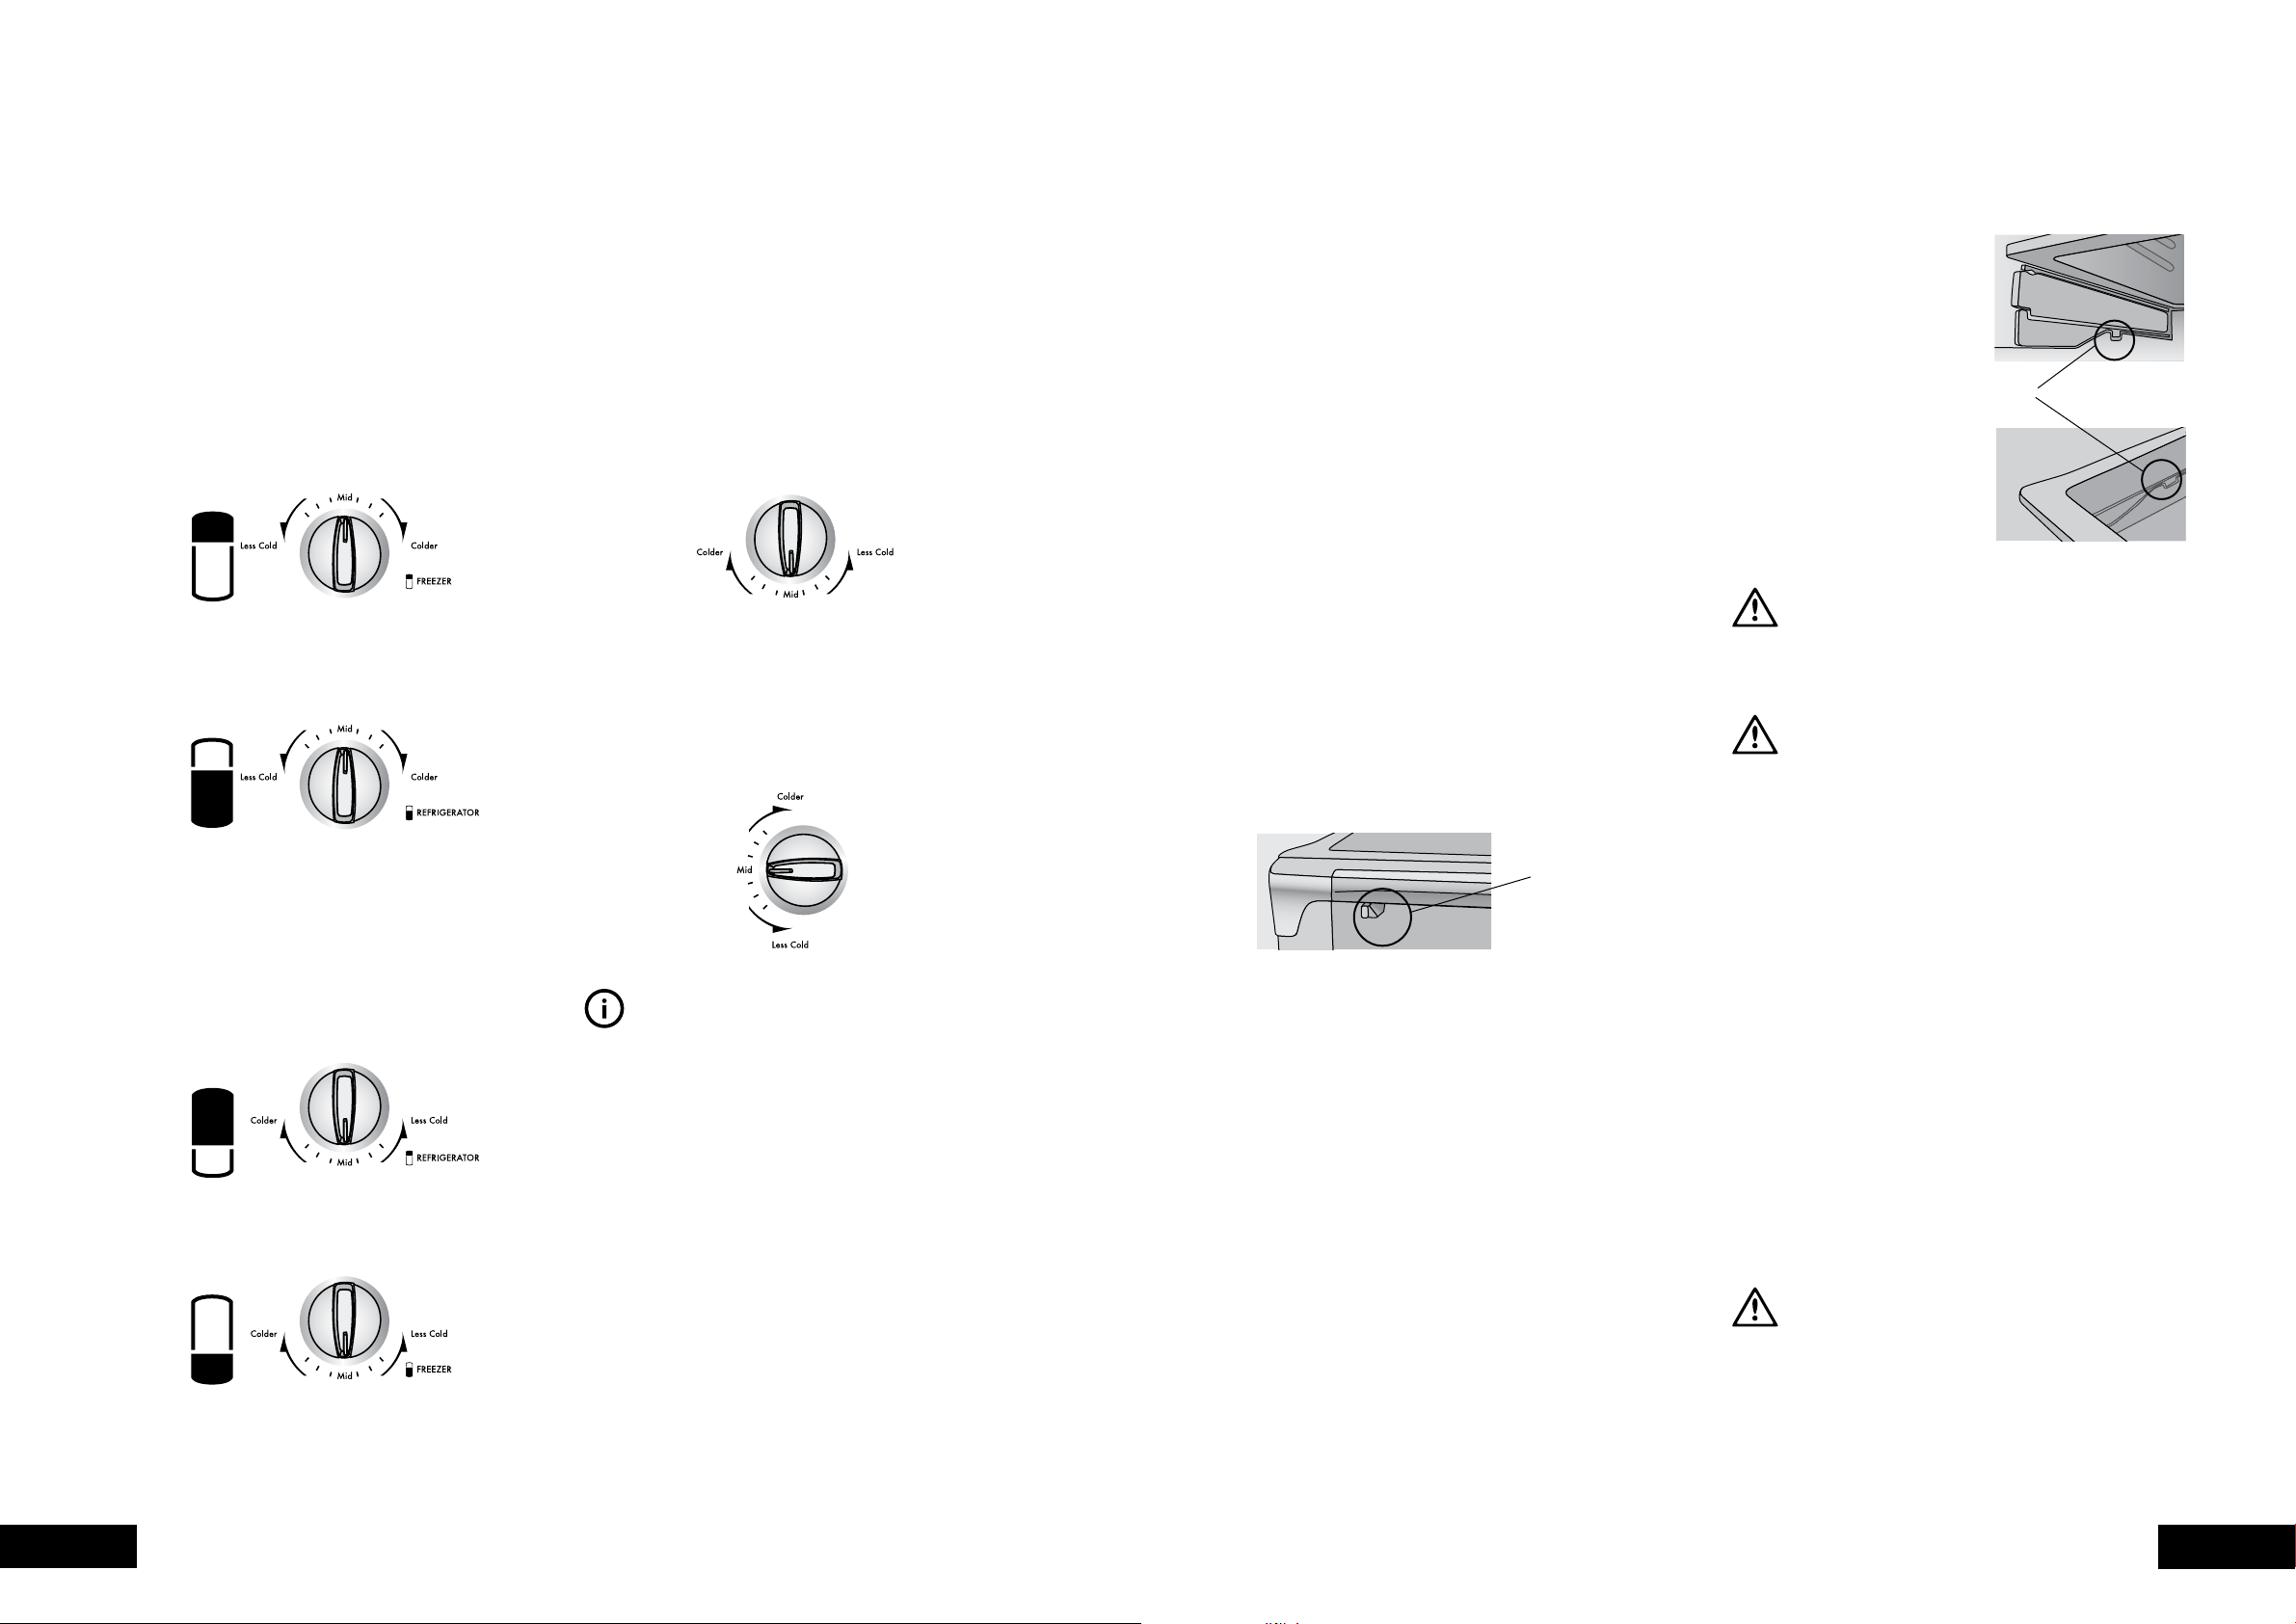
MANUAL CONTROLS
For top mount and bottom mount models, the coldest freezer
setting is not recommended in normal or very hot climates.
It will limit the cooling to the refrigerator section.
In very cold climates (where temperatures are below 10°C)
the freezer may need to be set colder.
Single door all refrigerator models
Set the temperature with the temperature control at the rear of
the compartment. Set refrigerator control to MID at start-up.
• Adjusting the all refrigerator temperature:
1. Turn clockwise to set colder.
2. Turn anti-clockwise to set less cold.
Single door all freezer models
Use the temperature control at the top of the compartment.
Set freezer control to MID at start-up.
• Adjusting the vertical freezer temperature:
1. Turn clockwise to set colder.
2. Turn anti-clockwise to set less cold.
TIPS & INFORMATION
The thermostat in the temperature control is affected by
altitude. It’s recommended you set it warmer to compensate
– eg. at 1000 metres above sea level, set the temperature
control to one setting warmer than MID.
Checking the softness of ice cream is a good way to
check the temperature of the freezer. Also, checking
the temperature of water is a good way to check the
temperature of the food storage compartment.
Controlling the temperature
Only make small temperature adjustments at first and wait
24 hours to see if you need to make any more.
Top Mount Models
Use the temperature controls at the rear of the refrigerator
compartment. Set refrigerator and freezer controls to MID
at start-up.
• Adjusting the freezer temperature:
1. Select the freezer control (top knob or left knob).
2. Turn clockwise to set colder.
3. Turn anti-clockwise to set less cold.
• Adjusting the refrigerator temperature:
1. Select the refrigerator control (bottom knob or
right knob).
2. Turn clockwise to set colder.
3. Turn anti-clockwise to set less cold.
Bottom Mount Models
Use the temperature controls at the rear of the refrigerator
compartment. Set refrigerator and freezer controls to MID at
start-up.
• Adjusting the refrigerator temperature:
1. Select the refrigerator control (top knob).
2. Turn clockwise to set colder.
3. Turn anti-clockwise to set less cold.
• Adjusting the freezer temperature:
1. Select the freezer control (bottom knob).
2. Turn clockwise to set colder.
3. Turn anti-clockwise to set less cold.
MANUAL (ROTARY) CONTROLS –
MANUAL MODELS
USING YOUR APPLIANCE
This section tells you how to make the most of the many
useful features - cleaning instructions can be found on
page 24.
Door storage bins
The top mount models, bottom mount freezer model and all
refrigerator models are fitted with door storage bins. These
bins adjust to meet different storage needs. All the door
bins are completely removable for cleaning. If you want to
remove or adjust a bin, lift it over the support lugs on the
inner door panel. To replace, push the bin down over the
support lugs to lock it in place.
Dairy compartment
Use the dairy compartment to store foods like butter,
margarine and cheeses. The compartment is slightly warmer
than the rest of the refrigerator compartment, while the lid
provides protection against odours.
Deli bin (where fitted)
Use the deli bin to store foods like smallgoods, fresh or
cooked meat and cheese, or as an additional crisper. The
bin will help prevent strong food odours from creeping into
the rest of the refrigerator. To remove the deli bin, pull it
forward, then lift it up and pull it further forward.
Crisper bin
Use the crisper bin to store vegetables, fruit or smallgoods.
Change the humidity by sliding the humidity control.
Humidity control
Storing vegetables
Store vegetables in the crisper bin and remember to set the
humidity control to more humid (closed).
Storing fruit & smallgoods
Store fruit and smallgoods in the crisper bin and remember
to set the humidity control to less humid (open).
USING YOUR APPLIANCE
Removal (standard Crisper Bins)
1. Empty food from the drawer.
2. Remove the crisper bin(s) by
pulling forward, then up and
forward again.
3. Remove the crisper shelf by
lifting the catches on the
underside of the shelf and
pulling the shelf forward.
Removal — easy glide (on
telescopic extension slides)
1. Remove the crisper bin(s) by
pulling forward, then up and
forward again, lifting the bin
off the slides. Push the slides
back into the refrigerator.
CAUTION
Never close the door while the telescopic slides are
extended. It may damage the slide and/or the refrigerator or
cause the slide to become disengaged from the refrigerator.
CAUTION
To clean a crisper cover with telescopic extension slides,
simply wipe with a damp cloth and warm soapy water.
Never immerse the cover in water, as this could affect the
operation of the slide.
To refit (see diagram on next page)
1. With the runners pushed in all the way.
2. Slide the bin into place over the telescopic slides and
under the shelf. Push the bin in until it stops, noting that
the bin will not be closed all the way.
3. Open the bin to access the finger tabs at the ends on
each side of the bin. Use your thumb and forefinger to
Iift the bin over the end of the slide and clip in place.
4. Fully close the bin.
Storesafe™ lockable bins (where fitted)
These bins are designed to store items like cosmetics and
medicines. They slide out for easy access. The left hand bin
has a lock that is operated by turning the knob located on the
fixed area between the bins. This may be turned with a coin.
You can remove the Storesafe™ bin(s) for cleaning. Remove
the bin by simply pulling past the stop in the runners. You will
need to lift the bin while pulling it forward. A small amount of
force may be required to overcome the front stop.
WARNING
Never store solvents or flammable materials like nail polish
remover or lighter fluid inside your refrigerator. They will
affect the life of the plastic components and may taint
stored food.
Catch
Loading ...
Loading ...
Loading ...