Loading ...
Loading ...
Loading ...
12 13
ICE & WATERICE & WATER
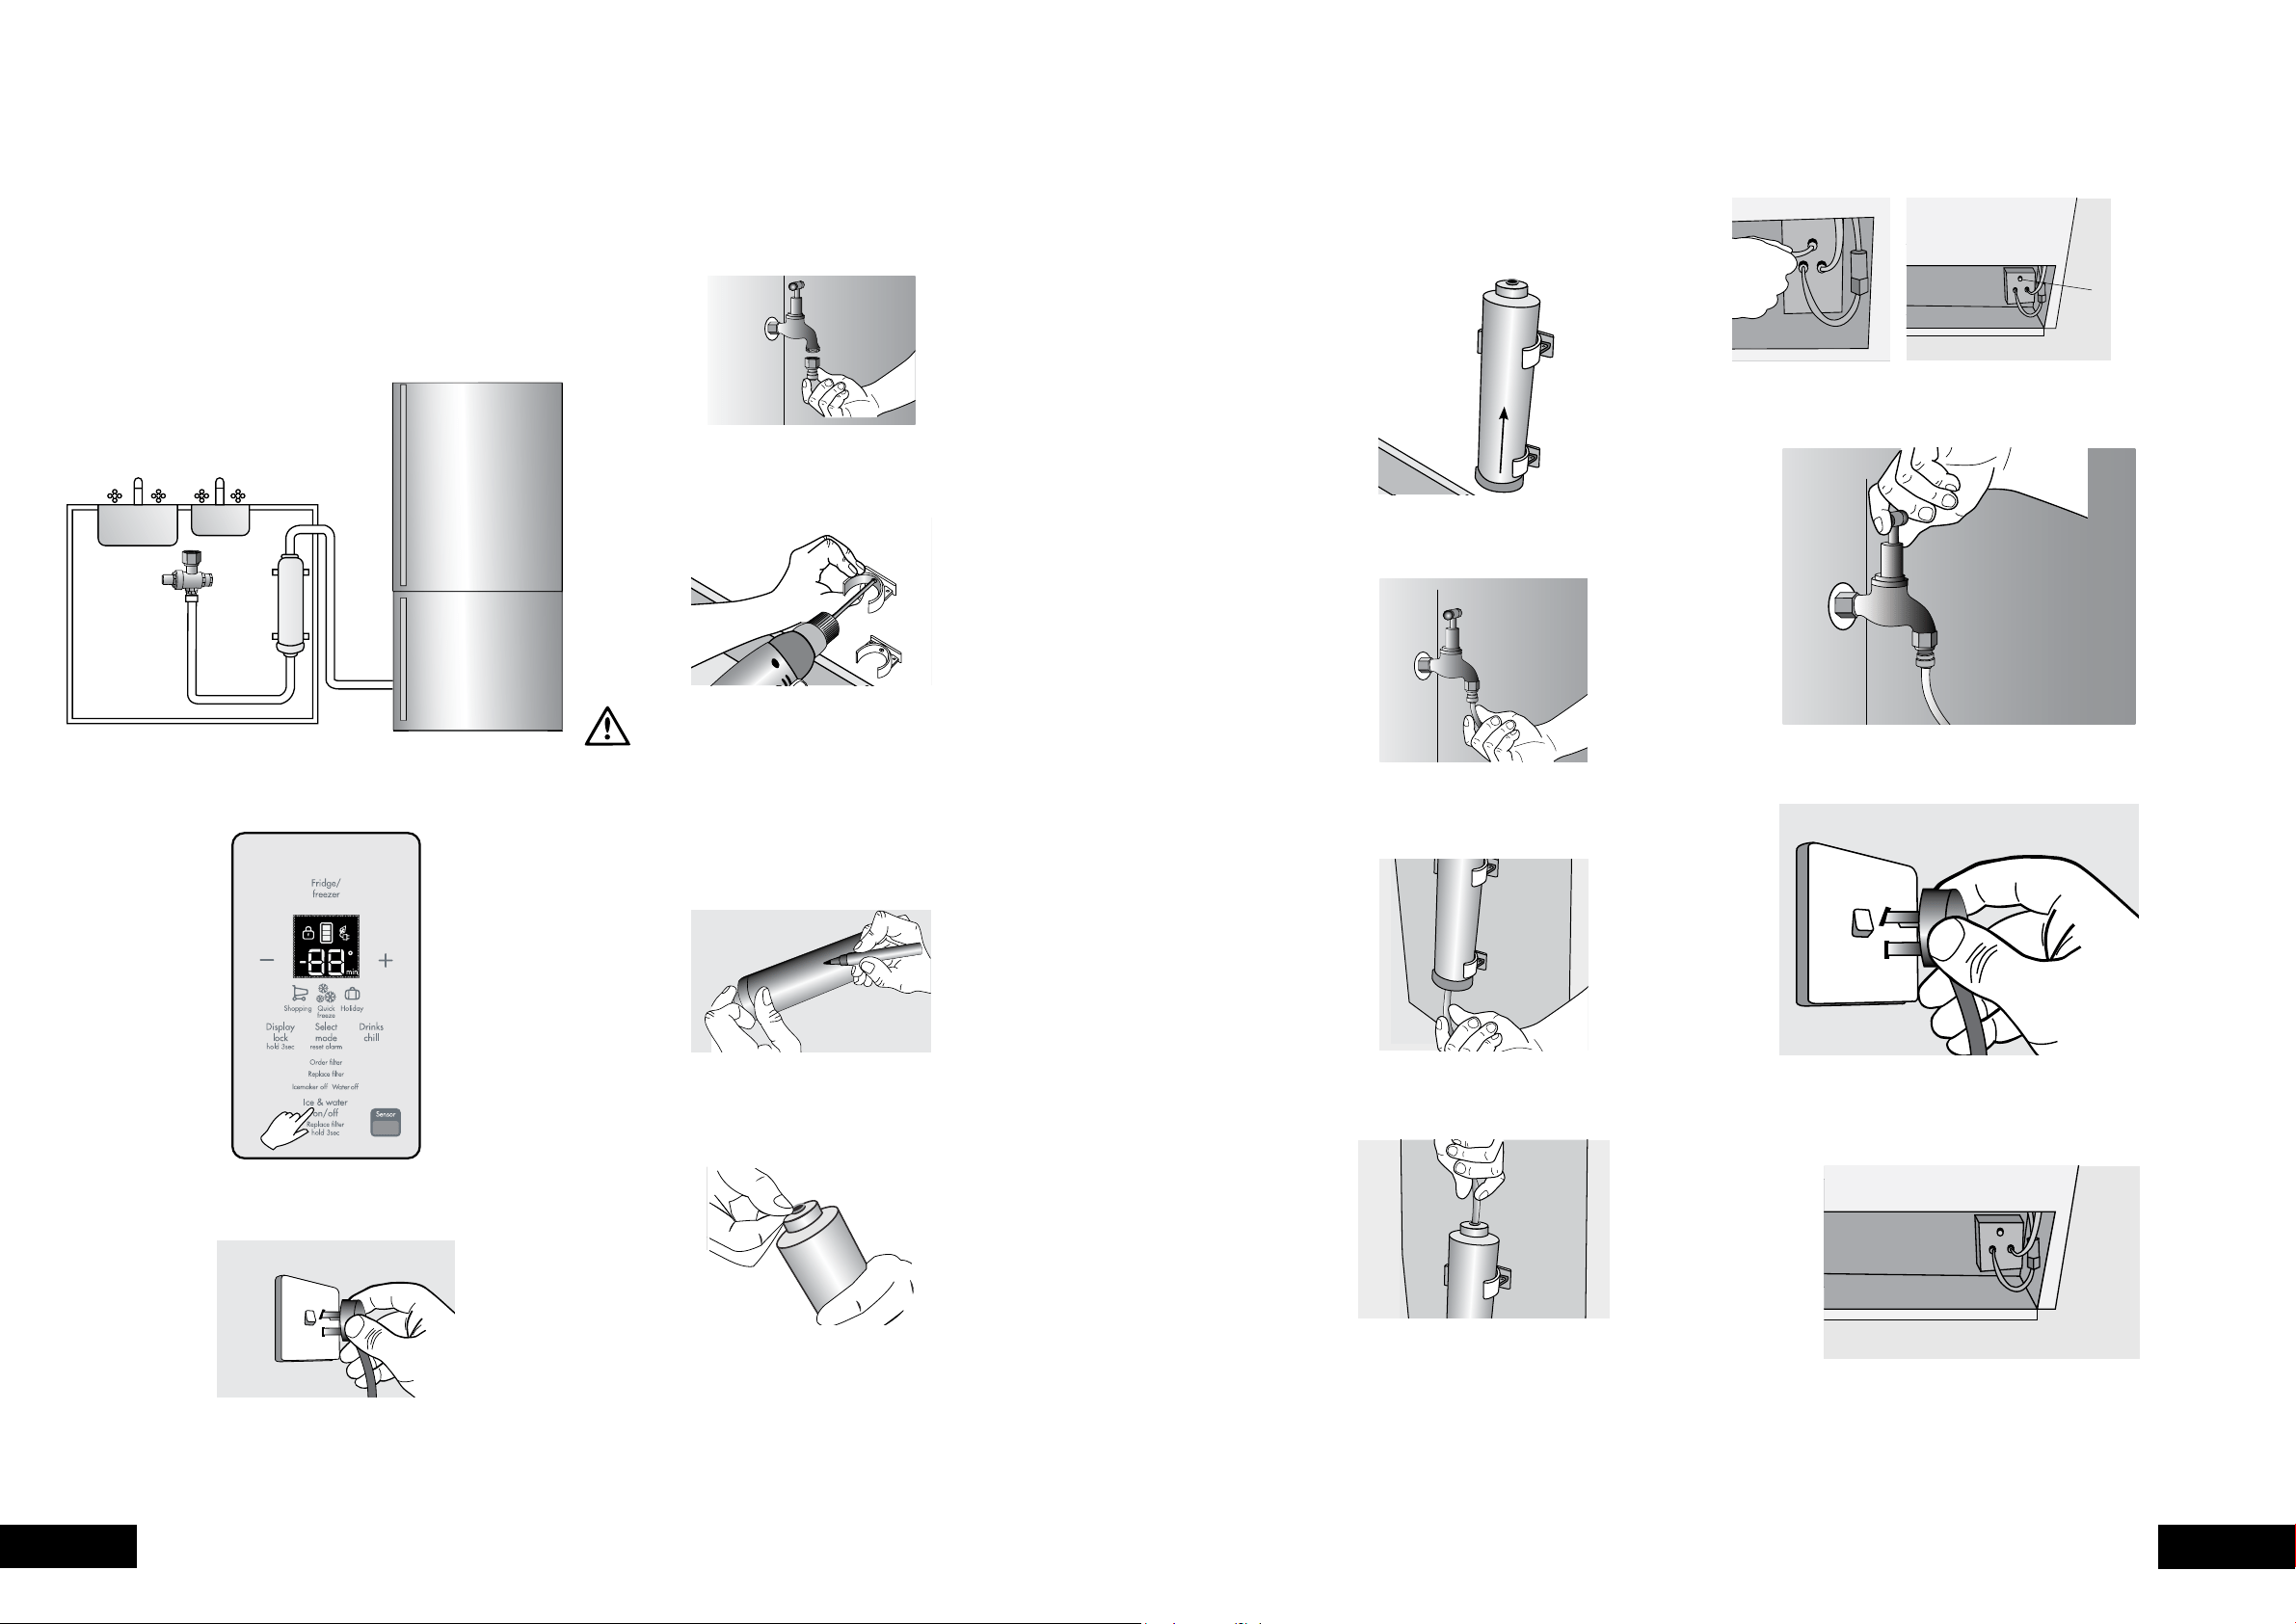
ICE AND WATER INSTALLATION INITIAL START-UP
Never install the water filter in an area of direct sunlight.
Check for water leaks at all water connection points in the
first 2 to 3 hours after installation, and correct it in case of
any water leak. Recheck after 24 hours; if leak still occurs,
it is recommended to contact a licensed plumber
for advice.
Water is to be connected as per diagram below.
Step 1.
Ensure that the ice maker and water dispenser are
switched OFF
Step 2.
Disconnect refrigerator from power supply.
Step 7.
Fit filter to brackets with water flow arrow pointing up.
water
flow
direction
Step 8.
Push shorter tube into tap fitting past insertion mark.
Step 9.
Push other end into filter INLET.
Step 10.
Connect remaining tube length into filter OUTLET.
Step 11.
Connect other end of remaining tube length to inlet on
bottom right hand side of refrigerator.
Step 3.
Connect tap fitting to water supply tap. Tap must be close
to the refrigerator.
Step 4.
Install brackets for filter close to tap. Plan to leave as much
tubing as possible behind the refrigerator to enable it to be
moved easily for cleaning or service.
CAUTION
Do not screw the brackets into the refrigerator as this
may void your warranty and permanently damage the
refrigerator.
Step 5.
Write date on filter. The filter will need to be replaced
every 12 months.
date fitted 1
Step 6.
Extend the collar and clip a circlip around the collar at both
ends of the filter.
inlet location
Step 12.
Turn on water and check all joints and tubes for leaks.
Step 13.
Reconnect the power.
Step 14.
Move the refrigerator back into place being careful not to
kink or split the tubing.
sink
brackets
mains
water inlet
kitchen
cupboard
filter
Loading ...
Loading ...
Loading ...