Loading ...
Loading ...
Loading ...
I
_ Before inspecting, cleaning or servicing the machine, shut off engine, wait for all moving parts to
come to a stop, disconnect spark plug wire and move wire away from spark plug. Remove key on I
electric start models. I
Failure to follow these instructionscanresult in serious personal injury or propertydamage, m
REMOVING AND REPLACING
THE TRIMMER HEAD
1. Stopthe engine andwait for all
moving parts to stop. Disconnectspark
plug wire and move it away from the
spark plug. Removethe ignition keyon
electric start models.
2. Two bolts (A, Figure5-3) securethe
trimmer head (B) to the spindlehead (C).
Loosenboth bolts (not the nuts)just
enough to open up thetrimmer headand
allow itto slide down the spindle head
and past the two stops. Do not attempt
to removethe bolts completely - theyare
permanentlyattached.
3. Installthe newtrimmer head on the
spindle head. Tighten the hardware
securely (to 75 in/Ibs.) and evenly.
4. If the wearcup (D, Figure5-3) is
worn, replaceit. Usea 1/2" socket
wrench to removethe screw (E,Figure5-
3) and washer (F). Install the newwear
cup and reinstall the washer and screw.
Tighten the screw securely.
Figure 5-3
INSPECTING/REPLACING
THE DRIVE BELT
Thedrive belt should not require inspec-
tion for many hours of operation. If
replacementbecomesnecessary,follow
the instructions given here.
Belt Inspection
1. Stop the engineand let all moving
parts stop. Allow the engineto cool. Dis-
connectthe spark plug wire and move it
awayfrom thespark plug. Removethe
ignition key on electric start models.
2. For convenience,we recommend that
you placethe unit on a raisedplatform to
makeaccessto the undersideof the deck
aseasyas possible.
3. Examinethe belt. Feedit around the
rear (engine) pulley so the entirebelt can
be examined. If cracks or other damage
are noted, a new belt is needed.
Belt Removal
1. Stop the engineand wait for engineto
cool. Disconnectthe spark plug wire and
move it away from the spark plug.
Removethe ignition key on electricstart
models.
2. Removegasolinefrom fuel tank.
GASOLINEIS HIGHLYFLAMMABLEAND
ITS VAPORSAREEXPLOSIVE.
• Drainfuel intoapprovedcontainerout-
doors,away from openflame.
• Be sure engine and muffler are cool
beforedraininggasoline.
• Donot smoke.
Failure to complycan result in serious
personalinjuryand propertydamage.
3. Carefullytip unit on its left side and
secure it in place.
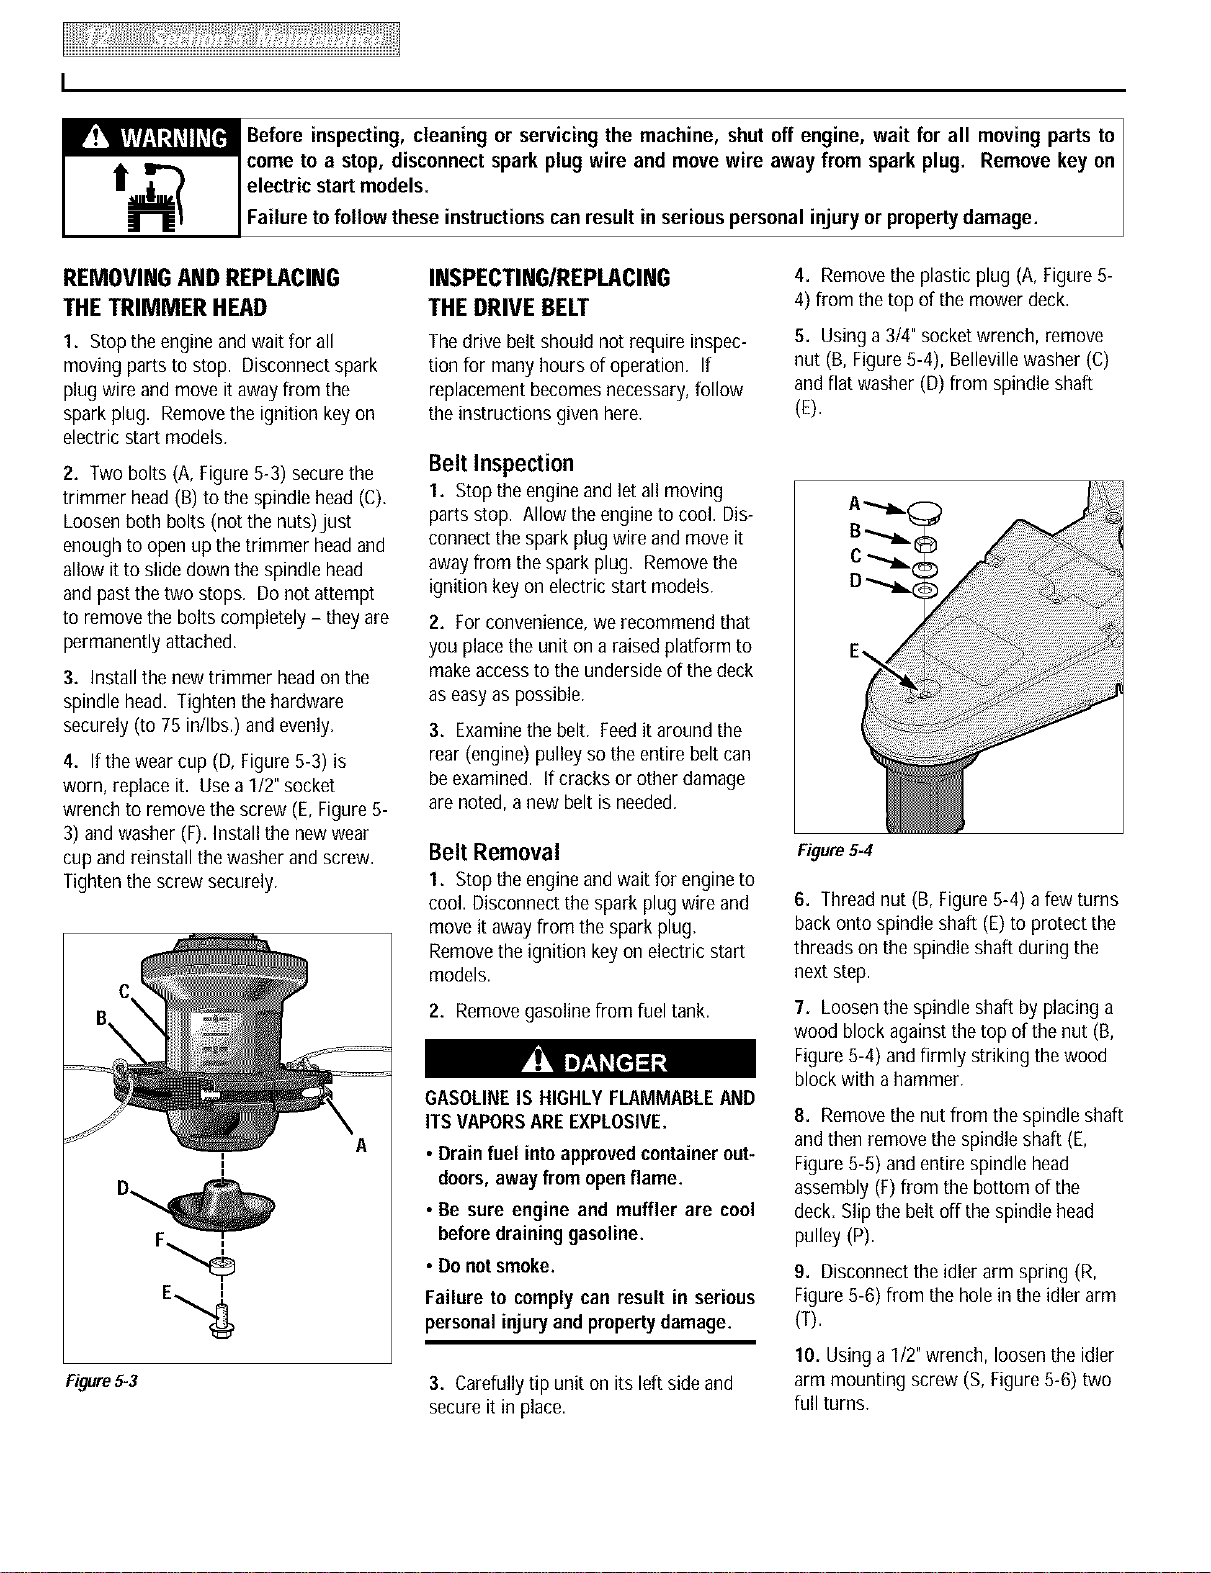
4. Removethe plasticplug (A, Figure5-
4) from thetop of the mower deck.
5. Using a 3t4" socketwrench, remove
nut (B, Figure5-4), Bellevillewasher (C)
and flat washer (D)from spindle shaft
(E).
Figure5-4
6. Threadnut (B, Figure5-4) afew turns
backonto spindle shaft (E)to protect the
threads on the spindle shaft during the
next step.
7. Loosenthe spindle shaft by placinga
wood block against thetop of the nut (B,
Figure5-4) andfirmly striking the wood
block with a hammer.
8. Removethe nutfrom the spindle shaft
andthen remove the spindle shaft (E,
Figure5-5) andentirespindle head
assembly (F)from the bottom of the
deck.Slip the belt off the spindle head
pulley (P).
9. Disconnectthe idler arm spring (R,
Figure5-6) from the hole in the idler arm
(T).
10. Using a 1/2"wrench, loosenthe idler
arm mounting screw (S, Figure5-6) two
full turns.
Loading ...
Loading ...
Loading ...