
Data de Correção: 21/10/2015
UG0177 - INGLÊS
- BESIDES THIS EQUIPMENT, A COMPLETE RANGE OF OTHER PRODUCTS ARE MANUFACTURED, CONSULT OUR DEALERS
- DUE TO THE CONSTANT IMPROVEMENTS INTRODUCED TO OUR EQUIPMENTS, THE INFORMATION CONTAINED IN THE PRESENT
INSTRUCTION MANUAL MAY BE MODIFIED WITHOUT PREVIOUS NOTICE.
Skyfood Equipament LLC
OFFICE
11900 Biscayne Blvd. Suite 616 - North Miami, FL 33181 - USA
1-800-503-7534 | 305-868-1603
www.skyfood.us
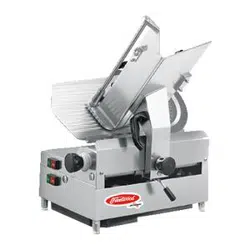
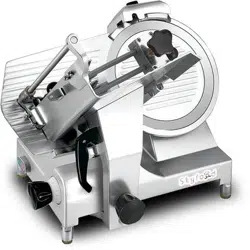
12” HEAVY DUTY SLICER
312EC1
INSTRUCTIONS MANUAL

2
1. BRIEF INTRODUCTION FOR THE PRODUCT ......................................... 3
1.1 Technical CharacterisƟcs ........................................................................................ 3
2. OPERATION........................................................................................4
3. SLICING ............................................................................................. 5
4. SHARPENING THE BLADE ................................................................... 5
5. MAINTENANCE AND CLEANING .........................................................5
6. TROUBLESHOOTING .......................................................................... 6
7. 312EC1 MODEL 12” HEAVY DUTY SLICER ............................................ 8
9. ELECTRICAL DIAGRAM ..................................................................... 11
SKYFOOD EQUIPMENT LLC - SERVICE ................................................... 12
SKYFOOD’S LIMITED WARRANTY ......................................................... 14
SUMMARY
15
___________________________________________________________
___________________________________________________________
___________________________________________________________
___________________________________________________________
___________________________________________________________
___________________________________________________________
___________________________________________________________
___________________________________________________________
___________________________________________________________
___________________________________________________________
___________________________________________________________
___________________________________________________________
___________________________________________________________
___________________________________________________________
___________________________________________________________
___________________________________________________________
___________________________________________________________
___________________________________________________________
___________________________________________________________
___________________________________________________________
___________________________________________________________
___________________________________________________________
___________________________________________________________
___________________________________________________________
___________________________________________________________
___________________________________________________________
___________________________________________________________
___________________________________________________________
___________________________________________________________
___________________________________________________________
___________________________________________________________
___________________________________________________________
___________________________________________________________
___________________________________________________________
___________________________________________________________
___________________________________________________________
___________________________________________________________

14 3
1. BRIEF INTRODUCTION FOR THE PRODUCT
Model 312EC1 Slicer is a new and improved food Slicer. Angle feed easy to operate. New
design with curved lines, no crevices or gaps. Removable carriage system and for easy
cleaning and sanitaon.
TABLE 01
CHARACTERISTICS UNIT 312EC1
Dimension in 24” x 19 ¼” x 23 5/8” (LxWxH)
Weight in 74.8
Slicing dimension lb 13 ¾” x 7 7/8” (LxW)
Slicing thickness lb 0-5/8”
The diameter of the blade lb 12”
Power of the motor W 420
Voltage V 110
Frequency Hz 60
1.1 Technical CharacterisƟcs
IMPORTANT:
The operator must be familiar with the content and understand the instrucƟons
before operaƟng this equipment.

4
1. Put the machine on a work table firmly. Then connect the ground wire.
2. Raise up the Gauge Plate and put frozen meat onto the Food tray, and then press the
green ON buon.
3. Adjust the slicing thickness according to your needs, and then push and pull the food
tray to slice the product.
2. OPERATION
01 – Meat depressor axle
02 - Blade cover
03 – Gauge plate
04 – Carriage bracket
05 – Meat clip device
06 – Sharpener assembly
07 – Meat clip device
08 – Food tray
13
12 5
3. SLICING
The frozen meat should be thawed for several hours to make the outer and inner
temperature the same aer taken out of the refrigerator. It is easier to slice when the
temperature of the meat is at 23 F (–5º) to 46 F (8º).
Usually when pressing the meat with fingers, tenderness can be felt in the center, so the
temperature of the meat is near the above temperatures.
4. SHARPENING THE BLADE
1. The blade needs to be sharpened frequently. Before sharpening, the smear on the blade
should be wiped out. Prevent the smear dirtying the grinding wheel. Once dired. It should
be cleaned with cleanser and a brush.
2. Loosen the fixing handle of the sharpener cover, li up the cover and turn it for the
grinding wheel and place it back onto the blade. And then fix the handle.
3. Switch the machine on. Press the handle of the grinding wheel on the back of the blade.
Generally speaking sharpen the blade for 20-40 seconds.
4. Turn off the power aer sharpening is done and turn the sharpener cover to its original
place.
5. MAINTENANCE AND CLEANING
1. Inspecon and preparaon before use:
A. Every acve part should be filled with small amount of lubricant regularly,
especially the round and square axes under the operang frame, to reduce the damage
caused by extended work.
B. Please make sure the blade is sharp.(If it is not sharp, please refer to Sharpening
the blade).
C. Pay aenon to the safety items. Especially the ground wire, before operang
the machine.
D. Aer switching on it is beer to let the machine work empty for 1-2 minutes to
see if there is any abnormality (like: abnormal noise, smell).
E. When cleaning the machine, please protect the power part and the working part
from water to avoid electricity leaking.
6
6. TROUBLESHOOTING
If there is any trouble when machine works, please make sure the following steps are
taken:
TROUBLE REASONS MEASURES
The machine doesn’t work
or work with low speed.
- The electrical outlet doesn’t
connect well.
- The wire drops.
- The voltage is not steady.
- Confirm the connecon
of the electrical outlet.
- Confirm if every part is
connected well, or if the
wire drops.
- Keep the voltage steady.
The effect of the Slicing is
not good.
- The me of thawing is so
short that the frozen meat
is too hard.
- The blade is not sharp enough.
- The meat supplying device
is not lubricated enough.
- The meat-nipping device
nips the meat too hard.
- Refer to the introducon
of the meat slicing.
- Refer to Sharpening the
blade.
- Fill in small amount of
lubricant in the blade pole,
but rap oil and bean of oil
are not allowed. It is beer
to clean the device with
dissolved liquid.
The speed of the
blade is slow
when it works.
- The wheel belt is loose.
- Lie down the machine and
then strain the adjusng
pole beside the motor.
11
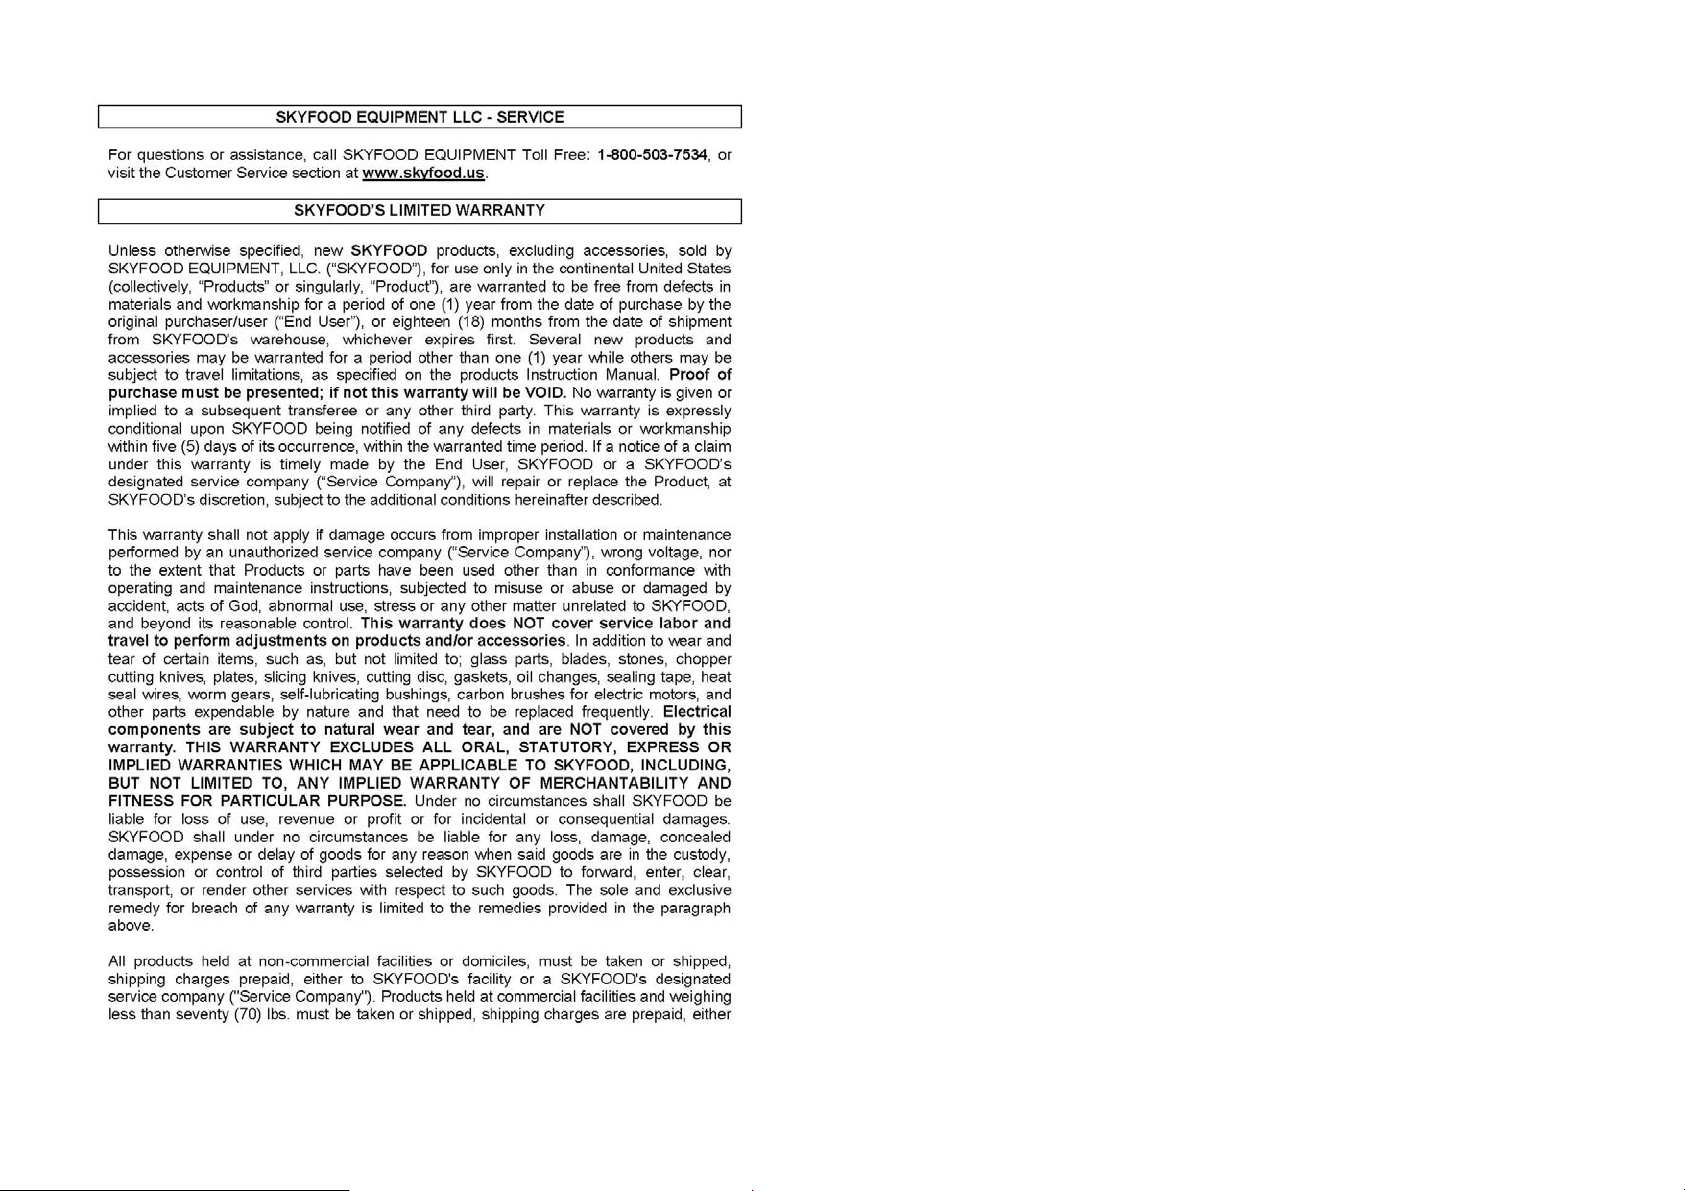
8. ELECTRICAL DIAGRAM
ST - Temperature limiter in motor
SB1 - Close switch
SB2 - Open switch
KM - Relay
HL - Work indicator
M - Motor
C - Starng capacitor of motor
10
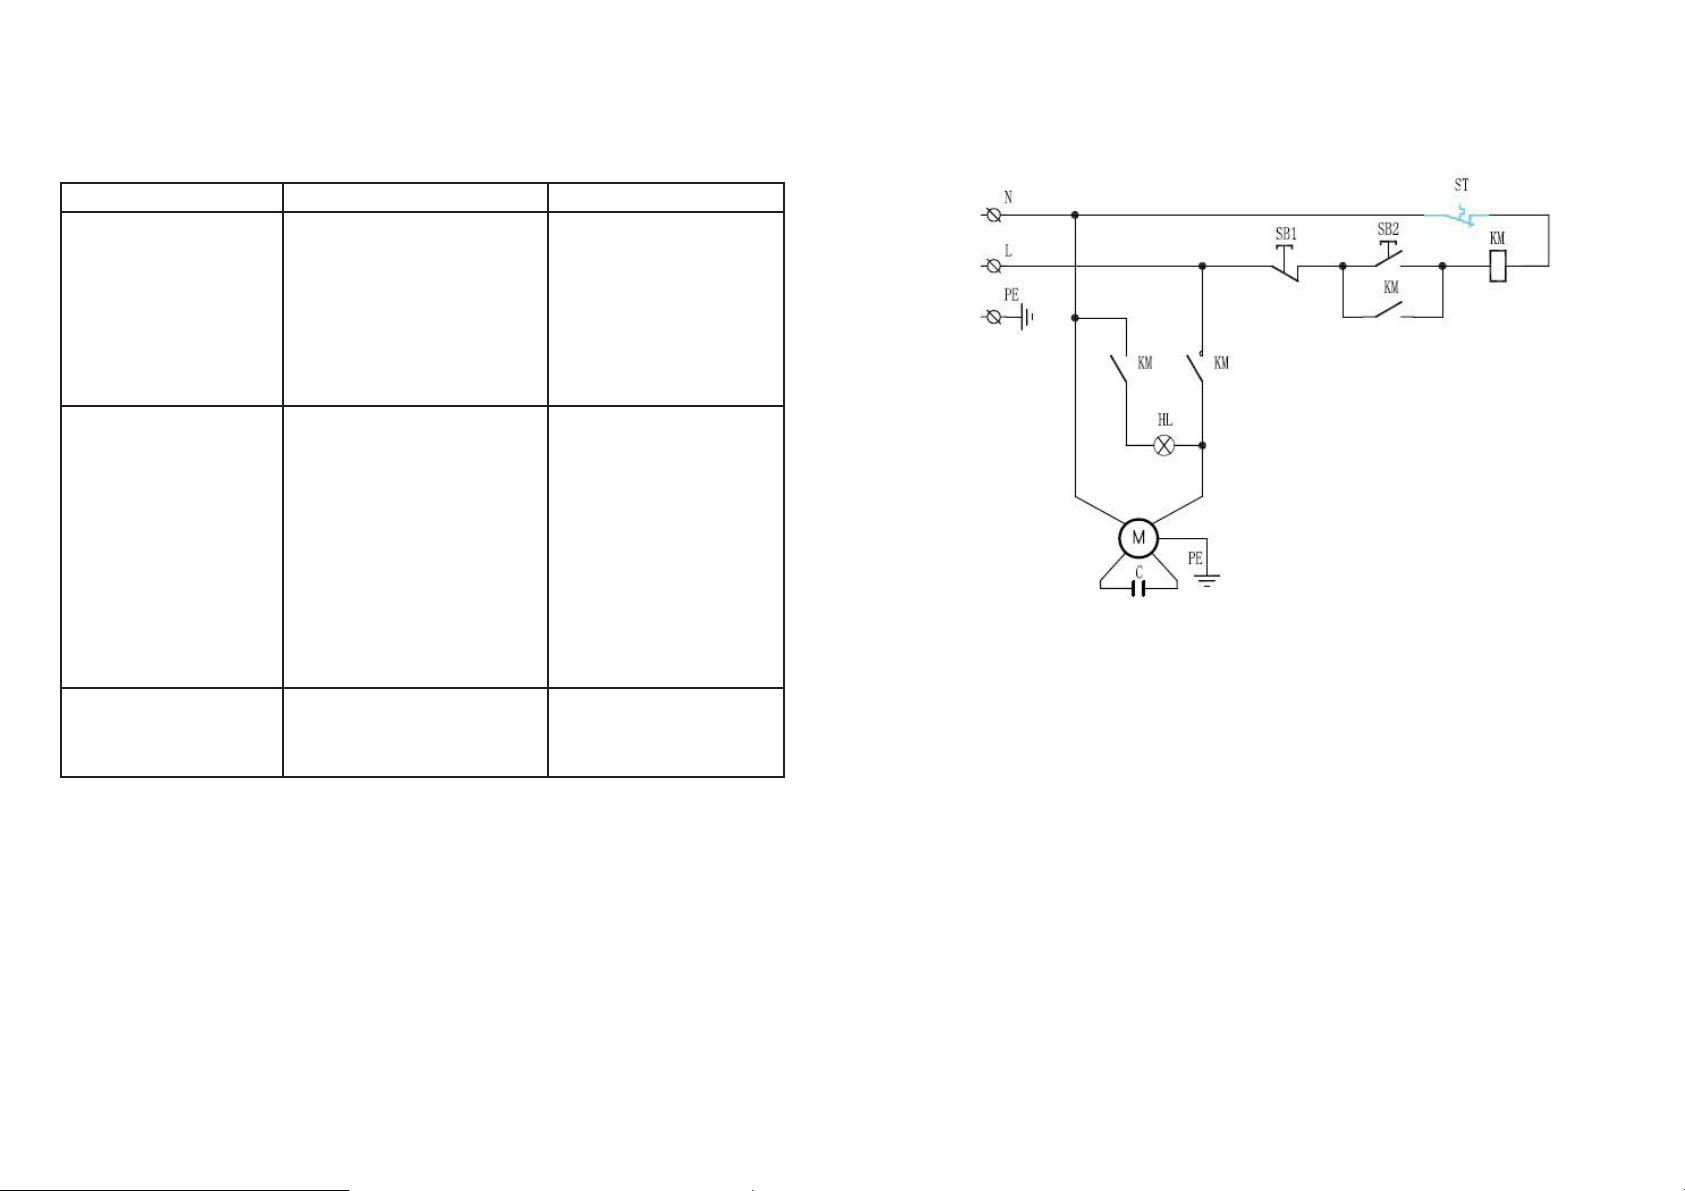
NUMBER DESCRIPTION
58 Grinding wheel pin
59 Sharpener cover
60 Sharpener knob
61 Sharpener support pin
62 Sharpener components seat
63 Grinding wheel pin
64 Upper buon of the sharpener pin
65 Power cord
66 Buon mulch
67 Switch
68 Relay
69 Spring
70 Sharpener module (one set)
7

8
7. 312EC1 MODEL 12” HEAVY DUTY SLICER
NUMBER DESCRIPTION
01 Base
02 Feet
03 Portable paron
04 Fulcrum bearing seat
05 Cover board
06 Adjusng knob
07 Cam
08 Slider pin
09 Slider
10 Eccentric sha of slider
11 Sliding axle
12 Bracket sliding bar
13 Bracket
14 Bracket bearing
15 Square sha
16 Pallet holder
17 Bracket fixing bolt
18 Bracket knob
19 Food tray
20 Capacitor retainer
21 Arc-shaped handle
22 Head screw
23 Aluminum hanging
24 Blade guarding support
25 Front block of the fixing arm axle
26 Fixing arm axle
27 Meat pressing plate
28 Fixing arm pulley
9
NUMBER DESCRIPTION
29 Sphere knob
30 Fixing arm knob
31 Rear block of fixing arm axle
32 Motor pulley
33 Blade Motor
34 Motor pressure plate
35 Boom plate
36 Capacitor
37 Blade guarding disc
38 Blade
39 Blade guard ring
40 Square-head nut of blade guard disc
41 Pulley axle
42 Belt pulley of the blade
43 Belt TB2-420A
44 Bearing 6204
45 Big retainer ring
46 Small retainer ring
47 Guard ring bolt
48 Meat scraper
49 Tension rod or protecon plate
50 Adjusng knob
51 Sharpener support
52 Adjusng screw
53 Supporng shoe
54 Sharpener locking knob
55 Fine grinding wheel
56 Upper buon of the sharpener pin
57 Crude grinding wheel