Loading ...
Loading ...
Loading ...
page 8
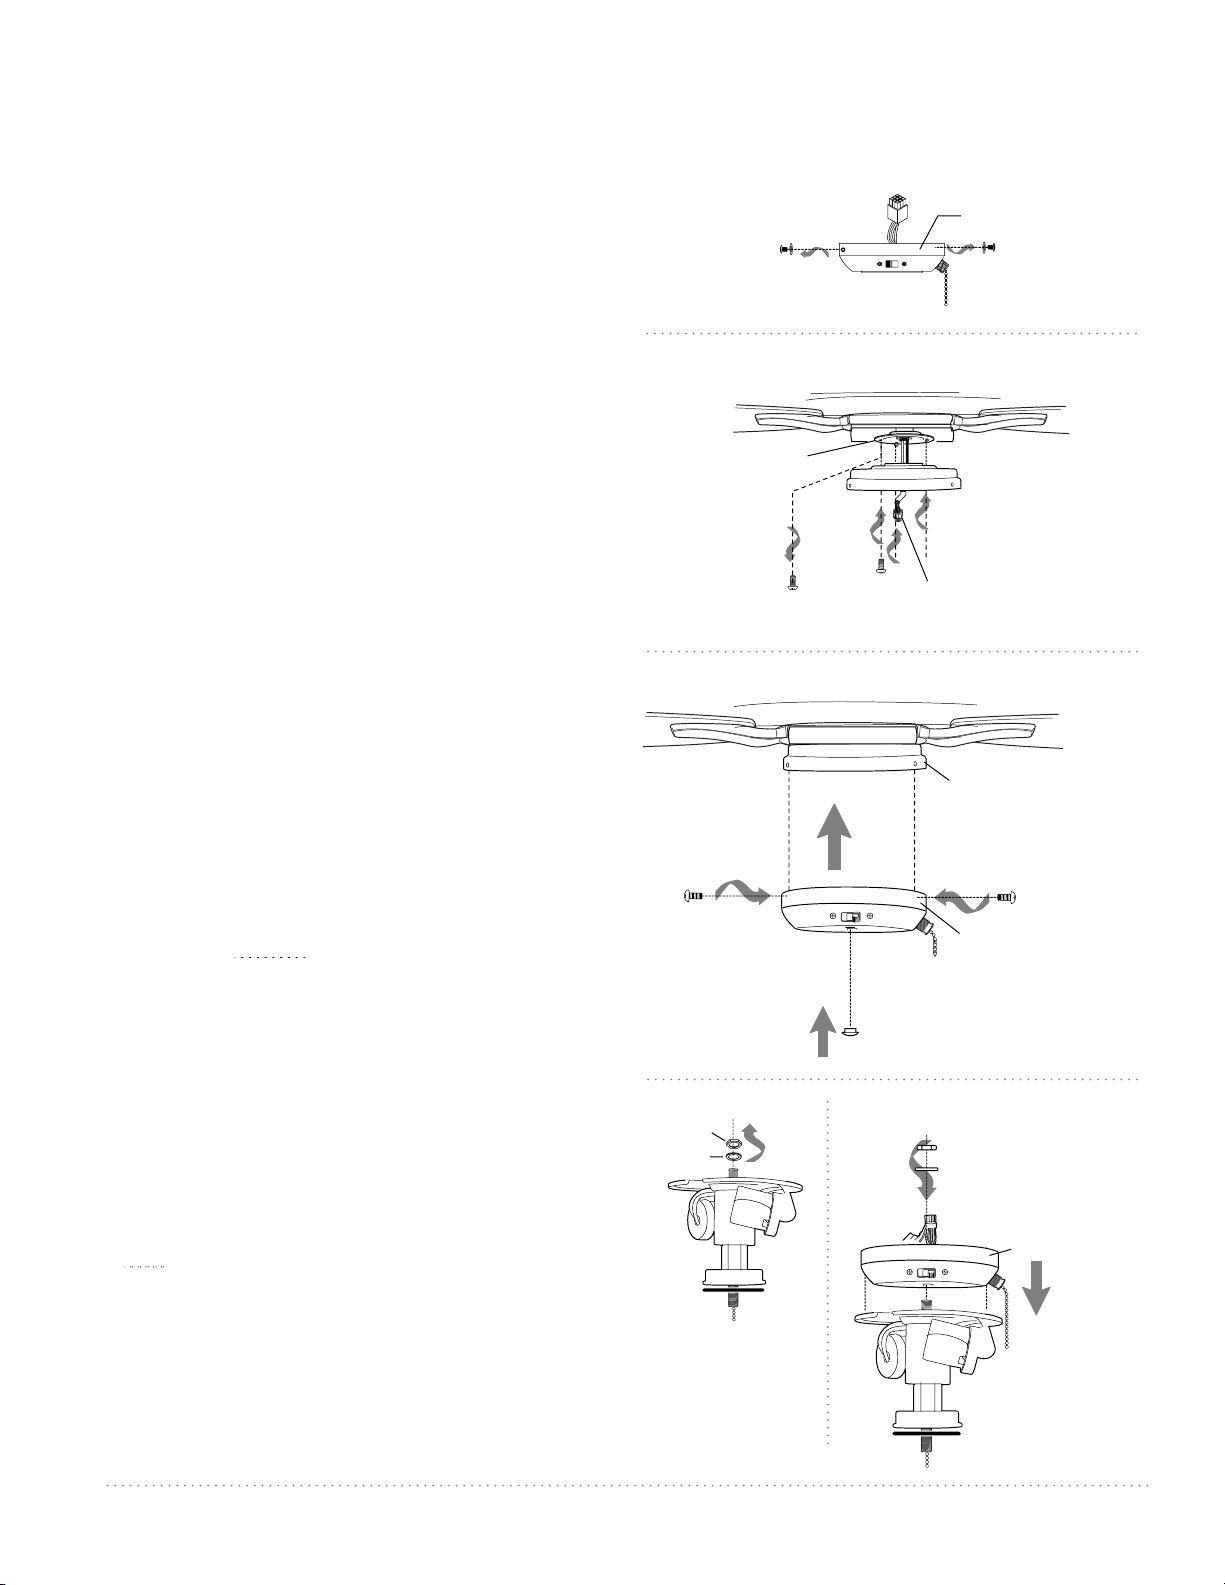
9. Light Kit Assembly (Optional).
Remove 3 screws from outer edge of
switch housing (save screws for later use).
[Refer to diagram 1.]
Remove 1 screw from motor plate (on
underside of motor) and loosen the
other 2 screws. Align slotted holes in
fitter plate with loosened screws in
motor plate, allowing the male plug
from the motor housing to come
through hole in middle of fitter plate.
Twist fitter plate to lock. Re-insert screw
that was previously removed and
securely tighten all 3 screws with a
Phillips screwdriver. [Refer to diagram 2.]
If you wish to use fan WITHOUT the
light kit, locate small cap in one of the
hardware packs and place firmly in hole
in center of switch housing cap. Align
holes in switch housing with holes in
fitter plate. Attach switch housing to
fitter plate with 3 screws that were
previously removed. Securely tighten all
3 screws with a Phillips screwdriver.
[Refer to diagram 3.] Please proceed to
Section 10 on page 10 to complete
installation without the light kit.
If you wish to use fan WITH the light kit,
remove hex nut and lock washer from
threaded rod at top of light kit fitter.
Align threaded rod in light kit fitter with
center hole in switch housing and then
screw switch housing onto threaded
rod. Replace lock washer and secure
with hex nut. [Refer to diagram 4.]
Please proceed to next page to use the fan
with the light kit.
["Light Kit Assembly" continued on
next page.]
switch
housing
motor housing
fitter plate
motor housing
motor plate
fitter plate
male plug
switch housing
diagram 1
diagram 2
diagram 3
cap
light kit
fitter
hex nut
lock washer
diagram 4
switch housing
light kit fitter
hex nut
lock washer
Loading ...
Loading ...
Loading ...