Loading ...
Loading ...
Loading ...
'Washers can be damaged if water is not removed from
hoses and internaH components before storage.
Prepare the washer for storage as follows:
°Select the cotton/sturdy and quicJ< setting and
add one cup of Neach to the detergent dispenser
without clothes in the tumNer. Run the clothes
washer through a com@ete cycle.
Turn the water faucets off and disconnect the iniet
hoses.
Disconnect the clothes washer from the electrkai
sup@y and Heave the washer door open to iet air
drcuhte inside the tumNer.
If the washer has been stored in belowofreezing
temperatures, allow time for any water Heft over in
the washer to thaw out prior to use.
For information on long-term storage or storage of your washer during e×treme cold temperatures,
call l_iaytag Customer Service toll-free at 1-888-462-9824.
U°$° customers usingTTY for deaf, hearing impaired or speech impaired, call 1-800-688-:2080.
iii:i'! ....i ERI,J s L,IGHT
instructions for replacing the bulb:
l) l.Jnplug or disconnect the clothes washer from the electrical power suppl F.
2) Open the door.
3) Unscrew the light bulb counter clod<wise from the sod<et.
4) Replace the bulb with a m0 watt candelabra base light bulb and rotate clockwise.
5) Plug in or reconnect clothes washer to the power supply.
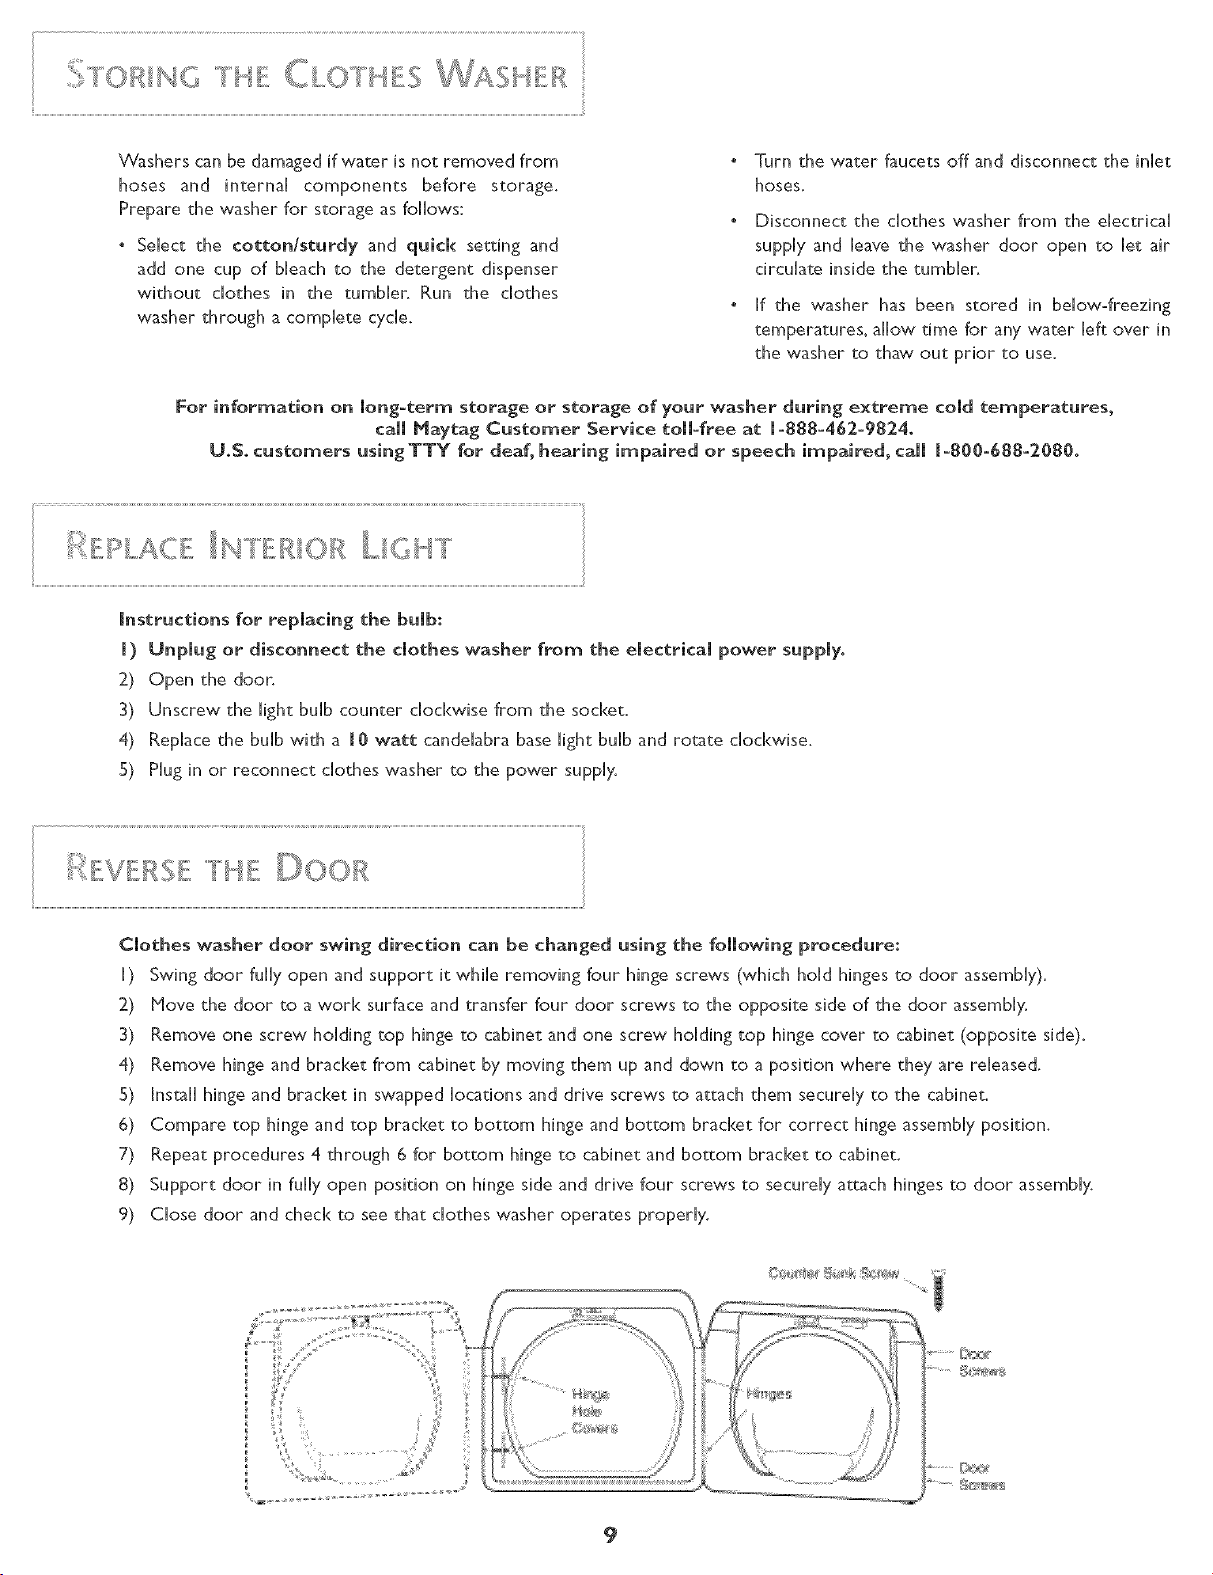
EVER: E THE DOOR
Clothes washer door swing direction can be changed using the following procedure:
I) Swing door fully open and support it while removing four hinge screws (which hold hinges to door assembly).
2) Hove the door to a work surface and transfer four door screws to the opposite side of the door assembly.
3) Remove one screw holding top hinge to cabinet and one screw holding top hinge cover to cabinet (opposite side).
4) Remove hinge and bracket from cabinet by moving them up and down to a position where they are released.
5} Install hinge and brad<et in swapped locations and drive screws to attach them securely to the cabinet.
6) Compare top hinge and top bracket to bottom hinge and bottom bracket for correct hinge assembly position.
7) Repeat procedures 4 through 6 for bottom hinge to cabinet and bottom bracket to cabinet.
8) Support door in fully open position on hinge side and drive four screws to securely attach hinges to door assembly.
9) Close door and check to see that clothes washer operates properly.
Loading ...
Loading ...
Loading ...