Loading ...
Loading ...
Loading ...
BAR AND CHAIN INSTALLATION
Model 358-350842 (Craftsman 2.1)
Model,358-350870 (Craftsman 2.1 PS)
Model 358-350880 (Craftsman 2.3 PS!VL)
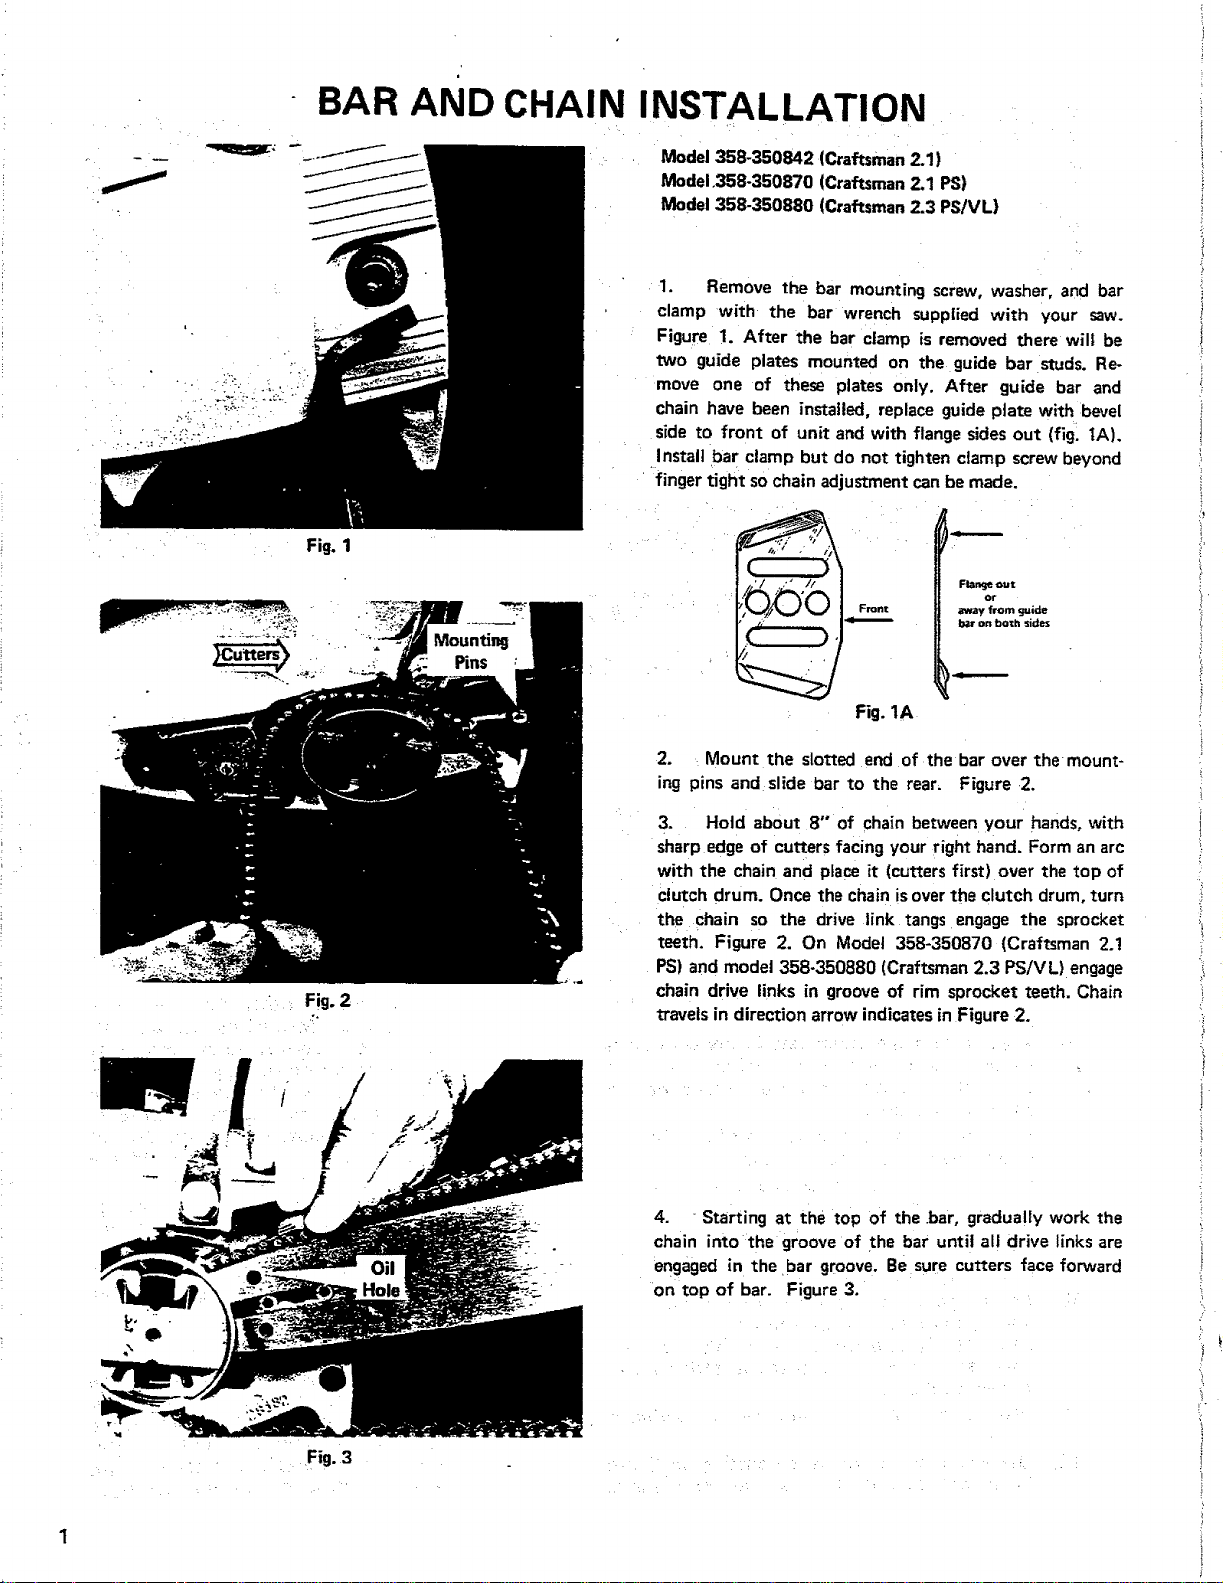
1. Remove the bar mounting screw, washer, and bar
clamp with the bar wrench supplied with your saw.
Figure 1. After the bar clamp is removed there wit| be
two guide plates mounted on the guide bar studs. Re*
move one of these plates only. After guide bar and
chain have been installed, replace guide plate with bevel
side to front of unit and with flange sides out (fig. tA).
Install bar clamp but do not tighten clamp screw beyond
finger tight so chain adjustment can be made.
Fig. 1
• Fig. 2
Fla_je out
or
_ay from clzzide
bar On both sid_
Fig. 1A
2. Mount the slotted end of the bar over the mount-
ing pins and slide bar to the rear. Figure 2.
3. Hold about 8" of chain between your hands, with
sharp edge of cutters facing your right hand. Form an arc
with the chain and place it (cutters first) over the top of
clutch drum. Once the chain isover the clutch drum, turn
the chain so the drive link tangsengage the sprocket
teeth. Figure 2. On Model 358-350870 (Craftsman 2.1
PS) and model 358-350880 (Craftsman 2.3 PS/VL) engage
chain drive links in groove of rim sprocket teeth. Chain
travels in direction arrow indicates in Figure 2.
Fig. 3
4. Starting at the top of the .bar, gradually work the
chain into the groove of the bar until all drive links are
engaged in the bar groove. Be sure cutters face forward
on top of bar. Figure 3.
Loading ...
Loading ...
Loading ...